The traceroute in Linux is used to track the path a data packet takes. A data packet passes multiple hops to reach its destination. If there are any issues in any network, the traceroute command can be used to find the problem and solve it. That’s why the traceroute command in Linux is a useful network troubleshooting tool. In the article, I will show you the usage of the traceroute command in Linux with some practical examples.
A. Description
Van Jacobson developed the traceroute command in the early phase of the internet. Now it is available in most Unix/Unix-like operating systems, even in Windows, Mac etc. The traceroute command in Linux sends a series of data packets of values 1,2,3…. and determines hops using those values. It also calculates the time based on the ICMP(Internet Control Message Protocol) message sent by a router. Moreover, the traceroute command in Linux has multiple options to customize its output.
B. Syntax
The syntax of the “traceroute” command in Linux is simple to look at. It is the “traceroute” command followed by one or multiple options and a host. The syntax goes like following:
traceroute [OPTION]... [HOST]C. Options
The “traceroute” command in Linux comes with tons of options. Listing all those options is beyond the scope of this article. However, you can check them by yourself by writing the command below:
man tracerouteUseful Options
- -n, hides.
- -f, –first_ttl, specifies initial hop.
- -m, –max_ttl, sets maximum hops.
- -q, –nprobes, limits number of tests.
- -w, –waittime, limits response time.
- -4, uses only.
- -6, uses only.
- -F, enables “Don’t Fragment” mode.
- -g, –gateway, is used to route through a certain IP address.
- -d, disables resolution of IP address.
- -t, –tos, specifies the maximum number of hops for a packet.
- -p, –port, is used to test a port.
Install the “traceroute” Command in Linux
The traceroute command in Linux doesn’t come by default in some systems. So you might need to install it manually. Follow the steps below to install it in Linux:
❶ Open an Ubuntu Terminal.
❷ Copy the following command in the command prompt and press ENTER.
sudo apt-get updateYou will see an output like the one below. Wait for the completion of the update.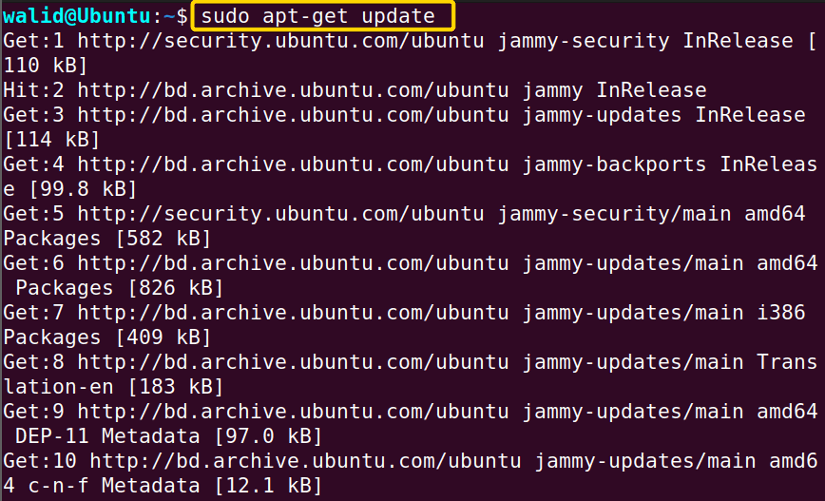 ❷ Now, write the following command in the Terminal and hit ENTER:
sudo apt-get install tracerouteYou will get an output like below. The installation will be completed in a minute.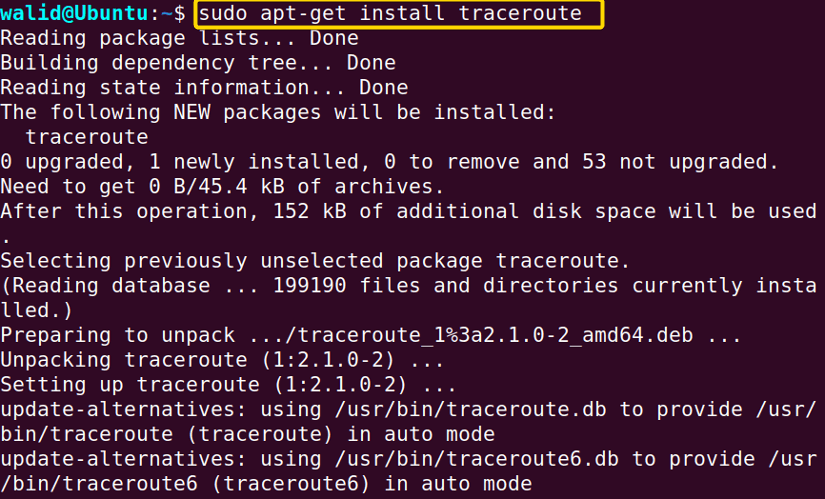 ❸ Finally, to check whether your installation was successful, type the following command and press ENTER:
traceroute --versionYou will be able to see the version of the “traceroute” command in Linux.
Practical Examples of the “traceroute” Command in Linux
In this part, I will show different usage of the “traceroute” command in Linux with some practical examples. Follow all the steps carefully.
Example 1: Route of linuxsimply.com Using the “traceroute” Command in Linux
Firstly, I will list out the route of the linuxsimply.com website. It is a simple process. Do the following:
Steps to Follow >
➊ At first open the Ubuntu Terminal.
➋ Type the following command in the command prompt:
traceroute linuxsimply.com➌ Now, press the ENTER button.
Output >
The first line shows the destination name, IP address, maximum number of hops and packet size. Hop means the step of leaving one network and entering another one. Then the lines show the hop number at the beginning, followed by hostname, IP address, and Round trip time (RTT). The RTT is the time a packet needs to reach its destination and return. By default, the traceroute command in Linux shows three RTTs in the millisecond (ms) unit.

Similar Readings
- The “iptables” Command in Linux [6 Practical Examples]
- The “netstat” Command in Linux [22 Practical Examples]
- The “nslookup” Command in Linux [12 Practical Examples]
- The “ufw” Command in Linux [12+ Practical Examples]
Example 2: Hide Hostname
You can hide the hostname in the traceroute command in Linux. To do that you need to use the “-n” option. Now follow the steps below:
Steps to Follow >
❶ Press CTRL + ALT + T to open an Ubuntu Terminal.
❷ Write the following command in the Terminal:
traceroute -n linuxsimply.com❸ Then hit the ENTER button.
Output >
There are three columns instead of four columns here. The first column is showing IP addresses, whereas the last three are showing RTT.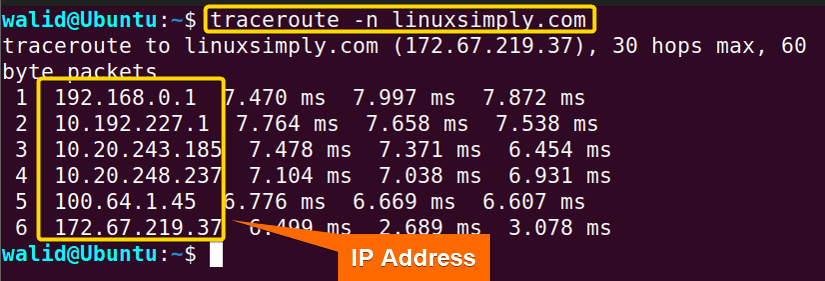
Example 3: Specify the Initial Hop Number of the “traceroute” Command in Linux
Sometimes the output of the traceroute command in Linux is long. However, you may wish to see the list from a particular hop number. You need to use the option “-f” for that purpose. Follow the steps below with me:
Steps to Follow >
❶ Launch the Ubuntu Terminal first.
❷ Enter the command in the command prompt below:
traceroute -f 5 linuxsimply.com❸ Press ENTER from the keyboard.
Output >
Now you can see, the hop numbers have started from 5 instead of 1.
Example 4: Set the Maximum Number of Hops
You may wish to print hops up to a specific number. You can specify the maximum number of hops using the option “-m”. Now do the following:
Steps to Follow >
❶ Open a Terminal in Ubuntu.
❷ Copy the following command in the command prompt:
traceroute -m 5 linuxsimply.com❸ Now hit the ENTER key.
Output >
At first, the output is showing “5 hops max”. Also, you can see that the list has stopped at number 5 which is our limit.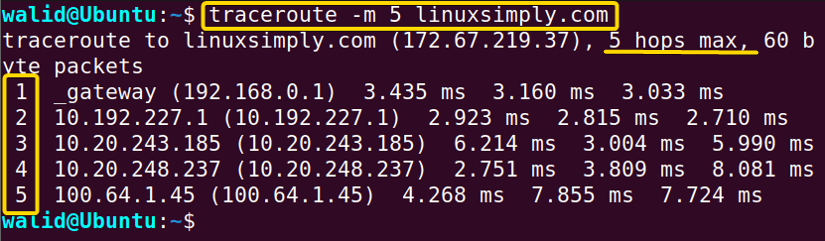
Example 5: Set the Number of Tests of the “traceroute” Command in Linux
In the previous example, you have seen that there are three RTT values. It is because the traceroute command in Linux calculates the round trip time for one hop three times. However, you can customize this according to your needs. For instance, I will tell the traceroute command to calculate the RTT value two times now. You can do the same by following the steps below:
Steps to Follow >
❶ Press CTRL + ALT + T to launch a Terminal in Ubuntu.
❷ Type the following command in the Terminal:
traceroute -q 2 linuxsimply.com❸ Press the ENTER button.
Output >
It is obvious that there are two columns at the end displaying RTT values this time.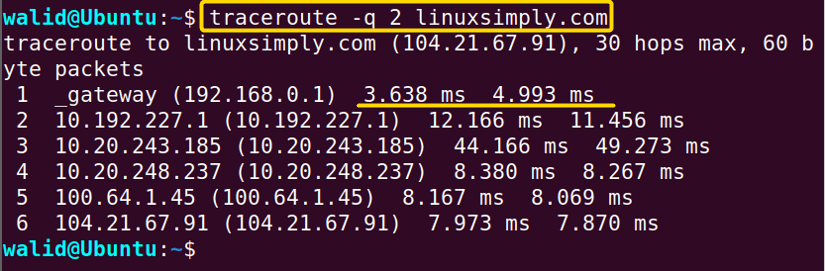
Example 6: Limit Response Time
The default response time of the traceroute command in Linux is 30 seconds. It means the traceroute waits 30 seconds for a response from a network device. If it doesn’t get any response this time, it moves on to the next device. However, it is also possible to set the time limit by yourself. Follow the steps below to do that:
Steps to Follow >
❶ Go to your Ubuntu and open a Terminal.
❷ Enter the following command in the command prompt:
traceroute -w 1 linuxsimply.com❸ Find the ENTER button on your keyboard and press that.
Output >
Here the limit of response time is 1 second. So the traceroute command will try a hop for one second and then move on to the next hop.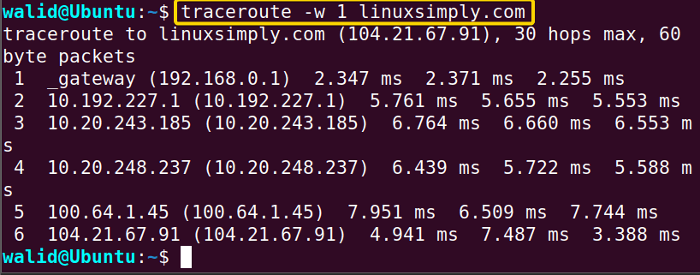
Similar Readings
- The “ftp” Command in Linux [14 Practical Examples]
- The “host” Command in Linux [10 Practical Examples]
- The “scp” Command in Linux [4 Practical Examples]
- The “sftp” Command in Linux [6 Practical Examples]
Example 7: Route Using Only IPv4
The IPv4 internet protocol uses 32-bit addresses and it has been in use since the beginning of the internet. You can tell the traceroute command in Linux to take only IPv4 addresses by the “-4” option. Now follow the steps below:
Steps to Follow >
❶ Launch the Ubuntu Terminal.
❷ Write the following command in your Terminal:
traceroute -4 linuxsimply.com❸ Now press ENTER.
Output >
Now you will only see IPv4 addresses in the Terminal even though you won’t find any visual difference.
Example 8: Route Using only IPv6
IPv4 can support a limited number of devices. To solve this issue, IPv6 is introduced. It uses 128-bit addresses and can support a literally unlimited number of devices. This time I will tell the traceroute command to use only IPv6 addresses. Now do the following:
Steps to Follow >
❶ Open an Ubuntu Terminal by pressing CTRL + ALT + T.
❷ Copy the command below in the Terminal:
traceroute -6 linuxsimply.com❸ Hit the ENTER from the keyboard.
Output >
I should have got a list of IPv6 addresses, and so should you. However, it is showing “Network is unreachable”. Multiple reasons can be involved here. But the main point is the destination linuxsimply.com cannot be reached using IPv6 from my network.
Example 9: Don’t Fragment
I mentioned earlier that the traceroute command in Linux sends data packets. But what if a data packet is too big for the next hop? The router fragments it. However, if you provide the option “-F”, it tells the router not to fragment, but rather to send a message so that the traceroute command can send a smaller packet this time. To enable “Don’t Fragment” mode, follow the steps below:
Steps to Follow >
❶ Launch a terminal from Ubuntu.
❷ Enter the following command in the command prompt:
traceroute -F linuxsimply.com❸ Now press ENTER from the keyboard.
Output >
Running the traceroute command with the option “-F” can result in fast and more accurate tracking. However, it may not work in some networks.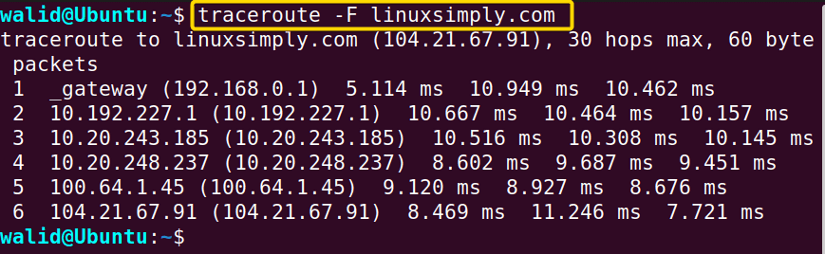
Example 10: Route Packet through a Gate Using the “traceroute” Command in Linux
It is possible to route through a certain IP address using the traceroute command in Linux. To do that you need to use the option “-g”. I am using a random IP address to show you this example, follow the steps with me:
Steps to Follow >
❶ Go to your Ubuntu and open a Terminal.
❷ Type the following command in the Terminal:
traceroute -g 192.168.0.1 linuxsimply.com❸ Then hit the ENTER button.
Output >
The output is different this time as it isn’t taking its usual route. The triple star (* * *) denotes that the route at a hop isn’t willing to share its information.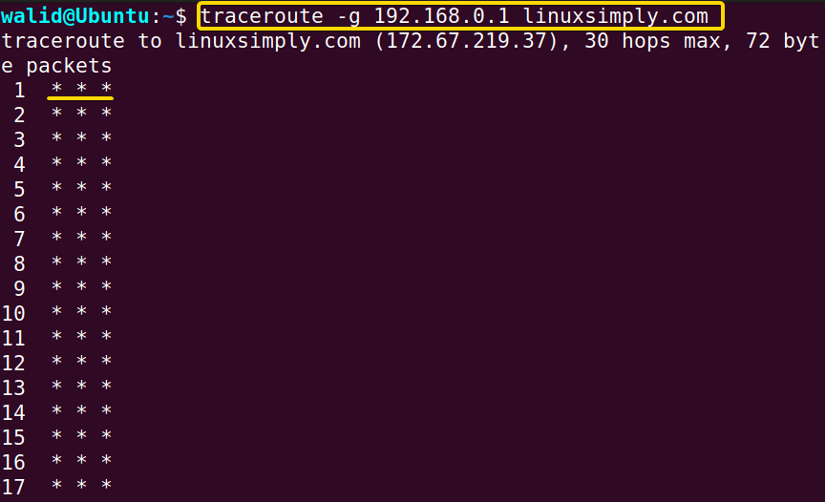
Example 11: Disable Resolution of IP Address in the “traceroute” Command in Linux
The traceroute command has an option to disable the resolution of IP addresses. It helps to speed up the process. The option is “-d”. Now follow the steps below with me:
Steps to Follow >
❶ Press CTRL + ALT + T to open the Ubuntu Terminal.
❷ Write the following command in the command prompt:
sudo traceroute -d linuxsimply.com❹ Provide a password (if necessary).
❸ Then press the ENTER key on your keyboard.
Output >
To implement option “-d” you need to have root privileges. However, you may not see a visual difference in your output.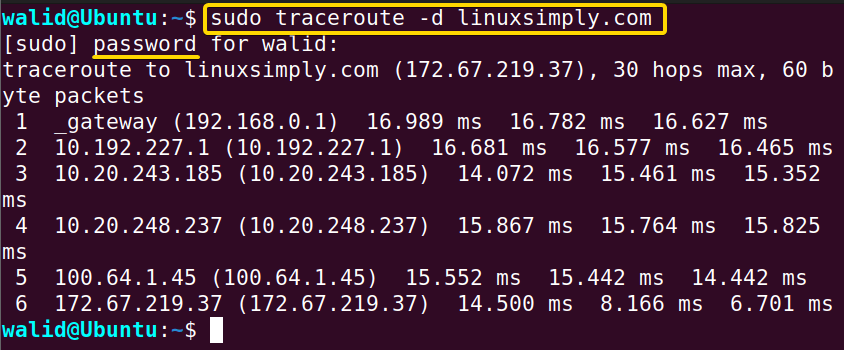
Similar Readings
- The “tcpdump” Command in Linux [6+ Practical Examples]
- The “rsync” Command in Linux [10 Practical Examples]
- The “screen” Command in Linux [13 Practical Examples]
- The “arp” Command in Linux [7 Practical Examples]
Example 12: Specify Maximum Number of Hops for a Packet
In this example, I will limit the maximum number of hops for a single data packet. I will use the option “-t” for this purpose. If I provide 20 as the value of option “-t”, one data packet will be allowed to access 20 hops only. Now do the following:
Steps to Follow >
❶ At first open a Terminal from Ubuntu.
❷ Now, enter the following command in the Terminal:
traceroute -t 20 linuxsimply.com❸ Then hit the ENTER key from the keyboard.
Output >
Again, you won’t see any visible difference in the output. Moreover, don’t get confused with Example 4.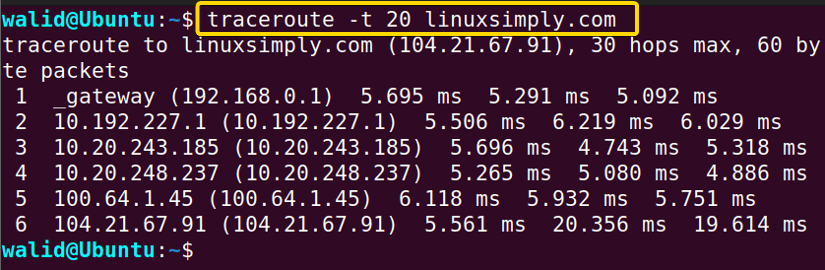
Example 13: Testing a Port Using the “traceroute” Command in Linux
Lastly, I will test a specific port using the traceroute command in Linux. For instance, I have an ssh server running in my Ubuntu. I want to test port 22. Now follow the steps below with me:
Steps to Follow >
❶ Firstly, Open an Ubuntu Terminal:
❷ Insert the following command in the command prompt:
traceroute -p 22 192.168.0.106❸ Now press the ENTER button.
Output >
My server’s name was Ubuntu and has an IP address of 192.168.0.106. In the output, you can see the name of my server and its IP address. So it is really working.
Conclusion
The traceroute command in Linux is difficult to understand at first. However, if you are interested in networking, you must know it. To get a good hand in the traceroute command in Linux, practice all the examples above and try to understand all the concepts.
Similar Readings
- The “wget” Command in Linux [14 Practical Examples]
- The “ping” Command in Linux [9 Practical Examples]
- The “curl” Command in Linux [9 Practical Examples]
- The “ dig” Command in Linux [10 Practical Examples]
- The “hostname” Command in Linux [12 Practical Examples]
- The “ip” Command in Linux [9+ Practical Examples]
- The “ifconfig” Command in Linux [6+ Practical Examples]
FUNDAMENTALS A Complete Guide for Beginners


