The ufw (Uncomplicated FireWall) is a firewall management tool for Linux systems that is used to configure and manage the built-in firewall of the Linux kernel. Additionally, it is designed to be easy to use and understand for users who are not familiar with firewall management. Furthermore, I will describe all the features and uses of the ufw command in Linux with multiple examples.
A. Description
Generally, the ufw command is used to interact with the firewall, and it provides a variety of options to enable or disable the firewall, open or close ports, and configure the firewall rules. However, before starting to use UFW, you should check your current firewall status and settings with “sudo ufw status.” If another firewall is already running, you should stop it or disable it before enabling UFW.
B. Syntax
The syntax of the ufw command in Linux is pretty simple, as shown below.
ufw [ACTION]... [OPTION]... [RULE]...- ACTION is the action to take, such as “enable”, “disable”, “status”, etc.
- OPTION is an optional flag or setting that modifies the behavior of the command.
- RULE is the rule to apply, such as “allow”, “deny”, “limit”, etc.
C. Options
There are numerous options available for the ufw command. Here, I have listed a few of them. However, You can learn more about the ufw command, its options and their uses by checking the man page.
man ufwUseful Options
- –version: Show the program’s version number.
- -h, –help: show help message.
- –dry-run: Show the changes that would be made to the firewall without actually applying them.
Installing the “ufw” Command in Linux
The ufw command is typically pre-installed on most Linux distributions. If it is not already installed on your system, you can install it using the package manager for your distribution. You can find out whether you have it on your machine or not by typing the below command
ufw --versionAlternatively,
ufw versionYour system will print out the version of the ufw command if it is already installed.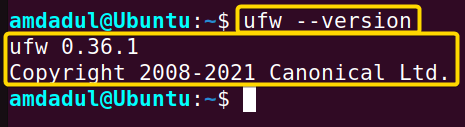 Otherwise, you can install the ufw command on your machine within a minute by following the instructions given below.
Steps to Follow >
➊ At first, open the Ubuntu Terminal
➋ Type the following in your command prompt:
sudo apt-get install ufwAlternatively,
sudo apt install ufw➌ Tap the ENTER key.
➍ Input your password
➎ Now, press ENTER
Output >
Upon completion of these steps, the ufw command will be installed on your machine.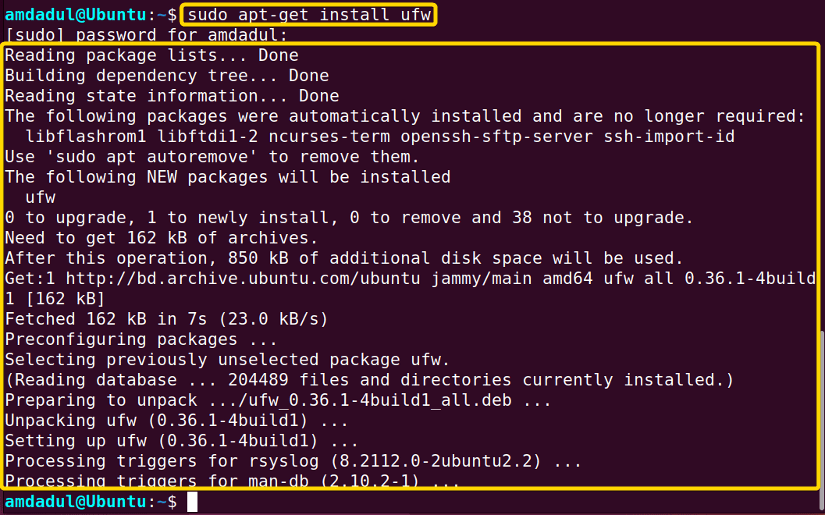
Practical Examples of the “ufw” Command in Linux
In Linux, the ufw command is a helpful tool to enable or disable the firewall, open or close ports, and configure the firewall rules. In the section below, I will show you some of the most useful applications for the ufw command in Linux.
Example 1: Defining the Default Behavior of the “ufw” Command in Linux
You can control incoming and outgoing traffic by using the ufw command. You can deny incoming connections that do not match any rule by running “ufw default deny incoming.” Alternatively, you can allow incoming connections that do not match any rule by running “ufw default allow incoming.” Again, to deny or allow outgoing connections, you can run the “ufw default deny outgoing” or “ufw default allow outgoing” commands, respectively. Here, I will show you the process of defining the default value, considering four cases.
Case A: Deny Incoming Connections
To deny the incoming connections that do not match any rule, you can follow the steps below.
Steps to Follow >
➊ At first, open the Ubuntu Terminal.
➋ Execute the command to deny the incoming connections that do not match any rule
sudo ufw default deny incoming➌ Now, press the ENTER button.
➍ Input your Password.
➎ Finally, Tap the ENTER key again.
Output >
In the following image, you can see that I have denied the incoming connections that do not match any rule.
Case B: Allow Incoming Connections
You can allow the incoming connections that do not match any rule, Here, I will show you the process to allow the incoming connections. You can do the same by following the steps below.
Steps to Follow >
➊ Open the Ubuntu Terminal.
➋ Run the command to allow the incoming connections that do not match any rule
sudo ufw default allow incoming➌ Press the ENTER button.
➍ Now, Provide your Password.
➎ Hit the ENTER key again.
Output >
In the image below, you can see that I have allowed incoming connections that do not match any rule.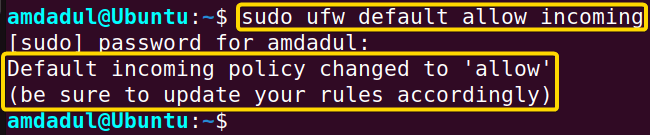
Case C: Deny Outgoing Connections
To deny the outgoing connections that do not match any rule, you can follow the steps below.
Steps to Follow >
➊ First, open the Ubuntu Terminal.
➋ Execute the command to deny the incoming connections that do not match any rule
sudo ufw default deny outgoing➌ Hit the ENTER button.
➍ Type your Password.
➎ Tap the ENTER key again.
Output >
In the following image, you can see that I have denied the outgoing connections that do not match any rule.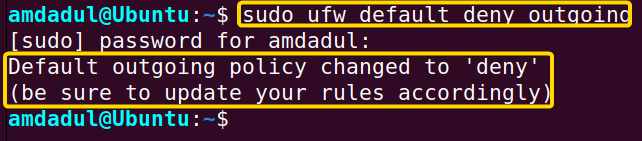
Case D: Allow Outgoing Connections
You can allow outgoing connections that do not match any rule using the ufw command in Linux. Here, I will show you the process for allowing outgoing connections. You can do the same by following the steps below.
Steps to Follow >
➊ Open the Ubuntu Terminal.
➋ Run the command to allow the outgoing connections that do not match any rule
sudo ufw default allow outgoing➌ Press the ENTER button.
➍ Provide your Password.
➎ Hit the ENTER key again.
Output >
The image in the section below shows that I have allowed outgoing connections that do not match any rule.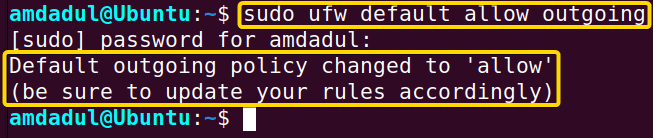
Similar Readings
- The “iptables” Command in Linux [6 Practical Examples]
- The “netstat” Command in Linux [22 Practical Examples]
- The “nslookup” Command in Linux [12 Practical Examples]
- The “tcpdump” Command in Linux [6+ Practical Examples]
Example 2: View the Current Firewall Status Using the “ufw” Command in Linux
The ufw command in Linux allows you to see the current firewall status. For, this you have to execute the ufw status command. Now, I will show you the current firewall status of my machine using the ufw command. To do the same, follow the steps below.
Steps to Follow >
➊ Open the Ubuntu Terminal.
➋ Now, Execute the command below.
sudo ufw status➌ Then, Tap the ENTER button.
➍ Input your Password.
➎ Finally, Press the ENTER key again.
Output >
In the following image, you can see that I have shown you the current firewall status in the terminal.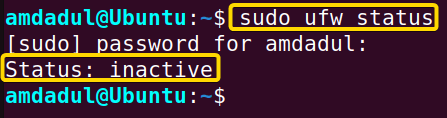
Example 3: Allow SSH connections Using the “ufw” Command in Linux
When you turn on the firewall, you don’t want to be locked out of your own server. To fix this, you need to make a rule that lets you get in through port 22 (or whatever number you use for SSH). Remember, you must specify the port that the service uses. This section will give you an example of how to allow SSH (Secure Shell) connections through port 22 (the default port for SSH is port 22). Now, You can do the same by following the steps below.
Steps to Follow >
➊ Launch the Ubuntu Terminal.
➋ Then, Type the following command in the Ubuntu Terminal.
sudo ufw allow 22➌ Press the ENTER button.
➍ Now, Provide your Password.
➎ Hit the ENTER key again.
Output >
In the following image, you can see that I have allowed the SSH connection through port 22.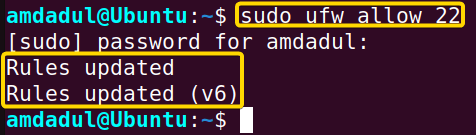
Example 4: Enable or Disable UFW Logging
The ufw command allows you to enable and disable UFW login. Here, I will show you both examples of enabling and disabling UFW logging, in the below two cases.
Case A: Enable UFW Logging
To enable UFW logging, you can follow the steps below.
Steps to Follow >
➊ At first, open the Ubuntu Terminal.
➋ Then, Execute the command to enable the UFW logging
sudo ufw logging on➌ Press the ENTER button.
➍ Now, Type your Password.
➎ Hit the ENTER key.
Output >
In the following image, you can see that I have enabled UFW logging on my machine.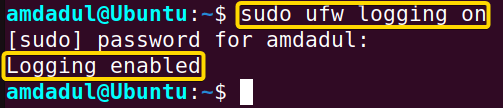
Case B: Disable UFW Logging
To disable UFW logging, you can follow the steps below.
Steps to Follow >
➊ Open the Ubuntu Terminal.
➋ Then, Run the following command to disable UFW logging
sudo ufw logging off➌ Tap the ENTER button.
➍ Now, Provide your Password.
➎ Finally, Press the ENTER key again.
Output >
In the image below, you can see that I have disabled UFW logging with the ufw command.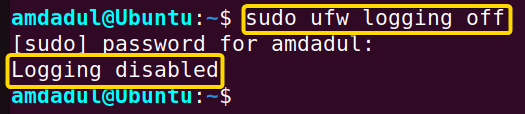
Example 5: Activate / Deactivate the Firewall Using the “ufw” Command in Linux
The ufw command allows you to activate and deactivate the firewall. Here, in this example, I will show you the process to activate and deactivate the firewall using the ufw command with the enable and disable ACTION in the following two cases.
Case A: Activate the Firewall
To activate the firewall, you can follow the steps below.
Steps to Follow >
➊ At first, open the Ubuntu Terminal.
➋ Execute the command to activate the firewall
sudo ufw enable➌ Press the ENTER button.
➍ Type your Password.
➎ Hit the ENTER key.
Output >
In the following image, you can see that I have activated the firewall on my machine.
Case B: Deactivate the Firewall
To deactivate the firewall, you can follow the steps below.
Steps to Follow >
➊ Open the Ubuntu Terminal.
➋ Run the command to deactivate the firewall
sudo ufw disable➌ Tap the ENTER button.
➍ Provide your Password.
➎ Press the ENTER key again.
Output >
In the image below, you can see that I have deactivated the firewall.
Example 6: Limit the Number of Connections to a Given Port Over Time
The UFW has a rate-limiting feature to block connections from IPs that have made six or more attempts within 30 seconds, helping to protect against brute-force attacks. In this example, I will show you how to open an SSH connection to all IPs with rate limiting. By following the steps below, you can achieve the same thing.
Steps to Follow >
➊ Launch the Ubuntu Terminal.
➋ Execute the following command.
sudo ufw limit ssh➌ Press the ENTER button.
➍ Type your Password.
➎ Hit the ENTER key.
➏Run the following command
sudo ufw status numbered➐ Finally, Tap the ENTER key again.
Output >
The image below shows you that I have limited the number of connections to a given port over time.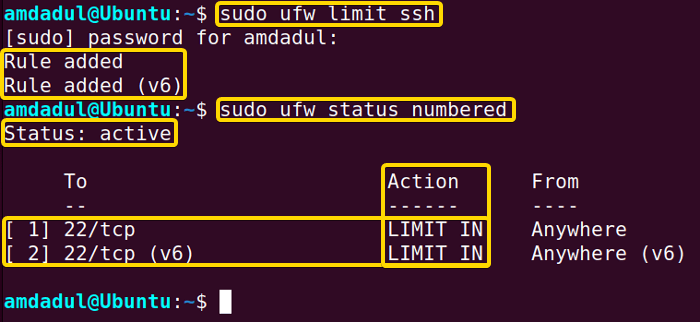
Similar Readings
- The “ftp” Command in Linux [14 Practical Examples]
- The “host” Command in Linux [10 Practical Examples]
- The “scp” Command in Linux [4 Practical Examples]
- The “sftp” Command in Linux [6 Practical Examples]
Example 7: Use IPv6 With the “ufw” Command in Linux
To ensure that UFW is protecting both your IPv4 and IPv6 connections on your Virtual Private Server (VPS), you can configure UFW to support IPv6. To accomplish this, edit the UFW configuration file using your desired text editor. Here, I will use the nano text editor to configure the UFW configuration file. You can do the same by following the steps below.
Steps to Follow >
➊ Open the Ubuntu Terminal.
➋ Run the following command and provide your password.
sudo nano /etc/default/ufw ➌ Tap the ENTER button.
➍ Confirm that IPV6 is set to yes
➎ Now, Save the change and take an exit.
➏ Restart your firewall by disabling it first with the following command.
sudo ufw disable➐ Then, enable the firewall with the following command.
sudo ufw enableOutput >
The following images show you how to configure the UFW to use IPv6. The first image shows you the configuration of the UFW configuration file.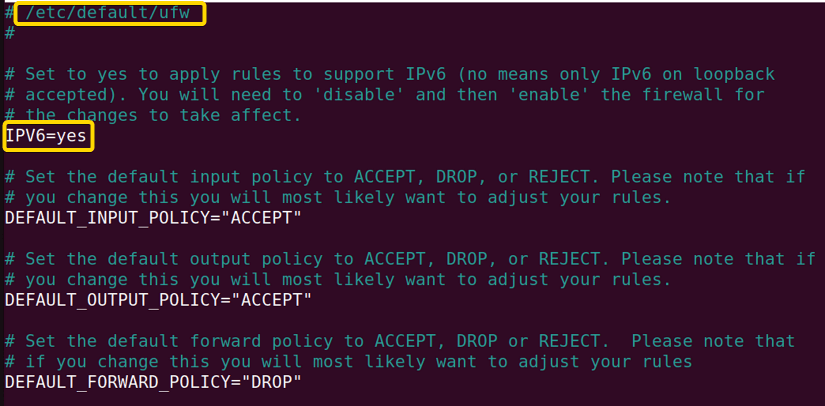 And, The second one shows you the disable and enable processes.
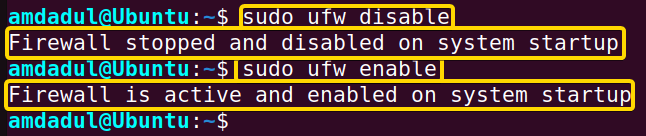 Finally, your UFW is ready to handle both IPv4 and IPv6 configurations when needed.
Example 8: Securing Web Servers Using the “ufw” Command in Linux
The ufw (Uncomplicated Firewall) command is a tool for managing a firewall on an Ubuntu Linux server. To secure a web server using ufw, you can follow the steps mentioned below.
Steps to Follow >
➊ Open the Ubuntu Terminal.
➋ Execute the following command.
sudo ufw enable➌ Press the ENTER button.
➍ Type your Password.
➎ Hit the ENTER key.
➏ Allow incoming traffic on port 80 (HTTP) and port 443 (HTTPS), using the following commands
sudo ufw allow 80/tcpsudo ufw allow 443/tcp➐ Tap the ENTER key.
➑ Deny all incoming traffic by default using
sudo ufw default deny incoming➒ Allow all outgoing traffic using the command
sudo ufw default allow outgoing➓ Check the status of the firewall by executing the command below
sudo ufw statusOutput >
In the following image, you can see the full process to secure the web services.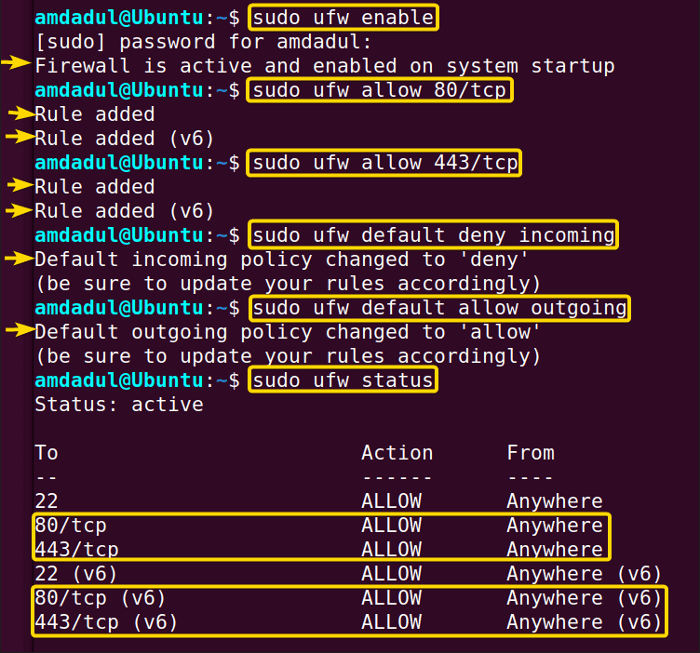 However, always remember It is good practice to monitor the firewall log files to check for any unwanted traffic and to keep your system updated.
Example 9: Specifying Port Ranges With the “ufw” Command in Linux
The ufw command allows you to specify the ranges of ports to allow or deny with UFW. To declare the range value you have to follow the format Lower_range_value : Upper_range_value. You also have to specify the protocol name (tcp or udp) that you want to apply. In the section below, I have demonstrated an example that you can follow to get the same result.
Steps to Follow >
➊ Open the Ubuntu Terminal.
➋ Run the command
sudo ufw allow 1000:2000/tcpAlternatively, you can run
sudo ufw allow 1000:2000/udp➌ Tap the ENTER button.
➍ Provide your Password.
➎ Press the ENTER key again.
➏ Now, you can check the status by the following command
sudo ufw status➐ Hit the ENTER key.
Output >
In the image below, you can see that I have specified the port range for the tcp protocol.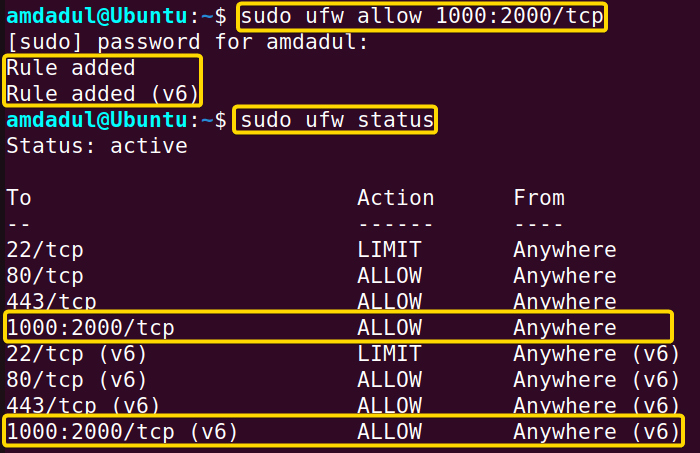
Example 10: Specifying IP Addresses With the “ufw” Command in Linux
One of the features of UFW is the ability to specify IP addresses for firewall rules. This means that you can allow or deny incoming traffic from specific IP addresses or ranges of IP addresses, providing more granular control over your firewall and increasing the security of your Linux system. In the following manner, You can specify an IP address with the ufw command.
Steps to Follow >
➊ Launch the Ubuntu Terminal.
➋ Execute the following command.
sudo ufw deny from 218.174.0.53➌ Press the ENTER button.
➍ Type your Password.
➎ Hit the ENTER key.
➏Run the following command
sudo ufw status numbered➐ Tap the ENTER key.
Output >
The image below shows you that incoming traffic from the specified IP (218.174.0.53) address has been denied by the firewall.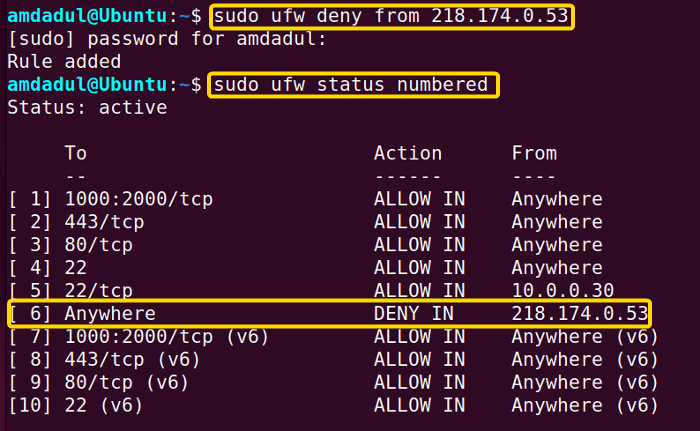
Similar Readings
- The “traceroute” Command in Linux [13 Practical Examples]
- The “rsync” Command in Linux [10 Practical Examples]
- The “screen” Command in Linux [13 Practical Examples]
- The “arp” Command in Linux [7 Practical Examples]
Example 11: Deleting Rules Using the “ufw” Command in Linux
The deleting process of the existing rules is simple using the ufw command in Linux. For deleting any rules you have to know the current number of the rule in ufw status. Then, you will be able to delete that rule by executing the “sudo ufw delete [rule_number]” command. Here, I will show you how to delete a rule. You will able to do the same by following the steps below.
Steps to Follow >
➊ At first, open the Ubuntu Terminal.
➋ Run the following command.
sudo ufw status numbered➌ Tap the ENTER button.
➍ Provide your Password.
➎ Press the ENTER key again.
You will get the list of rules with their serial numbers, as shown in the image below.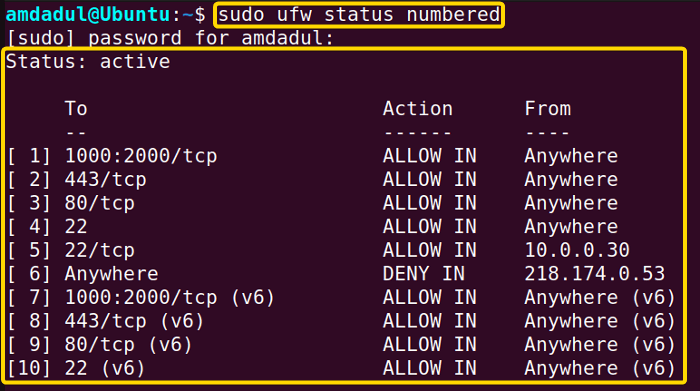 ➏ To delete any rule, let the rule “5” in this case, use the command below.
sudo ufw delete 5➐ Hit the ENTER key.
➑ Press “Y” to proceed with the delete operation.
Output >
In the image below, you can see that rule no “5” has been deleted.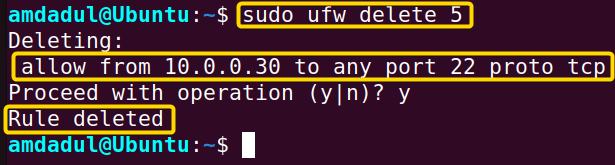
Example 12: Resetting Default Settings for the “ufw” Command in Linux
The ufw (Uncomplicated Firewall) command allows you to reset your cloud server’s firewall rules back to their default settings using the command “sudo ufw reset“. Now, You can follow the following steps to reset the default settings.
Steps to Follow >
➊ Open the Ubuntu Terminal.
➋ Now, Run the command
sudo ufw reset➌ Tap the ENTER button.
➍ Then, provide your Password.
➎ Press the ENTER key again.
➏ Now, press ‘Y’
➐ Hit the ENTER key.
Output >
You can see in the image below that all rules have been set to default.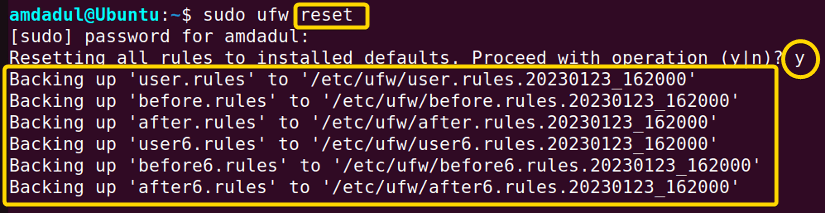
Conclusion
In this article, I’ve discussed the ufw command, which is useful to configure, enable, disable and check the status of the firewall. Additionally, I have explained its options with some relevant examples. Clearly, you should now have a better understanding of the ufw command and how to use it. In conclusion, This article will make it easier for you to become skilled in using the Linux command line.
Similar Readings
- The “wget” Command in Linux [14 Practical Examples]
- The “ping” Command in Linux [9 Practical Examples]
- The “curl” Command in Linux [9 Practical Examples]
- The “ dig” Command in Linux [10 Practical Examples]
- The “hostname” Command in Linux [12 Practical Examples]
- The “ip” Command in Linux [9+ Practical Examples]
- The “ifconfig” Command in Linux [6+ Practical Examples]
FUNDAMENTALS A Complete Guide for Beginners


