The screen command in Linux is used to run multiple sessions in a single terminal. For instance, you are working on a server remotely and you have only one terminal. But you want to run multiple processes simultaneously. The screen command makes it possible. Moreover, it minimizes the chances of abruptly closing a task midway that might be sensitive or takes a lot of time to complete. In this article, I will show you the usage of the screen command in Linux with several practical examples as simple as possible.
A. Description
The screen command in Linux comes by default in most Linux Distributions. The command was developed so that a user can run a process even though he is not connected to the terminal. Oliver Laumann and Carsten Bormann designed it first for Unix and published it in 1987. The command gained a lot of popularity later and went through a lot of changes. The screen command in Linux is particularly important for SSH(Secure Shell) sessions. A remote server user can run multiple processes on a single terminal by using the screen command.
B. Syntax
The syntax of the screen command in Linux is simple and it goes like the following:
screen [OPTION]... [COMMAND [ARGUMENT]]...C. Options
The screen command in Linux has a lot of options and you can check them yourself by writing the following command in the command prompt:
man screenUseful Options
- -S, creates a new session.
- -p, is used to assign a password to a session.
- -X, executes commands inside a session.
- -r, is used to reattach to a session.
- -ls, lists out all the running sessions.
How to Install the “screen” Command in Linux
Most of the time, the screen command in Linux comes by default. However, if your Linux Distro doesn’t contain this command, you can install it by following the steps below:
Steps to Follow >
❶ Launch a Terminal in your Ubuntu.
❷ Copy the following command in the command prompt and hit ENTER:
sudo apt-get install screenThe installation process will be started. You will see an output like below.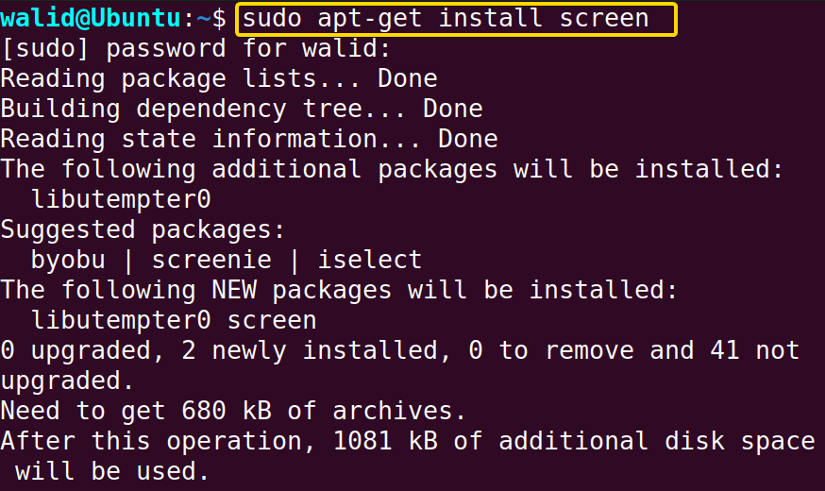
❸ Write “Y” if the see the message “Do you want to continue” and press the ENTER button again.
Your installation will be completed within a very short time.
Practical Examples of the “screen” Command in Linux
In this section, I will try to cover some basic usage and features of the screen command in Linux. I explained everything step-by-step. Follow everything with me to get the full effect.
Example 1: Create a Session Using the “screen” Command in Linux
Firstly, I will show you how I can start a session only using the screen command in Linux. The steps are simple. Follow them below:
Steps to Follow >
❶ At first, launch the Ubuntu Terminal.
❷ Write the following command in the Terminal:
screen❸ Press the ENTER button from the keyboard.
Output >
In the first image, I only type the screen command, nothing else. And pressed ENTER. You might feel like everything on the terminal has disappeared for some reason. However, it is not the case. Actually, you have started a new terminal session!
 In addition, if you ever get an output like this, just keep on pressing the Space button.
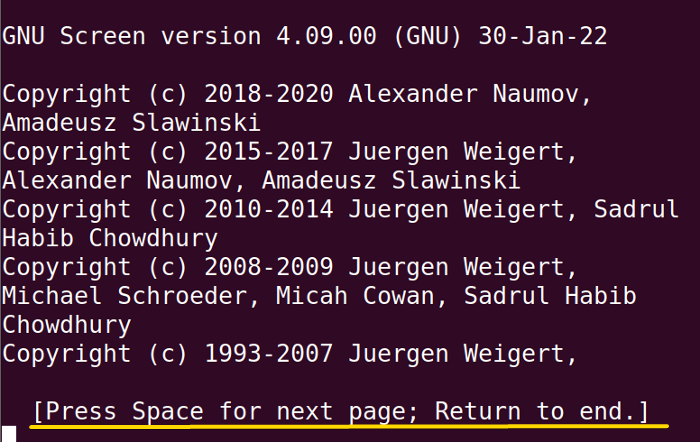
Similar Readings
- The “iptables” Command in Linux [6 Practical Examples]
- The “tcpdump” Command in Linux [6+ Practical Examples]
- The “nslookup” Command in Linux [12 Practical Examples]
- The “ufw” Command in Linux [12+ Practical Examples]
Example 2: Screen Detaching
In the previous example, you have learned how to start a new session. Now, I will show you how to detach without ending it. Now do the following:
Steps to Follow >
❶ Press CTRL + ALT + T to open an Ubuntu Terminal.
❷ Copy the following command in the command prompt to start a new session:
screen❸ Hold the CTRL button, press A and then D.
Output >
When you detach from a session, you will return back to your old session. Also, you will see a message “[ detached from …..]” like below.
Example 3: Create a Named Session Using the “screen” Command in Linux
This time I will create a named session. Named sessions help you to keep track of all the sessions running on a machine. Also, it makes reattaching easier. To name your session, follow the steps below:
Steps to Follow >
➊ Go to your Ubuntu and launch a Terminal.
➋ Insert the command below in the Terminal:
screen -S newsession➌ Then hit the ENTER key.
Output >
You should remember that creating a named session doesn’t mean the title of your Terminal will be different or anything. You won’t see any difference. However, it will help you later. As you can see, the new session looks exactly similar to Example 1.
Example 4: List of Screens Using the “screen” Command in Linux
Let’s say there are a lot of sessions running in my system and I want to have a list of them. Thankfully, the screen command in Linux comes with an option (“-ls”) to list all the sessions. Do the following to see your list:
Steps to Follow >
❶ Open a Terminal from your Ubuntu.
❷ Type the following command in the command prompt:
screen -ls❸ Hit ENTER from your keyboard.
Output >
Currently, there are two terminal sessions running on my machine. You can see a number followed by a string in the list. The number denotes PID (Process Identification Number) and the string is the name of that process. You will see “Attached” or “Detached” on the right side of the list. “Attached” denotes you are in that session right now and “Detached” is the opposite.
Example 5: Screen Reattaching
Now I will reattach to a session that I detached earlier. The screen command in Linux has an option “-r” for that purpose. You also need to provide an argument which can be the name of the session or PID (process identification number). Now do the following:
Steps to Follow >
❶ Launch an Ubuntu Terminal by pressing CTRL + ALT + T.
❷ Write the command below in the Terminal:
screen -r newsessionOR,
screen -r 2477❸ Find the ENTER button on your keyboard and press it.
Output >
At first, I reattached an existing session by its name. Then I detached from it and reattached it again using the PID.
Example 6: Kill a Screen Using the “screen” Command in Linux
Linux has a dedicated command to end any process which is the kill command. You can use this command to end a terminal session as well. But you need the PID of a process for that. In the image below, the PID of newsession is 2090. Write the following command to find the PID of your screens:
screen -ls Now follow the steps below:
Steps to Follow >
❶ Go to your Ubuntu and open a Terminal.
❷ Copy the following command in the command prompt:
kill 2090❸ Hit the ENTER key.
Output >
To show you that the process is killed, I used the “screen -ls” command. And see, it is showing “No Sockets found” which indicates there is no session running in your Ubuntu.
screen -lsExample 7: Terminate a Screen by Name
It is also possible to terminate a session by name using the screen command in Linux. For your information, you can end your session by typing “quit” too. But you need to be in the session for this. Now I will show you how to kill a session when you are detached. For that, I will use the “-X” option for that purpose. The “-X” option of the screen command in Linux can execute a command in a detached screen session. To find the name of your screens, type the following command in the command prompt:
screen -ls In the above photo, there is a screen session named newsession. To terminate it, do the following:
Steps to Follow >
❶ At first, launch a Terminal from Ubuntu.
❷ Insert the command in that Terminal:
screen -X -S newsession quit❸ Press the ENTER key.
Output >
Here, I executed the “quit” command in the detached newsession. As a result, it is terminated now. That’s why when I listed out the current running screen session, the output is “No Sockets found”.
screen -lsExample 8: Run a Process in the Background Using the “screen” Command in Linux
You have everything you need. Now let’s run a process in the background. Because you will use the screen command in Linux for this purpose mostly, For demonstration, I will upgrade my system this time. Now follow all the steps below with me:
Steps to Follow >
❶ Open an Ubuntu Terminal first.
❷ Write the following command to start a new screen session:
screen -S newsession❸ Then, copy the command below to upgrade your system:
sudo apt-get upgrade❹ Hold the CTRL button, then press A and D to detach the screen.
❺ To check the condition of the upgradation, insert the command below in Terminal:
screen -r newsession➏ Finally, press the ENTER button.
Output >
I have attached a couple of photos to help you with the process. The first photo shows how I created a new terminal session and reattached it after detaching it.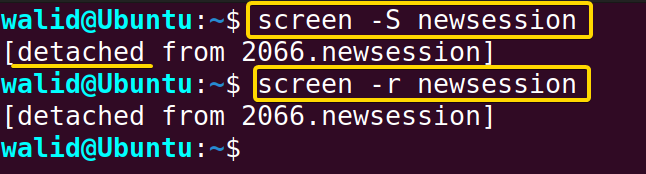 This image shows the command to start the upgradation process.
 Finally, this image shows what I found after reattaching. See, the process was still running in the background.
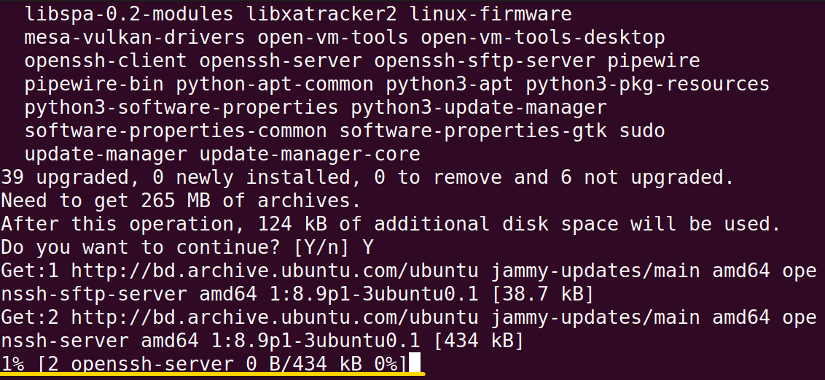
Similar Readings
- The “traceroute” Command in Linux [13 Practical Examples]
- The “rsync” Command in Linux [10 Practical Examples]
- The “ssh” Command in Linux [18 Practical Examples]
- The “arp” Command in Linux [7 Practical Examples]
Example 9: Renaming a Screen
In this example, I will show you how to rename an existing screen session. For instance, I have a session named oldsession and I want to rename it to newsesssion. You need both the name and PID of a session to do that. To view the name of your screens, insert the command below:
screen -ls Now follow the steps below to rename a screen session:
Steps to Follow >
❶ Firstly, open a Terminal in Ubuntu by pressing CTRL + ALT + T from the keyboard.
❷ Copy the following command in the command prompt:
screen -S 3135.oldsession -X sessionname newsession❸ Find the ENTER button on your keyboard and hit it.
❹ To check whether the name has changed, write the following command and press ENTER:
screen -lsOutput >
Now see, the session name has changed. I can be sure of that because the PID is the same.
Example 10: Add Password in the “screen” Command in Linux
You may require it to run a process securely. The screen command in Linux provides an option to assign a password to a session. The option is “-p” and your password should be the value. Moreover, you also need to use option “-S”. Now do the following:
Steps to Follow >
❶ Firstly, launch a Terminal in Ubuntu.
❷ Write the following command in the Terminal:
screen -S newsession -p 123456❸ Press the ENTER key.
Output >
Here I have created a screen session named newsession and the password is 123456. When I tried to reattach to that screen, it was asking for a password.
screen -r newsessionExample 11: Split the Screen Horizontally
If you are a Windows or MacOS user, splitting the screen is a regular thing for you. However, in Linux splitting is not that easy. Luckily, the screen command in Linux has made it easy for us. You can divide your screen by pressing some keys from the keyboard. To split your screen horizontally, do the following:
Steps to Follow >
❶ Open an Ubuntu Terminal firstly.
❷ Copy the following command in the command prompt to start a session and hit ENTER:
screen -S newsession❸ Press CTRL + A, followed by CTRL + S.
Output >
See, the screen is divided into half from the middle. I will show you later how to go to the other half and write something.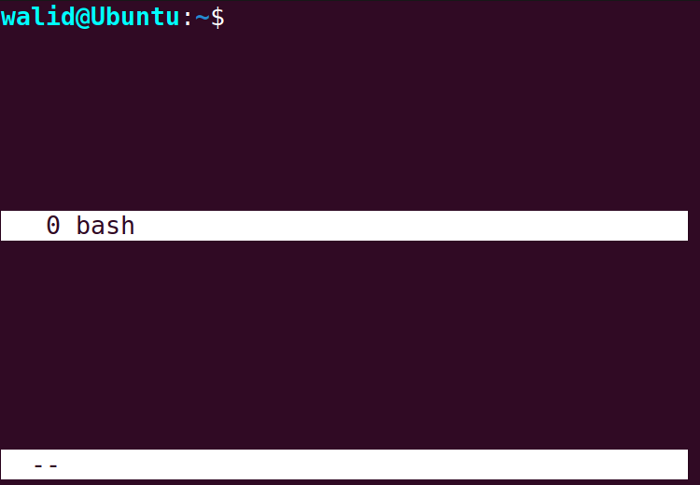
Example 12: Split the Screen Vertically
Now I will show you how to split the screen vertically in the screen command in Linux. Now follow the steps below with me:
Steps to Follow >
❶ Launch a Terminal from your Ubuntu.
❷ Insert the following command in the command prompt to start a session and hit ENTER:
screen -S newsession❸ Press CTRL + A, then the “|” sign (the vertical bar).
Output >
In the output, there is a vertical white line in the middle. That means the screen is split.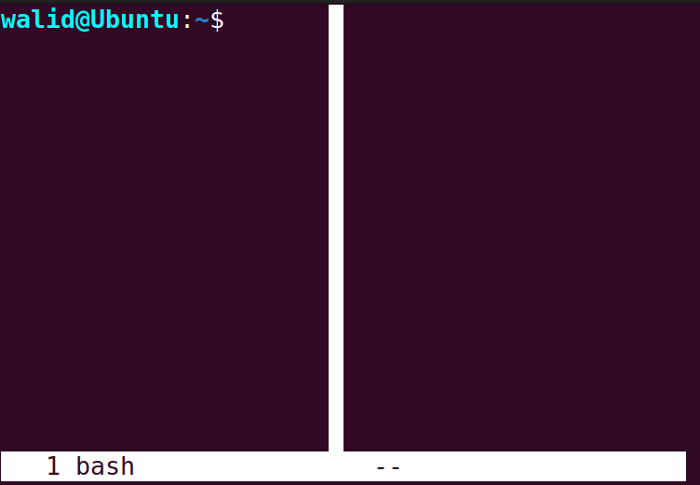
Example 13: Switch Between Tabs and Create New Window
In Example 11 and Example 12, you have learned how to split a screen. Now you will learn to switch between those tabs and create a window to write something. I will take the screen of Example 12 for this example. Now follow the steps with me:
Steps to Follow >
❶ Firstly, go to your Ubuntu and open a Terminal.
❷ Type the following command to create a session:
screen -S newsession❸ Split the screen vertically by pressing CTRL + A, then “|” ( the vertical bar).
❹ Press CTRL + A, then the Tab button to go to another tab.
❺ Again, press CTRL + A and CTRL + C to create a new window.
Output >
Here, I followed step 4 to go to the tab on the right. You can see the cursor there.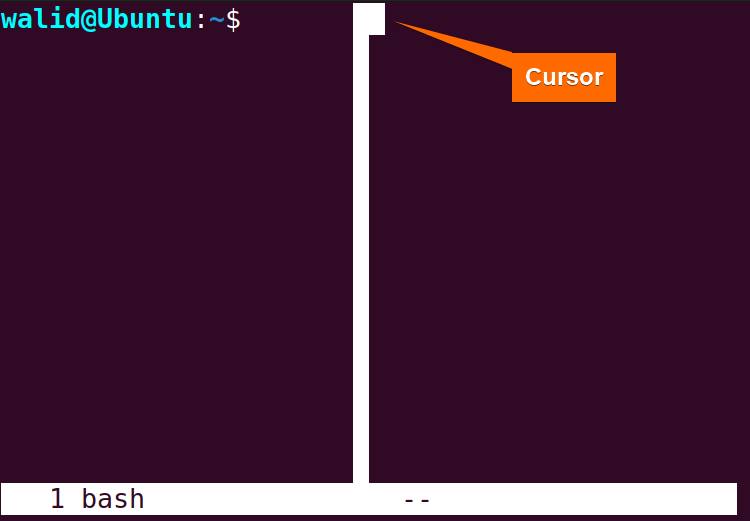 Then step 5 to create a window. Now the right tab also has “walid@Ubuntu” at the beginning. Now I can write commands on that tab as well.
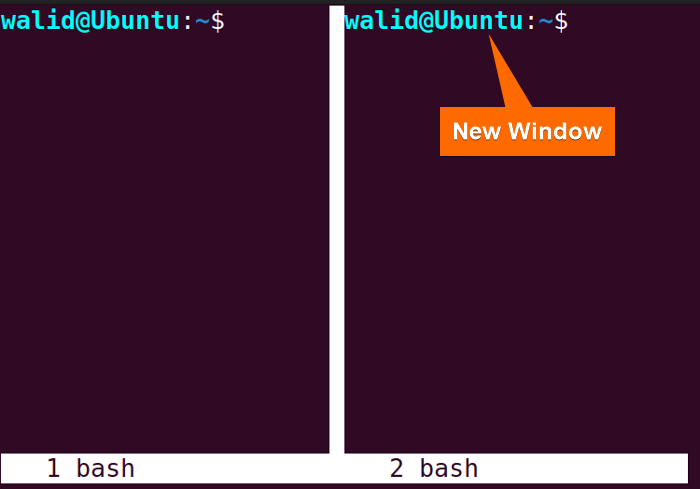
Conclusion
The screen command in Linux is a very useful command if you are accessing a server from a remote location. It will remove some hassle, make you more efficient and productive. I hope this article has helped you to grasp the screen command in Linux. Make sure you have practiced every example and followed every step.
Similar Readings
- The “wget” Command in Linux [14 Practical Examples]
- The “ping” Command in Linux [9 Practical Examples]
- The “curl” Command in Linux [9 Practical Examples]
- The “ dig” Command in Linux [10 Practical Examples]
- The “hostname” Command in Linux [12 Practical Examples]
- The “ip” Command in Linux [9+ Practical Examples]
- The “ifconfig” Command in Linux [6+ Practical Examples]
FUNDAMENTALS A Complete Guide for Beginners


