The arp command is a utility used to display and manipulate the Address Resolution Protocol (ARP) cache. It allows users to view the contents of the ARP cache, manually add or remove entries from the cache, and flush the entire cache if needed.
In this article, I will try to familiarize you with the “arp” command with some practical and useful examples.
Syntax of “arp” Command
The syntax of the arp command in Linux goes like the following:
arp [OPTION]... [HOSTNAME/IP ADDRESS]Options for “arp” Command
To know about the options, execute the following command:
man arpHere is some of the necessary options of arp command:
| Option | Description |
|---|---|
| -a | Shows all ARP cache entries. |
| -v or –verbose | Enable verbose mode. |
| -n or –numeric | Provides output in numerical format. |
| -d | Delete a host. |
| -H or –hw-type | Specifies network protocol. |
Note: The options are all case-sensitive, So, use them carefully.
How Does “arp” Command Work?
The arp command in Linux manages the Address Resolution Protocol (ARP) cache, which maps IP addresses to MAC addresses on a local network. It allows users to view the cache, add or remove entries, and clear the cache. When a device needs to communicate with another device, it sends out an ARP request to obtain the MAC address corresponding to the target IP address. The “arp” command facilitates troubleshooting network connectivity by managing these mappings.
Uses of the “arp” Command in Linux
Here are some practical and useful examples of the arp command in Linux:
1. Print IP Addresses and Mac Addresses Using the “arp” command in Linux
In the first example, I will pick in the ARP cache to see all the IP entries and their corresponding MAC addresses. All I need to do for that purpose is type the arp command in the terminal. To print IP addresses and their corresponding MAC addresses, do the following:
- At the beginning, go to your Ubuntu and open a Terminal.
- Copy the following command in the command prompt:
arp - Print ENTER from the keyboard.
In the output, you will see the following five columns:
- Address: IP address or hostname of the devices on the LAN.
- HWtype: Network protocol type (for instance – ether). Here ether means ethernet protocol.
- HWaddress: MAC addresses of the devices.
- Flags Mask: ARP cache entry type. C – Dynamically learned entry, M- Manually entered entry, P – Published entry, tell the host to respond to ARP request and ARP respond packets.
- Iface: Name of the network interface.
The image below shows all the columns from the output.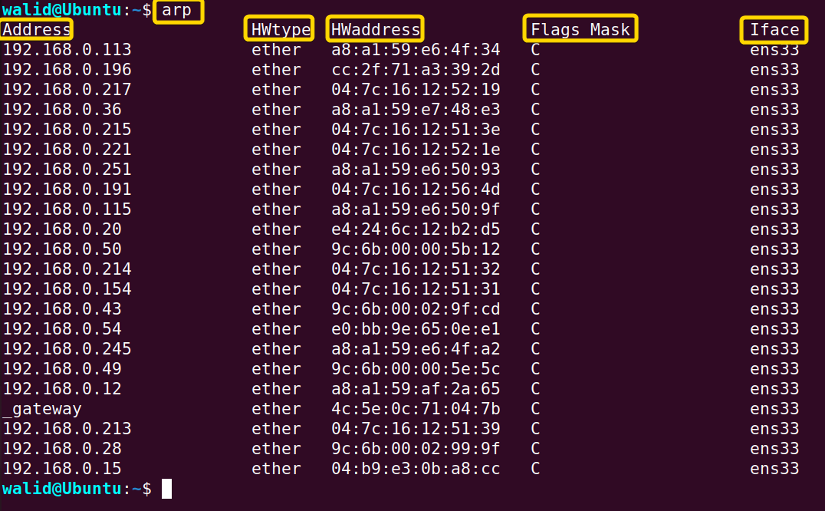
Similar Readings
- The “iptables” Command in Linux [6 Practical Examples]
- The “tcpdump” Command in Linux [6+ Practical Examples]
- The “nslookup” Command in Linux [12 Practical Examples]
- The “ufw” Command in Linux [12+ Practical Examples]
2. Print All Hosts on the ARP Cache
The arp command in Linux shows all the current hosts by default. However, use option -a to show all the hosts on the LAN.
arp -aUnlike “arp”, the output of the arp -a command doesn’t have any column heading. At first, you will see the hostname. If the hostname isn’t available, you will see the question mark (“?”). Then you will see the IP address, Mac address, Protocol type (HWtype), and network interface respectively.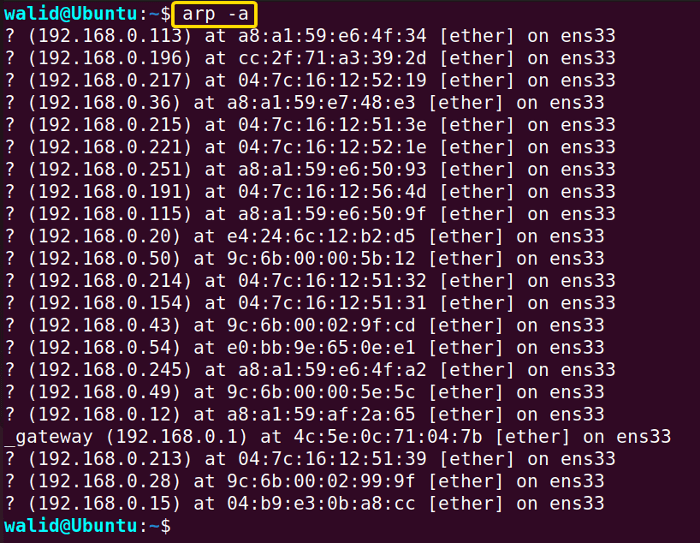
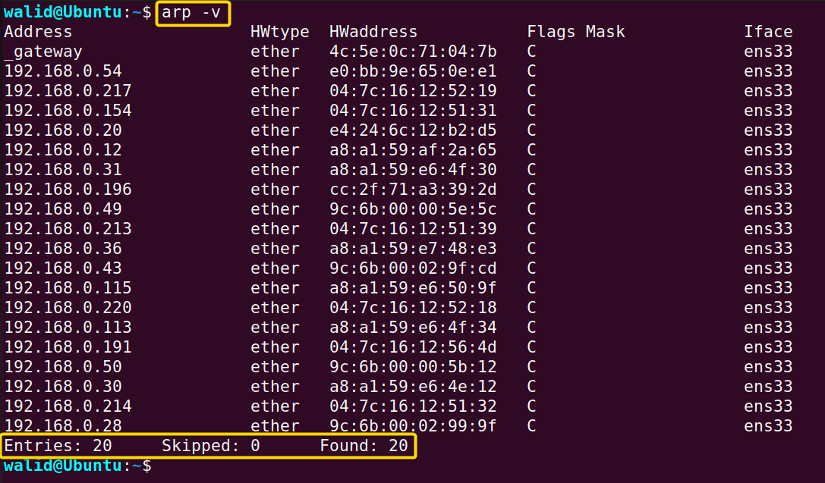
3. Enable Verbose Mode in the “arp” Command in Linux
The arp command in Linux provides an option -v to enable verbose mode. In verbose mode, the command command provides an extra line at the end showing the number of ARP cache entries etc. To enable verbose mode, use the command below:
arp -vIn the output, you can see an extra line on the bottom showing “Entries”, “Skipped” and “Found”.
- Entries: Number of ARP cache entries.
- Skipped: Number of entries skipped by the arp
- Found: Number of entries processed by the arp
4. Arp Cache Entries in Numerical Format
The -n option in the arp command in Linux shows output in the numerical format. You will see an IP address in place of the hostname. Moreover, arp -n doesn’t resolve IP addresses to MAC addresses. It only shows what is in the ARP cache. So, you might see an IP address in place MAC address.
To print ARP cache entries in numerical format, use the below command:
arp -nIn previous examples, you might notice a hostname “_gateway”. However, in this output, you can see only its corresponding IP address. You can check it by matching the MAC address. 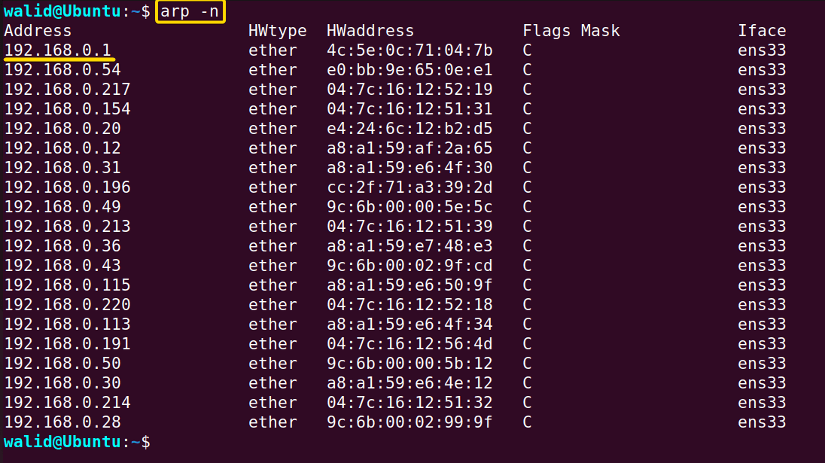
5. Delete A Host Using the “arp” Command in Linux
It is possible to delete a particular host from the ARP cache. The arp command in Linux provides the -d option for that. First, execute the following command to see all the hosts:
arp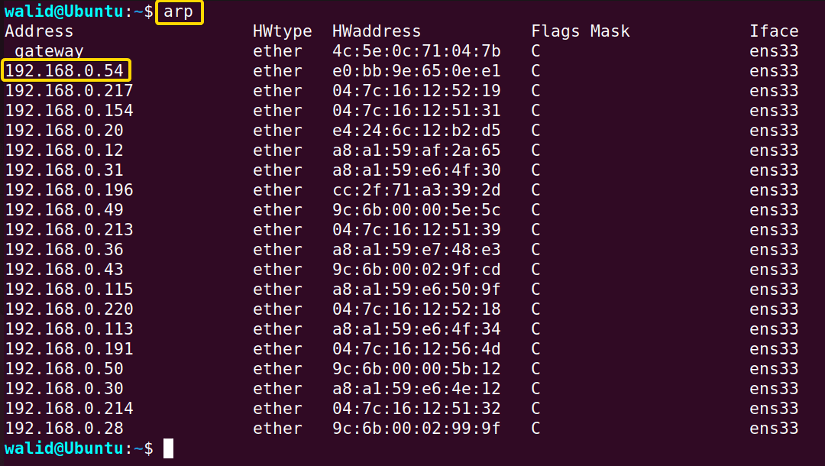 Let’s say, you want to delete the host with the IP address 192.168.0.54. To do that, use:
sudo arp -d 192.168.0.54Now, again use arp to list all the hosts.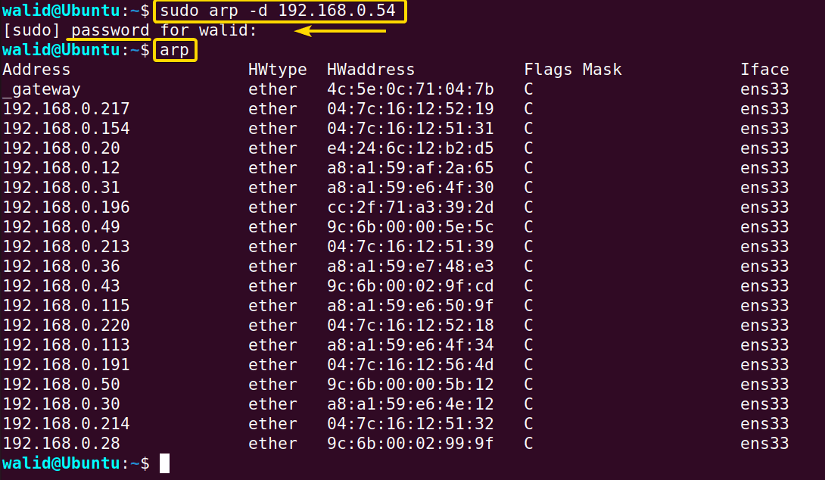 As you can see, there is no host with the IP address 192.168.0.54. So, it is deleted from the ARP cache.
Similar Readings
- The “traceroute” Command in Linux [13 Practical Examples]
- The “rsync” Command in Linux [10 Practical Examples]
- The “screen” Command in Linux [13 Practical Examples]
- The “ssh” Command in Linux [18 Practical Examples]
6. Applying the “arp” Command for a Particular IP Address
If you are interested in a particular IP address and its MAC address, you can only print its information using option -a of the arp command in Linux. For example, to know the MAC address and other information of an IP address 192.168.0.217, use:
arp -a 192.168.0.217
7. Prints Hosts With A Specific Type of Network Protocol
The arp command in Linux has a dedicated option -H to see all the hosts with a specific network protocol. For example, to print all the hosts with ethernet protocol, use the command below::
arp -H ether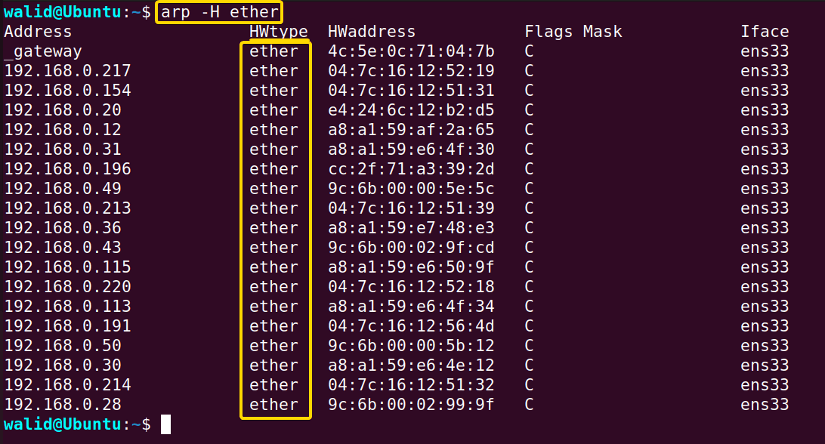
Conclusion
The arp command in Linux can be pretty hard for a beginner as you need some prior networking concepts. In this article, I have tried to explain it as easily as possible with examples. Hopefully, you have found that helpful.
People Also Ask
What is “arp” command?
The arp command in Linux is a utility used for displaying and manipulating the Address Resolution Protocol (ARP) cache. It allows users to view the ARP cache, add or remove entries manually, and flush the entire cache. ARP is crucial for mapping IP addresses to MAC addresses on a local network, facilitating proper communication between devices. The “arp” command helps manage this process, aiding in network troubleshooting and maintenance.
How do I send an ARP request in Linux?
You can send an ARP request in Linux using the arping command. It is a utility specifically designed to send ARP requests and measure the time taken for the response. Here’s the basic syntax:
sudo arping -c 3 <IP_address>Replace <IP_address> with the IP address to which you want to send the ARP request.
How to clear ARP in Linux?
To clear the ARP cache in Linux, you can use the ip or arp command, depending on your Linux distribution and version.
- Using ip command:
sudo ip -s -s neigh flush all - Using arp command:
sudo arp -a -d
How do I use ARP and ping?
ARP and ping are two essential tools for network troubleshooting. ARP is used to map an IP address to a MAC address, while ping is used to test the connectivity between two devices. Here’s how you can use them together:
- First, use the
arpcommand to check the ARP table cache on your Linux system. - Once you have the MAC address of the device you want to ping, use the ping command to test the connectivity between the two devices. For example, if you want to ping the device with IP address 192.168.1.1, you can use the following command:
ping 192.168.1.1
If the device is reachable, you should see a response from the device.
Where can I find a Linux ARP table?
On Linux systems, you can find the ARP (Address Resolution Protocol) table using the arp command or by checking the contents of the /proc/net/arp file.
- Open your terminal and simply type
arpThis command will display the ARP table, showing the IP addresses and their corresponding MAC addresses.
-
Alternatively, you can check the contents of the /proc/net/arp file by using a command like
catorless:cat /proc/net/arp
Similar Readings
- The “wget” Command in Linux [14 Practical Examples]
- The “ping” Command in Linux [9 Practical Examples]
- The “curl” Command in Linux [9 Practical Examples]
- The “ dig” Command in Linux [10 Practical Examples]
- The “hostname” Command in Linux [12 Practical Examples]
- The “ip” Command in Linux [9+ Practical Examples]
- The “ifconfig” Command in Linux [6+ Practical Examples]
FUNDAMENTALS A Complete Guide for Beginners


Tip: the arp binary is provided by the “net-tools” project.