A hostname is a unique name assigned to a computer that is connected to a network. It allows the device to be identified and accessed without using its IP address. In this article, I will discuss the hostname and all the features and uses of the hostname command in Linux with multiple examples.
A. Description
The hostname is a unique name that is set during the initial installation of an operating system, and for virtual machines, it is assigned dynamically by the system. In the case, where it is necessary to modify the hostname, the hostname command can be used to make the change.
B. Syntax
The syntax of the hostname command in Linux is pretty simple, as shown below.
hostname [OPTION]... [HOST_NAME]C. Options
There are numerous options available for the hostname command. In the section below, I have listed a few of them. You can learn more about the hostname command, its options and their uses by checking the man page.
man hostnameUseful Options
- –a, –alias: Print the alias name of the host (if used). This option is deprecated.
- -A, –all-fqdns: Print all FQDNs of the machine.
- -b or –boot: Allows to set a hostname permanently. If no hostname is specified, it will use the default hostname (i.e., localhost).
- -d, –domain: Print the name of the DNS domain.
- -f, –fqdn, –long: Print the FQDN (Fully Qualified Domain Name) which includes the short hostname and the DNS domain name.
- -F, –file: Used to read the hostname from a file.
- -i, –ip: This option for the hostname command is used to display the network addresses of the hostname.
- -I, –all-ip: Used to display all the network addresses associated with the hostname, including those that are configured on all network interfaces.
- -s, –short: Used to print the short hostname.
- -V, –version: Display the installed version information.
- -h, –help: Display the help manual.
Practical Examples of the “hostname” Command in Linux
In Linux, the hostname command is a helpful tool to change the hostname and perform modifications related to the hostname. It also helps to see the DNS (Domain Name System) and NIS (Network Information Service) domain names. In the section below, I will show you some of the most useful applications for the hostname command in Linux.
Example 1: Check the Hostname of Your Device Using the “hostname” Command in Linux
The hostname command in Linux allows you to check the hostname of your machine. Now, I will print out the hostname of my Linux machine simply using the hostname command. You can do the same by following the steps below.
Steps to Follow >
➊ Launch the Ubuntu Terminal.
➋ Type the following command into the command prompt:
hostname➌ Now, press the ENTER button.
Output >
In the following image, you can see that I have displayed the hostname (Ubuntu) of my Linux machine.
Similar Readings
- The “ftp” Command in Linux [14 Practical Examples]
- The “host” Command in Linux [10 Practical Examples]
- The “scp” Command in Linux [4 Practical Examples]
- The “sftp” Command in Linux [6 Practical Examples]
Example 2: Check the Short Hostname Using the “hostname” Command in Linux
If your Linux machine has a long hostname with one or more dots within the name, you can display the first portion (to the first dot) of the hostname by using option -s or –short after the hostname command. Currently, my Linux machine has the hostname Ubuntu.Amdadul.UX.1997 but now I want to display the hostname till the first dot, You can do the same by following the steps below.
Steps to Follow >
➊ At first, open the Ubuntu Terminal.
➋ To see the full hostname, execute the following command.
hostname➌ Now, press the ENTER button.
➍ Execute the command below, for the short hostname.
hostname -sAlternatively,
hostname --short➎ Tap the ENTER key
Output >
The image below shows that I have printed the hostname and the short version hostname of my Linux machine.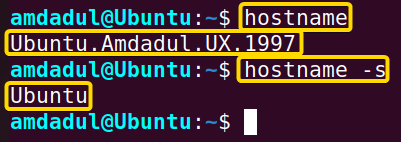
Example 3: Change Hostname Until Reboot With the “hostname” Command in Linux
The hostname command allows you to change the hostname. To do this, you have to add the sudo command before the hostname command and the attribute should be the new hostname. When you use this process to change the hostname, it will last until the next reboot. In this section, I will change my machine’s hostname to Amdadul until the next reboot. You can do the same by following the steps below.
Steps to Follow >
➊ At first, open the Ubuntu Terminal.
➋ To see the current hostname, execute the command.
hostname➌ Now, press the ENTER button.
➍ Execute the command, to change the hostname temporarily.
sudo hostname Amdadul➎ Press ENTER button.
➏ Input your Password.
➐ Tap the ENTER key.
➑ Run the command below.
hostname➒ Hit the ENTER button again.
Output >
In the following image, you can see the permanent and temporary hostnames.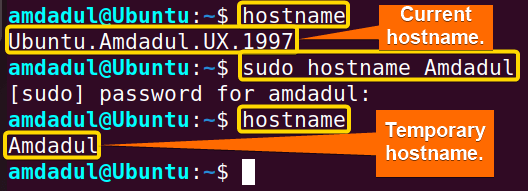 And in the 2nd image, I have printed out the hostname again after reboot. Now, you can see that hostname of my machine has reverted back to the previous one (Ubuntu.Amdadul.UX.1997).
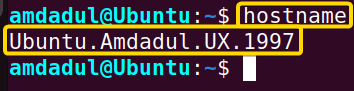
Example 4: Change Hostname Permanently
You can change the hostname permanently by running the hostnamectl command preceded by the sudo command. Alternatively, You can also do the same by manually editing the file named /etc/hostname and /etc/hosts with a text editor like nano. Here in this example, by using the first method I will change the hostname permanently from Ubuntu.Amdadul.UX.1997 to Ubuntu. You will able to do the same by following the steps below.
Steps to Follow >
➊ First, open the Ubuntu Terminal.
➋ To see the current hostname, execute the command.
hostname➌ Now, press the ENTER button.
➍ Execute the command, to change the hostname permanently.
sudo hostnamectl set-hostname Ubuntu➎ Press ENTER button.
➏ Provide your Password.
➐ Tap the ENTER key.
➑ Run the below command.
hostname➒ Hit the ENTER button again.
Output >
In the following image, you can see that I have changed the hostname permanently from Ubuntu.Lisa.UX.1998 to Ubuntu.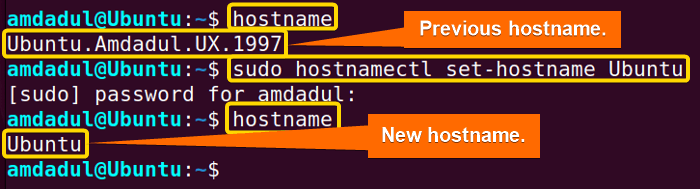
Example 5: Display NIS Domain Name
If you are using a network information service then you can check the NIS domain name by using the hostname command followed by the option -y, –yp, or –nis. In the section below, I will show you how to check the NIS domain name of a Linux machine. Now, You can do the same by following the steps below.
Steps to Follow >
➊ Launch the Ubuntu Terminal.
➋ Type the following command into the command prompt:
hostname -yAlternatively,
hostname --ypAlternatively,
hostname --nis➌ Now, press the ENTER button.
Output >
You can see in the below image that I have displayed the process to check the NIS domain name in the terminal.
Example 6: Change NIS Domain Name
The hostname command in Linux allows you to change the NIS domain name. The process of changing or setting a NIS domain name is exactly the same. Here, I will change the NIS domain name with the hostname command. Now, you will able to do the same by following the steps below.
Steps to Follow >
➊ First, open the Ubuntu Terminal.
➋ Execute the following command.
sudo hostname -y My_NISAlternatively,
sudo hostname --yp My_NISAlternatively,
sudo hostname --nis My_NIS➌ Now, press the ENTER button.
➍ Input your Password.
➎ Tap ENTER key.
➏ To check the new NIS domain name run the below command.
hostname -yAlternatively,
hostname --ypAlternatively,
hostname --nis➐ Press the ENTER button.
Output >
In the image below, you can see that I have changed the NIS domain name to My_NIS.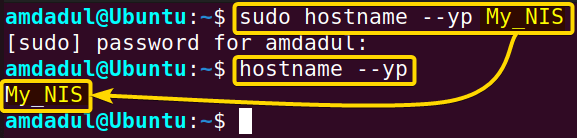
Similar Readings
- The “ dig” Command in Linux [10 Practical Examples]
- The “iptables” Command in Linux [6 Practical Examples]
- The “ip” Command in Linux [9+ Practical Examples]
- The “ifconfig” Command in Linux [6+ Practical Examples]
Example 7: Display Related Network Addresses
You can see the details of network addresses related to a hostname on your Linux machine using the hostname command followed by the option -i or –ip-address. Here, I will display the network address tied to my hostname (Ubuntu). You can do the same by following the process below.
Steps to Follow >
➊ At first, open the Ubuntu Terminal.
➋ Run the following command into the command prompt:
hostname -iAlternatively,
hostname --ip-address➌ Hit the ENTER button.
Output >
In the following image, you can see that I have displayed the network address related to my machine’s hostname.
Example 8: Display All Network Addresses
The hostname command in Linux allows you to see the list of all configured addresses on all network interfaces by using the option -I or –all-ip-address with the command. Here, I will display the list of all configured addresses of all network interfaces on my machine. You can do the same for your machine by following the steps below.
Steps to Follow >
➊ At first, open the Ubuntu Terminal.
➋ Type the following command into the command prompt:
hostname -IAlternatively,
hostname --all-ip-address➌ Now, press the ENTER button.
Output >
You can see in the image below that I have displayed a list of all the network addresses for the host.
Example 9: Display the Fully Qualified Domain Name (FQDN) of Your Linux System
The fully qualified domain name or FQDN, contains a short hostname and DNS domain name. To display the FQDN, you can use the hostname command followed by the option -f, –fqdn, or –long. Here, in this section, I will display the FQDN of my Linux machine. You can achieve the same by following the steps below.
Steps to Follow >
➊ Open the Ubuntu Terminal.
➋ Execute the following command into the command prompt:
hostname --longAlternatively,
hostname --fqdnAlternatively,
hostname -f➌ Now, tap the ENTER button.
Output >
In the following image, you can see the FQDN of my Linux machine.
Example 10: Display Aliases Set By the Host
The -a or –alias option after the hostname command in Linux allows you to see the alias (substitute hostname) if one has been set previously. In the section below, I will mention the steps to display the alias that substitutes for the hostname on my machine.
Steps to Follow >
➊ Launch the Ubuntu Terminal.
➋ Type the following command into the command prompt:
hostname -aAlternatively,
hostname --alias➌ Tap the ENTER button.
Output >
In the image below, you can see that there is no output as I have never set an alias to substitute the hostname. However, If you had set any alias to substitute your hostname on your machine then you would have got that as output.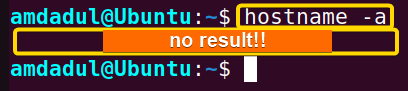
Example 11: Get Help About the “hostname” Command in Linux
In Linux, the help page for the hostname command contains a brief description of the command. You can see the help page by following the steps mentioned below.
Steps to Follow >
➊ At first, open the Ubuntu Terminal.
➋ Type the following command into the command prompt:
hostname --helpAlternatively,
hostname -h➌ Now, press the ENTER button.
Output >
In the image below, you can see the help page for the hostname command in Linux.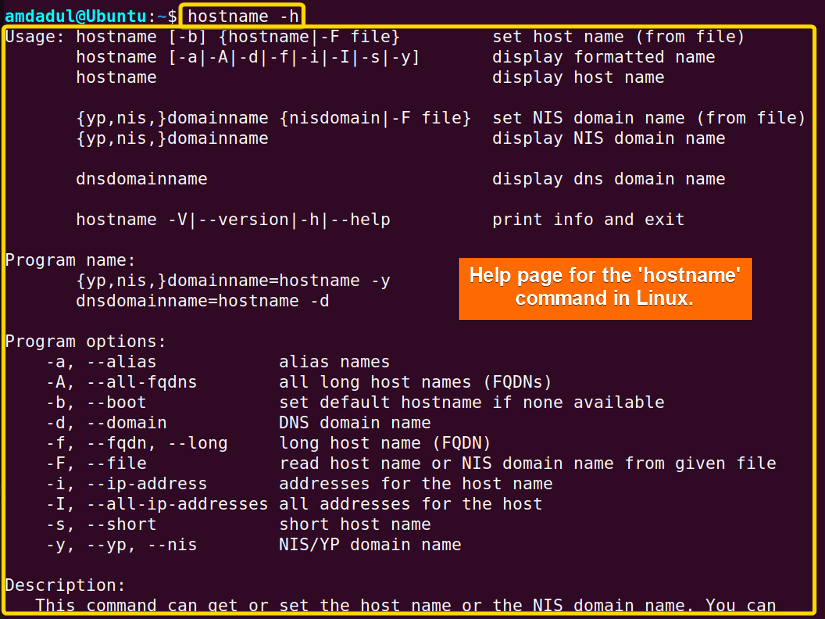
Example 12: Get the Version of the “hostname” Command in Linux
You can see the current version of the hostname command on your Linux machine with the –version option. Here, I will show you the version of the hostname command for my machine on the terminal. You can do the same by following the steps below:
Steps to Follow >
➊ Open the Ubuntu Terminal.
➋ Run the following command:
hostname --versionAlternatively,
hostname -V➌ Press the ENTER key.
Output >
In the following image, you can see that I have displayed the version of the hostname command in Linux.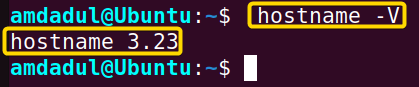
Conclusion
In this article, I’ve discussed details of the hostname command which is useful to display, set and modify the hostname of a Linux or Unix-based operating system. At the same time, I’ve discussed its options and provided some relevant examples. Hopefully, this article will help you better understand the hostname command and its use. Consequently, it will make your journey easier to become a power user of the Linux command line.
Similar Readings
- The “netstat” Command in Linux [22 Practical Examples]
- The “nslookup” Command in Linux [12 Practical Examples]
- The “ufw” Command in Linux [12+ Practical Examples]
- The “ssh” Command in Linux [18 Practical Examples]
- The “traceroute” Command in Linux [13 Practical Examples]
- The “rsync” Command in Linux [10 Practical Examples]
FUNDAMENTALS A Complete Guide for Beginners


