The sync command in Linux is used to synchronize the system’s data. It writes the cache files to permanent storage. Due to the faster speed of RAM, the system uses this temporary storage to process data rather than using permanent storage. And Kernel stores those data in RAM as cache files. Even though this action enhances the speed of the system, any kind of sudden crash could result in losing important cache data. So synchronizing data on the permanent memory is safe bait. In this article, I will talk about the sync command and its usage with some practical examples.
A. Description
The sync command allows putting your data in sync both in permanent storage & volatile memory. It makes sure all buffered modifications made to file metadata and data are written to the underlying file systems. Every Linux user should use the sync command before halting the processor in an unusual manner to save all the cache data. Also, remember the sync command is only assured to schedule messy blocks for writing, it can take a short time before all the blocks are finally written.
B. Syntax
The sync command is a simple tool but has an important role in protecting your buffered data. The syntax of this command is straightforward. The syntax is,
sync [option]... [file]...Note: Whatever is enclosed by a square bracket in the above syntax is not mandatory. Moreover, the option & file both are enclosed by square brackets and followed by 3 dots representing that multiple options & files can be used & synchronized at a time.
C. Options
The sync command in Linux is one of the flexible tools to manage your data. It has some options which you can use to customize the synchronization process. I will give a list of them with a short list here. You can view a lot more information about the command from the man page.
man syncUseful Options
- -d, –data, to sync only the data of the filesystem, and essential metadata.
- -f, –file-system, to sync the filesystem containing the specified files.
- –version, to check the version of the command and then exit.
- –help, to display the help messages for the command and then exit.
NOTE: The options in Linux CLI (Command Line Interface) are all case-sensitive, So be cautious while using them.
Practical Examples of the “sync” Command in Linux
The sync command while used ensures that all the cached files of your system are written on the permanent storage. Make sure to run the command beforehand when there is a need for an unusual shutdown of your system. I will give some practical examples of the sync command in the following article, so keep reading.
Example 1: Sync All User Cache Files Using the “sync” Command in Linux
The sync command when used without any arguments, by default, synchronizes and writes all the cache files of the current user to the disk. You can use the sudo command while running the command to include the synchronization of all the mounted files too. The syntax is,
syncOR,
sudo syncNote: Only a superuser can sync filesystems inside the root. So to run the command for all filesystems use ‘sudo’ ( Substitute User DO) before the command. Temporarily it allows you to appoint your current user to have root privileges.
Check the below steps to sync all the data in your system.
Steps to Follow >
➊ At first open the Ubuntu Terminal.
➋ Type the following commands in the command prompt:
syncsudo sync➌ Give your password.
➍ Now, press the ENTER button.
Output >
Check the below picture, your output display will look like it. If you notice you can’t see anything on your output, it’s because the sync command works in the background. And it can take a little time to write all the cached files. 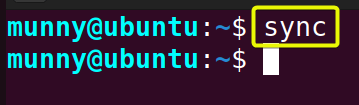 And when you run the command with sudo to run all the files including the mounted files, the output will look like the following picture,
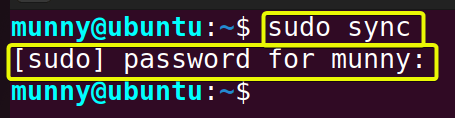
Similar Readings
- The “time” Command in Linux [4 Practical Examples]
- The “tty” Command in Linux [4 Practical Examples]
- The “uptime” Command in Linux [5 Practical Examples]
- The “vmstat” Command in Linux [6 Practical Examples]
- The “uname” Command in Linux [11 Practical Examples]
- The “apt-get” Command in Linux [10 Practical Examples]
Example 2: Sync Specific File Systems Using the “sync” Command in Linux
You can specify the file systems you want to sync. Sync one or multiple specific file systems using the sync command. To do so, just type the command and then give the file name you want to sync with their location. If you want to sync multiple files then give the names of multiple files and their associated locations. You can also sync multiple files at a time that are stored in different places. Just specify the right location of each file. The syntax is,
sync </location/file_name_1> </location/file_name_2>...Read the below steps to sync some of your specific files practically. I will sync my two files named story and WeddingList which are stored in the same location, Desktop. And two other files A1 & B1, are stored in different locations.
Steps to Follow >
➊ Begin by opening the Ubuntu Terminal.
➋ Type the following command in the command prompt to sync files from the same location:
sync /home/munny/Desktop/story /home/munny/Desktop/WeddingList➌ Now, press the ENTER key.
➍ After that, type the following command in the command prompt to sync files from different locations:
sync A1 /home/munny/Desktop/B1➎ Finally, press the ENTER button.
Note: Make sure to use the right location of your filesystems to run the command successfully.
Output >
After running the first command the output display will look like the following image. And, after running the second command the output display will look like the following image.
Example 3: Sync Only File Data Using the “sync” Command in Linux
You can sync only the file data with the minimum metadata necessary for filesystem consistency while synchronizing them. To do that, use the sync command with the option –data or -d followed by the filenames you want to sync with their location. The syntax is,
sync -d </location/file_name_1> </location/file_name_2>...Proceed to carry out the following steps to sync only the file data practically.
Steps to Follow >
➊ Start by opening your Ubuntu Terminal.
➋ Type the following command in the command prompt:
sync -d /home/munny/Desktop/File1 /home/munny/Desktop/File2➌ Now, hit the ENTER button.
Output >
The command will sync only the file data of the files File1 & File2, like in the below picture.
Similar Readings
- The “free” Command in Linux [8 Practical Examples]
- The “getent” Command in Linux [11 Practical Examples]
- The “groupadd” Command in Linux [7 Practical Examples]
- The “addgroup” Command in Linux [7 Practical Examples]
- The “groups” Command in Linux [6 Practical Examples]
- The “firewall-cmd” Command in Linux [7 Practical Examples]
Example 4: Sync a Filesystem Containing files Using the “sync” Command in Linux
So far you learned how to sync a specific filename. Now if you want to sync the entire filesystem and all the containing files with the sync command then use the option –filesystem or -f after the command. The syntax is,
sync -f <file_system_name>Go through the below steps to sync one of your file systems. I will sync my filesystem Yearly_Routine and it’s 15 containing files.
Steps to Follow >
➊ Launch the Ubuntu Terminal.
➋ Then type the following command in the command prompt:
sync -f Yearly_Routine➌ Finally, tap the ENTER key.
Output >
The output image will look like the below picture.
Example 5: Sync a Directory and Sub-Directory Using the “sync” Command in Linux
You can sync any directory and also any subdirectory inside of a directory. Just specify the name of that directory or subdirectory with their location on your system with the sync command. The syntax is,
sync </location/directory> OR,
sync <location/directory/sub-directory>Follow the below steps to see practically.
Steps to Follow >
➊ Launch your Terminal application on your Ubuntu.
➋ Type the following command in the command prompt to sync a directory:
sync /home/munny/Directory➌ Tap the ENTER button.
➍ Then, type the following command in the command prompt to sync a system subdirectory:
sudo sync /var/log/lastlog➎ Finally, Tab the ENTER button again.
Output >
I ran the first command to sync my Directory and got the below output display. Then I ran the second command to sync my system subdirectory log and the output looked like the below image.
Similar Readings
- The “groupmod” Command in Linux [5+ Practical Examples]
- The “id” Command in Linux [7+ Practical Examples]
- The “service” Command in Linux [6 Practical Examples]
- The “sestatus” Command in Linux [4 Practical Examples]
- The “shutdown” Command in Linux [7 Practical Examples]
- The “finger” Command in Linux [6 Practical Examples]
Example 6: Sync Mounted Partitions Using the “sync” Command in Linux
Use the sync command to sync any particular mounted file. Just give the mounted file location after the sync command. Also, remember to use the sudo command before the sync command, as the mounted files are stored inside the root directory. The syntax is,
sudo sync </location/mounted_partition>Follow the below steps to sync any mounted filesystem.
Steps to Follow >
➊ Begin by opening your Ubuntu Terminal.
➋ First, type the following command in the command prompt to check all the mounted files on your system:’
df -h➌ Press the ENTER button.
➍ Then type the following command in the command prompt to sync the sda3 mounted file from the list,
sudo sync /dev/sda3➎ Give your password.
➏ Finally, tap the ENTER key.
Note: The df (Disk Free) command in Linux is used to display the files’ information by checking the used space and free space by the files. You can run this command to check your mounted files and their information.
Output >
After running the first command, you will see the list of all the mounted files on your system. From the list of my mounted file, I will sync the sda3 file.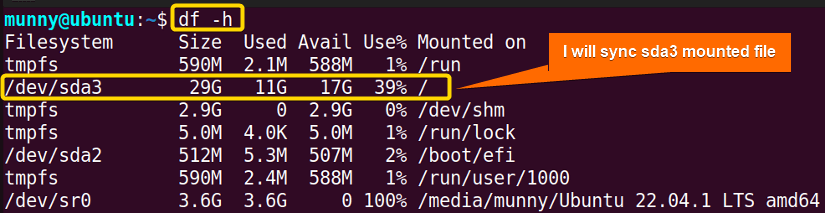 After that, run the second command to sync the selected mounted file. I ran the command to sync my mounted file sda3 and the output looked like the following image.
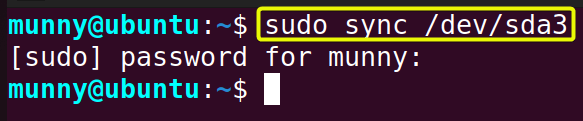
Example 7: Check the “sync” Command Version on Your System
Check the version of the sync command tool on your system using the option –version or -v of your command. The syntax is,
sync --versionRead the below steps to see the command version on your system.
Steps to Follow >
➊ Run the Ubuntu Terminal.
➋ Type the following command in the command prompt:
sync --version➌ Now, push the ENTER button on your keyboard.
Output >
The output display will show the version, copyright, and “license of the sync command.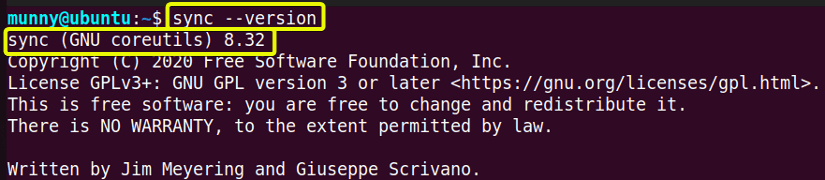
Similar Readings
- The “dmesg” Command in Linux [7+ Practical Examples]
- The “install” Command in Linux [6+ Practical Examples]
- The “reboot” Command in Linux [3 Practical Examples]
- The “sudo” Command in Linux [8 Practical Examples]
- The “chage” Command in Linux [7 Practical Examples]
- The “env ” Command in Linux [9 Practical Examples]
Example 8: Print the Help messages for the “sync” Command
While working with the sync command, if you need any help with the options and usage of the command use the –help option. It will concisely display all the details about the command options and then exit. The syntax is,
sync --helpSee the below steps to learn how to print help messages.
Steps to Follow >
➊ First, open the Ubuntu Terminal.
➋ Then, type the following command in the command prompt:
sync --help➌ Finally, press the ENTER button.
Output >
The output will display the following help messages for the command.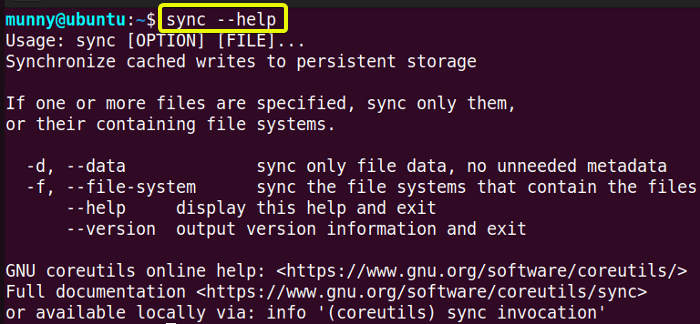
Conclusion
In this article, I discussed the sync command and how it can be used to synchronize your system’s buffered files with some practical examples. After completing the article, I hope you will learn most of the stuff related to the command tool and be a power user of LINUX.
Similar Readings
- The “passwd” Command in Linux [7 Practical Examples]
- The “df” Command in Linux [11 Practical Examples]
- The “apt” Command in Linux [13+ Practical Examples]
- The “top” Command in Linux [8 Practical Examples]
- The “htop” Command in Linux [7 Practical Examples]
- The “enable” Command in Linux [6 Practical Examples]
FUNDAMENTALS A Complete Guide for Beginners


