The enable command in Linux is a built-in shell command. It is used to enable and disable the shell built-in commands. Built-in commands are necessary to define a shell function. The enable command is also used to enable service providers with runtime applications, services, and operations. Such as, it can be used to enable named printers and classes. In this article, I will discuss how to use the enable command in different aspects.
A. Description
Built-in commands are packed within the bash shell itself. When a built-in command is used with a simple command, the shell executes directly without affecting another program. These commands define a shell function by keeping the same name as the shell built-in and maintaining the functionality of the built-in within the function. And you can enable or disable them using the enable command in Linux. Disabling them will allow you to execute a disk command having the same name as a shell built-in without using a full pathname.
B. Syntax
The syntax of the enable command is quite straightforward. You just have to type the enable command followed by the built-in command you want to enable.
enable [OPTION]... [builtin_command_name]...For enabling named printers and classes, just type the enable command and then the specified printer name you want to enable.
enable [OPTION]... Printer_nameC. Options
You can use the enable command without any options. And without any option, it will show the list of all enabled built-ins. Also, there are several options for the enable command you can use with. I will list some of the most useful ones with their purposes here. As the enable command is a shell built-in, it does not have the man page. You can get more info using the help command.
help enableUseful Options
- printer (to enable the name of the printer)
- -f ( to load built-in commands from shared object filename)
- -d (to delete a built-in loaded with the -f/–filename)
- -n (to disable each built-in command or display a list of disabled built-ins)
- -a (to list all the built-ins saying if it is disabled or not)
- -p ( to print the list of built-ins in a reusable format)
- -s (to print only the names of POSIX ‘special’ built-ins)
Practical Examples of the “enable” Command in Linux
The enable command is a useful command tool. Which helps to both enable and disable the built-in commands. Whenever you need to disable or enable a shell built-in variable or a service provider you can use the enable command. Without options, the enable command shows the list of all the enabled built-ins. Just type the enable command in your command prompt.
enableSee the image, where you can see all the built-ins in my machine.
Note: I used the column argument to see the full list in several columns within a page. You can skip that if you have no issue seeing the full list by scrolling.
Below I will use some examples to explain the enable command with some options.
Example 1: Print All the Built-ins Showing Their Status Using The “enable” Command in Linux
Every machine has some shell built-in commands which are called from the shell and executed directly in the shell itself. If you want to see the list of all the built-ins and whether they are enabled or not use the option -a with the enable command. The syntax is:
enable -aFollow the below steps to do it yourself.
Steps to Follow >
➊ At first open the Ubuntu Terminal.
➋ Type the following command in the command prompt:
enable -a | column➌ Now, press the ENTER button.
Output >
From the output image, you can see the list of all the built-ins. And if you noticed all my built-in commands are enabled right now.
- The “time” Command in Linux [4 Practical Examples]
- The “tty” Command in Linux [4 Practical Examples]
- The “uptime” Command in Linux [5 Practical Examples]
- The “vmstat” Command in Linux [6 Practical Examples]
- The “uname” Command in Linux [11 Practical Examples]
- The “apt-get” Command in Linux [10 Practical Examples]
Example 2: Disable a Built-in Command And Print All the Disabled Built-in Commands
You can also disable a built-in command with the enable command. Whenever you need to disable any enabled command, use the option -n with the enable command. Followed by the command name you want to disable. You can also see the list of all the disabled built-ins. Just type the enable command with the option -n. The syntax to disable a built-in is:
enable -n <built-in_command_name>To view all the disabled built-ins as a list:
enable -nFollow the below steps to check them practically.
Steps to Follow >
➊ At first open the Ubuntu Terminal.
➋ Type the following command in the command prompt to see the disabled list:
enable -n | column➌ Now, press the ENTER button.
➍ Then write the following command to disable the cd command:
enable -n cd➎ Press the ENTER button
➏ After that. type the following command to view the disabled list again:
enable -n | column➐ Finally, hit the ENTER button.
Output >
From the first output image, you can see the list of all the disabled built-ins. And the result is none. If you remember from the upper example, I have all the built-ins in my machine enabled.
Using the second command, I will disable the cd command. And I will check the list of disabled built-ins to see if I disabled it successfully with the third command. After running the command check the below image, the cd command is now in the list of enable -n type.
Example 3: Enable a Disabled Built-in command Using the “enable” command in Linux
Suppose you have a disabled built-in command and you want to enable it. It’s too simple to do. Just use the enable command followed by the name of the command you want to enable. The syntax is:
enable <built-in_command_name>Check out the below example by following the steps where I will enable the cd command which I disabled in the previous example.
Steps to Follow >
➊ At first open the Ubuntu Terminal.
➋ Type the following command in the command prompt:
enable cd➌ Now, press the ENTER button.
➍ Now type the following command to check the list of disabled commands and if I have successfully removed the cd command from that list.
enable -n | column➎ Then press the ENTER button.
Output >
I used the first command to enable the cd command. And then checked if I have done it successfully with the second command. From the output image, you can see the cd command is not in the list of disabled anymore.
- The “free” Command in Linux [8 Practical Examples]
- The “getent” Command in Linux [11 Practical Examples]
- The “groupadd” Command in Linux [7 Practical Examples]
- The “addgroup” Command in Linux [7 Practical Examples]
- The “passwd” Command in Linux [7 Practical Examples]
- The “firewall-cmd” Command in Linux [7 Practical Examples]
Example 4: Print Only the Special Built-in Commands Using the “enable” command in Linux
There are some special built-in commands which are built in the POSIX (Portable Operating System Interface) shell. You can view the list of them using the enable command with the -s option. The syntax is:
enable -s Follow the below steps to check yourself:
Steps to Follow >
➊ At first open the Ubuntu Terminal.
➋ Type the following command in the command prompt:
enable -s | column➌ Now, press the ENTER button.
Output >
From the output image, you can see the list of all the special built-ins. And they all are enabled.
- The “groupmod” Command in Linux [5+ Practical Examples]
- The “id” Command in Linux [7+ Practical Examples]
- The “service” Command in Linux [6 Practical Examples]
- The “sestatus” Command in Linux [4 Practical Examples]
- The “shutdown” Command in Linux [7 Practical Examples]
- The “finger” Command in Linux [6 Practical Examples]
Example 5: Print All the Built-in Commands Which Are in a Reusable Format
The command line lets your system remember the commands that you used up to a default limit of 1000. That means Linux can remember the last 1000 commands you used and make it easier to reuse them. To see the list of all built-in commands in a reusable format, use the enable command with the option -p. The syntax is:
enable -pFollow the below example to check practically.
Steps to Follow >
➊ At first open the Ubuntu Terminal.
➋ Type the following command in the command prompt:
enable -p | column➌ Now, press the ENTER button.
Output >
From the output image, you can see the list of all the built-ins in a reusable format. And they all are enabled.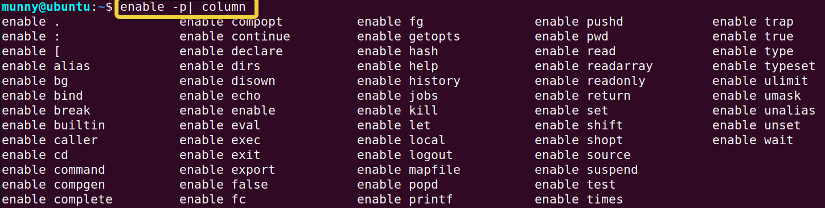
- The “dmesg” Command in Linux [7+ Practical Examples]
- The “install” Command in Linux [6+ Practical Examples]
- The “reboot” Command in Linux [3 Practical Examples]
- The “sync” Command in Linux [8 Practical Examples]
- The “chage” Command in Linux [7 Practical Examples]
- The “env ” Command in Linux [9 Practical Examples]
Example 6: Dynamic Loading of Built-in Commands From the Shared Object Filename
Dynamic loading is a way through which a program can load a specific library if it’s already not loaded. And then call a particular function within that library. You can load built-in commands by the dynamic loading process from a shared object filename using the enable command. Just type the enable command with the option -f, followed by the filename. The syntax is:
enable -f <shared_file_name>I will load my shared object file names libshared.so .Follow the below steps to check yourself with an example.
Steps to Follow >
➊ At first open the Ubuntu Terminal.
➋ Type the following command in the command prompt:
enable -f libshared.so | column➌ Now, press the ENTER button.
Output >
From the output image, you can see the list of all the loaded built-ins.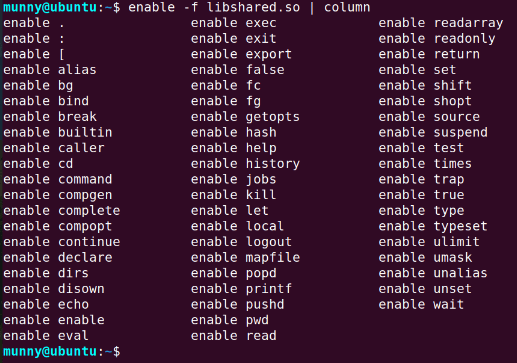
Conclusion
In this article, I explained the basics of the shell built-in commands and how to enable or disable them using the enable command. I used different options with the command to modify the usage and showed examples of them. If you go through all of them, you will learn well enough to use the enable command in Linux. Happy learning!
- The “sudo” Command in Linux [8 Practical Examples]
- The “df” Command in Linux [11 Practical Examples]
- The “apt” Command in Linux [13+ Practical Examples]
- The “top” Command in Linux [8 Practical Examples]
- The “htop” Command in Linux [7 Practical Examples]
- The “groups” Command in Linux [6 Practical Examples]
FUNDAMENTALS A Complete Guide for Beginners


