Linux-based systems are multiuser systems which means multiple users can operate on the same system. These users are identified by their unique UIDs(user identifiers), Moreover, users are also assigned to a group with a specific GID(group identifier) when they are created.
To create user with UID and GID in Ubuntu, you can follow the below steps:
- Create a group with specific GID: Run
sudo groupadd -g <XXXX> <GroupName>. - Confirm group’s GID: Run
getent group | grep <GroupName>. - Create a new user with specific UID and GID: Run
sudo useradd -u <YYYY> -g <XXXX> <USERNAME>. - Confirm the user’s desired UID and GID: Run
id <USERNAME>.
In this article, I will elaborately discuss the abovementioned steps along with two more cases.
What is UID in Ubuntu?
UID (User IDentifier) is a unique number per user, specifying a user within the Linux system and it determines which elements the user can work with. As with the user’s list, UIDs are also stored in the /etc/passwd file. In Ubuntu, like most other Linux distributions for new users, UID starts from 1000.
What is GID in Ubuntu?
GID (Group IDentifiers) is a unique number for a group of users who share some common entities. A user can belong to multiple groups so it can have multiple GIDs. As with the user’s list & UIDs, GIDs are also stored in the /etc/passwd file. In Ubuntu, like most other Linux distributions for new groups, GID starts from 1000.
3 Cases to Create User with UID and GID in Ubuntu
When creating a group you can set your own GID. You can do the same for UID when you are creating a new user to the system. Thus you can create user with UID and GID if you set them while creating group and user.
This article mentions 3 cases to create a user with UID and GID in Linux including creating a user with only a specific UID, adding a user with only a specific GID and finally creating a user with UID and GID.
1. Create a User with Only Specific UID
To create a user with only specific UID, you have to mention the UID while creating the user as follows:
1. Create a New User with a Specific UID in Ubuntu
You can create a new user with your desired UID from the terminal using the useradd command. However, You have to be a root user to execute the useradd command. Check the steps below to do that:
- Open the Ubuntu Terminal by pressing CTRL+ALT+T.
- Type the following command in the Ubuntu terminal:
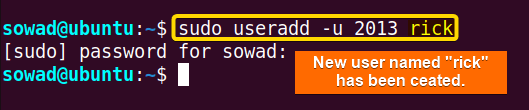
sudo useradd -u 2013 rickIn the following image, you can see that I have created a new user named “rick”.EXPLANATION
- Now, set a password to login into the newly created user “rick” by typing the following command:
sudo passwd rickHere the passwd command sets/changes the password.
After running the above command, you’ll be able to set a password for the newly created user like the following image. Moreover, now you can log into the new user “rick” whenever you want.


2. Confirm Whether the User Contains the Specific UID
You can check whether the new user “rick” contains the assigned UID (2013) by using the id command. Here is how:
id rickIn the following image, you can see that the new user “rick” has been assigned with the desired UID 2013.
- How to Create a Jenkins User on Ubuntu? [2 Methods]
- How to Create MySQL User in Ubuntu? [2 Cases]
- Create User Without Home Directory in Ubuntu in Just 3 Steps
- How to Create a User in Docker Container Without Docker File?
2. Create a User with Only Specific GID
To create a user with only specific GID, first you need to create the group mentioning your GID and then add user with that GID. Follow the 4 steps to do so:
1. Create a Group with a Specific GID in Ubuntu
You can create a new group with your desired GID from the terminal using the groupadd command. However, You have to be a root user to execute the groupadd command.
To create a group with specific GID, use groupadd -g command. Here is an example where I created a group named “mortygroup” with GID 2023:
sudo groupadd -g 2023 mortygroup- groupadd: Adds a new user
- -g 2013: Sets the GID to 2023.
- mortygroup: Creates a new group named mortygroup.
In the following image, you can see that I have created a new group named “mortygroup”.
2. Confirm Whether the Group Contains the Specific GID
You can check whether the new group “mortygroup” contains the assigned GID (2023) by typing the following command:
getent group | grep mortygroup In the above image, you can see that the new group “mortygroup” has been assigned with the desired GID 2023.
3. Create a New User with a Specific GID in Ubuntu
Now, create a new user with your desired GID from the terminal using the useradd command with the -g option followed by the desired GID. However, You have to be a root user to execute the useradd command. Go through the steps below:
- Open the Ubuntu Terminal.
- Type the following command in the Ubuntu terminal:
sudo useradd -g 2023 mortyIn the following image, you can see that I have created a new user named “morty”.

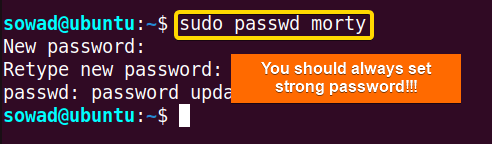
- Now, Set a password for the user by typing the following command:
sudo passwd mortyAfter running the above command, you’ll be able to set a password for the newly created user like the following image. Moreover, now you can log into the new user “morty” whenever you want.


- How to Create an FTP User in Ubuntu? [Step-by-Step]
- Create a New SFTP User in Ubuntu with a New SSH Key
- How to Create Group and Add User in Ubuntu? [2 Cases]
- Create FTP User for Specific Directory in Ubuntu [4 Steps]
4. Confirm Whether the User Contains the Desired GID
You can check whether the new user “morty” contains the assigned GID (2023) by typing the following command:
id -g mortyIn the following image, you can see that I have created the new user “morty” with our desired GID 2023.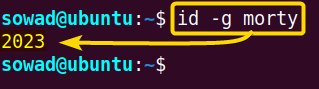
3. Create a User with Specific UID and GID
To create a user with specific UID and GID, first create a group with your desired GID and then add the user with your specific UID and GID. Here is how:
1. Create a Group with a Specific GID
You can create a new group with your desired GID from the terminal using the groupadd command. However, You have to be a root user to execute the groupadd command. Here, I have created a group named “rmgroup” with GID 2060. To do so type the following command in the Ubuntu terminal:
sudo groupadd -g 2060 rmgroup- -g 2060: Sets the GID to 2060.
- rmgroup: Creates a new group named rmgroup.
In the following image, you can see that I have created a new group named “rmgroup”.
2. Confirm Whether the Group Contains the Specific GID
You can check whether the new group “rmgroup” contains the assigned GID (2060) by typing the following command:
getent group | grep rmgroupIn the following image, you can see that I have created the new group “rmgroup” with the desired GID 2060.
3. Create a New User with the Specific UID and GID in Ubuntu
To create a user with a specific UID and GID in the terminal, use the useradd command. Add the -u option for the UID and -g for the GID, followed by the desired numbers. However, You have to be a root user to execute the useradd command. Here’s how you can do it:
- Open the Ubuntu Terminal.
- Type the following command in the Ubuntu terminal:
sudo useradd -u 2050 -g 2060 rickmortyIn the following image, you can see that I have created a new user named “rickmorty”.

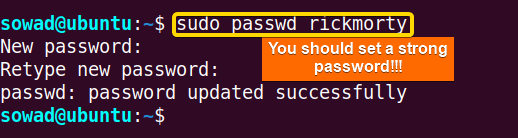
- Now, set a password for the user by typing the following command:
sudo passwd rickmortyAfter running the above command, you’ll be able to set a password for the newly created user like the following image. Moreover, now you can log into the new user “rickmorty” whenever you want.


- How to Create Multiple Users in Linux? [2 Methods]
- Create a User in Ubuntu as Read-Only Access to Log Folder
- How to Create User Account in Ubuntu with Public Key
- Create A User in Ubuntu that Runs a Script and Logs Out [4 Steps]
4. Confirm Whether the User Contains the Desired UID and GID
You can check whether the new user contains the assigned UID (2050) and GID (2060) by typing the following command:
id rickmortyIn the following image, you can see that I have created a new user “rickmorty” with our desired UID, 2050 & GID, 2060.
Conclusion
In Linux-based multiuser systems UIDs and GIDs play an important role in maintaining the harmony of the system resource distributions among multiple users and groups. Hope this article will help you to play with the approaches to create a user with custom UID and GID in Ubuntu.
People Also Ask
How to add user with specific UID GID in Ubuntu?
To add user with specific UID and GID in Ubuntu, first create a group with the specific GID: sudo groupadd -g <NNNN> <GroupName>. Then create a user with that GID and your specific UID: sudo useradd -u <XXXX> -g <NNNN> <USERNAME>.
Can GID and UID be the same?
Yes, in Unix-like operating systems, GID and UID can be the same. They’re both numerical identifiers that are given to users and groups. It’s pretty common for them to be the same, but there’s no rule that they should be different. Some administrators might want to make sure that a user’s GID matches their UID for convenience or other reasons.
What does UID 1000 mean?
UID 1000 usually stands for user identifier 1000. In Unix-based systems, every user is given a unique identifier for identification. Usually, UID 1000 is the default number assigned to the initial user created on a system. This number is important for managing the system and setting the file permissions.
What does GID 1000 mean?
GID 1000 is usually the group identifier that’s assigned to the user group on a Unix-like system. It’s usually used to tell regular user accounts apart from system users and other groups. On Unix-like systems, like Linux, each person has their unique user ID and they belong to one of the groups identified by GID. GID 1000 usually represents the main group of regular non-administrators.
How do I find my user UID in Ubuntu?
To find your user UID, simply run: id -u User_Name. UIDs are stored in the same /etc/passwd file as the user’s list in Linux. You can also check this file to get your UID.
How do I find my user GID in Ubuntu?
To find your user GID, simply run the command: id -g -n User_Name. GIDs are stored in the same /etc/passwd file as the user’s list in Linux. By checking this file, you can also get your GID.
How to set UID in Linux?
You can set a new UID of a user by using the usermod command. To change your user’s UID to XXXX you can run the following command: usermod -u XXXX User_Name
How to set GID in Linux?
You can set a new GID of a user by using the groupmod command. To change the GID of a group of your user to XXXX you can run the following command: groupmod -g XXXX Group_Name.
What are the UID and GID of the root?
Both the UID and GID of the root user are 0 in Linux. The root user is the supreme one among all users in the Linux system. Moreover, the root user can exercise all kinds of special powers in a Linux-based system. To conclude, It is not the naming that makes it supreme but this special UID and GID.
Relaed Articles
- How to Create User and Add to Sudo in Ubuntu? [2 Methods]
- 2 Ways to Create a User With Access to a Drive in Ubuntu
- How to Create a New User in Ubuntu by GUI? [Step-by-Step]
- 2 Ways to Create User Account in Ubuntu Using Terminal
- How to Create Home Directory for Existing User in Ubuntu
- How to Create a Root User in Ubuntu [Step-by-Step]
- How to Create a Sudo User in Ubuntu? [Step-by-Step]
FUNDAMENTALS A Complete Guide for Beginners


This post is very informative and I would dare to say this is absolut singular on the internet, or maybe its me who cant find anything remotely close to this when it comes to a novice like myself actually (almost) being able to understand what I’m presented by. remarkable, thank you!
If I may ask, if I want to recreate this user “pi:x:1000:100:,,,:/home/pi:/bin/bash” how would I go about and write the two line of terminal cods?
I would be very appreciative if you could help me out!
Thank you for your kind words! I am glad this can be a useful resource for beginners.
If you want to recreate the user pi with
pi:x:1000:100:,,,:/home/pi:/bin/bashinformation, first execute the following command to add the new user:sudo useradd -u 1000 -g 100 -c ",,," -d /home/pi -s /bin/bash piThen you need to add the user password using:
sudo passwd piBut, you should also know that this will throw you an error saying
UID 1000 is not unique. This happens because in your system your very 1st user usually uses UID 1000. To resolve this issue you can add this new user with another UID or you can let your system automatically assign you a UID.If you want to go the extra mile to get the exact result then you can create a 2nd user and then from the 2nd user change the UID of the 1st user. After that from the 1st user change the 2nd user’s UID to 1000.
If you need more specific or detailed information, feel free to create a new thread in our forum.