Ubuntu server is a specialized version of the standard Ubuntu operating system specially designed for networks and services. It can function as a straightforward file server or operate seamlessly within a cloud environment with up to 50,000 nodes. It’s renowned for its stability, and security, and also preferred for both beginners and seasoned administrators.
This guide delves into the installation process of the Ubuntu server, providing you with a step-by-step walkthrough.
Requirements to Install Ubuntu Server
- A minimum of 512 MB RAM (recommended 1GB or more).
- Minimum 2.5 GB of disk space.
- A DVD or a USB flash drive.
Steps to Install Ubuntu Server
Before heading into installing the Ubuntu server, back up your important data. Then, to install the Ubuntu server, follow the steps below:
Step 1: Download Ubuntu Server ISO
You can download the Ubuntu Server ISO file from the official site of Ubuntu.
Step 2: Create a Bootable USB Drive
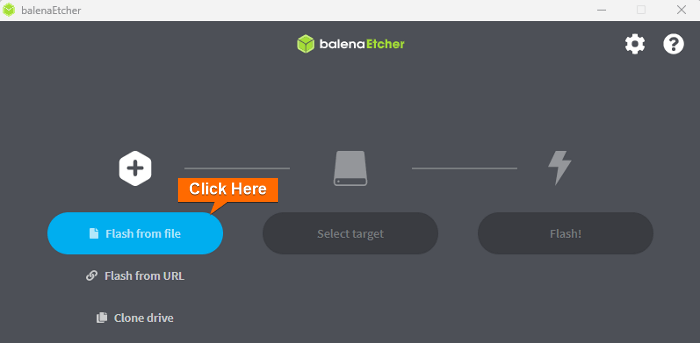
To create a bootable USB drive, use Etcher. First, install Etcher on Windows or MacOS.
- After installing, open it and click on “Flash from file”.

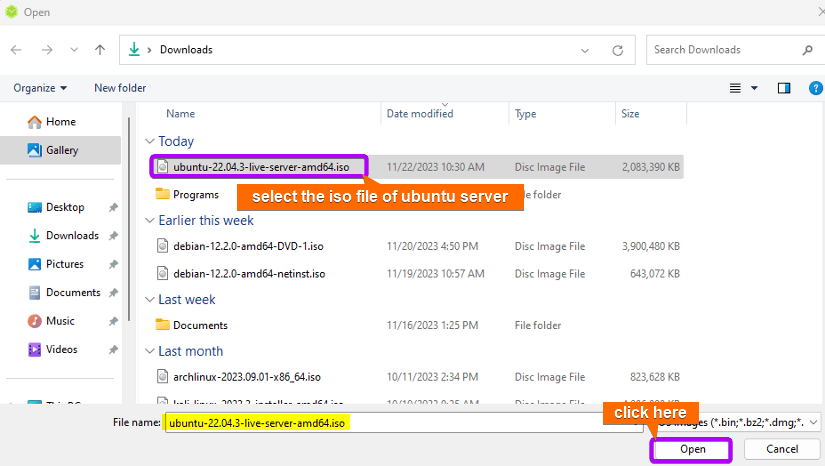
- After that, browse the ISO file from the downloaded location.

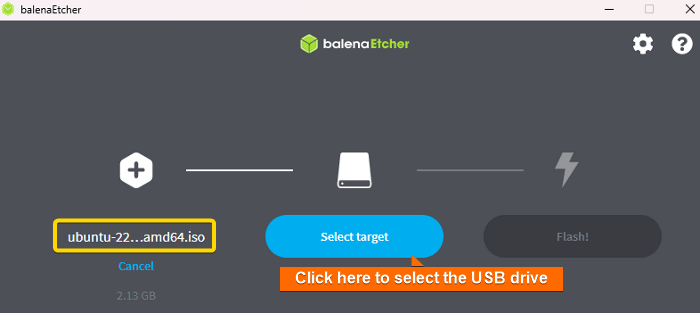
- Now, plug in your USB drive to the PC and click on “Select target”.

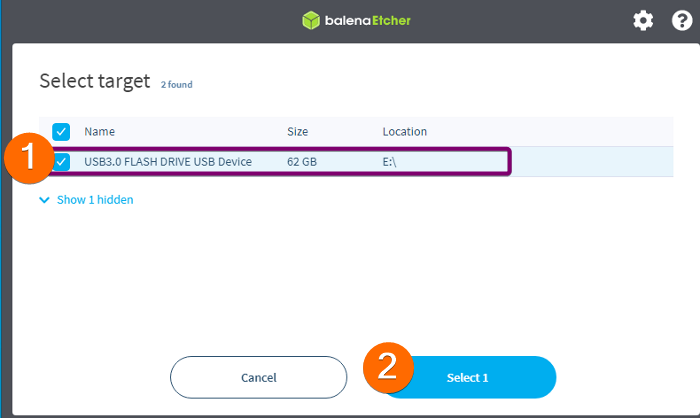
- Select the plugged-in USB drive from the list shown.

- Finally, click on “Flash” to start the ISO file on the USB drive and Etcher will make it bootable.
Step 3: Boot the System From USB
Select “Try or Install Ubuntu Server” to load the installer of the Ubuntu server. 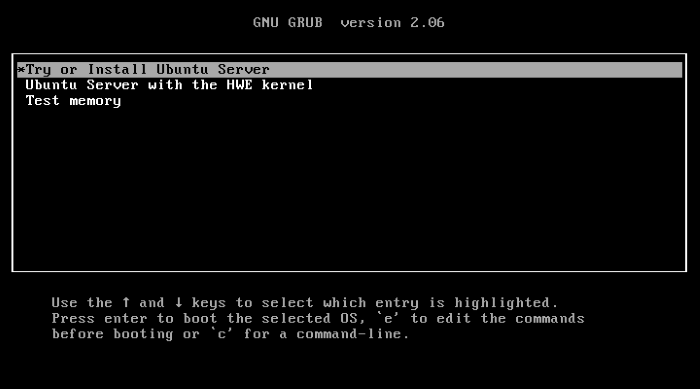
Step 4: Language and Keyboard Configuration
Choose your preferred language using the UP and DOWN keys and press ENTER. 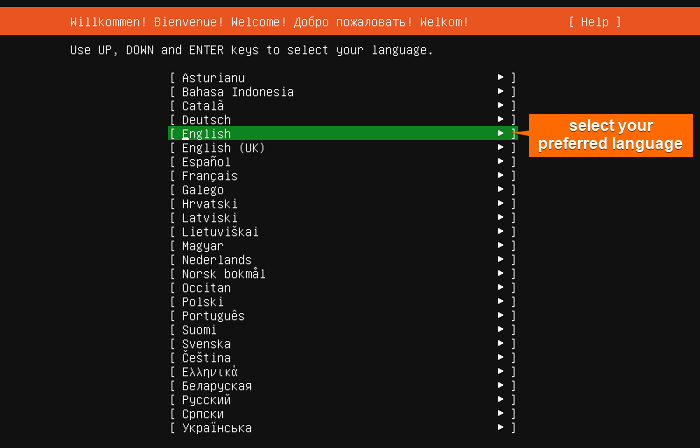
Step 5: Choose Keyboard Layout
Select your preferred keyboard layout and variant using the UP and DOWN keys. Select “Done” and press ENTER. 
Step 6: Choose the Installation Type
Choose Ubuntu Server as a base for the installation. Then, select “Done” and press ENTER. 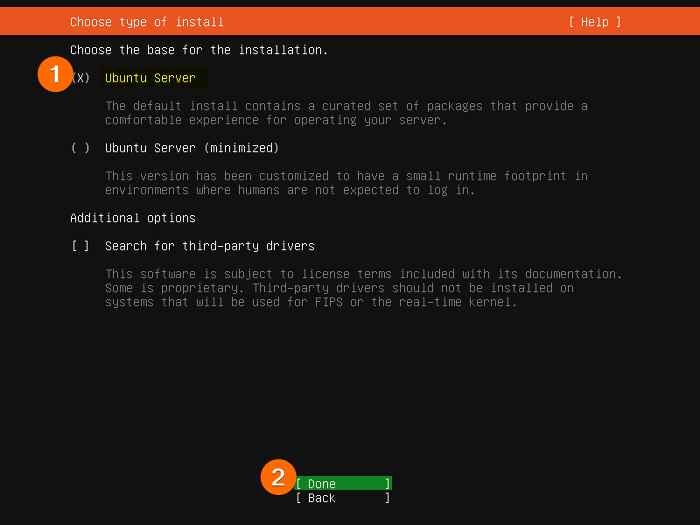
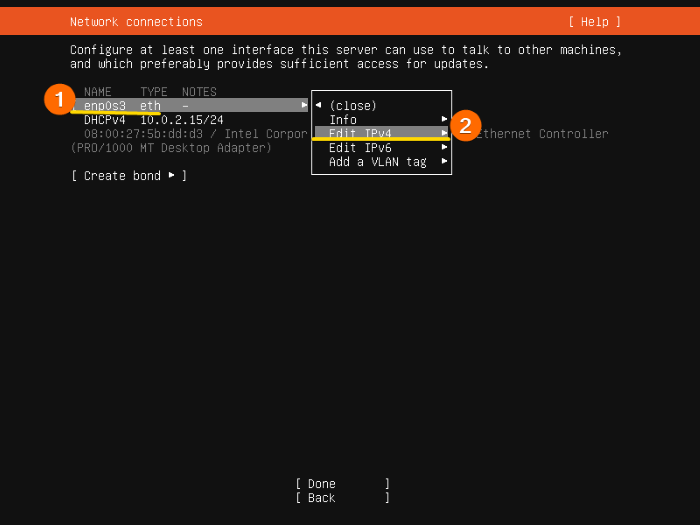
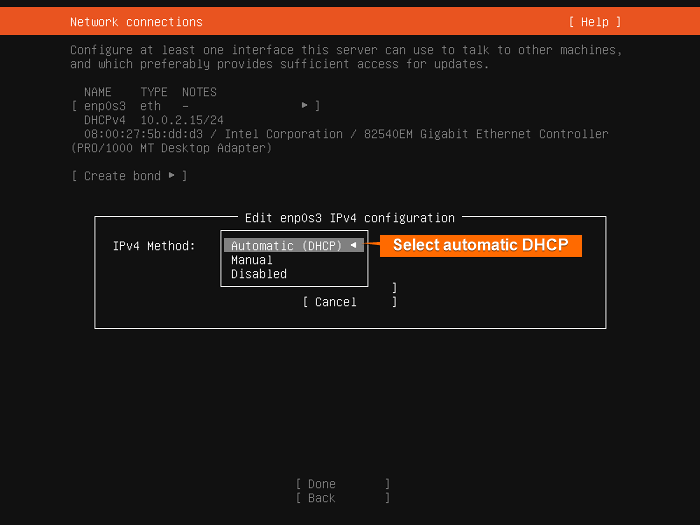
Step 7: Network Configuration
- Navitgate to enp0s3 eth > Edit IPv4 using the arrow keys.

- Select Automatic (DHCP) and press ENTER. Choose “Done” and press ENTER.
 Choose “Done” and press ENTER.
Now, the Ubuntu Archive Mirror will be configured automatically based on your current location during installation. 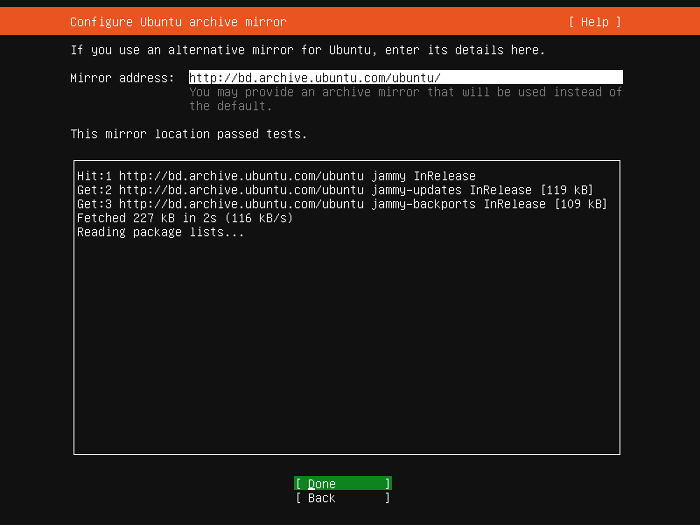
Step 8: Configure the Storage
Opt for “Use an entire disk” to let the installer automatically create partitions on the entire disk. 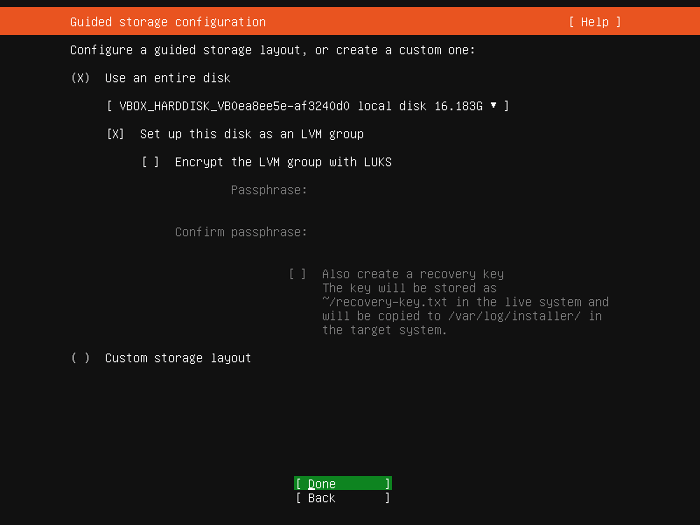 Select ‘Done‘ and press ENTER.
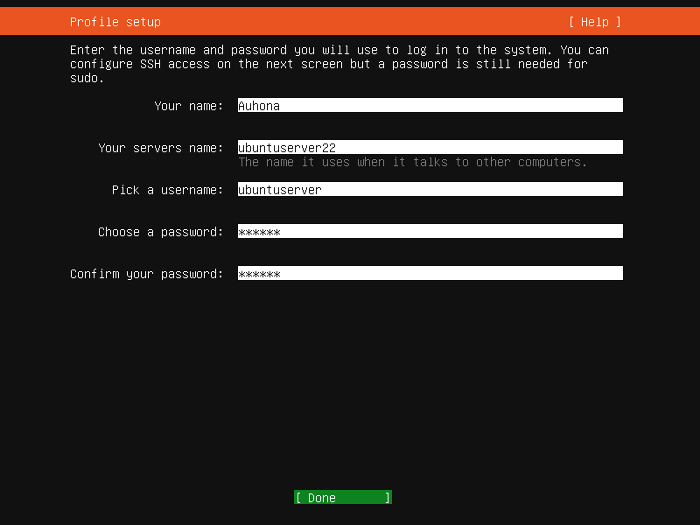
Step 9: Configure Profile settings
- Enter the username and password you will use to log in to the system.
- Click “Done” and hit ENTER.
Step 10: SSH Setup
Select “Install OpenSSH Server”. Then choose “Done” and hit ENTER. 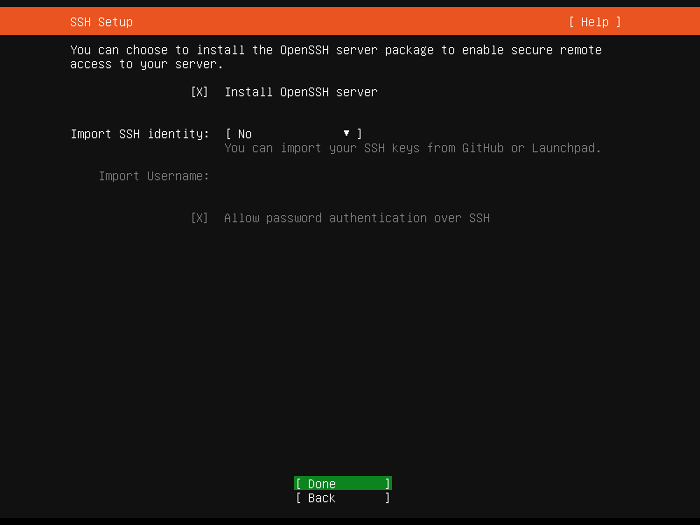
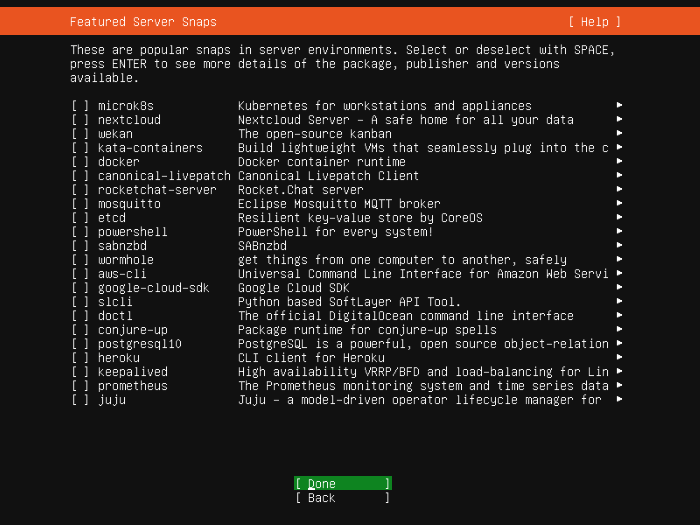
Step 11: Finish Installation
When the installation is completed select “Reboot Now” and press ENTER. 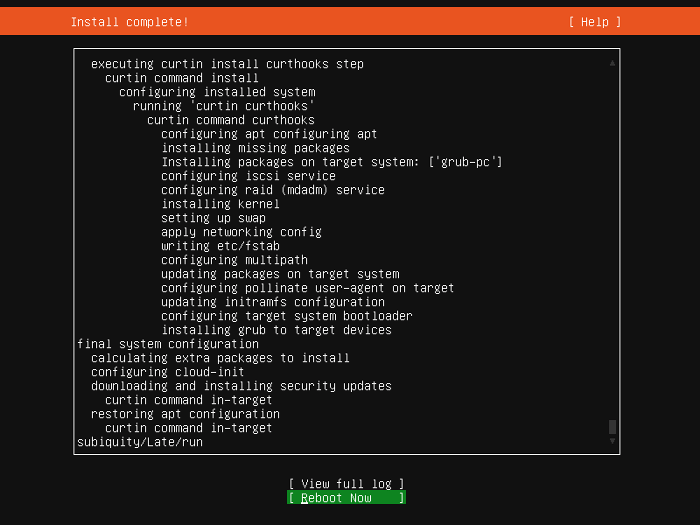 Now you can log in to the profile you created using the corresponding username and password.
 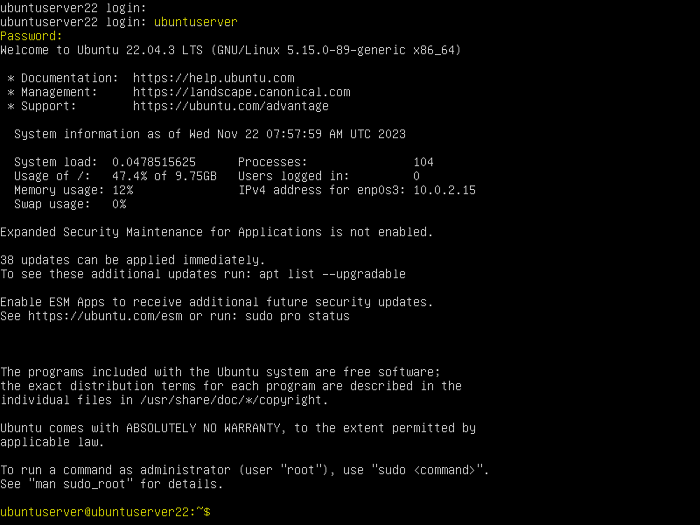 Finally, the Ubuntu server has been installed successfully.
Conclusion
In wrapping up this guide on installing the Ubuntu server, you’ve successfully navigated the essential steps required to set up a reliable and effective server environment. Your server is now ready to host applications, and manage databases.
People Also Ask
How to Convert Ubuntu desktop to Ubuntu server?
To convert the Ubuntu desktop to the Ubuntu server:
- Firstly, backup your data before any significant change.
- After that, open ubuntu terminal.
- Uninstall the desktop environment using the following command:
sudo apt-get remove ubuntu-desktopReplace “Ubuntu-desktop” with the name of your Ubuntu desktop.
- Using the following commands, remove the unnecessary packages
sudo apt-get autoremove sudo apt-get clean - Now, install server components using the following command:
sudo apt-get install openssh-server tasksel linux-generic - Run
taskselto select and install specific server packages. - Lastly, reboot your system to apply the changes by running
sudo rebootcommand. - Verify that server components are installed using
systemctl status ssh
What are the differences between Ubuntu server and Ubuntu?
| Feature | Ubuntu Server | Ubuntu (Desktop) |
| Purpose | Designed for server environments | Designed for desktop/laptop use |
| Installation | Minimal installation with no GUI | Full installation with GUI |
| Interface | Command-line interface (CLI) | Graphical user interface (GUI) |
| Resources | Lightweight and resource efficient | Moe resource-intensive for GUI |
| Desktop Environment | None by default | Various desktop environment availabile |
| Use Cases | Servers, data centers, virtualization | General desktop and laptop use |
What can a Ubuntu server do?
Ubuntu Server, created by Canonical, is a server operating system compatible with a variety of architectures (like x86, x86-64, ARM v7, etc). It works as a versatile platform for various purposes, such as:
- Hosting websites
- Managing FTP
- Operating as an email server
- Functioning as a file and print server
- Facilitating container deployment
- Supporting cloud services
- Acting as a database server
- Serving as a development platform
Is Ubuntu server free?
Yes, the Ubuntu server is free and follows the principles of open-source software. Users can download, install, and use the Ubuntu server without any cost. Additionally, the Ubuntu server receives regular updates and security patches, contributing to its stability and reliability.
Does Ubuntu server have GUI?
No, the Ubuntu server does not include a graphical user interface (GUI) by default. However, if you need, you have the option to install a GUI. Nevertheless, the server version is primarily crafted for command-line administration.
How to use the Ubuntu server without GUI?
Using the Ubuntu server without a graphical user interface (GUI) involves working with the command line interface (CLI). After installation tasks like file navigation, text editing, user administration, package handling, and system configuration are executed exclusively through command-line commands. Networking configurations, service management, and firewall settings are also managed through the CLI using commands like systemctl and ufw.
Related Articles
- How to Install Debian 12 (Bookworm) [A Complete Guide]
- How to Install Kali Linux [Step by Step]
- How to Install Ubuntu [Step by Step]
- How to Install Kubuntu [A Step-by-Step Guide]
- How to Install Lubuntu [Step-by-Step]
- How to Download & Install Xubuntu [Easiest Guide]
- How to Install Linux Mint 21.2 Victoria [Easy Guide]
- How to Install Zorin OS 16 [Easiest Guide]
- How to Install Red Hat Enterprise Linux [Simple Guide]
- How to Install Fedora [A Step-by-Step Tutorial]
- How to Install CentOS 9 [Easiest Guide]
<< Go Back to Linux OS Single Installation | Linux OS Installation Guide | Learn Linux Basics
FUNDAMENTALS A Complete Guide for Beginners


