CentOS stands out as a widely embraced open-source Linux distribution designed for server applications, offering alignment with Red Hat’s RPM package manager. Its primary objective is to deliver a reliable operating system compatible with upstream RHEL (Red Hat Enterprise Linux). Consequently, CentOS is considered one of the premier free Linux distributions suitable for server environments.
Requirements to Install CentOS
- Minimum 10 GB of free space.
- Minimum 2 GB RAM (4 GB recommended).
- USB drive.
What is CentOS?
CentOS (Community ENTerprise Operating System) is a free and open-source distribution derived from the Red Hat Enterprise Linux (RHEL) source code. The community develops and maintains it, providing a stable and reliable operating system for servers and enterprise environments. It is recognized for its stability, robust security features, and diverse panel choices.
CentOS Linux Distribution Key Features:
- Security Features: CentOS incorporates robust security features, including the Security-Enhanced Linux (SELinux) system, which allows users to enable access control policies for different processes and files.
- Updates: Red Hat launches a new significant version of CentOS Linux, with a support period of ten years. This approach minimizes potential issues associated with software updates.
- Stability: CentOS uses stable software versions since the release cycle is longer. Therefore, applications don’t need to be updated as often.
- Panel Options: CentOS users can choose from a variety of management platforms, such as cPanel, Plesk, WebMin, Spacewalk, CWP, Virtualmin, and VestaCP.
Steps to Install CentOS
Before diving into the installation process, it’s always good practice to back up your important data before making any significant changes to your system.
To install CentOS follow the steps below:
Step 1: Download the CentOS ISO File
Go to the CentOS official Website to download CentOS 9’s ISO file. 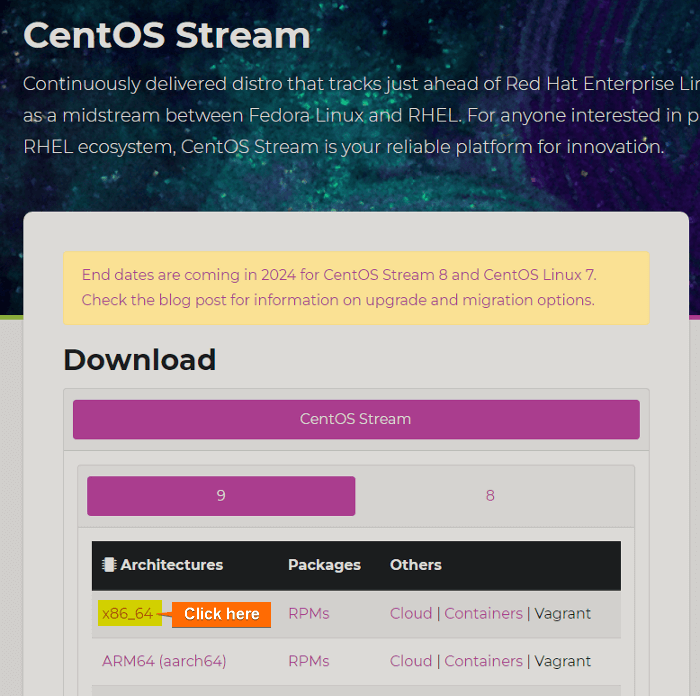
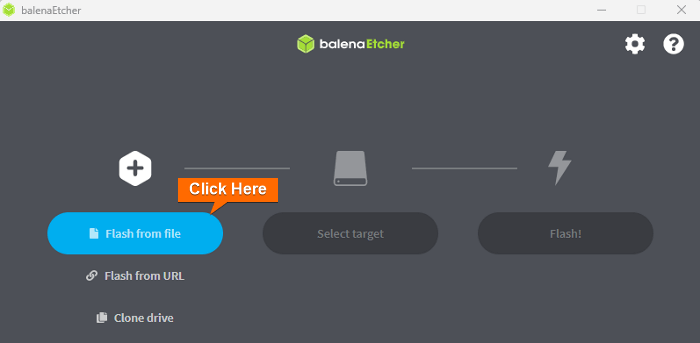
Step 2: Create a Bootable Media
You can utilize Etcher, an open-source application to create a bootable USB drive from the ISO file.
- Initiate by installing Etcher on either Windows or MacOS. Upon installation is complete, launch the application and Choose the “Flash from File” option.

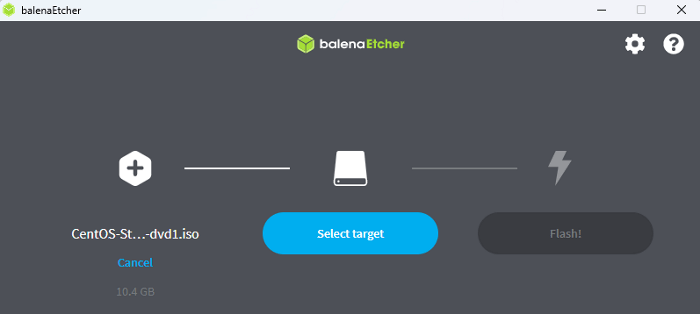
- Next, pick the ISO file from the location where you downloaded it.

- After that, connect your USB pen drive to the computer and click on “Select target”.

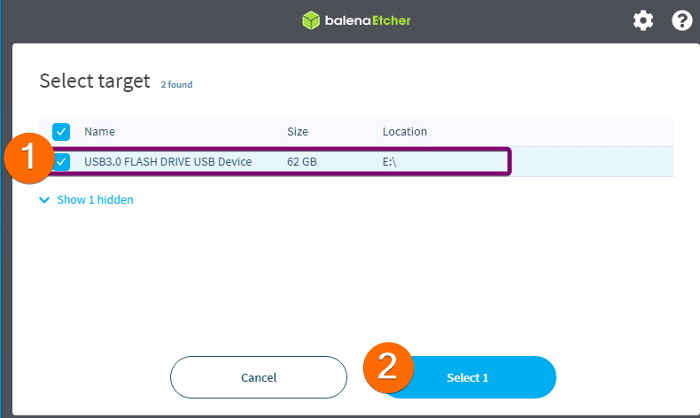
- Select your USB drive from the list.

- Finally, click on Flash! to start the ISO file on the USB drive.


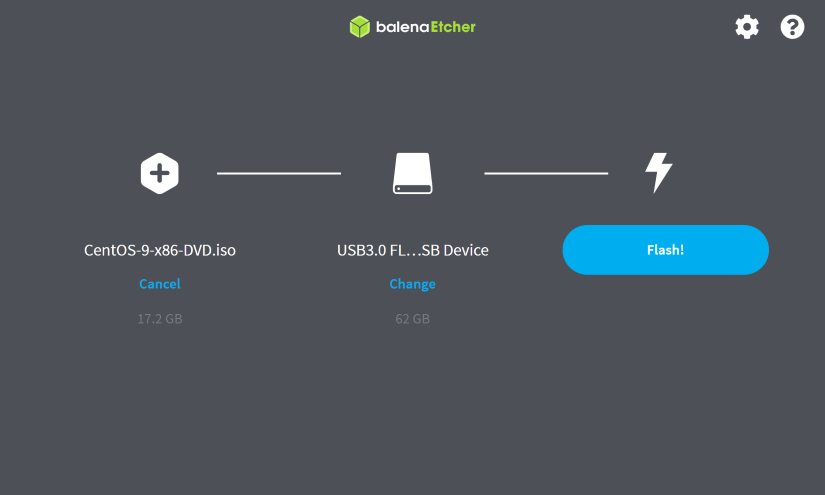
Following that, Etcher will proceed to transfer the contents of the ISO file to your USB drive, thereby making it bootable.
Step 3: Boot CentOS from USB
To boot RHEL from the USB drive follow the below steps:
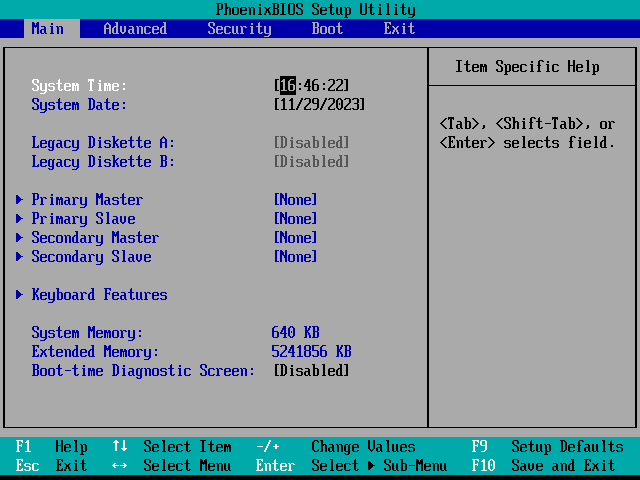
- First, insert the bootable USB drive into the computer. Subsequently, power on/restart the computer, and the boot window will automatically appear.

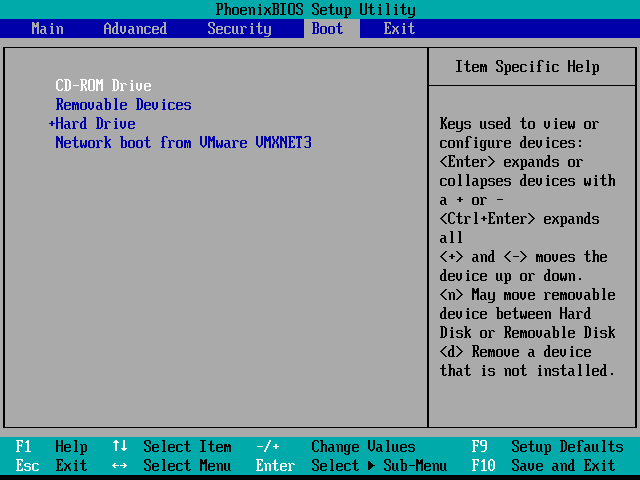
- Navigate to Boot using the RIGHT ARROW key and then keep the cursor on Removable devices using the Down ARROW key.
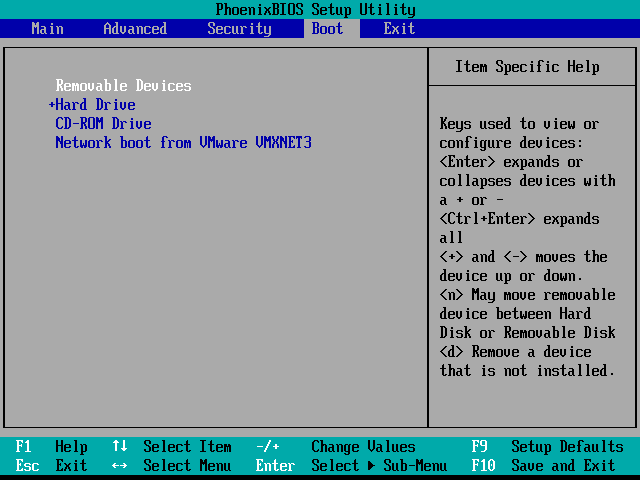
- Now use the + key to move the “Removable Devices” option on the top.
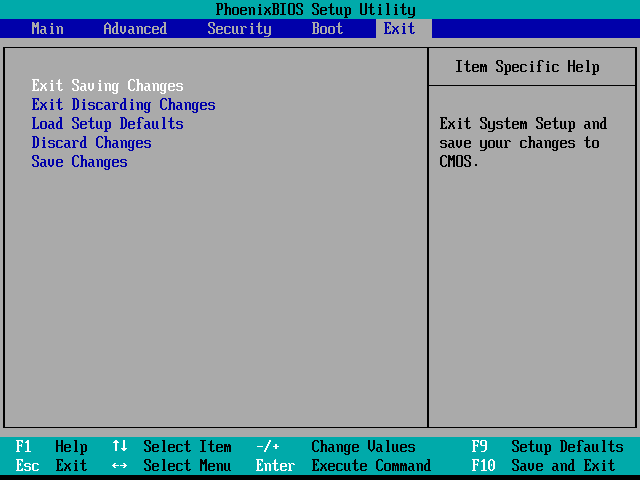
- Navigate to Exit by using the RIGHT ARROW (or you can press ESC) and keep the cursor on the Exit Saving Changes option. Then, press ENTER.
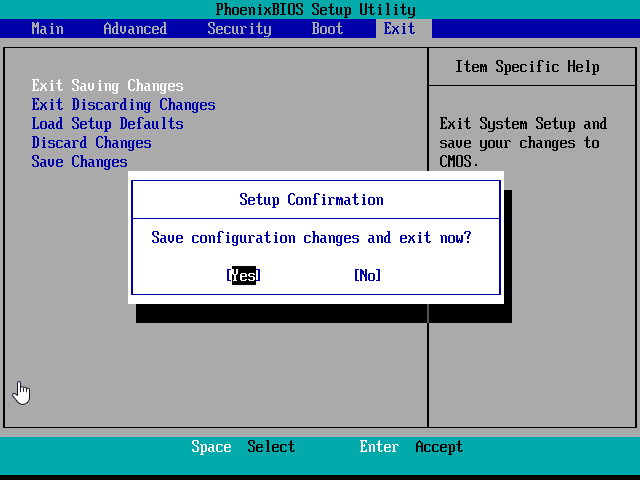
- Select Yes and press ENTER.
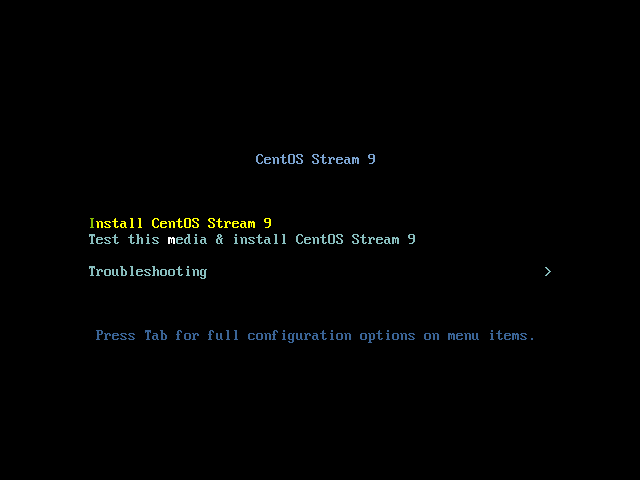
- After booting, the install window will appear on the screen. Here select “Install CentOS 7” using the UP and DOWN ARROW and press ENTER.
Step 4: Choose the Language
Select your preferred language (for example ENGLISH) and click on Continue. 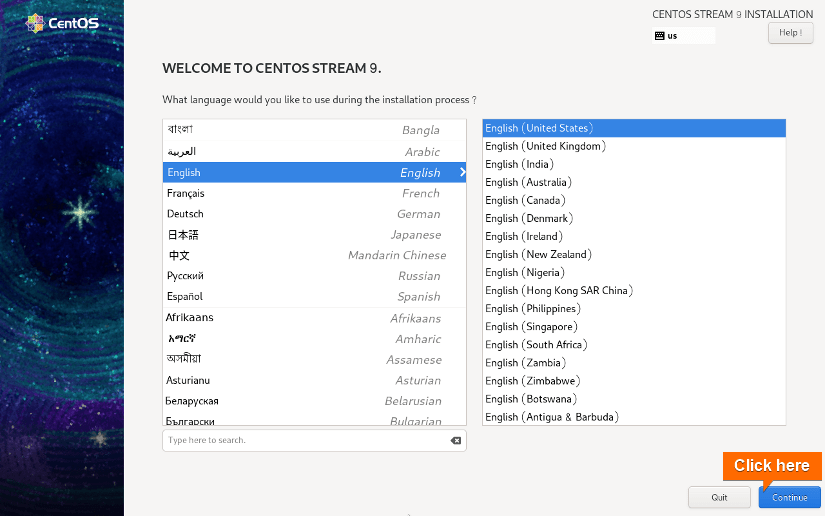 Following the language selection, the central screen known as “Installation Summary” will appear, presenting configuration options as below:
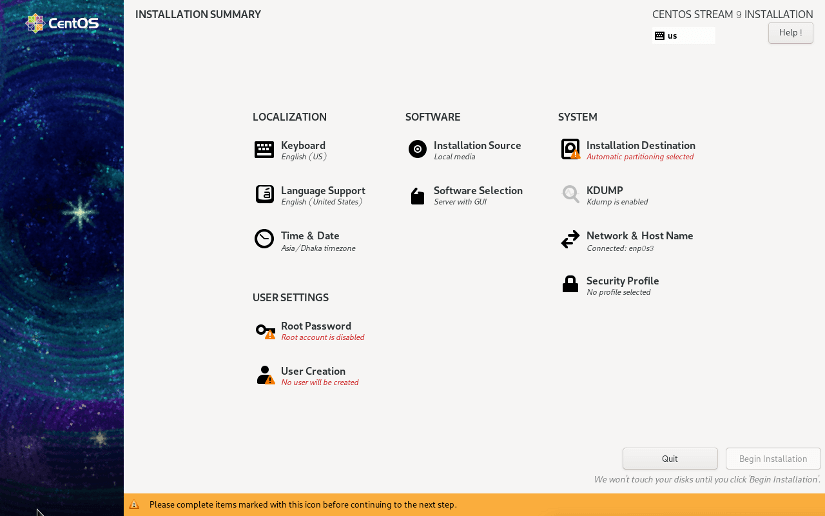
Step 5: Set Date and Time
To configure the date and time, navigate to “Date & Time” from the “Installation Summary” prompt. Now, select your preferred “Region” and “City”. Then, click on Done. 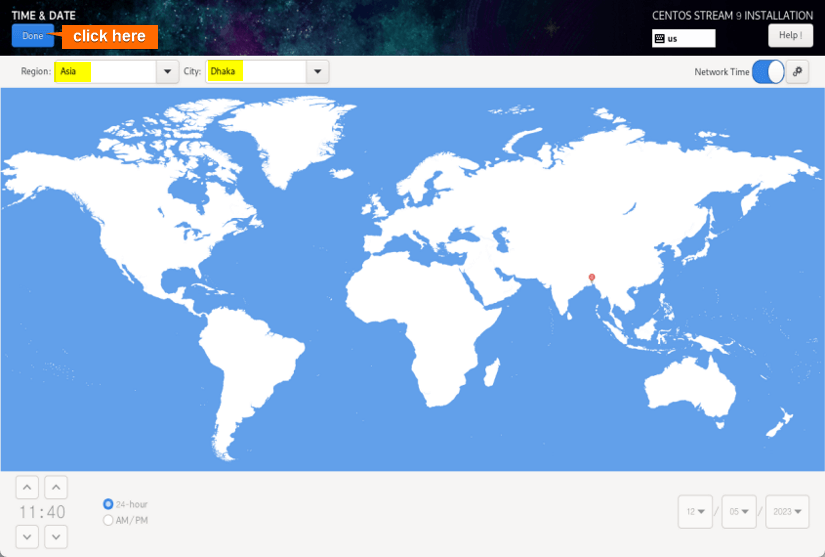
Step 6: Select a Keyboard Layout
First, navigate to “KEYBOARD LAYOUT” from the “INSTALLATION SUMMARY” prompt. After that, click on the “+” icon. ![]() Here, you can add a keyboard layout by selecting it from the list. Click on Add.
Here, you can add a keyboard layout by selecting it from the list. Click on Add. 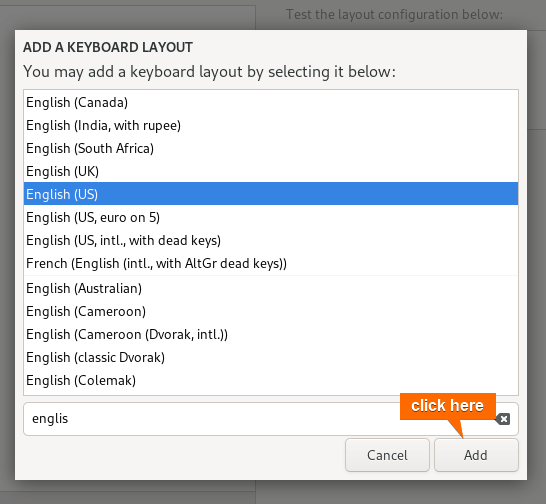 After that, this prompt will close, and then click on Done on the “KEBOARD LAYOUT” prompt.
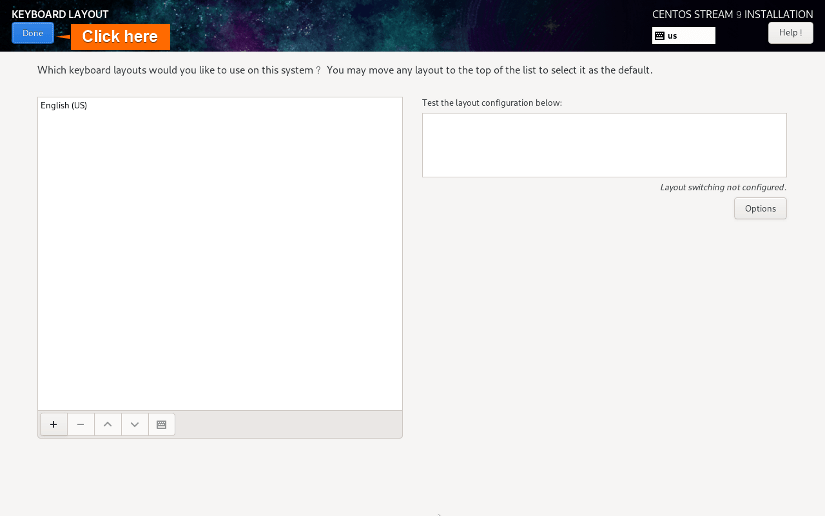
Step 7: Select Installation Destination
Click on Installation Destination and then check the Automatic option of “Storage Configuration”. Now, select ATA VBOX HARDDISK in the “Local Standard DIsks” and click on Done. 
Step 8: Set Root Password
Go to “ROOT PASSWORD” from the “Installation Summary” prompt. Now, set a root password and click on Done. 
Step 9: Create a User Account
To create a user account, go to “USER ACCOUNT” from the Installation summary prompt. After that, type your Full name and Username, and set a password for the account. 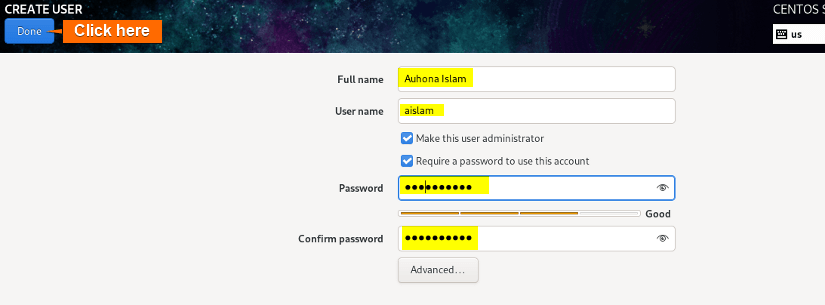
Note: If you want the user account to be an administrator, check the “Make this user administrator” option.
Step 10: Start the Installation Process
Click on Begin Installation. 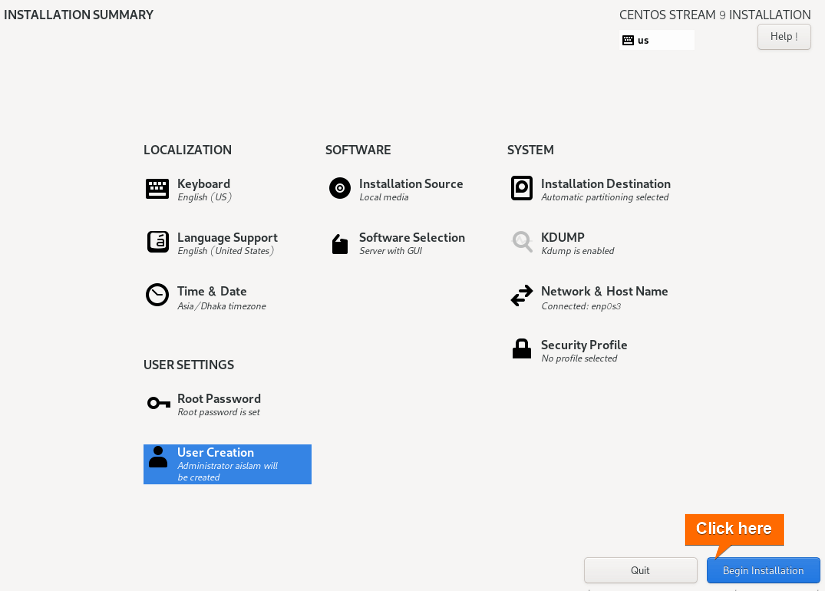
Step 11: Reboot the OS
Now, click on the Reboot option. 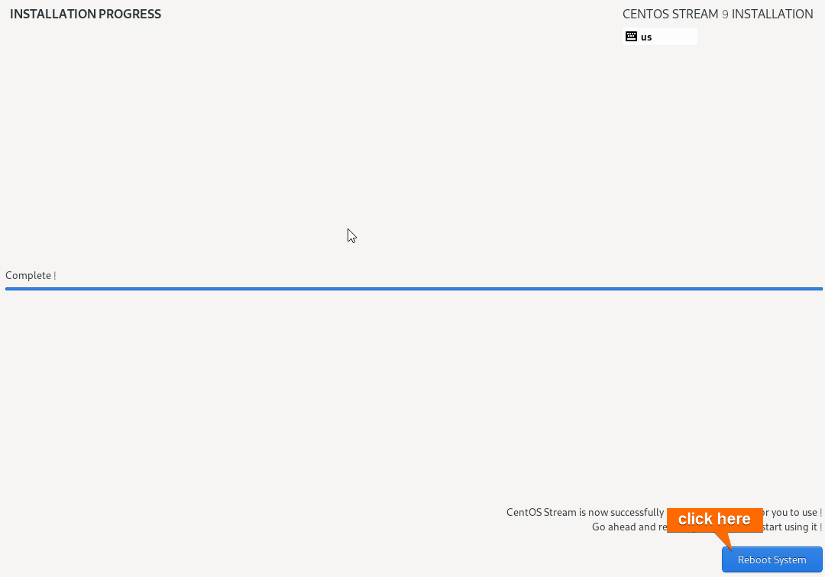 After rebooting, a prompt will appear with the user account created while installing. Here, click on the username, type the user password, and lastly press ENTER.
 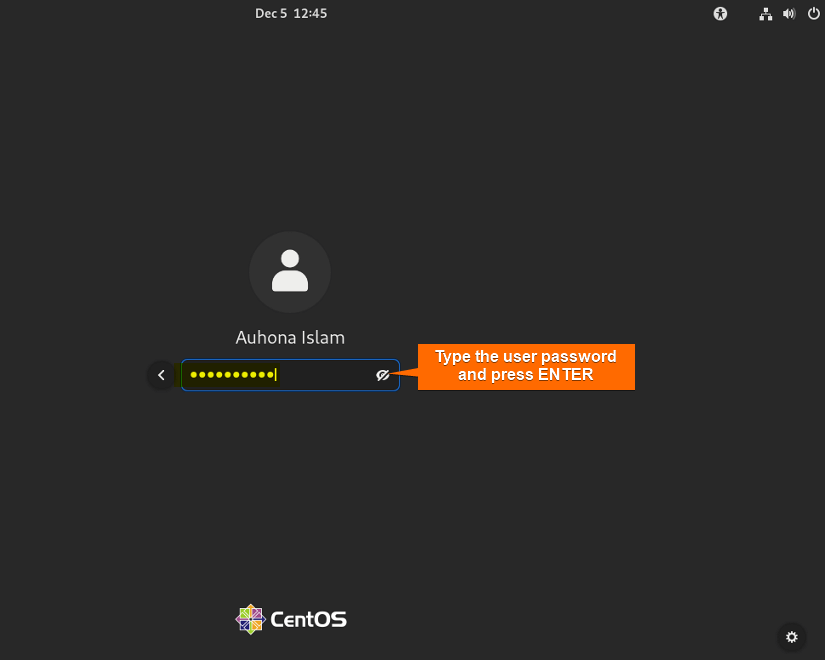 After logging into the user account, here is the CentOS desktop interface.
  Great job! You’ve effectively set up CentOS. Feel free to delve into the system and explore its features.
Conclusion
In conclusion, installing CentOS is a straightforward process that involves creating a bootable installation media, configuring system settings, and allowing the installer to set up the operating system on your chosen hardware or virtual environment. CentOS, renowned for its stability and security features, is a popular choice for servers and enterprise applications.
People Also Ask
Is CentOS and RHEL same?
No, CentOS and RHEL are not the same. While CentOS is built from the same source code as RHEL. The key differences lie in their support models, branding, release timing, stability, and target audience. RHEL is a commercially supported and branded enterprise.
What is GCC CentOS?
GCC on CentOS refers to the GNU Compiler Collection installed on a CentOS operating system. It is a set of compilers for various programming languages, including C, C++, Fortran, and others essential for building and compiling software from source code. Users can install GCC on CentOS using package management commands like YUM or DNF.
Which is faster CentOS or Ubuntu?
CentOS is widely recognized for its stability in comparison to Ubuntu, primarily attributed to less frequent package updates. However, this characteristic can also pose a drawback. If you seek the most recent versions of specific applications or software, you’ll need to undertake manual installations.
Is CentOS 7 end of life?
CentOS 7 was scheduled to reach its end of life (EOL) on June 30, 2024. However, it’s important to note that information about end-of-life dates can change
What replaced CentOS Linux?
The traditional CentOS Linux, which was a downstream, free, and community-supported version of Red Hat Enterprise Linux (RHEL), was replaced by CentOS Stream as the primary focus of development.
What is the difference between CentOS Linux and CentOS Stream?
CentOS Linux and CentOS Stream are two distinct variants of the CentOS operating system with notable differences in their release models and update approaches. CentOS Linux adheres to a traditional fixed-release model, providing a stable and reliable platform with updates focusing on security and bug fixes. It typically follows the release cycle of Red Hat Enterprise Linux (RHEL). In contrast, CentOS Stream adopts a rolling release model, positioned between Fedora and RHEL. This results in a more continued stream of updates, allowing users to access newer RHEL releases. CentOS Stream is favored by developers and those seeking a balance between stability and proximity to the cutting edge of software development.
Related Articles
- How to Install Debian 12 (Bookworm) [A Complete Guide]
- How to Install Kali Linux [Step by Step]
- How to Install Ubuntu [Step by Step]
- How to Install Ubuntu Server?
- How to Install Kubuntu [A Step-by-Step Guide]
- How to Install Lubuntu [Step-by-Step]
- How to Download & Install Xubuntu [Easiest Guide]
- How to Install Linux Mint 21.2 Victoria [Easy Guide]
- How to Install Zorin OS 16 [Easiest Guide]
- How to Install Red Hat Enterprise Linux [Simple Guide]
- How to Install Fedora [A Step-by-Step Tutorial]
<< Go Back to Linux OS Single Installation | Linux OS Installation Guide | Learn Linux Basics
FUNDAMENTALS A Complete Guide for Beginners


