Red Hat Enterprise (RHEL) is a powerful and widely used operating system that provides a secure and stable platform for businesses. Installing RHEL may seem daunting for some, but with a systematic approach, it can be a straightforward process. This guide will walk you through the step-by-step process of how to install Red Hat Enterprise Linux, ensuring a smooth setup for your system.
Requirements to Install Red Hat Enterprise Linux (RHEL)
- Minimum 10 GB disk space (20GB recommended).
- Minimum 4 GB RAM.
- USB drive (a minimum capacity of 8GB).
What is Red Hat Enterprise Linux?
Red Hat Enterprise Linux (RHEL) is a leading and widely used enterprise-grade Linux operating system developed and maintained by Red Hat, Inc. It is designed to provide businesses and organizations with a stable, secure, and scalable platform. RHEL is known for its reliability, security features, and comprehensive support services.
Key features and aspects of Red Hat Enterprise Linux include:
- Stability and Reliability: RHEL has gained a reputation for its stability and reliability. It undergoes rigorous testing and certification processes to ensure a high level of performance.
- Security: RHEL includes advanced security features and tools to safeguard systems and data. Regular security updates and patches are provided to address potential vulnerabilities.
- Lifecycle and Long-Term Support (LTS): RHEL has a stable, long-term lifecycle for major releases, offering predictability and support for organizations in IT infrastructure planning.
- Package Management: RHEL uses RPM for easy software package management, enabling simple installation, updates, and removal of the system.
- Enterprise Software Ecosystem: RHEL is a key component of an integrated enterprise software ecosystem, encompassing middleware, development tools, and management solutions for a comprehensive platform supporting enterprise applications.
Install Red Hat Enterprise Linux (RHEL)
The process of installing RHEL includes the major tasks of downloading the RHEL’s ISO file, creating a bootable USB drive, booting RHEL, pre-installation, and post-installation configuration.
To install Red Hat Enterprise Linux (RHEL), follow the steps below:
Step 1: Get RHEL ISO File
Download the ISO file from the RHEL’s official website. 
Step 2: Create a Bootable USB Drive
To create a bootable USB drive from the ISO file, utilize Etcher, an open-source application. Begin by installing Etcher on either Windows or MacOS. Once the installation is complete, launch the application and choose the “Flash from File” option. 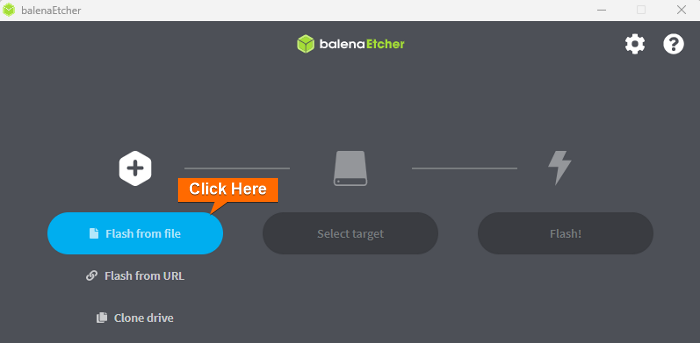 Next, pick the ISO file from the location where you downloaded it.
 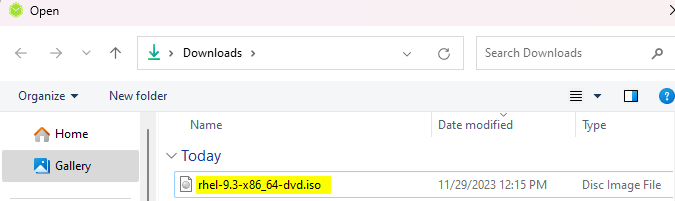 Now, connect your USB pen drive to the computer and click on “Select target.”
 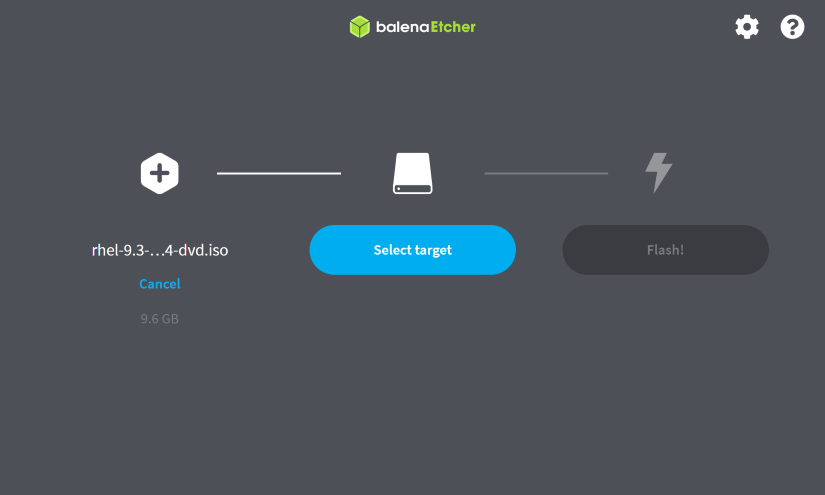 Select your USB drive from the list.
 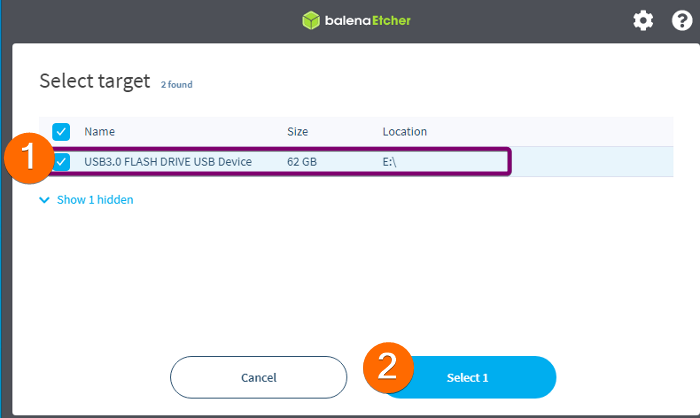 Finally, click on Flash to start the ISO file on the USB drive.
 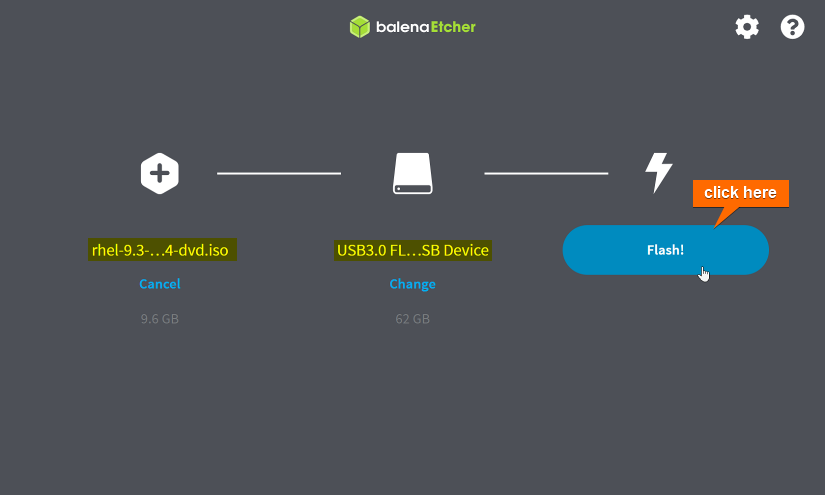 Following that, Etcher will proceed to transfer the contents of the ISO file to your USB drive, thereby making it bootable.
Step 3: Boot RHEL from USB Drive
To boot RHEL from the USB drive follow the below steps:
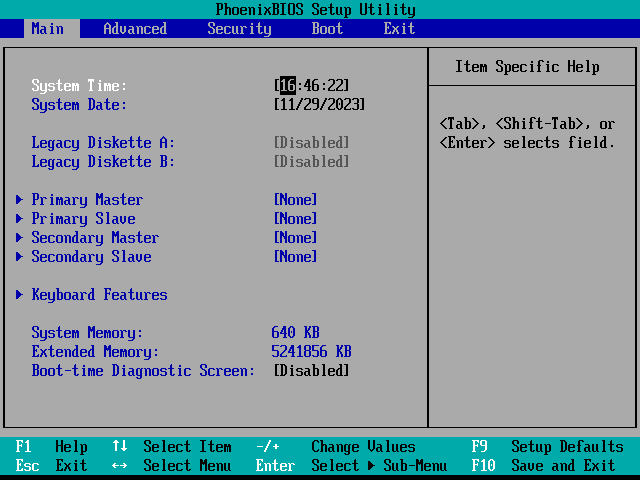
- First, insert the bootable USB drive into the computer. Subsequently, power on/restart the computer, and the boot window will automatically appear.

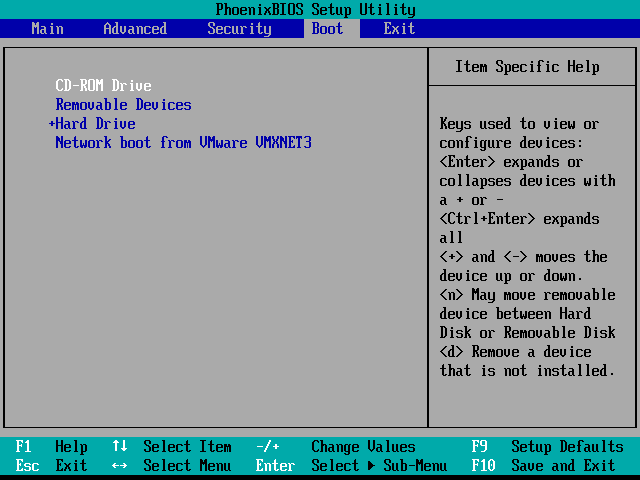
- Navigate to Boot using the RIGHT arrow key and then keep the cursor on Removable Devices using the DOWN arrow key.
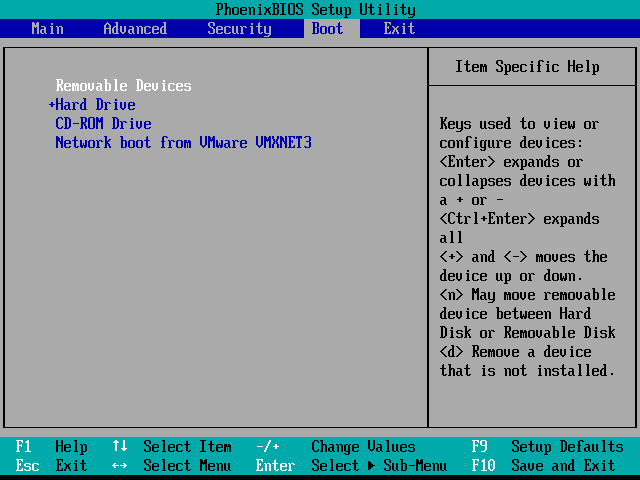
- Now use the + key to move the “Removable Devices” option on the top.
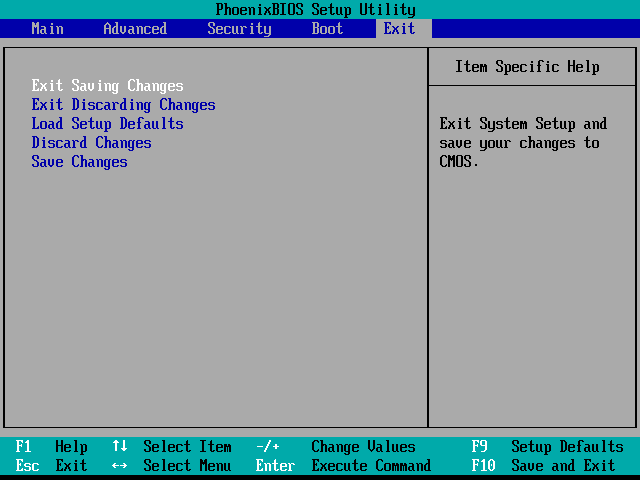
- Navigate to Exit by using the RIGHT arrow (or you can press ESC) and keep the cursor on the Exit Saving Changes option. Then, press ENTER.
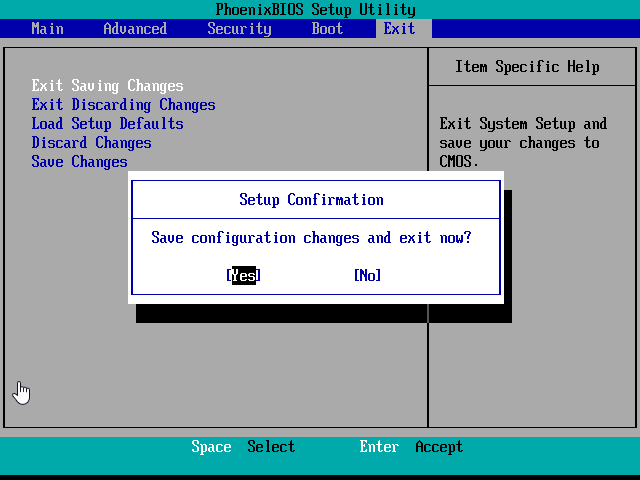
- Select Yes and press ENTER.
After booting, the install window will appear on the screen. Here select “Install Red Hat Enterprise Linux 9.3” using the UP and DOWN arrow and press ENTER. 
Step 4: Select the Language
Select your preferred language (for example ENGLISH) and click on Continue. 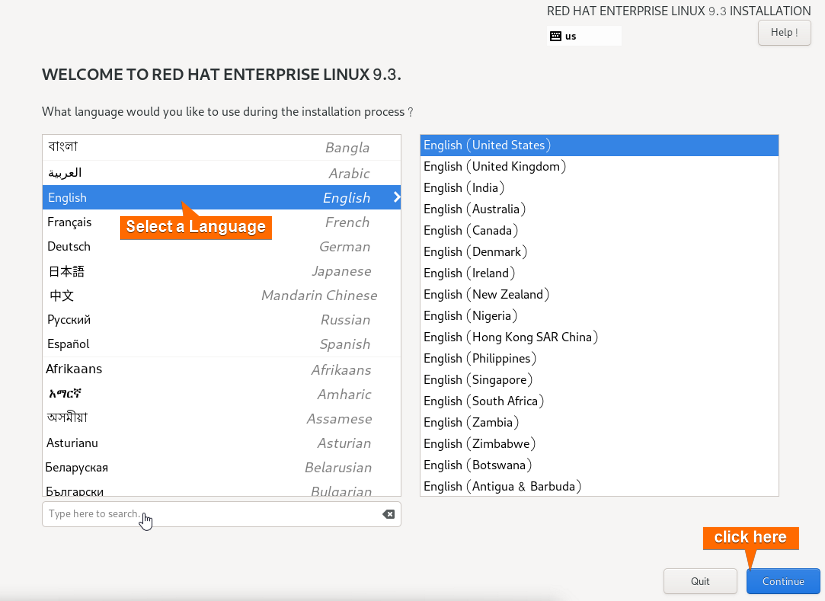 Following the language selection, the central screen known as “Installation Summary” will appear, presenting configuration options as below.
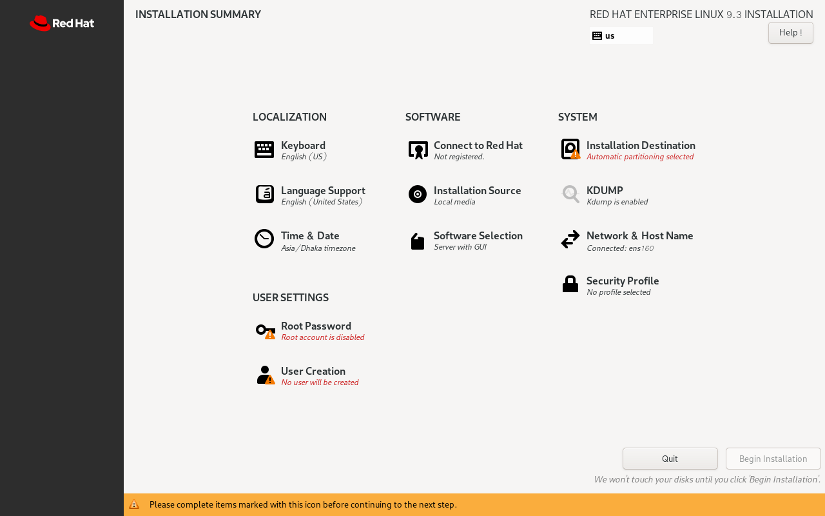
Note: You can configure “DATE & TIME”, “KEYBOARD”, “SOFTWARE SELECTION” and other settings from here before installation.
Step 5: Select Device on Installation Destination
Now, click on Installation Destination and then check the Automatic option of “Storage Configuration”.
Then select the “local standard disk” and click on Done. 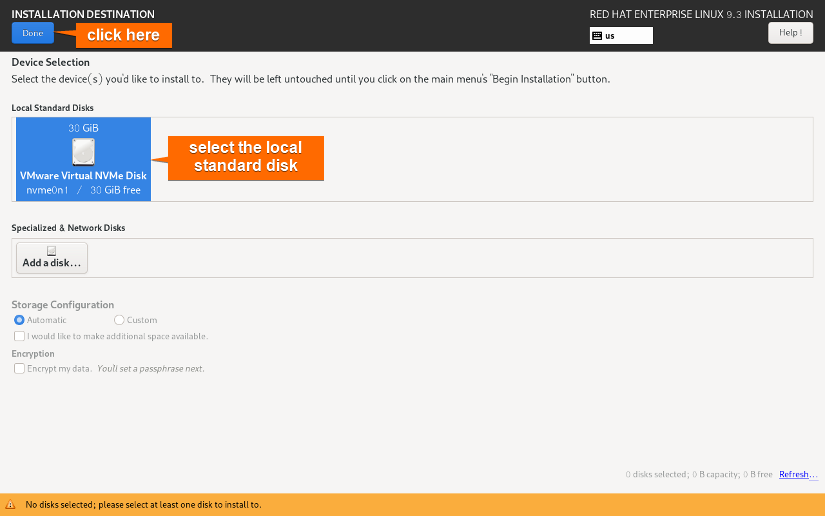
Step 5: Network and Hostname Configuration
To configure the network and hostname, first, go to “NETWORK & HOSTNAME”, click on Ethernet, and enable the network configuration. Then, set a hostname and click on Apply. Finally, hit the Done button. 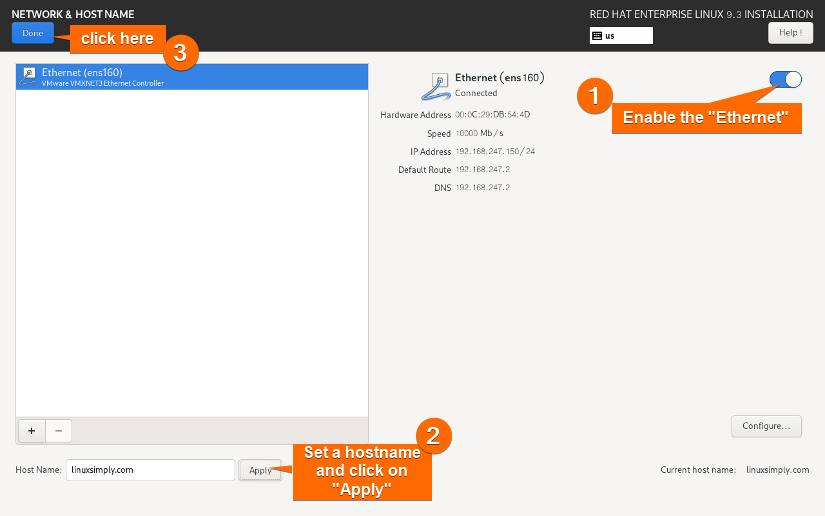
Step 6: Set Root Password
From the “Installation Summary” window, click on “Root Password”. Now, Set a password and double-click on Done. 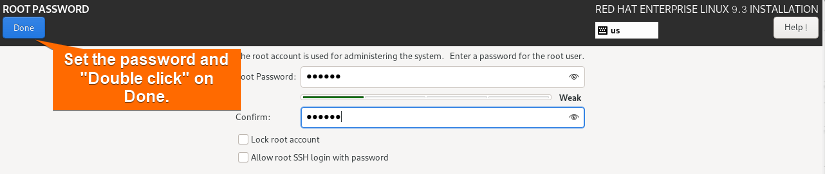
Step 7: Begin the Installation
To start the installation, on the “Installation Summary” screen, click on Begin Installation. 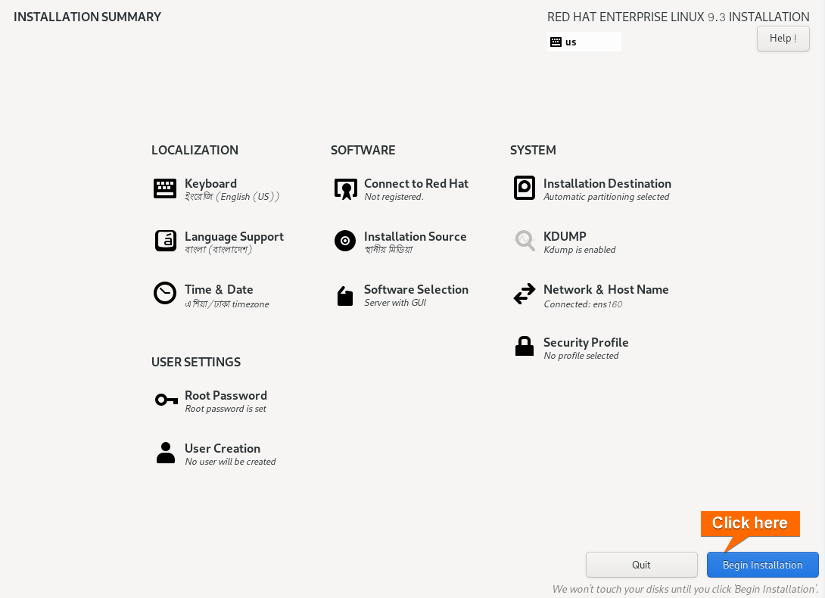 After some time, the installation process will conclude by showing Complete on the “Installation Progress” screen. Finally, click on Reboot System.
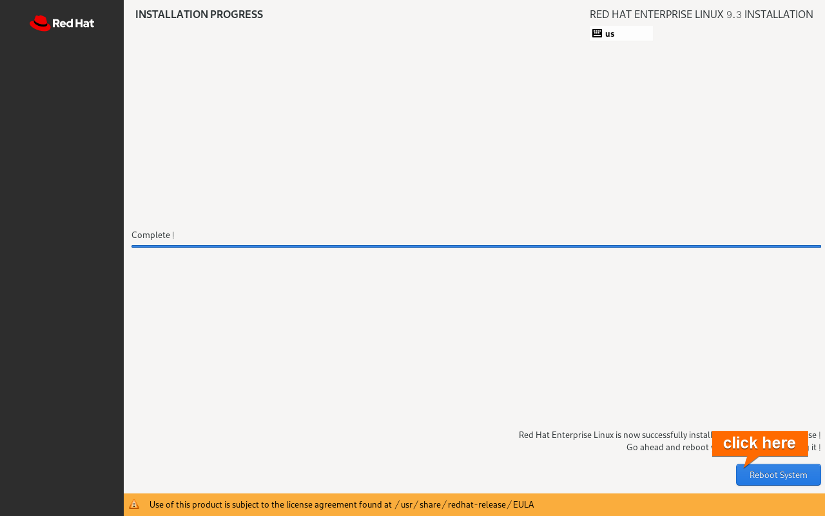
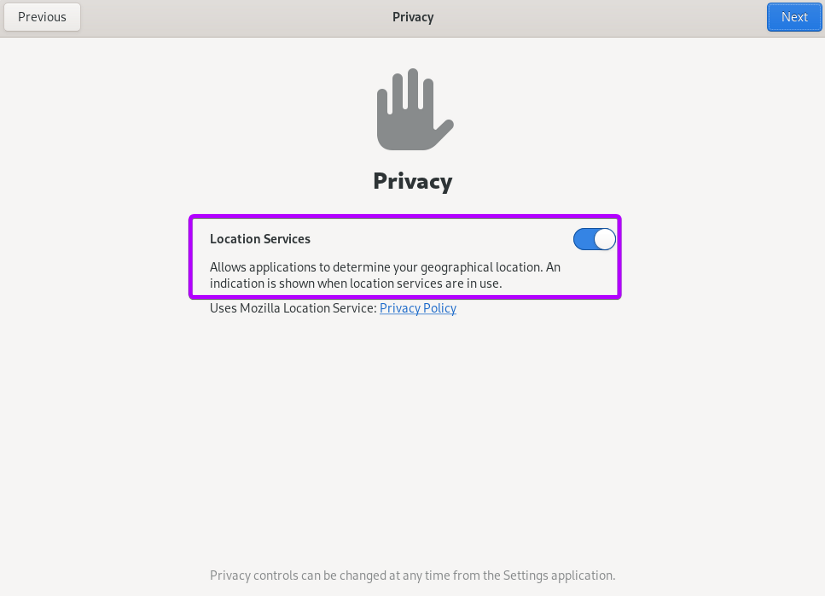
Step 8: Post Installation Setup
Upon rebooting the system, you’ll need to configure a few additional settings for the operating system.
- First, turn on your Location Services and click on Next.

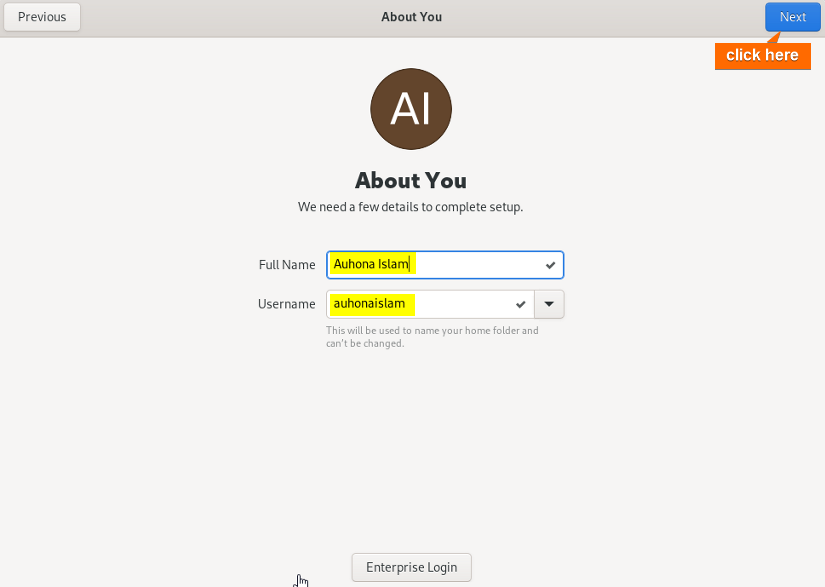
- Type your full name and the username will be automatically taken. Then click on Next.

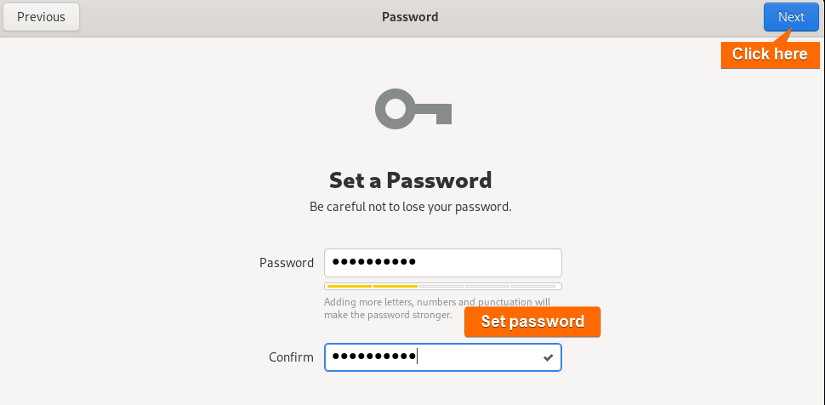
- Now, set a password and click on Next.

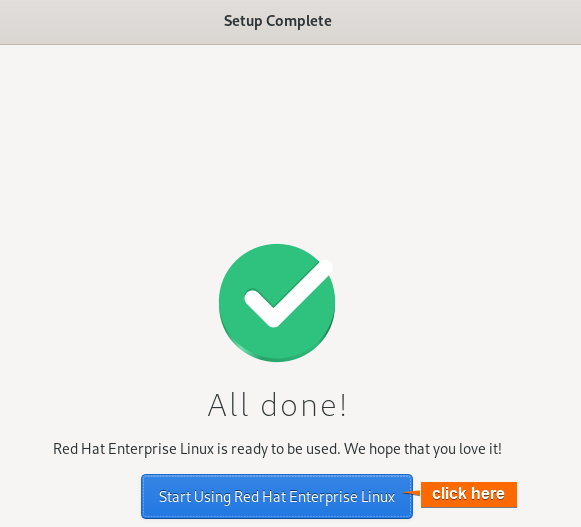
- After completing all the setup steps, click on “Start using Red Hat Enterprise Linux” to begin using the operating system.

Finally, the desktop interface of Red Hat Enterprise Linux will appear as below. 
Conclusion
In summary, installing Red Hst Enterprise Linux (RHEL) is a user-friendly process that sets the stage for a robust and secure computing environment. By adhering to the installation steps, users can unlock the benefits of RHEL’s stability, long-term support, and enterprise-grade features. By following the simple steps outlined in the installation guide, you can quickly establish a reliable foundation for your computing needs.
People Also Ask
Why Red Hat is not free?
Red Hat Enterprise Linux (RHEL) is not free because it is a commercially supported and extensively tested enterprise-grade operating system. Red Hat invests significantly in development, certification, security, and ongoing support services, making RHEL a reliable choice for businesses. The subscription fees charged by Red Hat contribute to the continuous improvement, maintenance, and provision of comprehensive support for RHEL.
What is disk partitioning, and how should I configure it?
Disk partitioning means dividing your storage into sections. At a minimum, you should have a root (“/”) partition. Advanced users may also create separate partitions for /home, swap, and other directories. Here are some tips to configure disk partitioning:
- Root (/) Partition: Allocate 20-30 GB for the root partition containing the operating system files.
- Swap Partition: Assign 2 times the amount of RAM for the swap partition.
- /home Partition: Dedicate the remaining space to the /home partition for user data.
- Separate Partition: Consider a separate /boot partition for boot files and, if needed, a /var partition for variable data.
- Backup: Always back up data before partitioning to prevent data loss.
Can I install RHEL without a graphical interface?
Yes, RHEL can be installed on virtual machines using the text-based installer option. Here are the general steps to install RHEL without a graphical interface:
- Boot from Installable media
- Access the installer
- Select installation option
- Navigate to
How do I update my system after installing RHEL?
After installation, use the yum or dnf package manager to update your system. Regularly applying updates is essential for security and performance. You can run any command between sudo yum update and sudo dnf upgrade command.
Can I customize the software packages during installation?
Yes, RHEL provides options to customize software packages based on your needs. You can choose predefined environments or manually select packages.
How to install and register Red Hat Enterprise Linux automatically?
To install and register Red Hat Enterprise Linux (RHEL) automatically, you can use the method called kickstart. Kickstart is a system for automating the RHEL installation process, including registration with Red Hat Subscription Management. Here’s a step-by-step guide:
- Create a Kickstart configuration file (typically with a
.cfgextension) usingnanoorvi. - Include Subscription Management Information by adding the following line in the file:
# Subscription Management subscription --username=<your_username> --password=<your_password> --auto - Make the Kickstart file accessible during the installation.
- Start the RHEL installation on the target system and pass the Kickstart file location as a boot parameter. For example:
linux ks=http://path/to/ks.cfg
The system will proceed with the installation automatically using the settings specified in the Kickstart file. The system will also be registered with Red Hat Subscription Management.
How is the Red Hat Enterprise Linux storage connected?
Red Hat Enterprise Linux (RHEL) can connect to storage using various technologies and protocols. The storage connectivity in RHEL typically involves the following methods:
- Direct -Attach Storage (DAS)
- Storage-Area Network (SAN)
- Network-Attached Storage (NAS)
- iSCSI (Internet Small Computer System Interface)
- Local Storage
Related Articles
- How to Install Debian 12 (Bookworm) [A Complete Guide]
- How to Install Kali Linux [Step by Step]
- How to Install Ubuntu [Step by Step]
- How to Install Ubuntu Server?
- How to Install Kubuntu [A Step-by-Step Guide]
- How to Install Lubuntu [Step-by-Step]
- How to Download & Install Xubuntu [Easiest Guide]
- How to Install Linux Mint 21.2 Victoria [Easy Guide]
- How to Install Zorin OS 16 [Easiest Guide]
- How to Install Fedora [A Step-by-Step Tutorial]
- How to Install CentOS 9 [Easiest Guide]
<< Go Back to Linux OS Single Installation | Linux OS Installation Guide | Learn Linux Basics
FUNDAMENTALS A Complete Guide for Beginners


