A shared folder refers to a directory that has been configured to be accessible and writable by multiple users or across multiple systems. It’s a designated directory that allows different users or machines to read from and write to its contents, facilitating easy sharing of files and data. However, Ubuntu offers different methods to retrieve files, transfer data, or collaborate with another operating system such as Windows.
In this article, I will explore different approaches how to access shared folders in Ubuntu and having a seamless sharing experience.
Watch How to Access Shared Folder in Ubuntu
2 Methods to Access Shared Folders in Ubuntu
With the help of a graphical interface and command line tools, you can access shared files in Ubuntu. Here’s how to use them:
1. Using GUI (Nautilus) to Access Shared Folder in Ubuntu
Nautilus is regarded as the official file manager for GNOME desktop environment or default desktop environment. It provides a graphical user interface (GUI) to navigate and manage files and folders in Ubuntu. To use Nautilus:
-
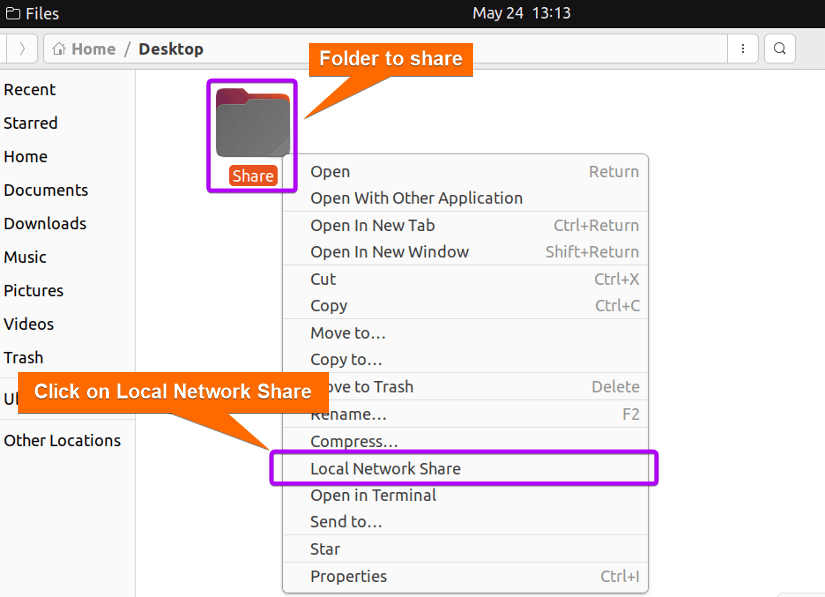
Choose a folder you want to share with other operating systems such as Windows. I have chosen the folder called Share in my Desktop for this purpose.
-
Afterwards, right-click on Share folder and a popup menu will appear and click on Local Network Share.

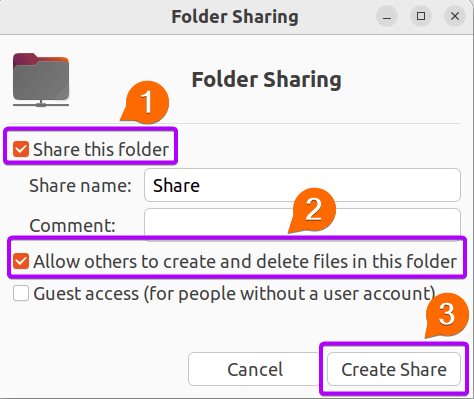
- A dialogue box will appear on the screen as in the image below. Select Share this folder, Allow others to create and delete files in this folder, and then press Create Share.

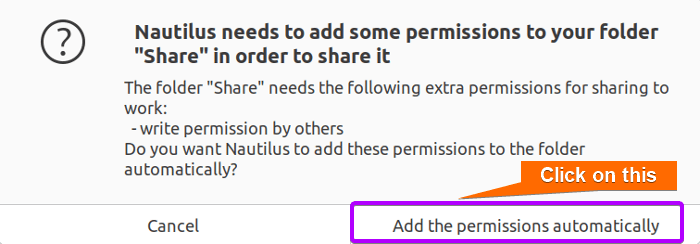
- Now Nautilus will require you to press Add the permissions automatically to finally prepare the folder for sharing.
 You will see that the folder Share is ready to access.
 The green share icon at the bottom-right corner of the folder indicates that you can share this folder’s contents.
 -
Now you can create files in this folder. I have saved an image, Photos.jpeg and created a folder, Files to share within the Share directory.

- Now go to the Ubuntu terminal and run the following command.
hostname -IIt will obtain IP address of the current Linux system.
 It is visible that 192.168.153.128 is the IP address of my Ubuntu system.
 -
Now go to This PC in Windows and type IP of your Linux system and the name of the folder, Share in the address box.
\\192.168.153.128\Share
From the above image, it is clear that I can view the contents of the “Share” folder from Windows and have full control over these files.
 You will see that the folder Share is ready to access.
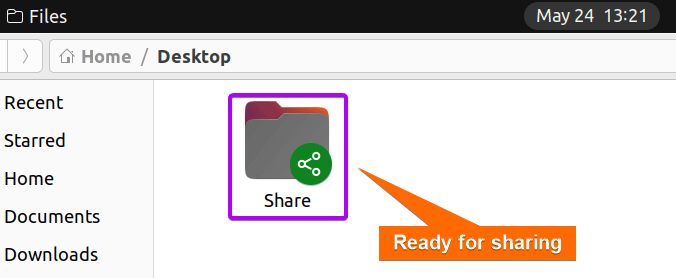 The green share icon at the bottom-right corner of the folder indicates that you can share this folder’s contents.
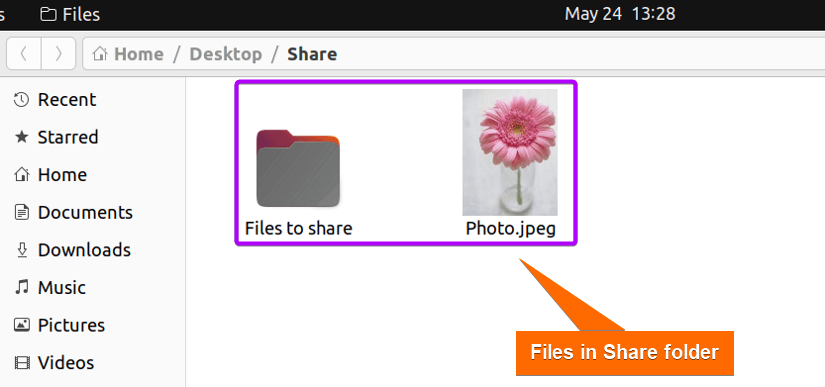
 It is visible that 192.168.153.128 is the IP address of my Ubuntu system.
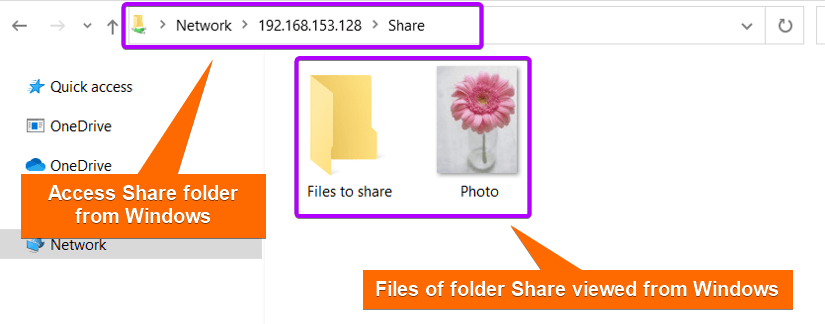
Read More: Install, Configure and Connect Samba on Ubuntu Using GUI
2. Using Ubuntu Command-line Tools to Access Shared Folder
To have remote access over a network or customize command scripts according to your sharing requirements, command-line tools will be a perfect choice. Follow the steps to use CLI tools to access the shared folder:
Step 1: Enable Sharing Options in Windows
To enable sharing options in Windows:
-
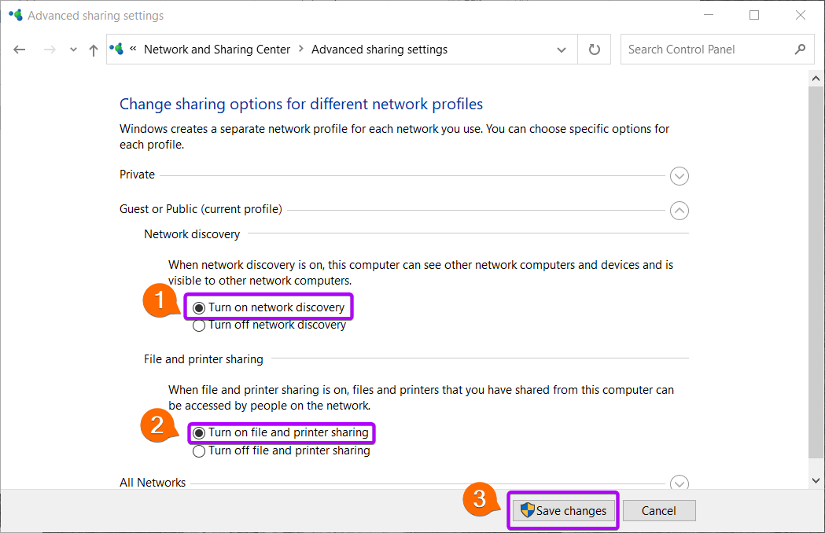
Open the Control Panel and go to Network and Internet > Network and Sharing Center.
-
Click on Change advanced sharing settings at the left side of the page.
- Then, turn on network discovery, file and print sharing, and click Save changes.


Read More: How to Share Files between Linux and Windows Dual Boot [3 Methods]
Step 2: Enable Sharing Options for a Folder in Windows
To enable sharing options for a folder in Windows:
-
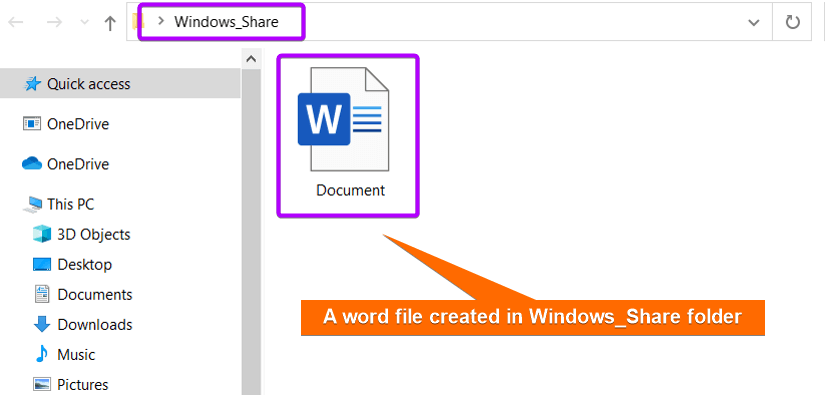
Create a folder, let’s say Windows_Share on Windows, and save a file, say Document in it.

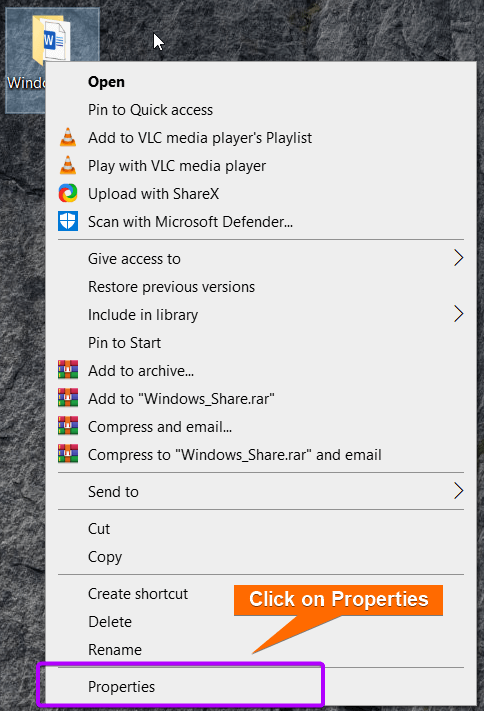
- Afterward, right-click on Windows_Share and go to Properties.

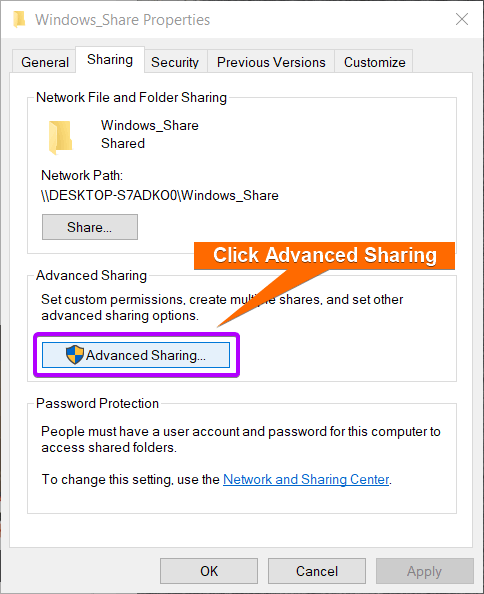
- Navigate to Sharing > Advanced Sharing.

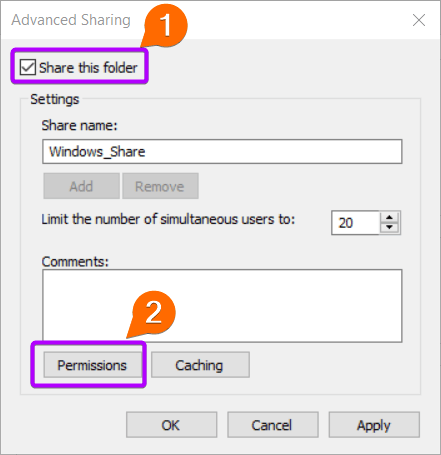
- Select Share this folder and then click on Permissions.

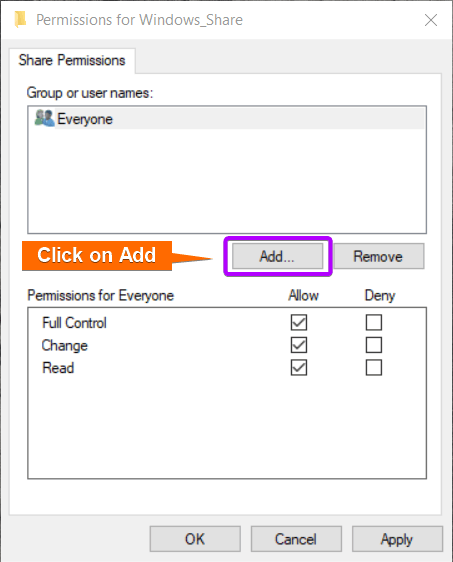
- Click on Add if you prefer only the account “User” to be able to share the Windows_Share folder. Otherwise, you can select Everyone to give anyone access to your folder.

- Then put in the name of your desired user account and click OK.
 Now, you will be redirected to Permissions for Windows_Share. Enable Full Control, Change, and Read permissions for your desired account. You can enable these options for anyone by selecting Everyone.
 -
Click OK to save these changes.
As you can see, User is my Windows user account which has all three permissions of the shared folder, Windows_Share. -
Now, go to Security and check the recent changes for your specified account for sharing the folder. Click on Close to close Windows_Share Properties.
 Now, you will be redirected to Permissions for Windows_Share. Enable Full Control, Change, and Read permissions for your desired account. You can enable these options for anyone by selecting Everyone.
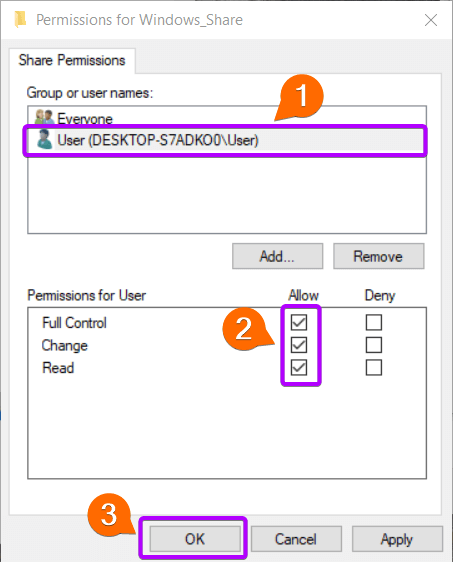 As you can see, User is my Windows user account which has all three permissions of the shared folder, Windows_Share.
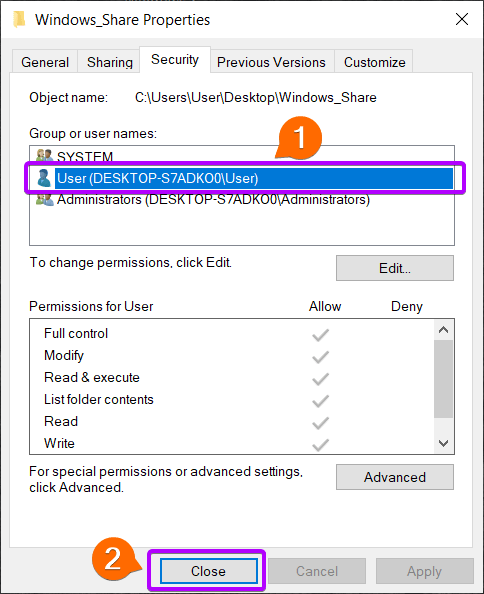
Read More: How to Share Files between Linux and Windows
Step 3: Access Shared Folders in Ubuntu
Two prominent command line tools for accessing shared folders are cifs-utils package and smbclient package. The cifs-utils package has more comprehensive features for managing shared folders. On the other hand, the smbclient tool is a lightweight utility for basic sharing operations with folders.
Case 1: Using “cifs-utils” to Access Windows Shared Folder in Ubuntu
CIFS or Common Internet File System is a tool that contains utilities that help to mount and manage SMB/CIFS share files, printers, or serial ports over a network. It helps to mount SMB shares to local directories. Therefore, this package will build a bridge between Windows and Ubuntu for the shared folder, Windows_Share. Here’s how to use it:
-
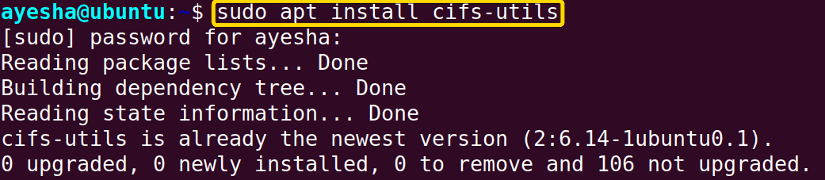
Install the “cifs-utils” package using this command below:
sudo apt install cifs-utils
- Now you need to create a directory that will serve as a mount point or be linked to the shared folder, Windows_Share on a Windows machine.
mkdir /home/ayesha/Desktop/cifs_shareThis command will create cifs_share directory in Desktop will now be able to mount the shared folder, Windows_Share.
-
Lastly to mount a shared folder run the following command:
sudo mount -t cifs //192.168.0.105/Windows_Share /home/ayesha/Desktop/cifs_share -o username=UserEXPLANATIONHere,-t cifsspecifies that CIFS (Common Internet File System) needs to be mounted.192.168.0.105is the IP address of the Windows system./home/ayesha/Desktop/cifs_shareindicates the absolute path of cifs_share folder in Desktop of my Linux system.-ospecifies the options to be used when mounting a file system, in this case, specifies the username option. As you can see in the preceding image, I was prompted to enter my password for my Windows user. Moreover, my Windows IP is 192.168.0.105 and the user account that has the control of shared folder is User.
-
Now navigate to Files >Desktop > cifs_share.
-
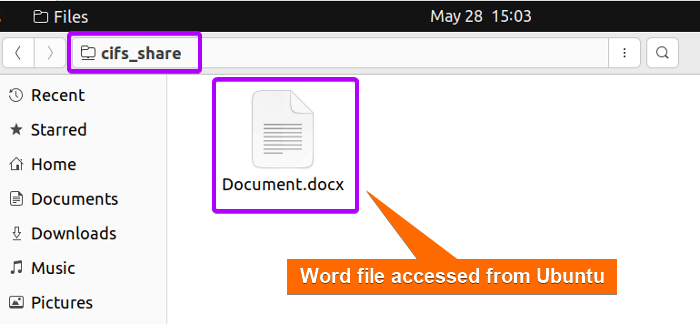
Open cifs_share folder and you can view the word file, Document from Ubuntu.
 The image above shows that the word file, Document which was created in Windows can now be accessed from Ubuntu.
 As you can see in the preceding image, I was prompted to enter my password for my Windows user. Moreover, my Windows IP is 192.168.0.105 and the user account that has the control of shared folder is User.
 The image above shows that the word file, Document which was created in Windows can now be accessed from Ubuntu.
Case 2: Using “smbclient” to Access Windows Shared Folder in Ubuntu
smbclient is a command-line tool that provides a client interface to access and manage resources on SMB (Server Message Block) servers. The smbclient tool offers various tools to browse, download and manage files on SMB shares. Follow the steps to access shared folders in Ubuntu using smbclient:
-
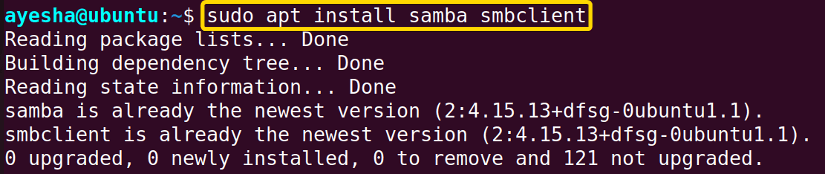
To install smbclient package, execute the command below:
sudo apt install smbclient
- Now to gain access to the Windows folder, Windows_Share in Ubuntu terminal, execute the following command.
smbclient //192.168.0.105/Windows_Share -U User It is clear from the above image, that the Windows account, User is acting as the SMB server and I had to enter my password to authenticate this account.
 -
To better understand this accessing method, let’s list its contents with the following command.
ls You can see in the preceding image that the previously created word file, Document of Windows_Share folder is now displayed.
 It is clear from the above image, that the Windows account, User is acting as the
 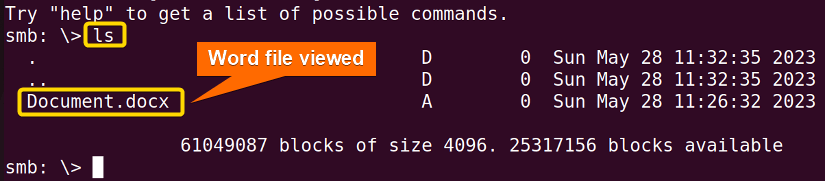 You can see in the preceding image that the previously created word file, Document of Windows_Share folder is now displayed.
Read More: How to Access Samba Share from Windows [2 Methods]
Conclusion
An effective sharing process between Ubuntu or any other operating system like Windows should include easy access to shared folders in Ubuntu. This article demonstrated three simple ways to accomplish this task. However, the best method for accessing folders ultimately depends on your preference for a graphical interface such as Nautilus or a command-line interface like cifs-utils and smbclient command.
People Also Ask
What network protocols can I use to access a shared folder in Ubuntu?
SMB/CIFS is the most widely used file-sharing protocol for Windows, Linux, and macOS systems. Besides this, some other network protocols are NFS, SSHFS, and FTP or SFTP.
How do I mount a CIFS share from Windows Command Line?
Type the command net use Z: \\computer_name\share_name /PERSISTENT:YES in the command line window of Windows. Z: represents the drive where you want to assign your shared folder.
How does CIFS authentication work?
CIFS is based on a client-server model. The client sends an authentication request to the server and the server asks for user credentials based on the authentication protocol. Afterward, the client sends the response back to the server which it verifies. Hence if the credentials match, a secure connection is established between client and server.
How does SMB protect data when sharing files?
SMB Encryption is used to protect data which provides end-to-end encryption. Encryption protocols like Transport Layer Security (TLS) or Secure Sockets Layer (SSL) make it difficult to intercept or decipher data.
How to unmount a shared folder?
To unmount a folder, especially from the default folder for mounting, mnt, you can use the command sudo unmount /mnt/<folder-name>.
Related Articles
- How to Configure NFS Server in Linux? [5 Steps]
- How to Install and Configure Samba Server in Ubuntu? [4 Steps]
- How to Install, Configure and Connect Samba Client on Ubuntu
- How to Copy File from Windows to Linux Using SSH [2 Methods]
FUNDAMENTALS A Complete Guide for Beginners


