VirtualBox is the world’s most popular open-source virtualization software. It allows you to create and run different virtual machines in your host operating system. Running a virtual machine on your system provides you with a flexible and convenient way of using different operating systems without altering your primary operating system. Whether you’re a newcomer to Linux or an experienced user, creating a virtual Ubuntu environment can be a valuable tool for learning and experimentation.
There are various ways to install Ubuntu:
- Replace the current OS with Ubuntu.
- Dual-boot installation of Ubuntu.
- Install Ubuntu on Virtualbox.
- Install Ubuntu on VMware Workstation.
- Install Ubuntu on VMware Player.
In this article, I will show you how you can install Ubuntu on VirtualBox.
Requirements to Install Ubuntu on VirtualBox
- Minimum 4 GB RAM.
- Minimum 8.6 GB free storage (30 GB+ recommended).
- At least 2 GHz dual-core processor.
- Minimum screen resolution of 1024×768.
- Active internet connection.
Method 1: Install Ubuntu Manually
Installing Ubuntu manually in VirtualBox provides a way to create a customized virtual environment with a hands-on approach. It allows users to fine-tune every aspect of the installation. It is also important for testing and development.
This method is ideal for people who need precise control over software installation and system setup. It ensures a fine-tuned virtual Ubuntu system aligned with an individual’s preference and requirements. This makes it a preferred choice for people who want a personalized experience.
Step 01: Install Virtualbox
First of all, to install Ubuntu in VirtualBox, you need to have VirtualBox installed. To install VirtualBox follow these step by step instructions below:
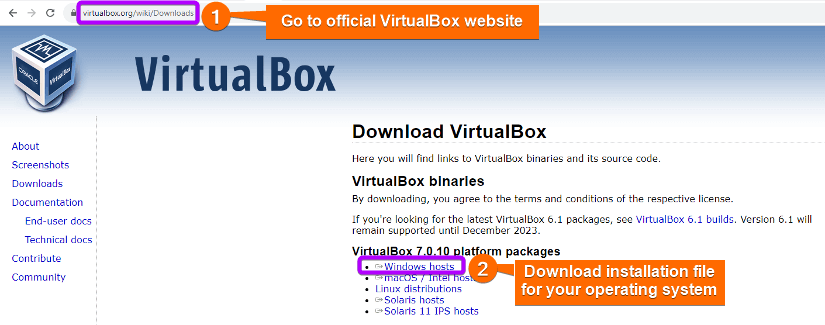
- To begin, open your web browser and visit the official VirtualBox website.
- From the side menu select Downloads. Here you will see the latest version of the app. Click on the “Windows hosts” link to initiate the download.

- You need to have the virtualization feature enabled from your BIOS. To enable CPU virtualization, first, reboot your computer. Then, while your PC is rebooting, keep pressing the key specified for opening the BIOS. You can find the key on your manufacturer’s website or it may be displayed on the screen during startup. Now, check for the virtualization technology in the BIOS menu and enable virtualization. After that, save changes, exit from BIOS, and Reboot your PC. Now you will proceed to use VirtualBox in your system.
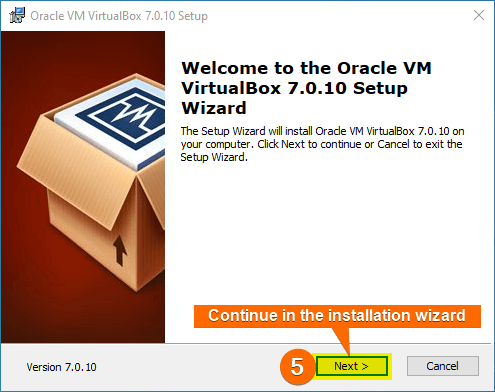
- Change your directory, locate the downloaded installer file, and double-click on it to begin the installation. Click on “Next” in the installation wizard.


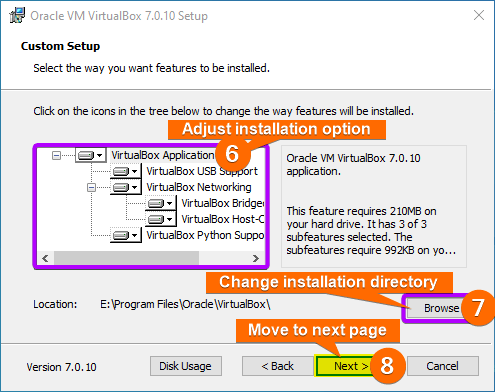
- Now, you will be able to customize the installation from the prompted window. Select the specific components you want to install. You will also be able to change the installation directory from this window.
- After finalizing your choice, click the Next button.
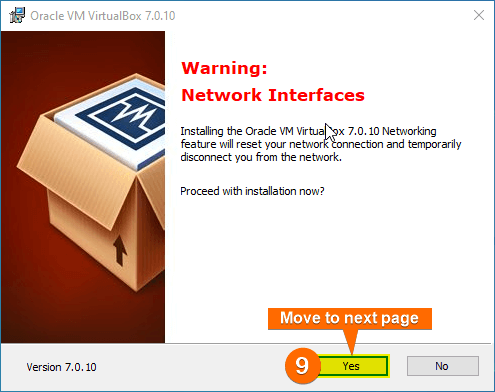
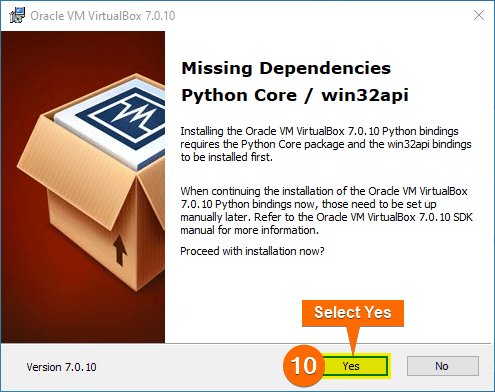
- Click “Yes” on the Network Interfaces window and then on the Missing Dependencies window.
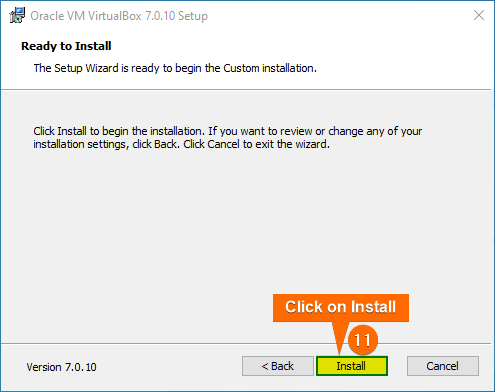
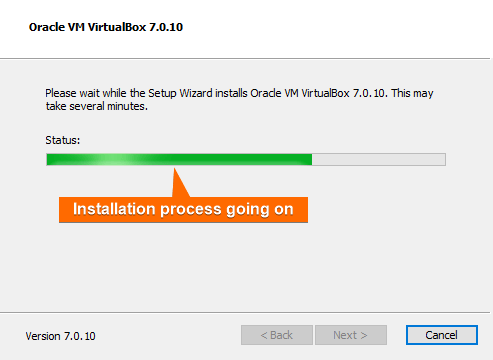
- Now, click on “Install” to initiate the installation.

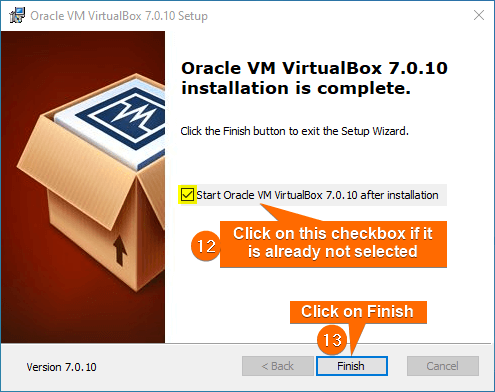
- After, completing the installation, click “Finish” to exit the installation wizard. Make sure you have the Start VirtualBox checkbox checked. It will automatically open VirtualBox after closing the installer wizard.


Step 02: Download Ubuntu Image
You need to download the Ubuntu image first to use it in the VirtualBox. This Ubuntu image will serve as the foundation for your virtual machine, enabling you to explore the Linux world within VirtualBox securely. To download the Ubuntu image:
- Visit the official Ubuntu website’s download page.
- Select the Ubuntu version that suits your needs. Though in this guide, I am downloading the latest version, I will recommend you choose the latest LTS (Long Term Support) version for stability.
- The Ubuntu image will be downloaded to your system. Make sure you have a stable internet connection for a swift download.
Step 03: Create a New Virtual Machine
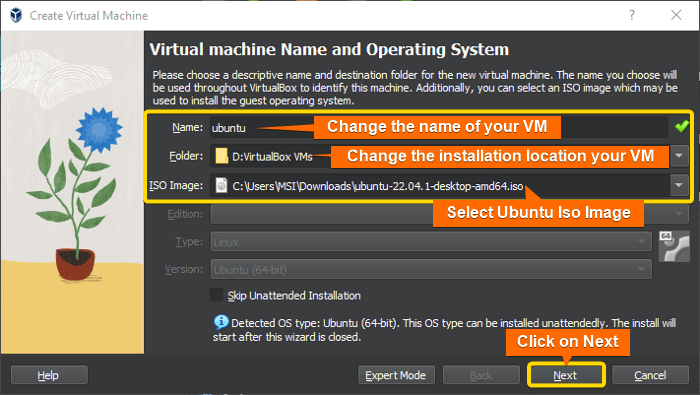
In this step, we will create a VM, give a name to that VM, set its location and iso image, and allocate hardware to the VM. To create a new VM:
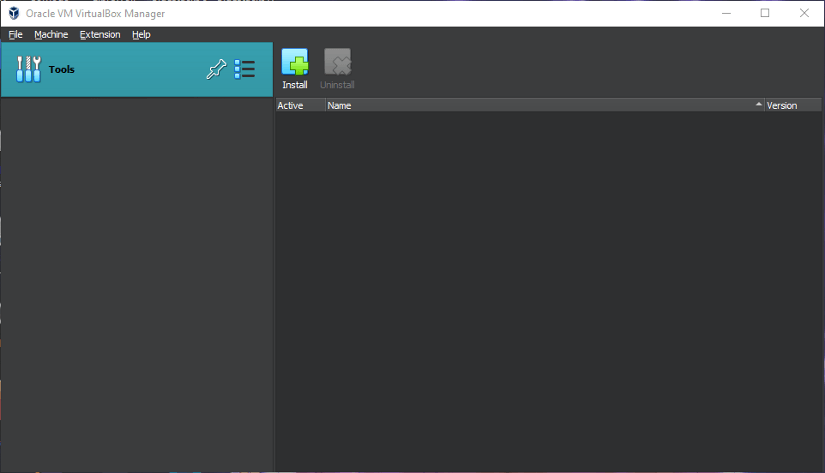
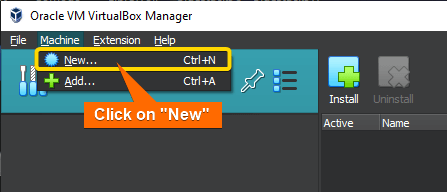
- Open VirtualBox, select “Machine” and click “New.”

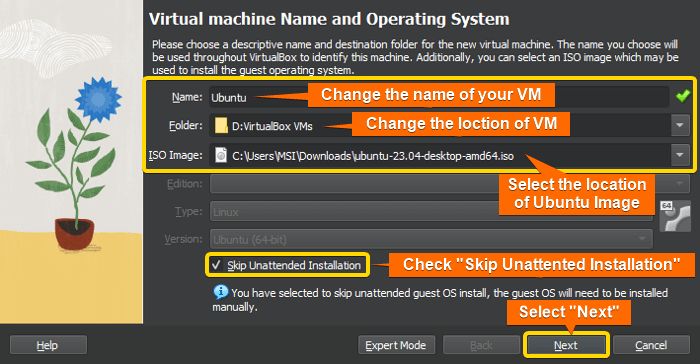
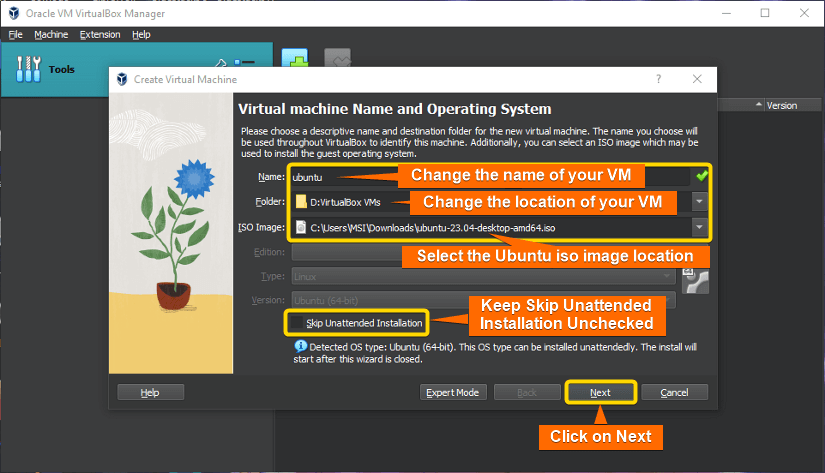
- Enter a name for your VM, I have used “ubuntu” here.
- You can change the location of your virtual machine. The virtual machine will be installed and stored there.
- Select the Ubuntu image you downloaded in the previous section. It will automatically detect the type and version of the iso image.
- Click on the checkbox to skip unattended installation. (I am using manual installation in this section; I will show unattended installation in Install Ubuntu Using Unattended Installation.)
- Click on “Next”.

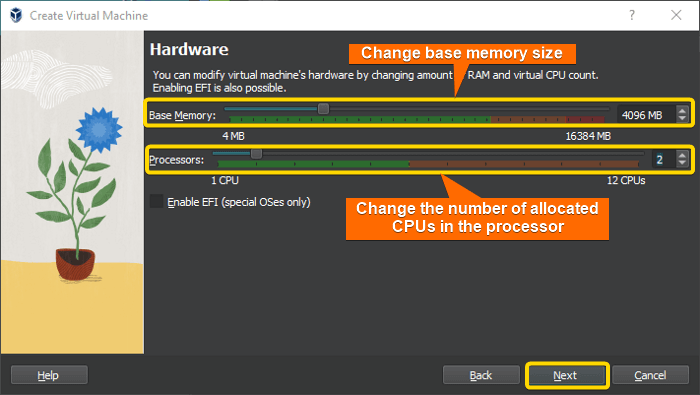
- Select the size of base memory (RAM) you want to allocate and select the number of CPUs you will use as processors for the virtual machine by dragging the slider or typing it in the right box. I recommend using at least 4GB (4096 MB) Base Memory and 2 CPU cores for the processor. You can select more or less according to your primary system availability. Click on “Next”.
 Warning: You can allocate more memory and CPU cores for a smoother experience, but make sure to stay in the green region of the slider.
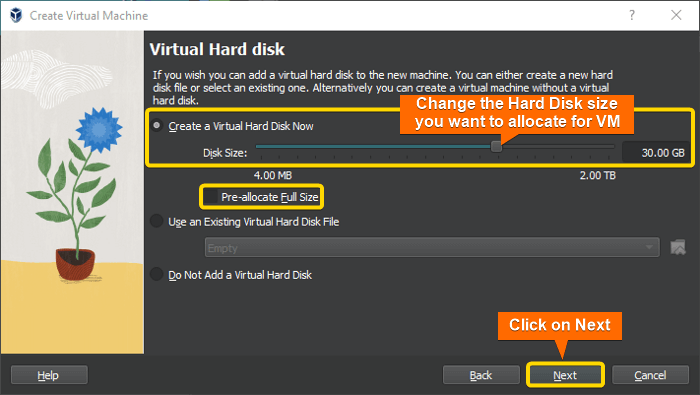
 - Select “Create a Virtual Hard Disk Now” and change the amount of storage you want to give to your VM. I recommend using 30GB of storage for the Ubuntu virtual machine Hard Disk. You can choose more or less according to your preference. If you want to pre-allocate whole storage then click on the checkbox “Pre-allocate Full Size”. Then the whole assigned store will be separated and will be reserved for the virtual machine’s usage. But if it is unchecked then the storage will be allocated dynamically according to your usage. For casual usage, pre-allocating the full size is not recommended.
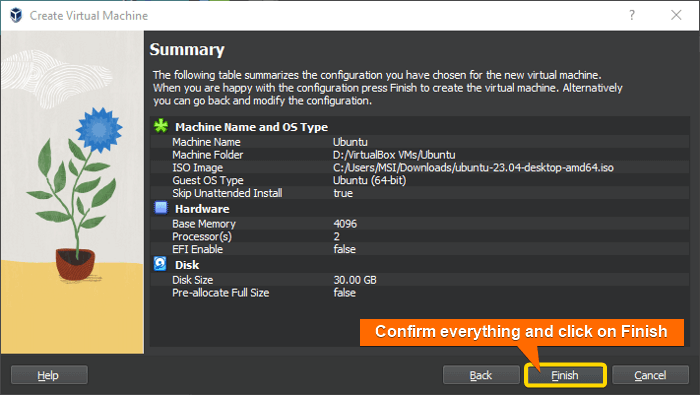
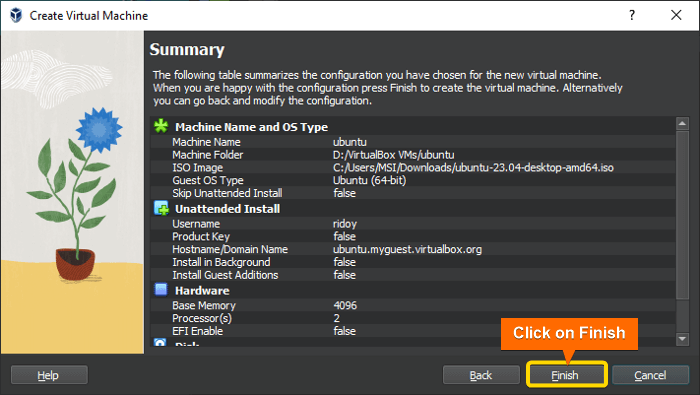
- Now, check all the details from the summary and if everything is as you wanted then hit “Finish”. Otherwise, go back and change those settings. After finishing this, you will be back to the VirtualBox Manager interface.
Step 04: Start the Newly Created Virtual Machine
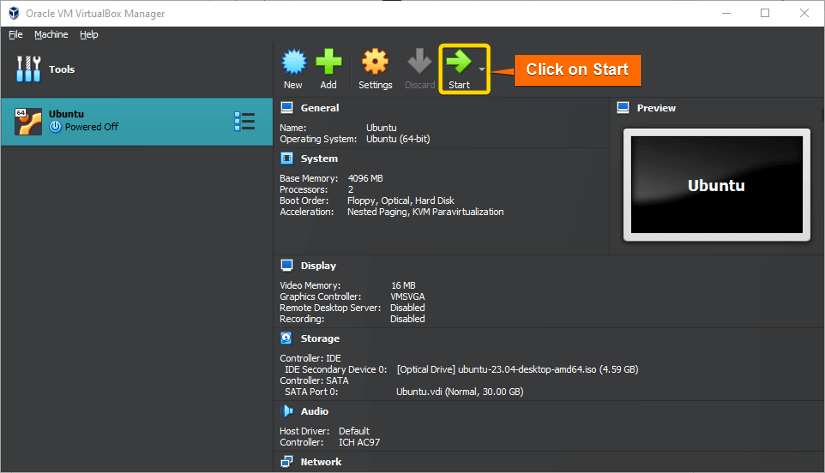
Click on “Start”. Make sure the Ubuntu virtual machine is selected. You will be prompted with a message saying “Powering VM up”. It will start the VM that you created.
Step 05: Pre-Installation Setup of Ubuntu
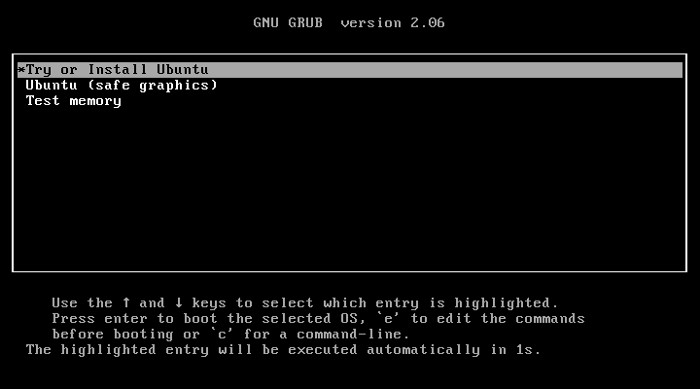
Now, you will select different preferences for Ubuntu installation as following:
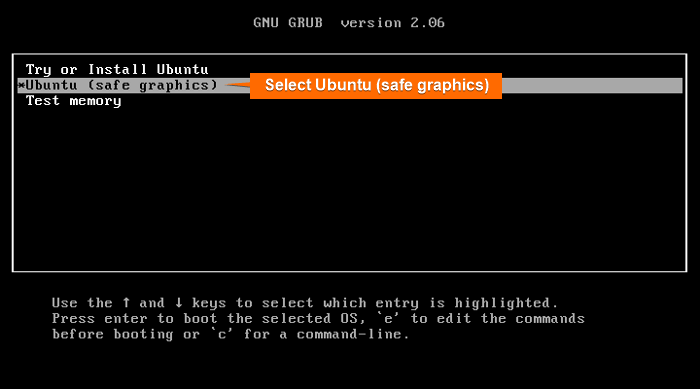
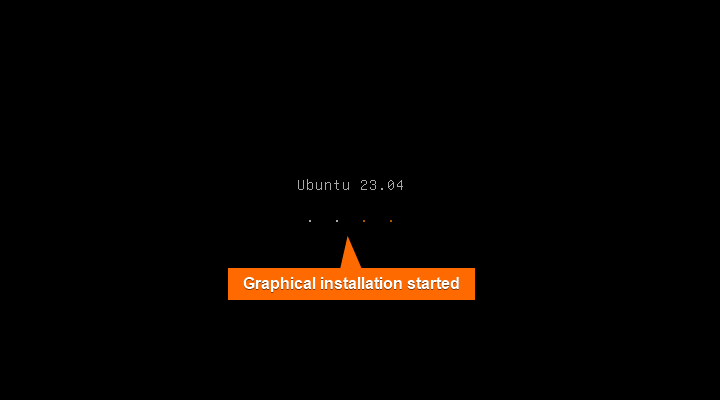
- Select “Ubuntu (safe graphics)” and press ENTER. Ubuntu graphical installation interface will open after some moments. VirtualBox will prompt 2 messages in the sidebar that it detected your mouse and keyboard.


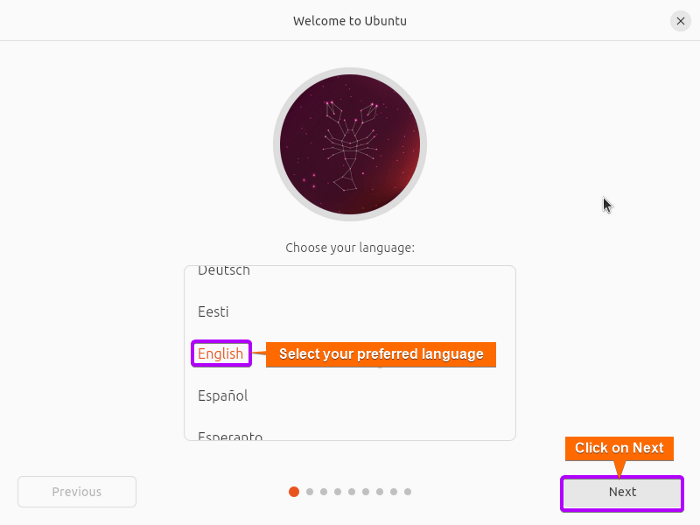
- Select your preferred language and click on Next.
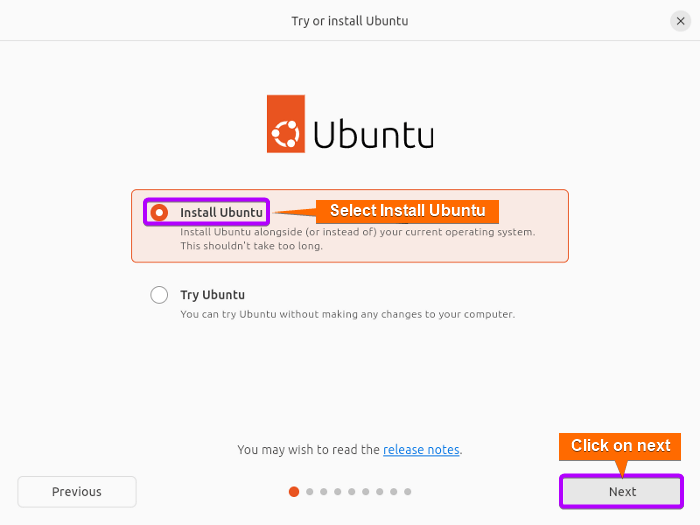
- Click on Install Ubuntu and then click on Next.
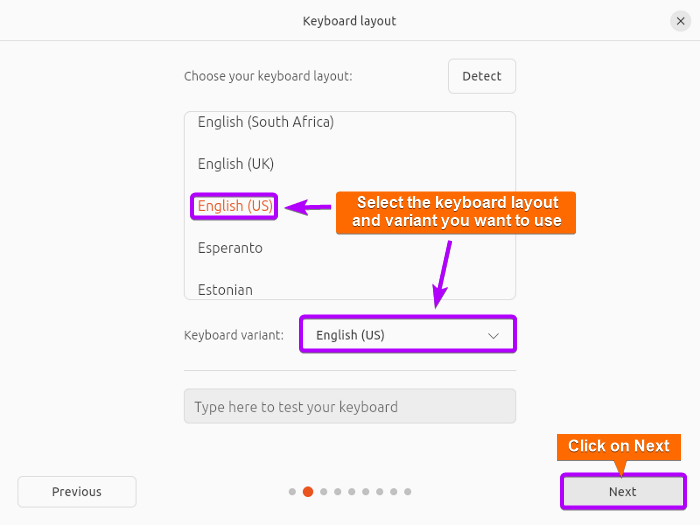
- Select your keyboard layout and keyboard variant. You can also try typing with your keyboard to check if it’s working properly. Now, click on Next.
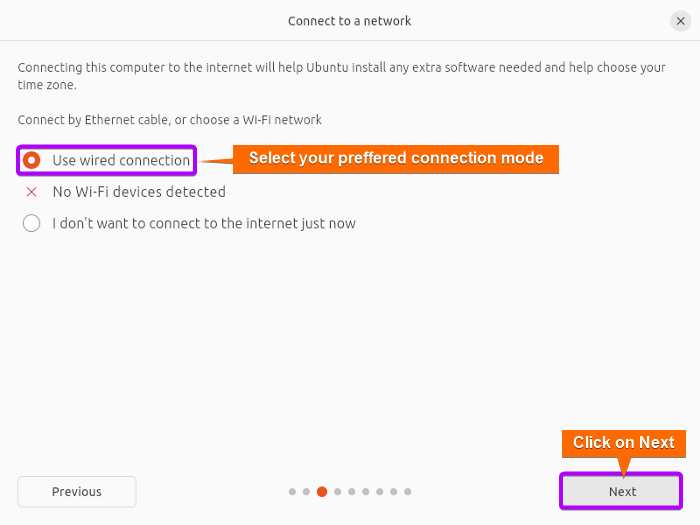
- Select your preferred connection mode and click on Next.
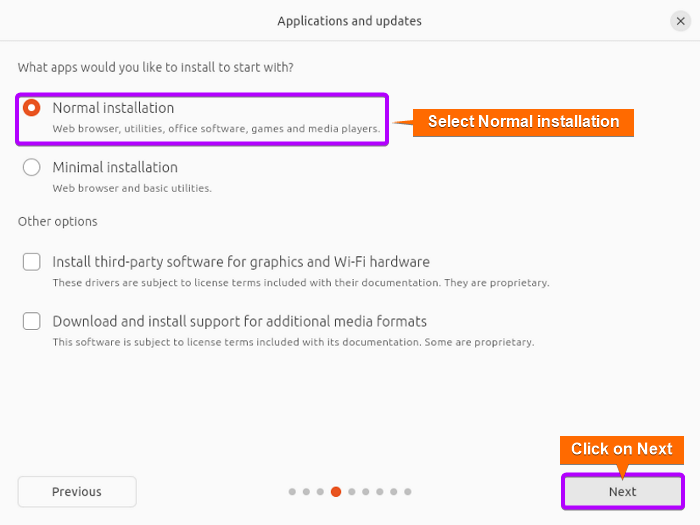
- Select your preferred installation type. Here I am selecting Normal installation. If you are short on storage, you can choose minimal installation as well. You can also select additional options to install additional proprietary software for Wi-Fi drivers, graphics drivers, media drivers, and some extra fonts. Again, click on Next.
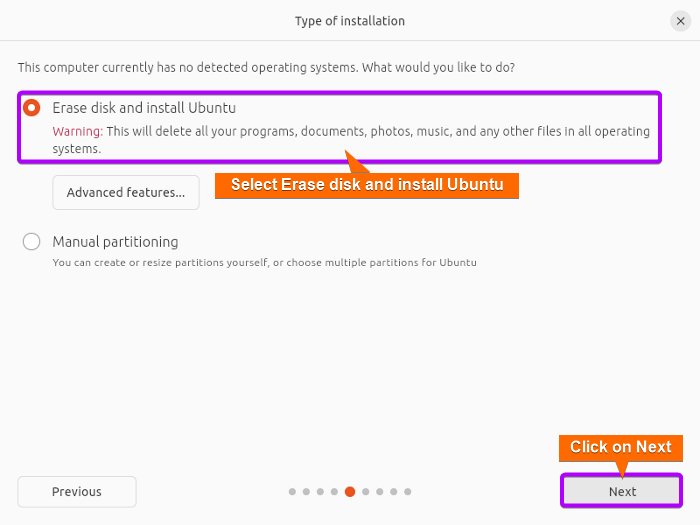
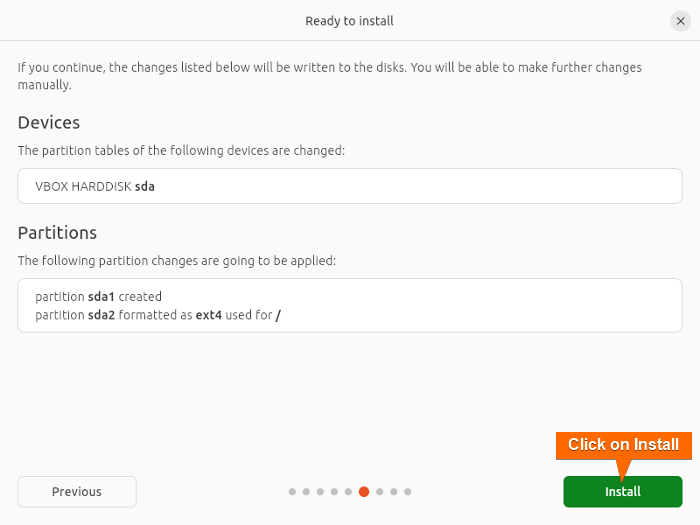
- Select Erase disk and install Ubuntu. You can also create partitions in the storage by selecting manual partitioning. After that, click on Next.
- Click on Install.
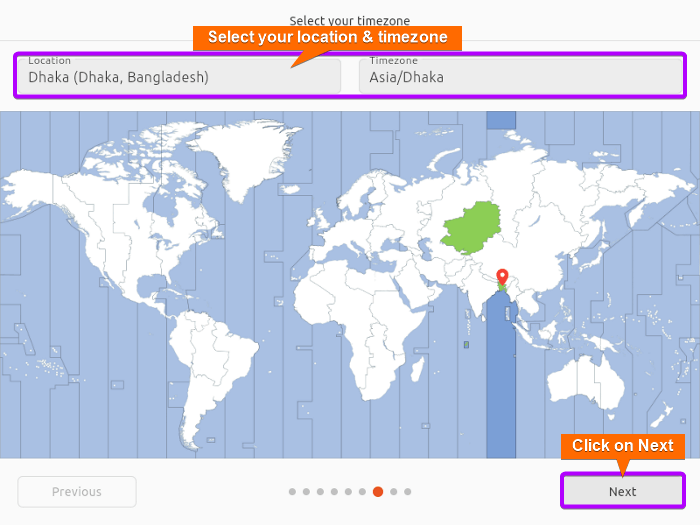
- Select your location and time zone. Then click on Next.
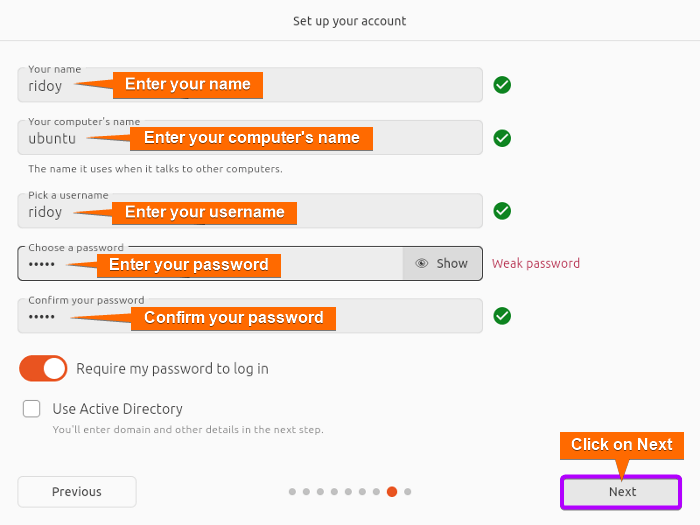
- Add your name, computer name, username and password. It is important to change the default credentials as keeping the default credentials will not give you sudo access. Also create a long and strong password with uppercase, lowercase, number, and special characters in it. After that, click on Next.
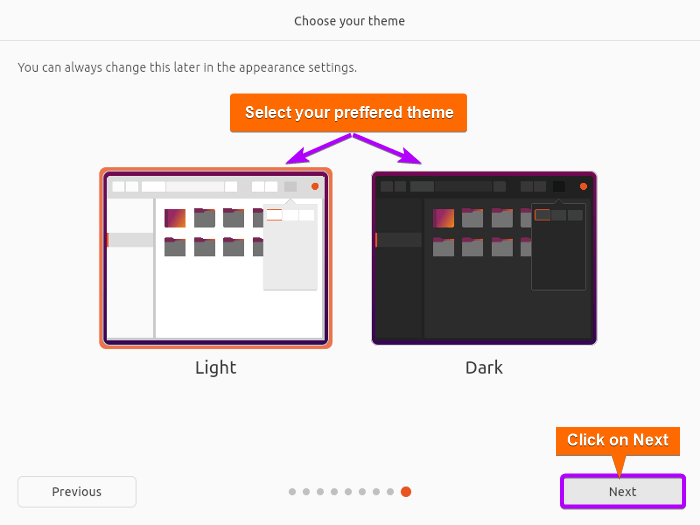
- Select your preferred theme and click on Next.
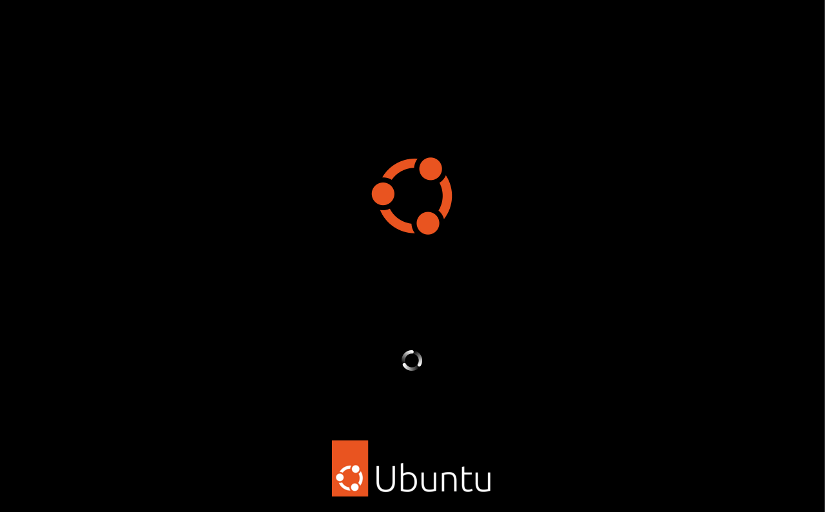
Step 06: Installation of Ubuntu
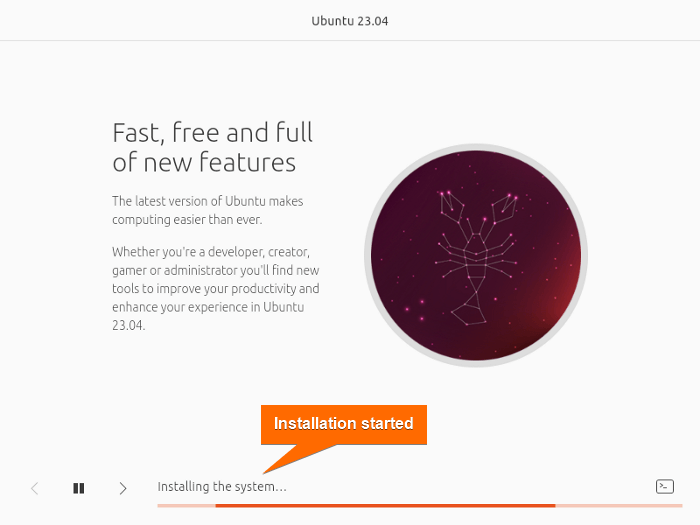
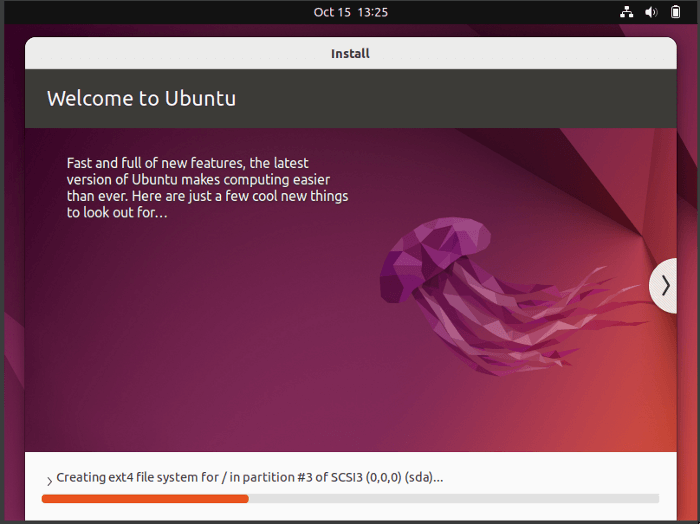
In this step, VirtualBox will start installing Ubuntu in the VM you created.
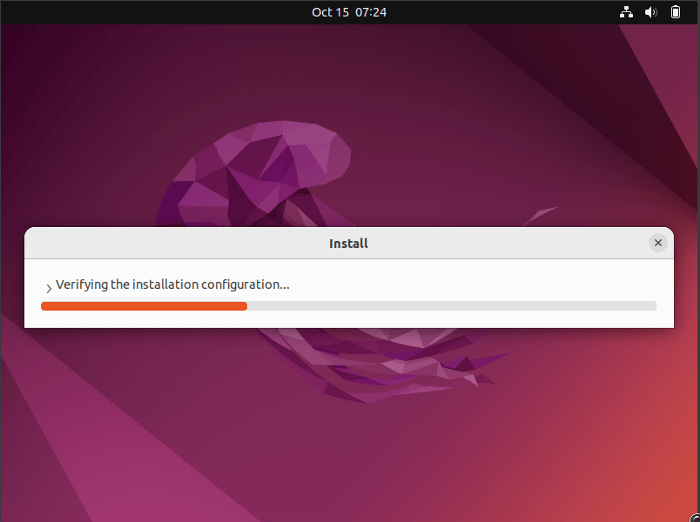
- After pre-installation setups are done the Ubuntu installation in VirtualBox will start. This process will take some time.
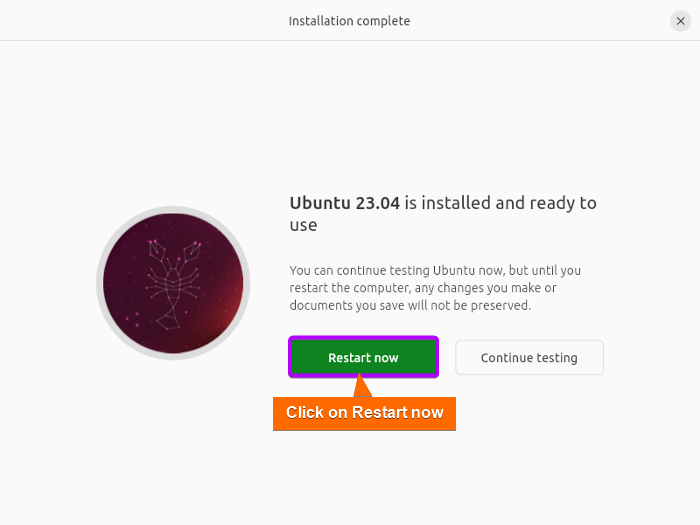
- After installation is completed, click on Restart now.
Step 07: Post-Installation Setup of Ubuntu
In this step, you will log in to the Ubuntu system and start using it. The post-installation setups are as follows:
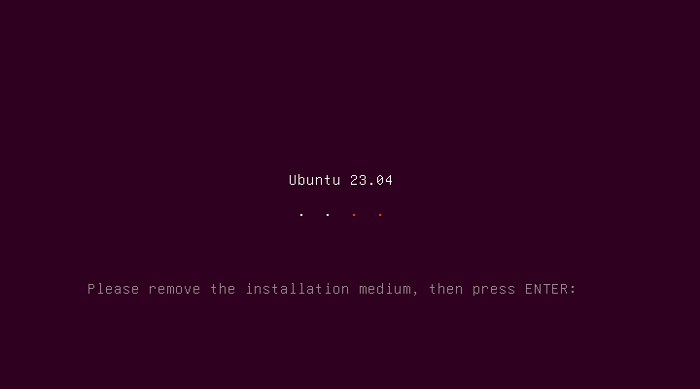
- While restarting you will be prompted to remove your installation medium. You can simply move the Ubuntu iso image to another location and then hit ENTER. Or, you can go to Devices> Optical Drives> Remove disk from virtual drive. It will remove the Ubuntu iso image medium. After that hit ENTER.
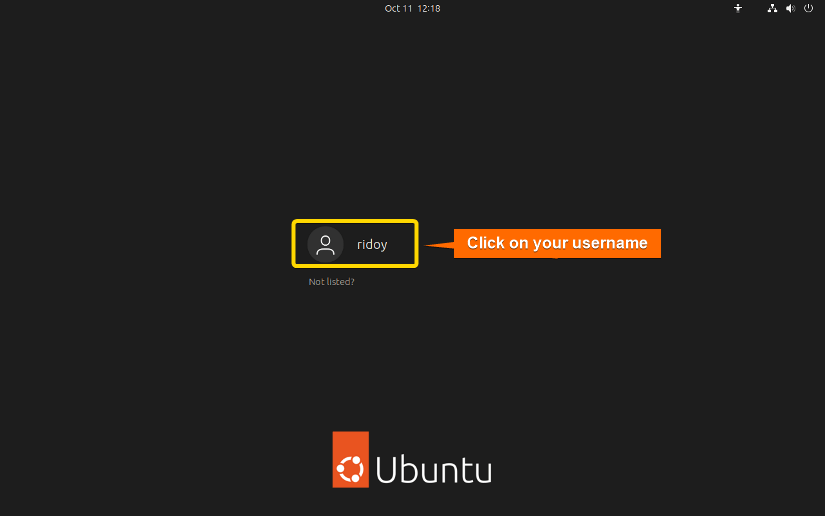
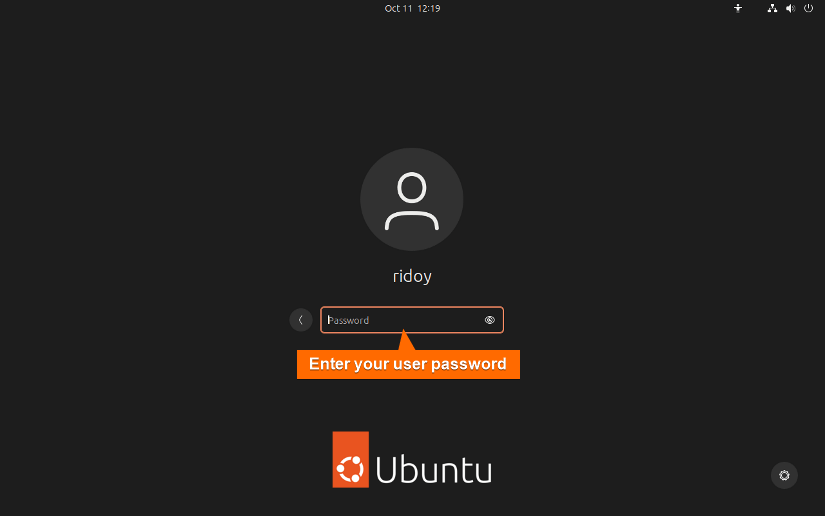
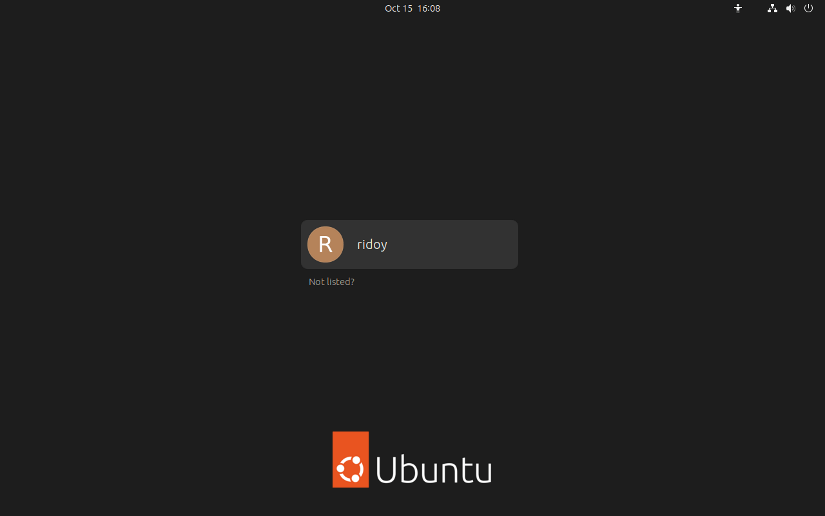
- Now click on the user account that you created and enter your password. Then hit ENTER.

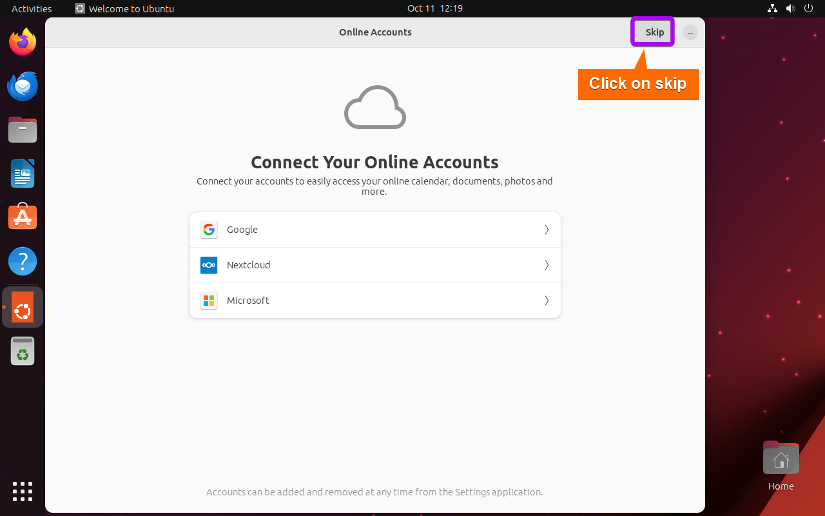
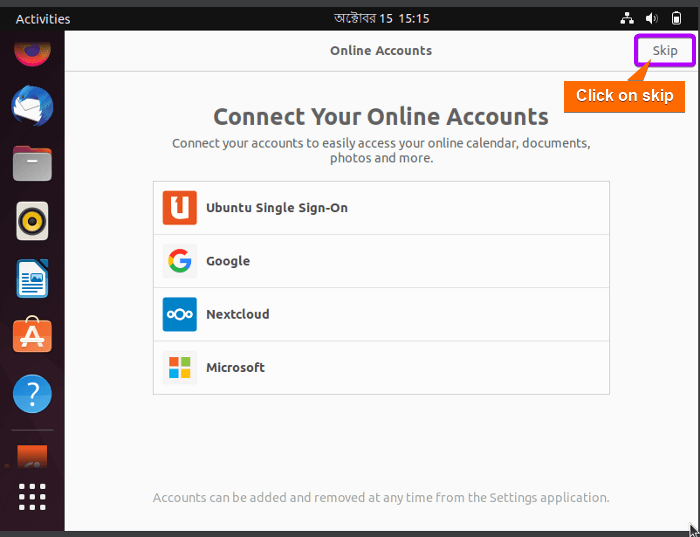
- You can connect your online accounts in this step and then move to the next step. I am skipping this step in this demonstration.
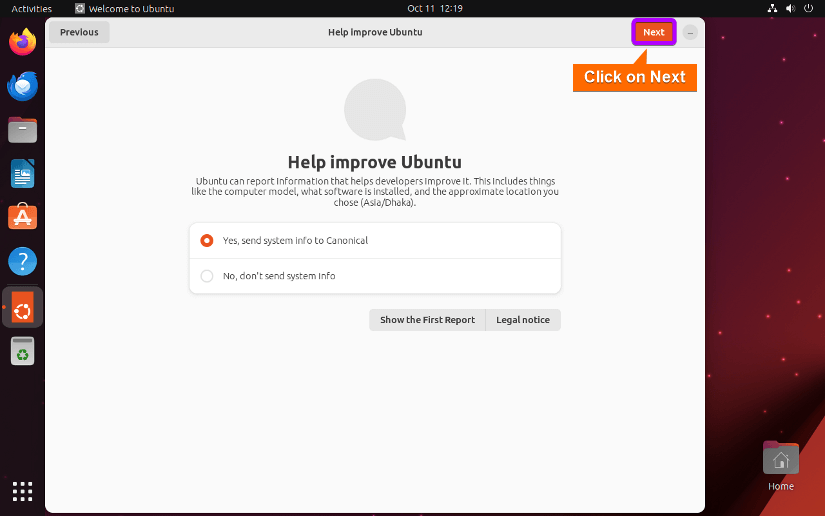
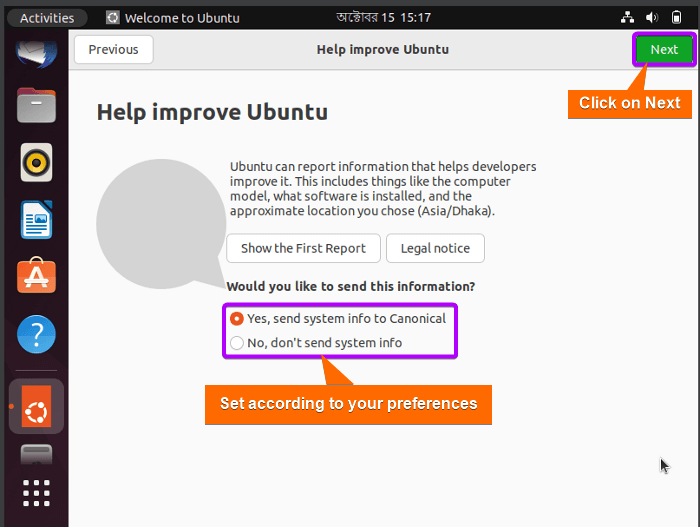
- Click on Next. If you do not want to share information with Canonical then select “No, don’t send system info” and then click on Next.
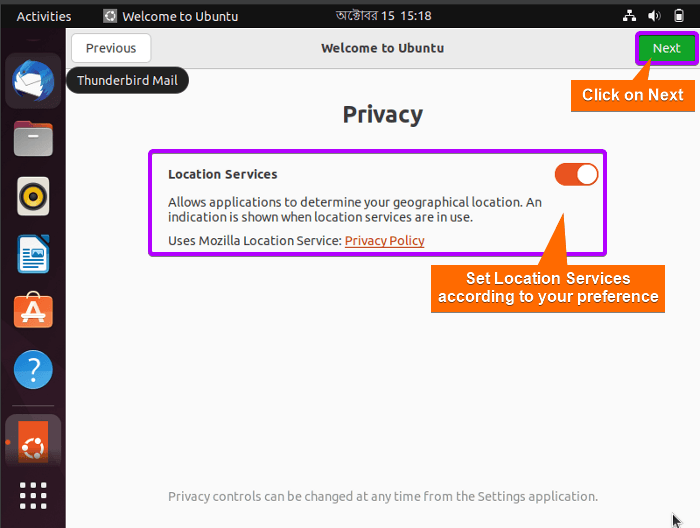
- Set Location Services according to your preference and click on Next.
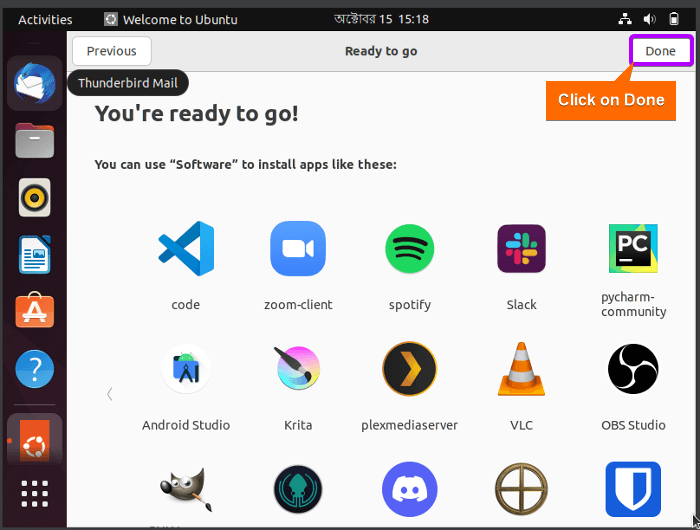
- Now, click on Done. You are ready to go. Explore Ubuntu to your heart’s content. If you face any serious issues, you can simply remove the virtual machine from VirtualBox and recreate the virtual machine again.


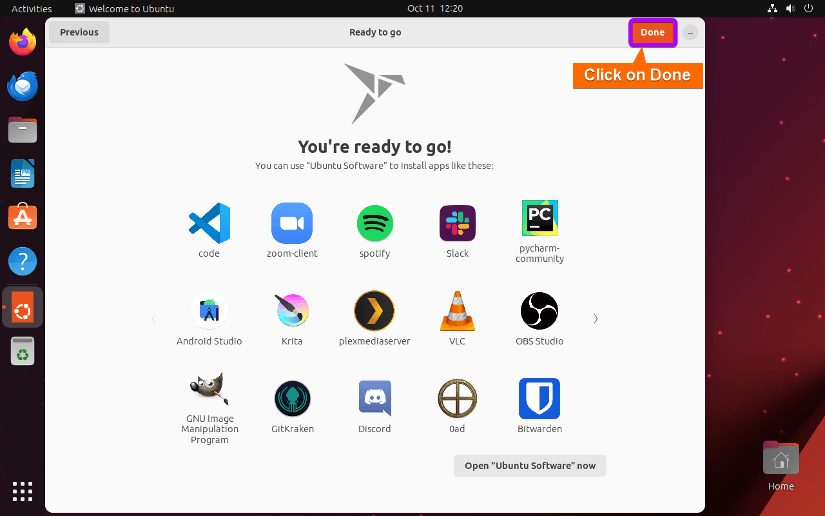
 You are ready to go. Explore Ubuntu to your heart’s content. If you face any serious issues, you can simply remove the virtual machine from VirtualBox and recreate the virtual machine again.
Step 08: Update Ubuntu
After you create a new VM, it is recommended to update your system and all packages to their latest stable release to have a smooth and hassle-free user experience. To update your system and system packages follow these step-by-step processes:
- Open the terminal and execute the following command:
sudo apt update && sudo apt upgrade
- Enter your sudo password when prompted.

- Press Y and then ENTER to update all packages in Ubuntu. All packages will be downloaded and updated to their latest stable releases.


Method 2: Install Ubuntu Using Unattended Installation
Unattended installation is a feature that allows you to install a guest operating system (OS) automatically, without any user interaction. Performing unattended installation of Ubuntu in VirtualBox can save time and simplify the setup process. Currently, the latest VirtualBox stable release version is 7.0.10, the latest Ubuntu release is 23.04 and the latest Ubuntu LTS (Long Term Support) release version is 22.04. As of this version, VirtualBox is not fully optimized for Ubuntu 23.04. So, in this section, I will show how to do the unattended installation for both Ubuntu releases.
For Ubuntu 23.XX
As unattended installation in VirtualBox for Ubuntu 23.04 is fully not optimized yet, instead of installing the full version of Ubuntu it only installs the “Try Ubuntu” version. Here’s the step-by-step process of doing that:
- First, select Machine and then click on New.
- Change the VM name and installation location. Then select the Ubuntu image from the ISO Image option and click on Next.
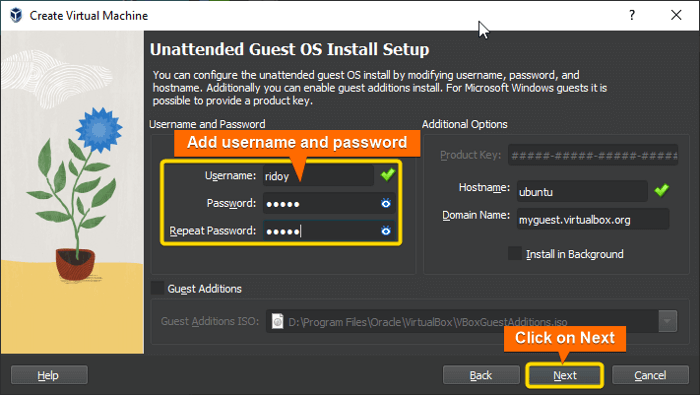
- Add a Username and Password according to your preference. Then click on Next.
- Allocate Base memory (RAM) and Processor’s CPU cores for your VM and click on Next.
- Allocate the hard disk size for your VM. You can also pre-allocate the full size of the hard disk if you want. Now, click on Next.
- Revise all the information. If there is any discrepancy in the details then go back and change that. Now, click on Finish.
- Now just sit back and relax. VirtualBox will automatically handle the entire installation process. However, instead of installing Ubuntu, VirtualBox will automatically set up “Try Ubuntu” for this version.

- After setup is complete, the Ubuntu interface will be opened. Click on Start Setup.
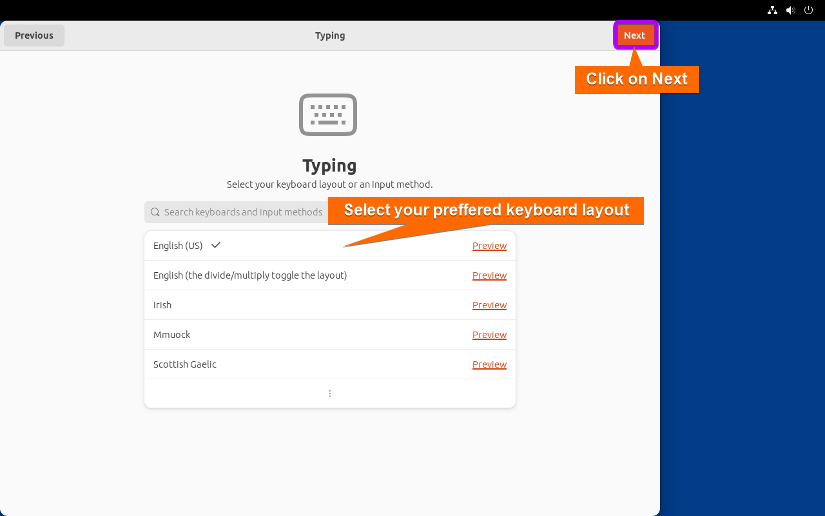
- Select your preferred keyboard layout and click on Next.
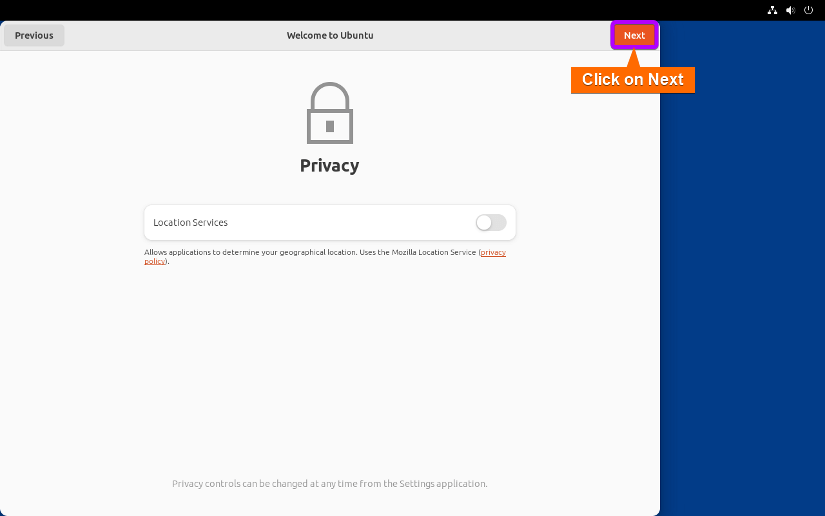
- Set Location Services according to your preference and click on Next.
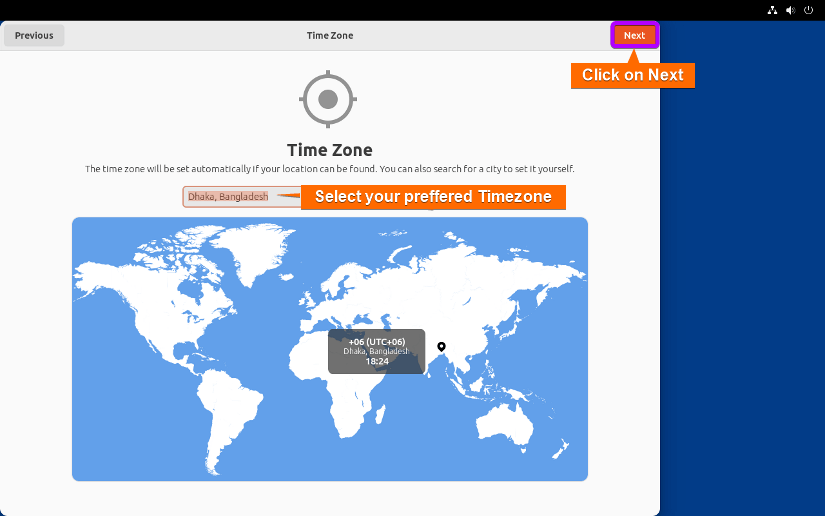
- Set your Time Zone and click on Next.
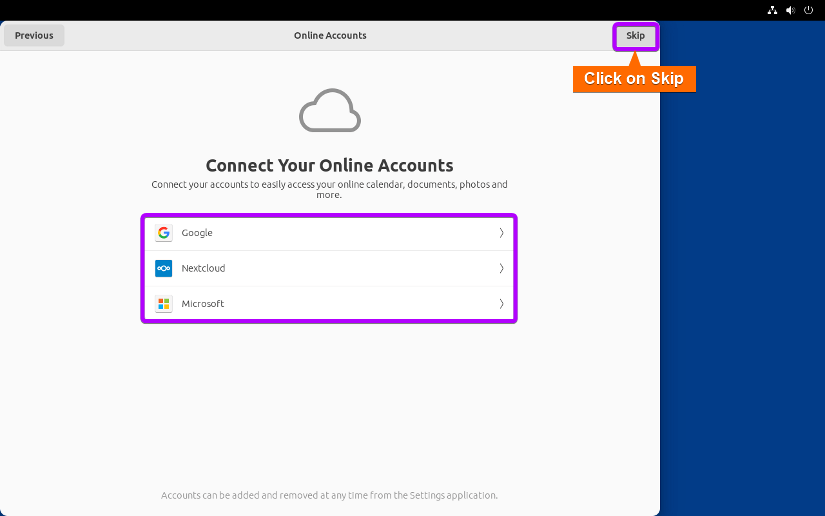
- Click on Skip. If you want you can connect your online account and move forward to the next step.
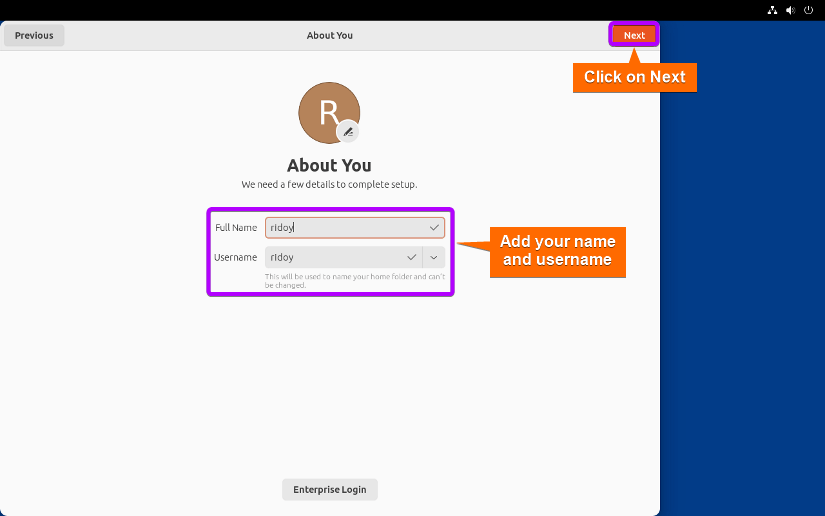
- Add your Full Name and Username and click on Next.
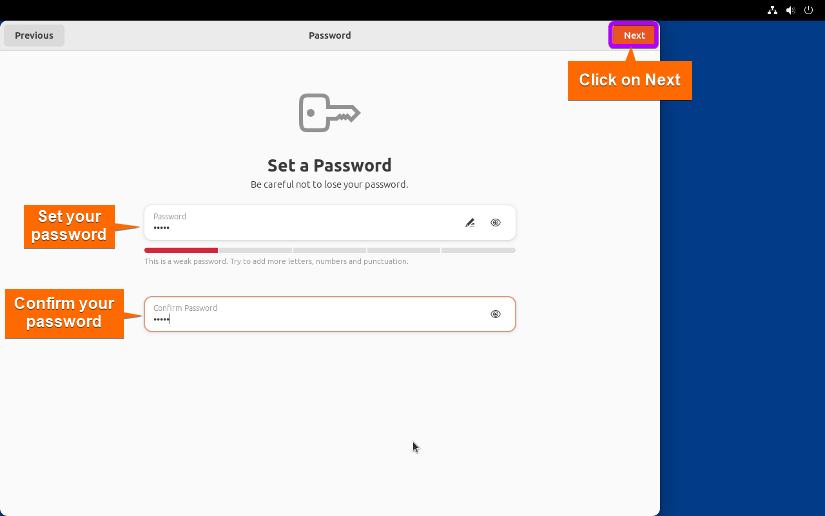
- Set your password and confirm it. Then click on Next.
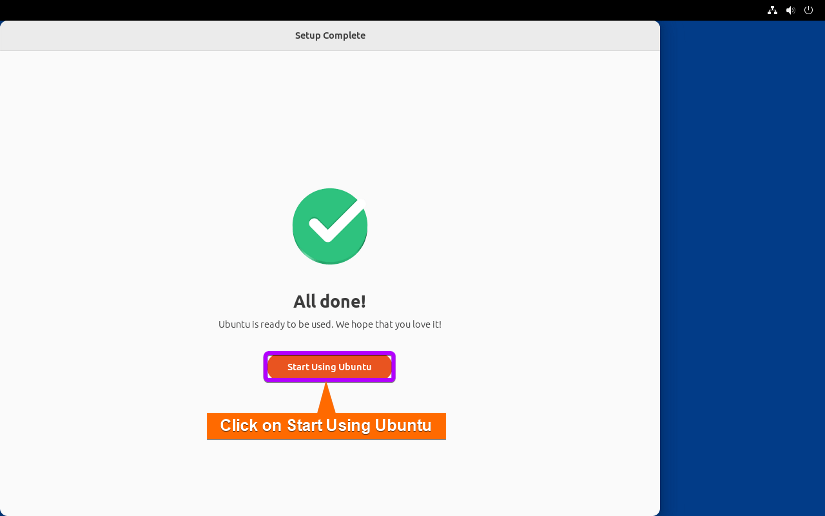
- All of the setup is complete. Now click on Start Using Ubuntu.
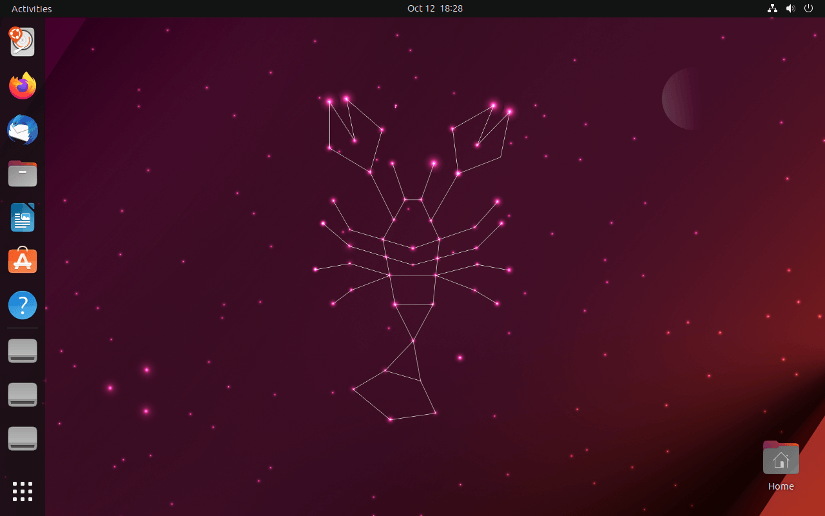
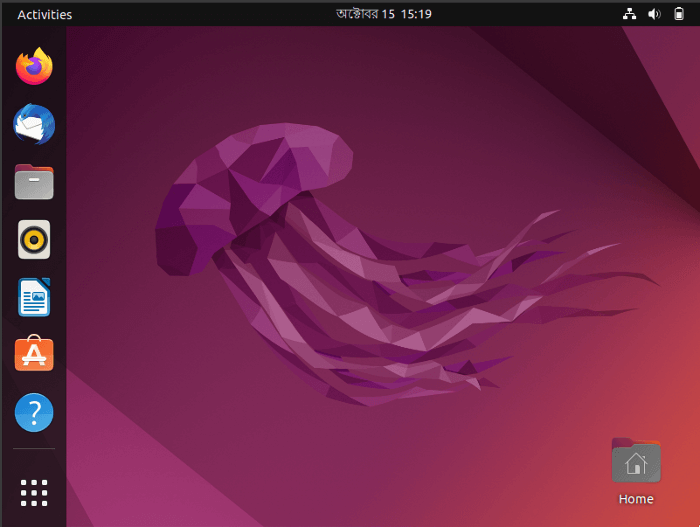
- Finally, the Ubuntu home screen will be opened now.


For Ubuntu 22.XX LTS
VirtualBox can automatically install this version of Ubuntu with its unattended installation feature. For unattended installation of Ubuntu in VirtualBox follow these step-by-step processes:
- You can follow the instructions from Install Ubuntu using the unattended installation for Ubuntu 23.XX for creating a new virtual machine and setting it up for unattended installation. Make sure to select the Ubuntu 22.XX image in the ISO Image.
- After finishing the setup, VirtualBox will automatically install Ubuntu VM in your system. The installation process will take some time. So just sit back and relax.


- After installation is completed, the VM will restart and will ask you to log in with the credentials you set during setup. Log in to your account.
- The first time you log in to your account, you will have to do some additional setup. Click on skip. You can also add your online account and then move to the next page.

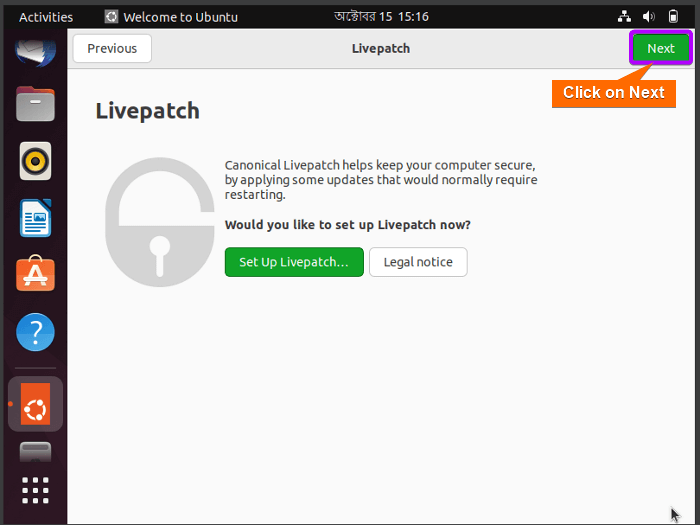
- Then you will be asked to set up Livepatch. Livepatch is used to update and patch your Kernel while the system boots up. You can set this up or you can skip this step for now by clicking on Next.
- At this point, you will be asked to share your user data with Canonical. Set that according to your preference and click on Next.

- Then set your location services settings according to your preference and click on Next.

- Finally, click on Done.

- Now, you are ready to go. Use and experiment with Ubuntu to your heart’s content.
How to Open Ubuntu in Full Screen Using VirtualBox Guest Additions?
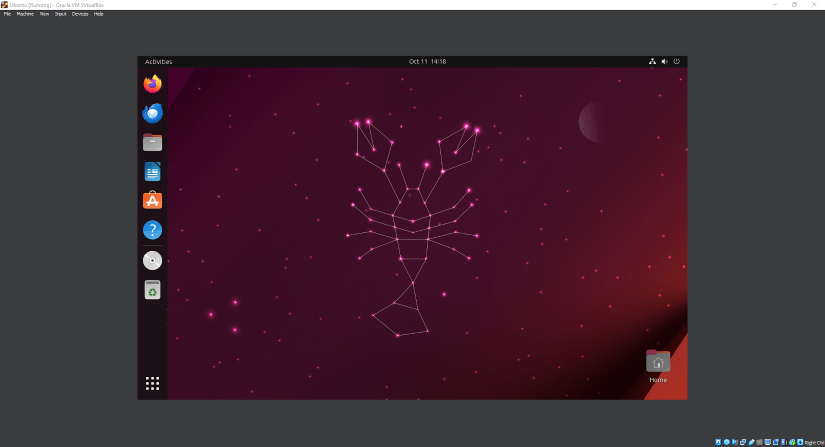
When you are using the newly created Ubuntu VM you may notice that Ubuntu is appearing in a small window. Even when you are trying to resize it or maximize it, the window size is persistent and the extra space is filled with blank spaces. To solve this issue, you have to install additional VirtualBox Guest Additions packages. Follow these processes to do that:
- First, open your Ubuntu VM.

- Then, click on devices. Then click on “Insert Guest Additions CD image”.

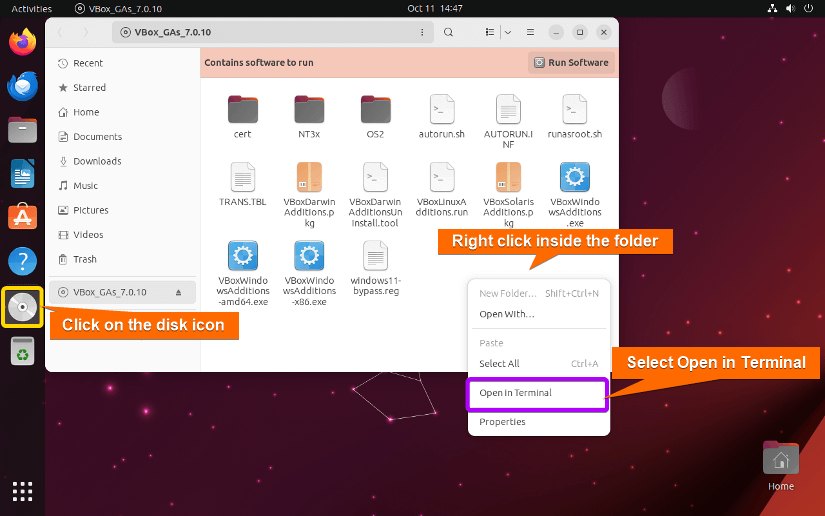
- After that, a disk icon will appear on the sidebar of the Ubuntu interface. Now, click on the disk icon and a folder will open.
- Then, click on Run Software. Or, you can open a terminal in this location by right-clicking inside the folder and selecting Open in Terminal. After that, execute the following command in the terminal:
./autorun.sh
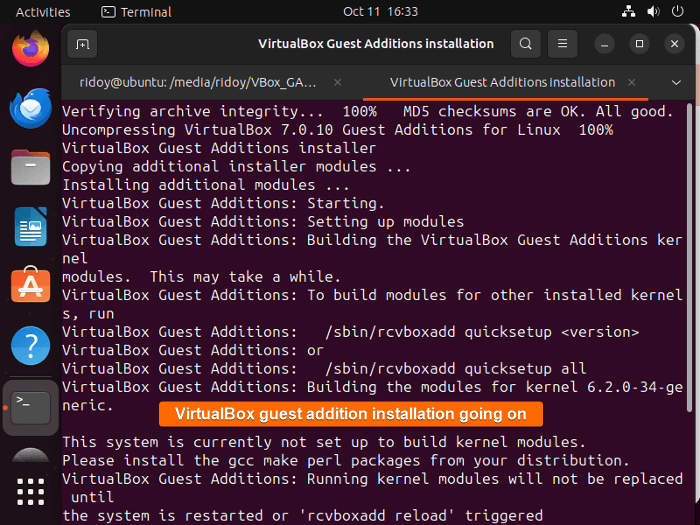
- A new window will open and will ask for your sudo password. Type your sudo password and click on Authenticate.
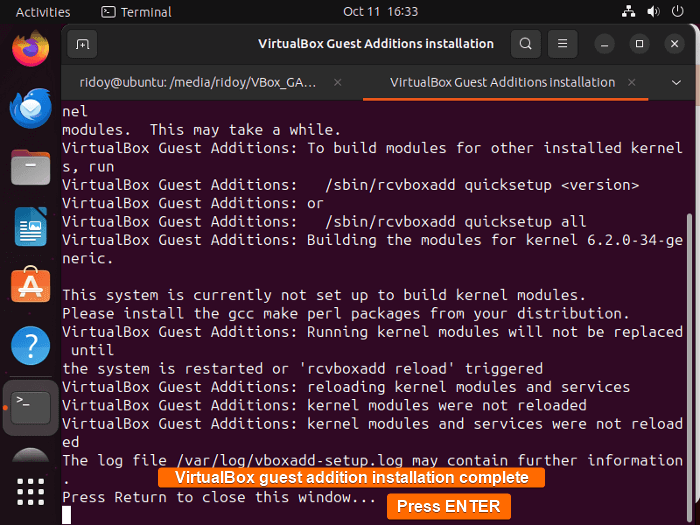
- Then, VirtualBox will install VirtualBox Guest Additions packages automatically.
- After the installation is completed, press ENTER.
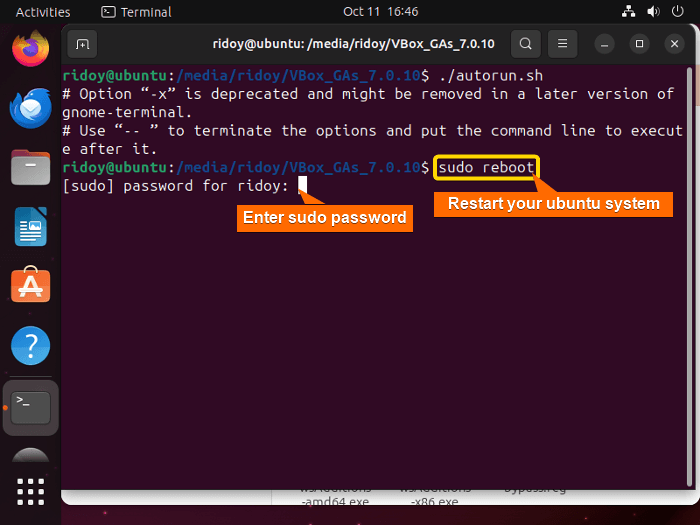
- Now, you need to restart your VM for the changes to take effect. You can manually restart your VM graphically. Or you can simply run the following command to restart Ubuntu automatically:
sudo reboot - Enter your sudo password.
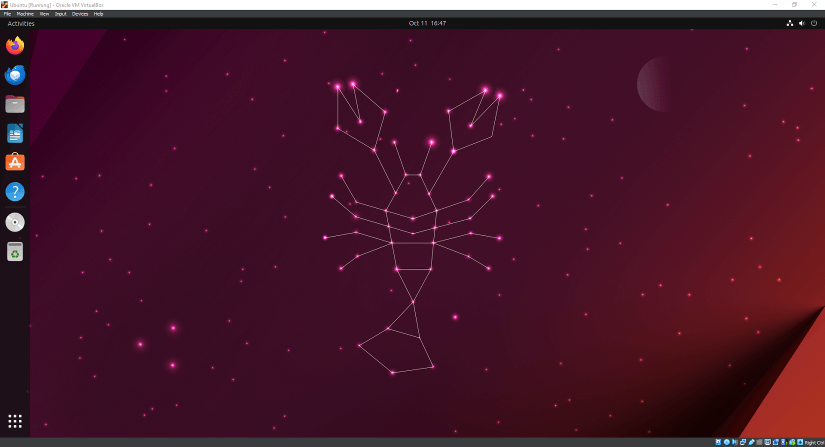
- After that Ubuntu will restart and you can see that Ubuntu is now opening in full-screen mode and you can now manually resize the Ubuntu VM window.


Conclusion
To sum it up, installing Ubuntu on VirtualBox unlocks a world of possibilities. Whether you are new to virtualization or an expert user, in this guide I have explored all possible ways to create a virtual machine in VirtualBox and install Ubuntu there. I hope the flexibility of full access to the customization and the security of an isolated VM will lead you to a new exploration of the Linux journey.
People Also Ask
What is VirtualBox?
VirtualBox is an open-source virtualization software developed by Oracle. It allows its users to create and manage virtual machines on their host computers. With VirtualBox, you can run multiple operating systems simultaneously on a single physical machine. This enables you to experiment, develop, and test software across different environments without altering your primary system. Its user-friendly interface and cross-platform compatibility make VirtualBox an invaluable tool for any user.
What is Ubuntu?
Ubuntu is a renowned and user-friendly Linux distribution. It is known for its accessibility and versatility. It was developed by Canonical Ltd. Ubuntu offers a powerful alternative to proprietary operating systems like Windows and macOS. Its seamless updates, security features, and regular releases make it a preferred choice for both beginners and advanced users. Ubuntu’s commitment to providing a free, reliable, and customizable computing experience, makes it a popular choice for desktops, servers, and cloud deployments.
Can I delete the iso file after installing Ubuntu in VirtualBox?
Yes, you can safely delete the iso file after Ubuntu installation is complete on VirtualBox. It is no longer necessary after the VM is up and running. But if you ever want to repair Ubuntu installation then you will need the iso file. However, in that case, having the iso file will make creating a new Ubuntu VM far easier and faster.
Can I use all the features of Ubuntu if I install it on VirtualBox?
Yes, you can use most of the features of Ubuntu as fluently as a native installation on VirtualBox. However, some resource-intensive tasks like heavy gaming or graphic-intensive applications might have reduced performance compared to a native Ubuntu installation.
Why do people install Ubuntu on VirtualBox?
The main reason people install Ubuntu on VirtualBox is that you can securely use Ubuntu as a guest OS without affecting our primary OS. There are many other reasons. People use it for learning Linux, software development, creating isolated environments, experimenting without affecting their main system, testing server configurations, etc.
What is the minimum requirement for Installing Ubuntu on VirtualBox?
For a smooth usage of the virtual Ubuntu system, it is recommended to ensure you have a 2 GHz dual-core processor or better, 4 GB of RAM, and 30 GB of free hard drive space allocated for the Ubuntu VM.
Related Articles
- How to Install Arch Linux on VirtualBox [3 Methods]
- How to Install Fedora on VirtualBox [Simple Guide]
- How to Install Debian on VirtualBox [Step-by-Step]
- How to Install VirtualBox Guest Additions on Debian
- How to Install Kali Linux on VirtualBox [Easiest Guide]
- How to Install CentOS 7 on VirtualBox [8 Easy Steps]
- How to Install VirtualBox Guest Additions on CentOS
<< Go Back to Virtual Machine Installation Guide | Linux OS Installation Guide | Learn Linux Basics
FUNDAMENTALS A Complete Guide for Beginners


