VirtualBox is the most widely used open-source virtualization software in the world. It enables users to build virtual computers within their existing operating systems, enabling them to experiment with multiple platforms. It is a preferred choice for new and expert users for its friendliness and array of features.
CentOS 7 is an open-source Linux distribution based on Red Hat Enterprise Linux 7 (RHEL 7). It stands out for its stability, security, and performance in the Linux community. Its reliability makes it a preferred choice for server deployments and developing environments. So, the installment of CentOS on VirtualBox provides users with a powerful and versatile platform for virtualization. This article will show how to install CentOS 7 on VirtualBox in your host system.
Minimum Requirements to Install CentOS 7 on VirtualBox
- 10GB minimum Storage, 20GB+ recommended.
- 2GB minimum RAM, 4GB+ recommended.
- Dual-Core Processor.
8 Steps to Install CentOS 7 on VirtualBox
To install CentOS on VirtualBox in your host machine follow these step-by-step processes:
Step 1: Download and Install VirtualBox
VirtualBox is an open-source virtualization software developed by Oracle. It allows its users to create and manage virtual machines on their host computers. To install VirtualBox in your host system go through the following process:
- First download the latest version of the app from the Official VirtualBox website.
- Now install the VirtualBox app in your host system.
- Make sure you have CPU virtualization technology turned on from your BIOS/UEFI settings.
Step 2: Download CentOS
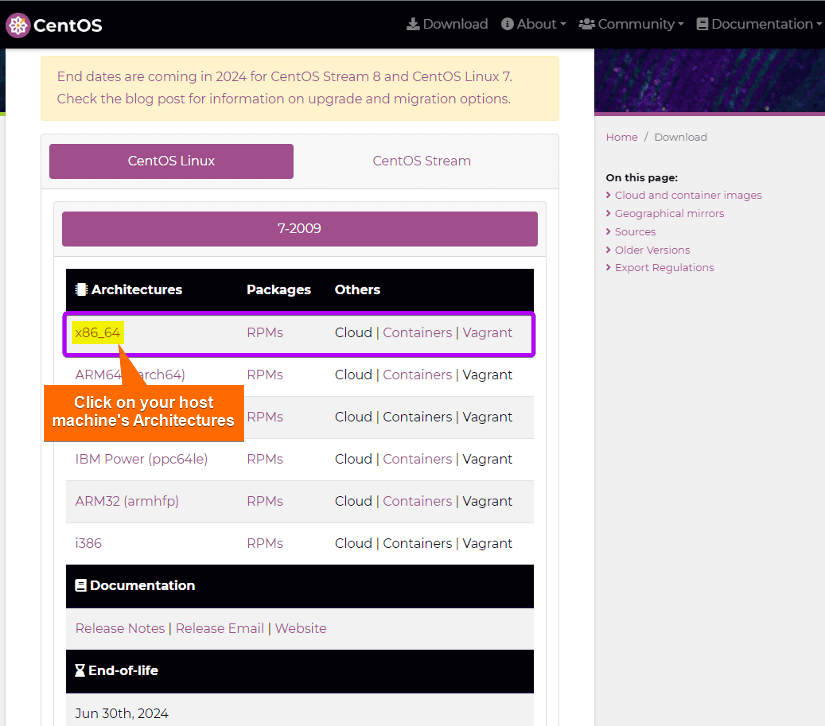
- First, go to the official CentOS website’s download page to download the CentOS ISO image. Then click on your host computer’s architecture. For example x86_64 architecture.

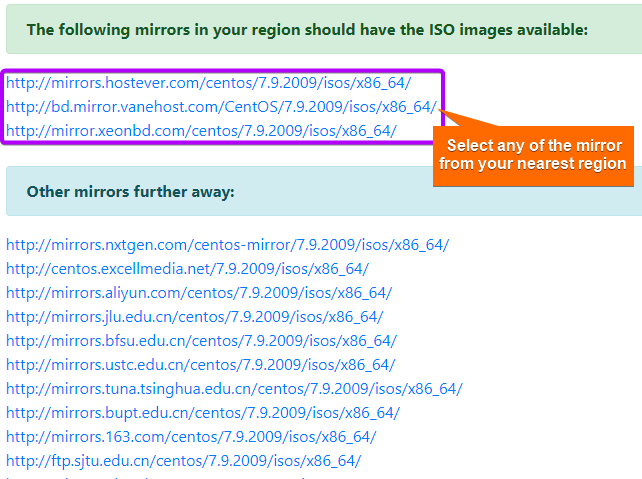
- After that, select any of the mirrors in your nearest region.

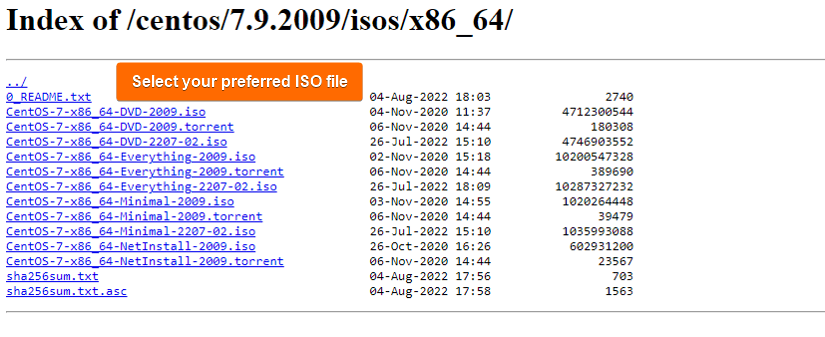
- Click on any of the ISO files that you prefer. This will start the download of the CentOS ISO image.

Step 3: Create a CentOS VM
To create the CentOS virtual machine (VM), follow these steps:
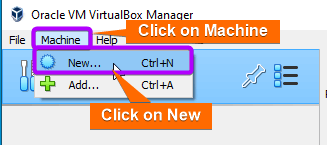
- First, open VirtualBox, and select Machine > New.

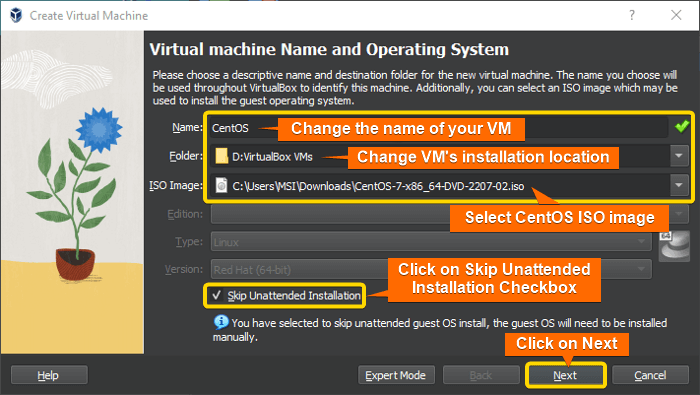
- Then, add a name for your virtual machine, set its installation location, and select CentOS DVD ISO image. Make sure that the Skip Unattended Installation checkbox is selected. Click on Next.

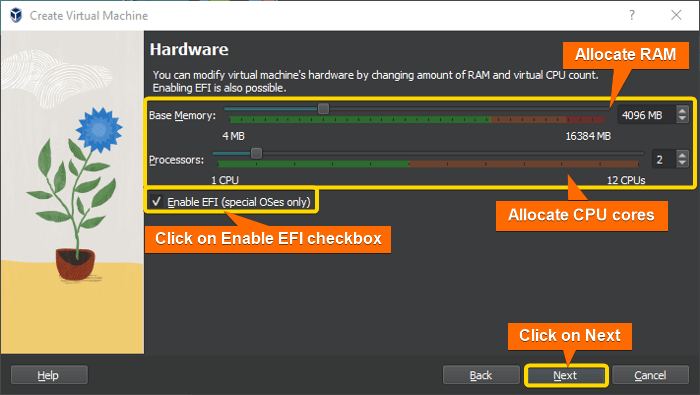
- Allocate RAM (Base Memory) and CPU cores for your VM. If you have a newer version of the processor, click on the Enable EFI checkbox. Then click on Next.
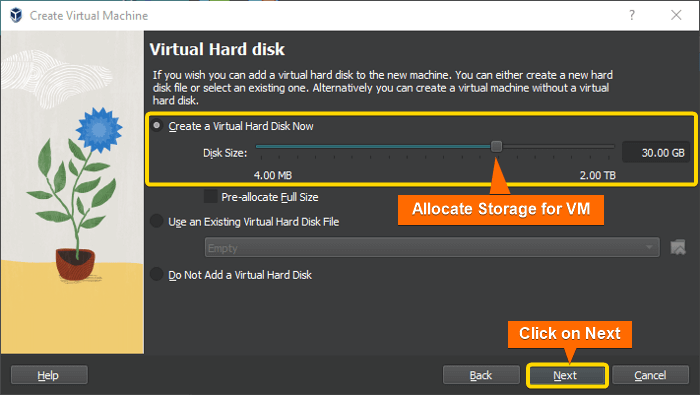
- After that, allocate virtual Hard Disk Size for the VM. Click on Next.
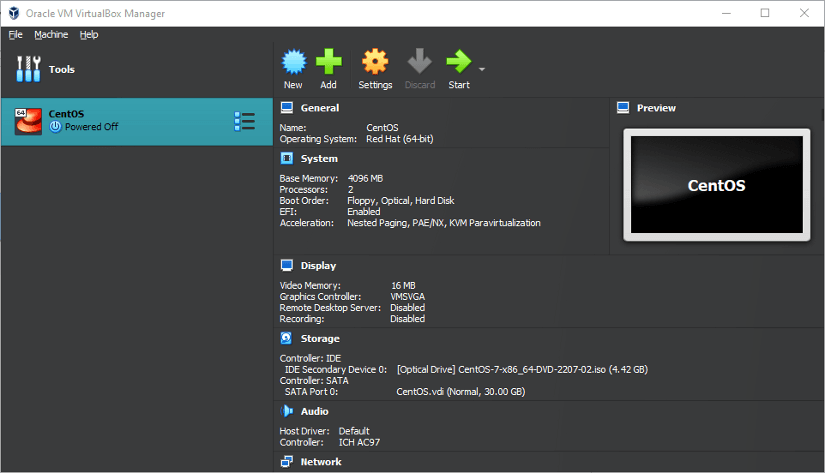
- Check the summary of the VM and click on Finish.
- Finally, the newly created VM will be added to the VirtualBox Manager.


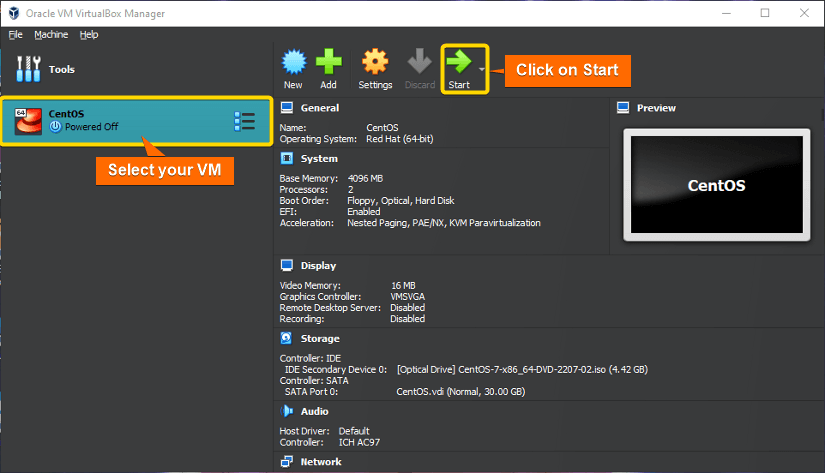
Step 4: Start CentOS VM
- First, start the newly created CentOS VM. After that, the CentOS installation DVD will boot up.
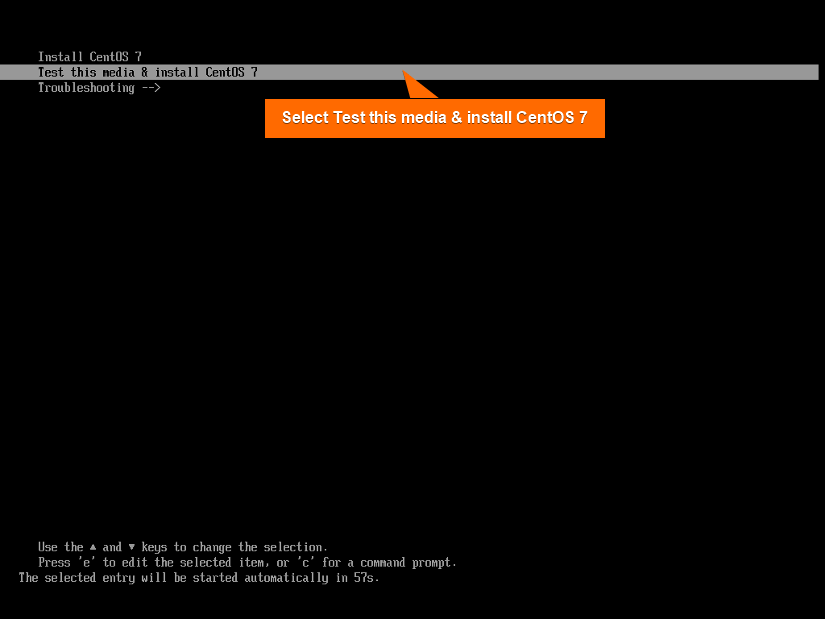
- Then, select Test this media & install CentOS 7.

- Now the CentOS ISO image’s integrity will be checked and then the CentOS installer will boot up.

Step 5: Pre-Installation Setup
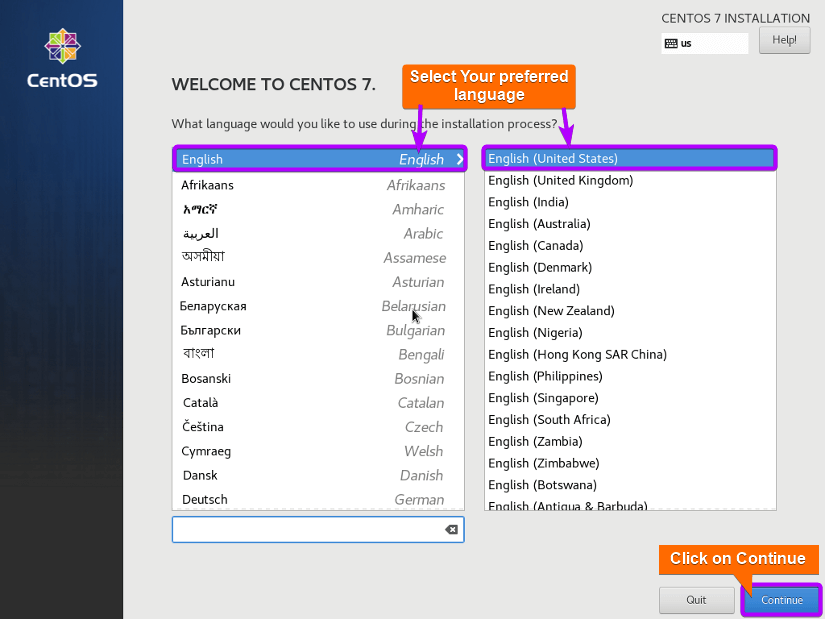
- At the beginning, select your preferred Language.
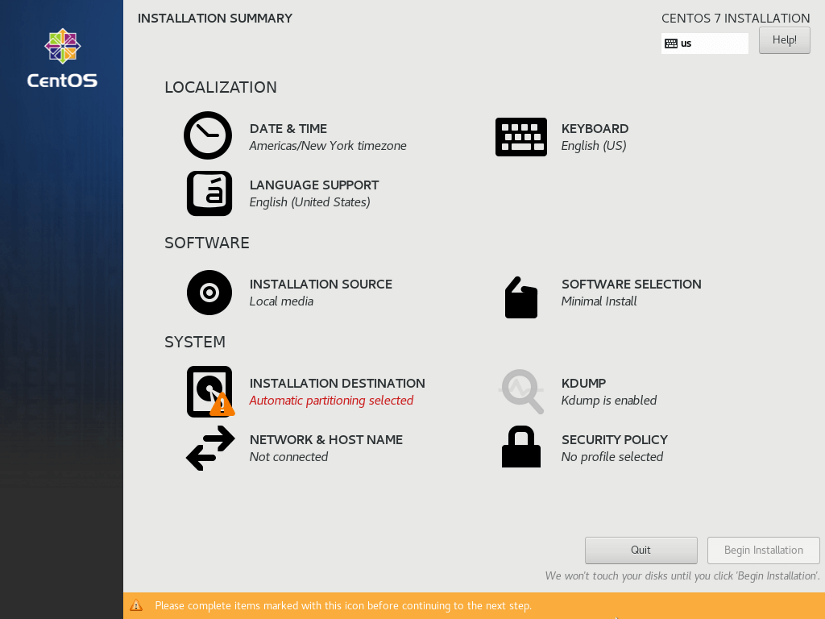
- Now, the CentOS 7 installation menu will open up.
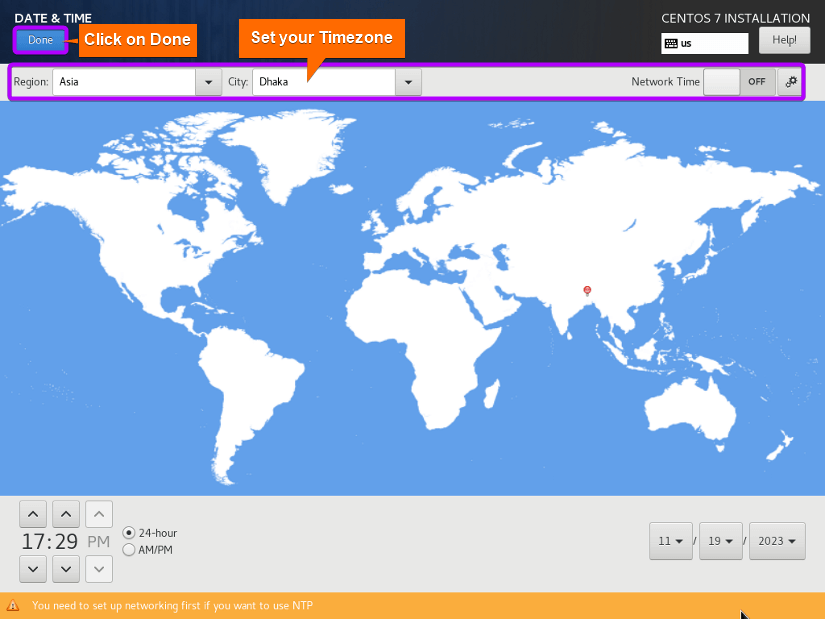
- Then, select Date & Time.
- After that, select your preferred time zone. The Network Time will be enabled after you connect to a network. Click on Done.
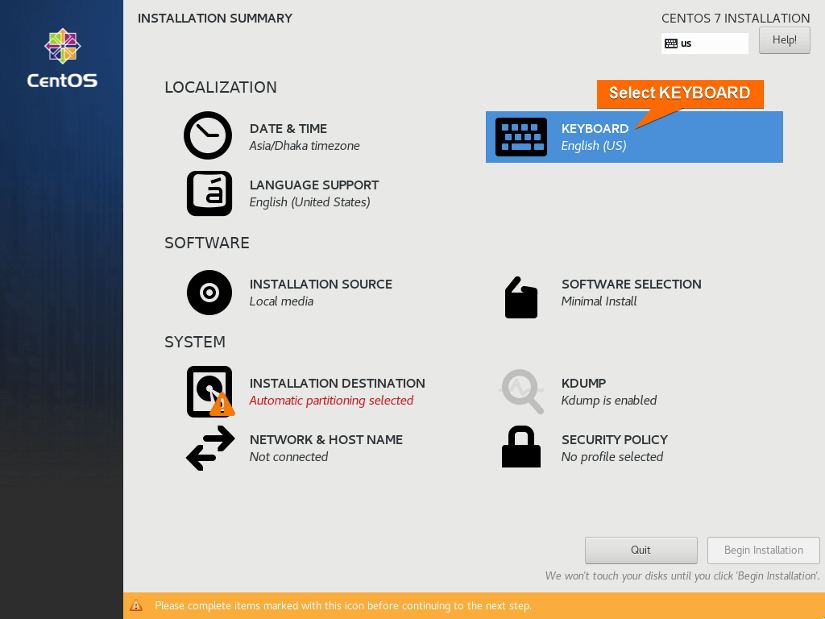
- Click on Keyboard.
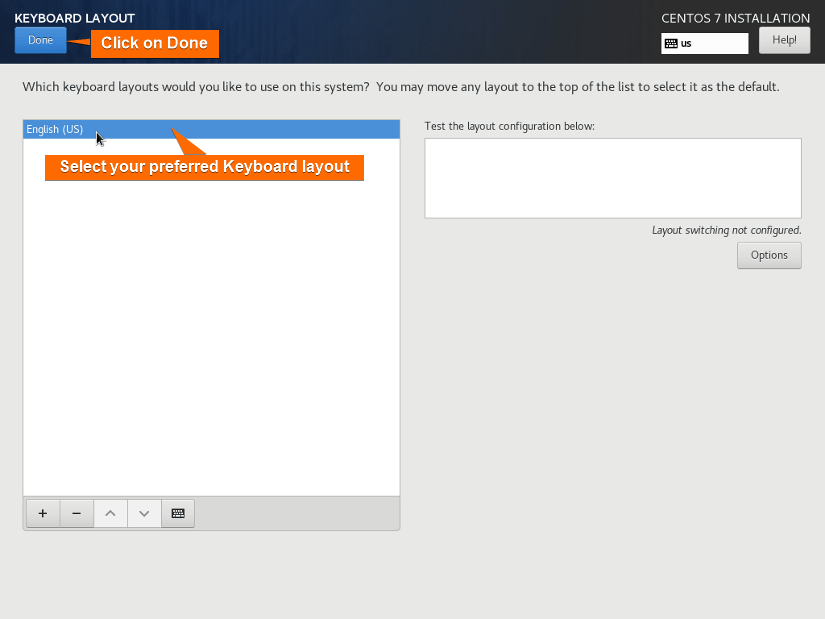
- Select your preferred keyboard layout and click on Done.
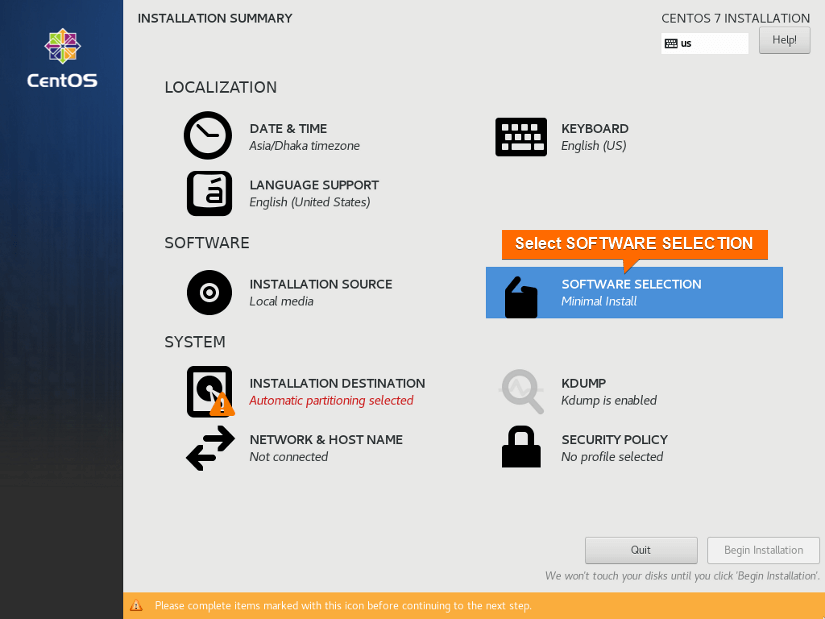
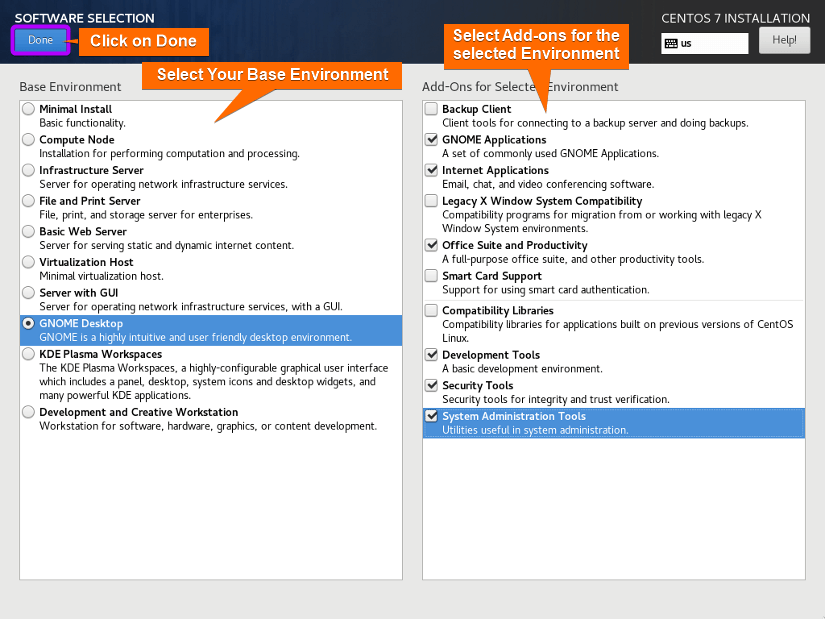
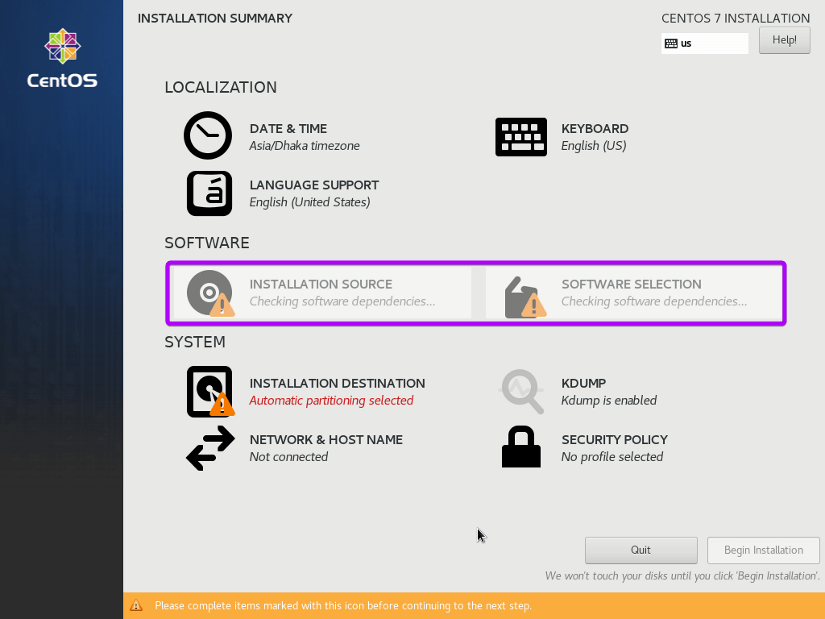
- Click on Software Selection.
- Select the Base Environment according to your choice. You can add additional add-ons for your selected environment. Click on Done.
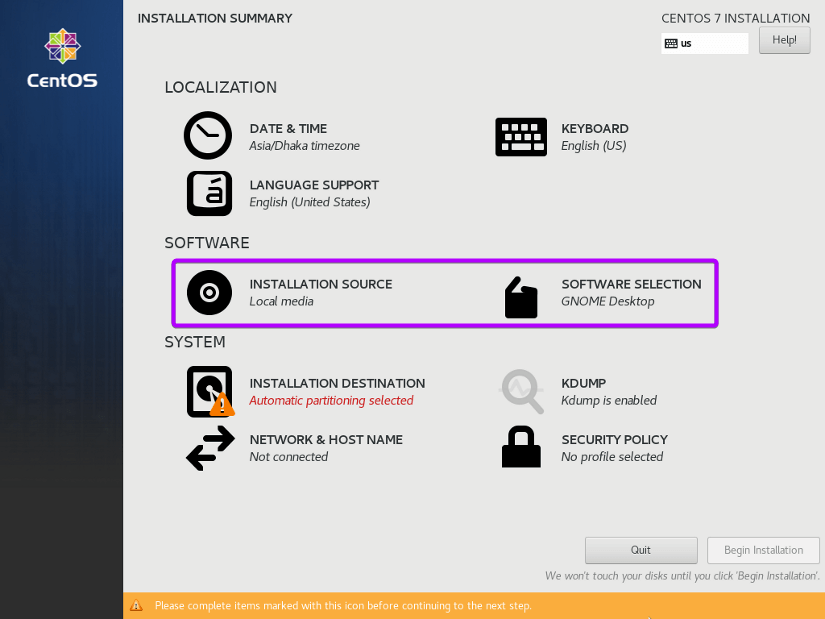
- After that, your software packages will update. Give it some time.
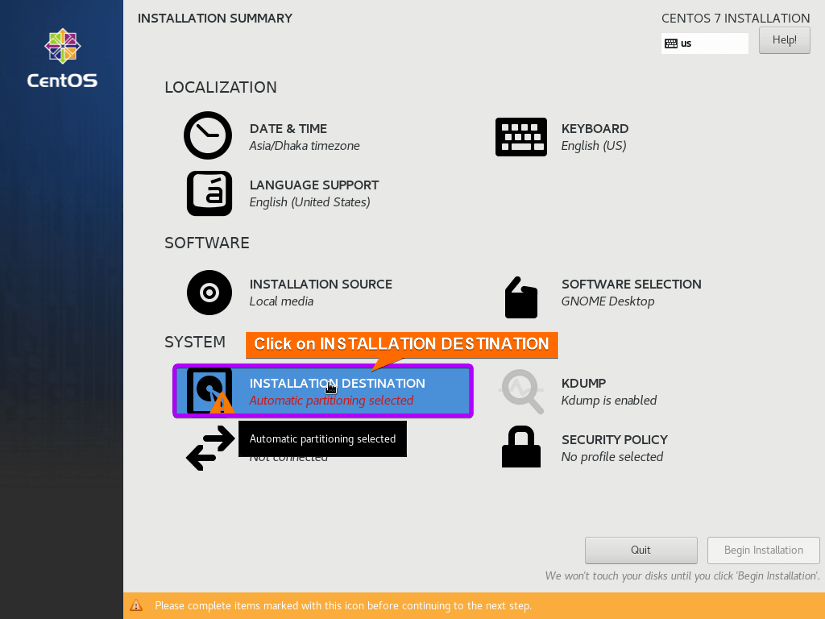
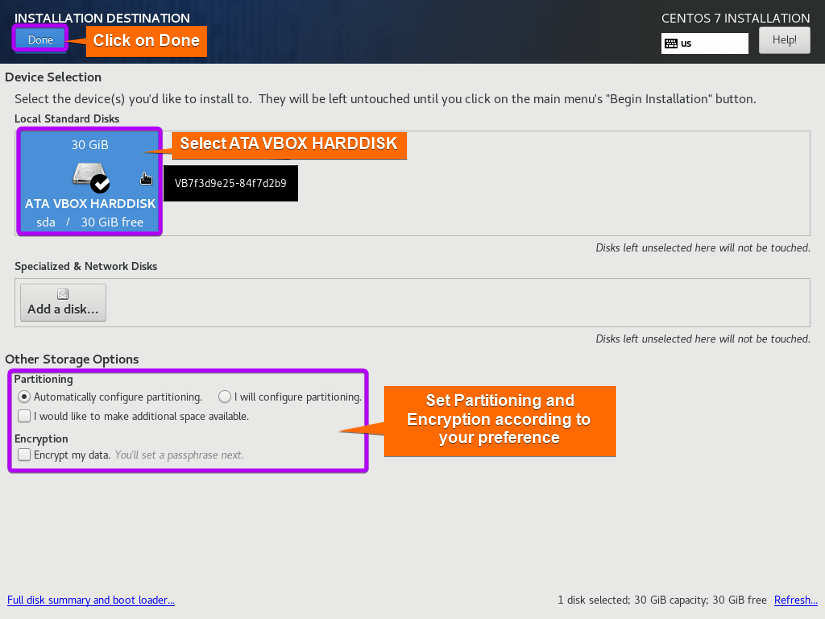
- Click on Installation Destination.
- Select ATAVBOX HARDDISK. By default, automatic partitioning is selected. You can also manually partition and encrypt your storage drive. Click on Done.
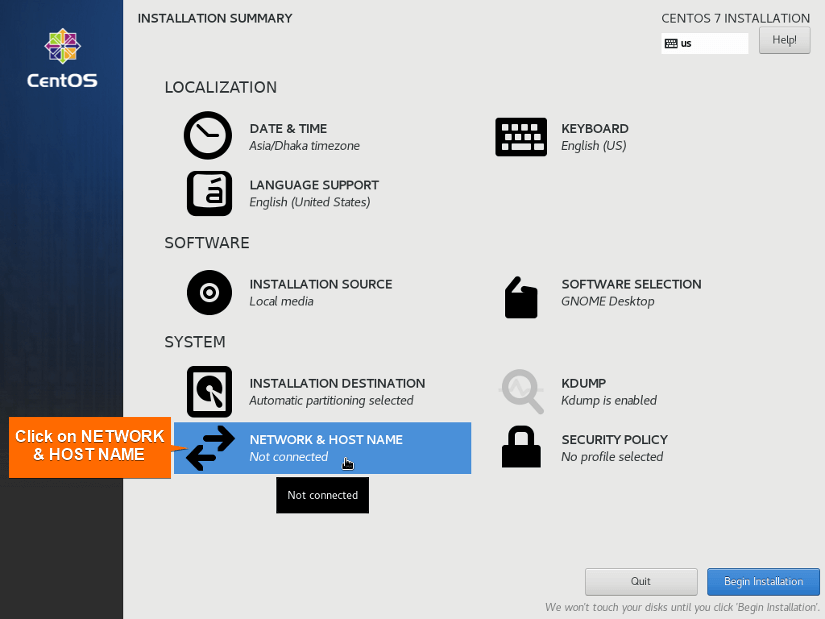
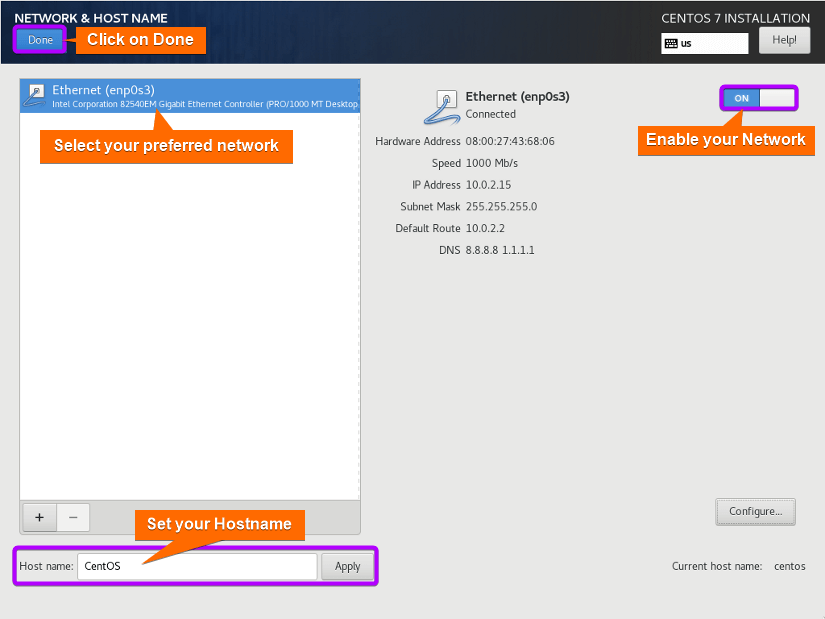
- Select Network & Hostname.
- Select your preferred network and enable it. Add your Hostname and click on Done.
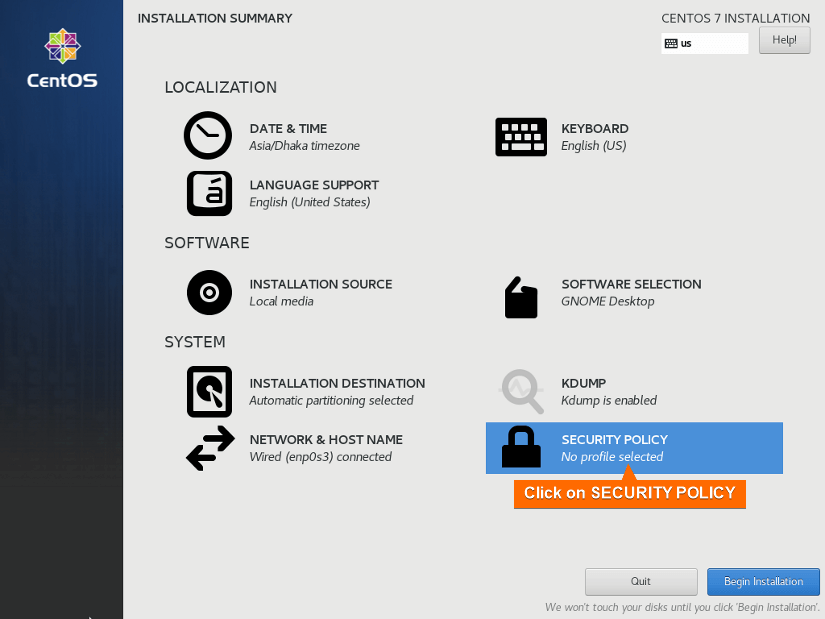
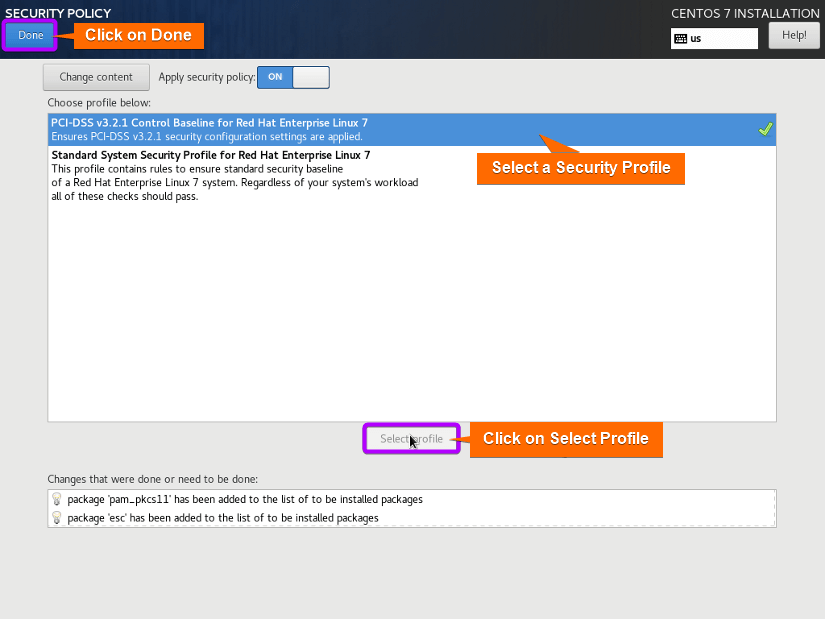
- Click on Security Policy.
- Finally, select the profile applicable to your system. Click on Done.

Step 6: Start Installation
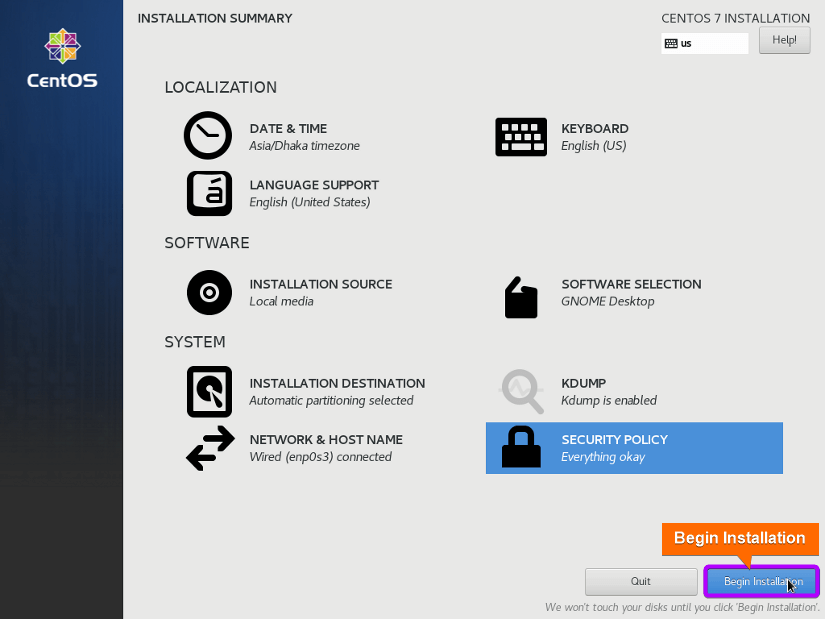
- First, revise all the installation setting summaries and then click on Begin Installation.
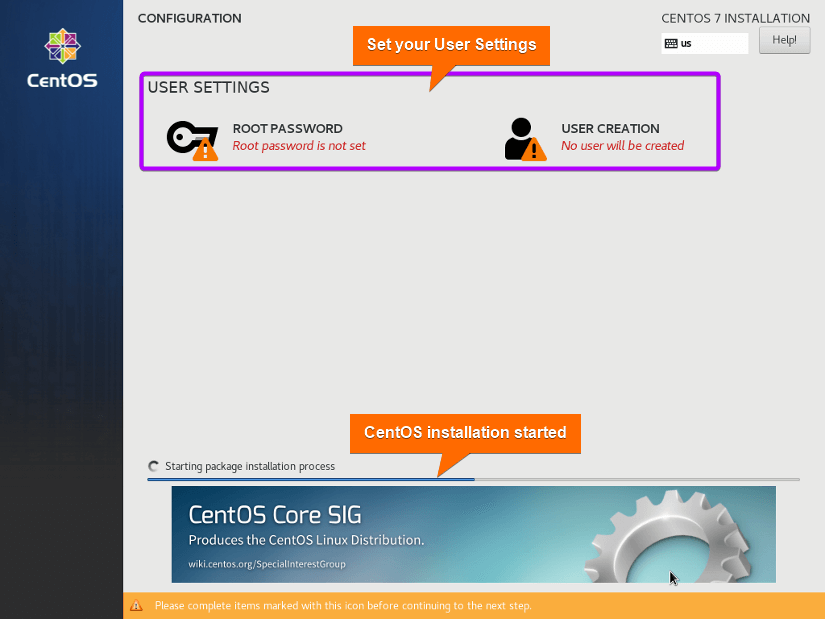
- Now the installation will start. This will take some time. In the meantime, you can add your user account and set up your root password and user password.
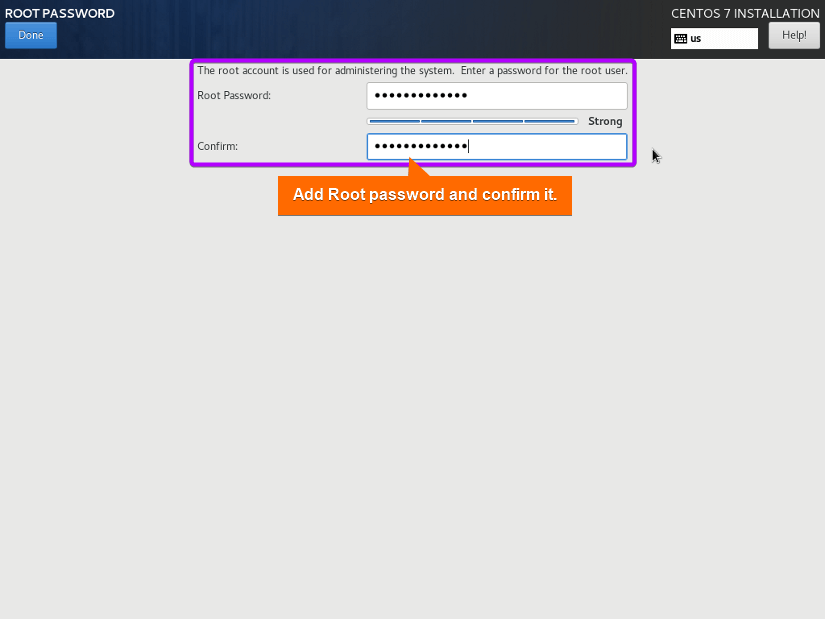
- Click on Root Password. Add and Re-type your root password. Then click on Done.
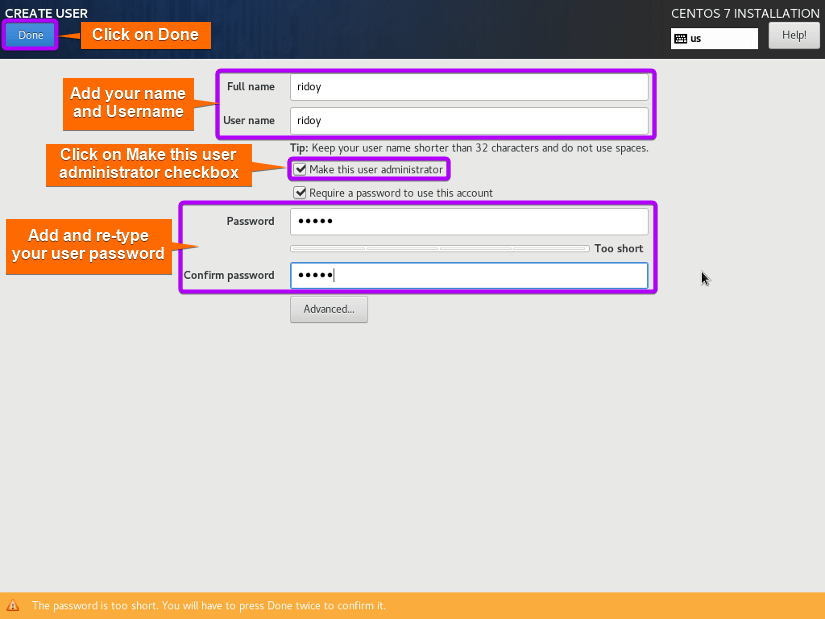
- Now click on User Creation. Add your name and user name. Then click on Make this user administrator. After that, add and confirm your user password. Finally, click on Done.
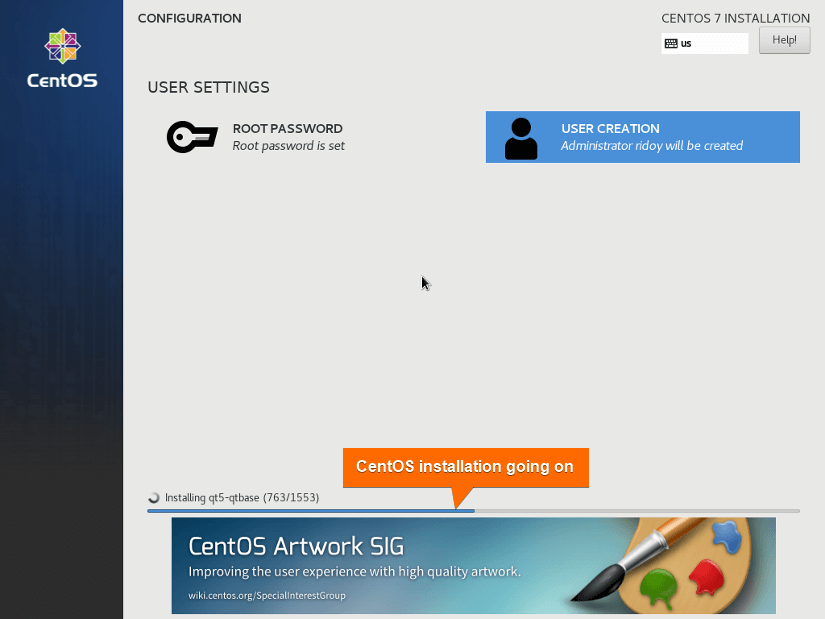
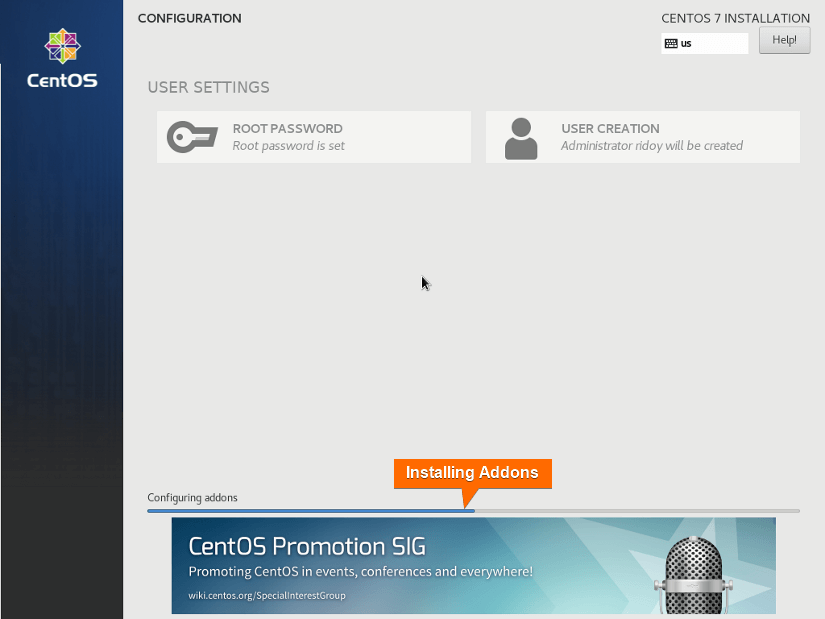
- The CentOS will be installed according to your preferred Base Environment and Add-ons.
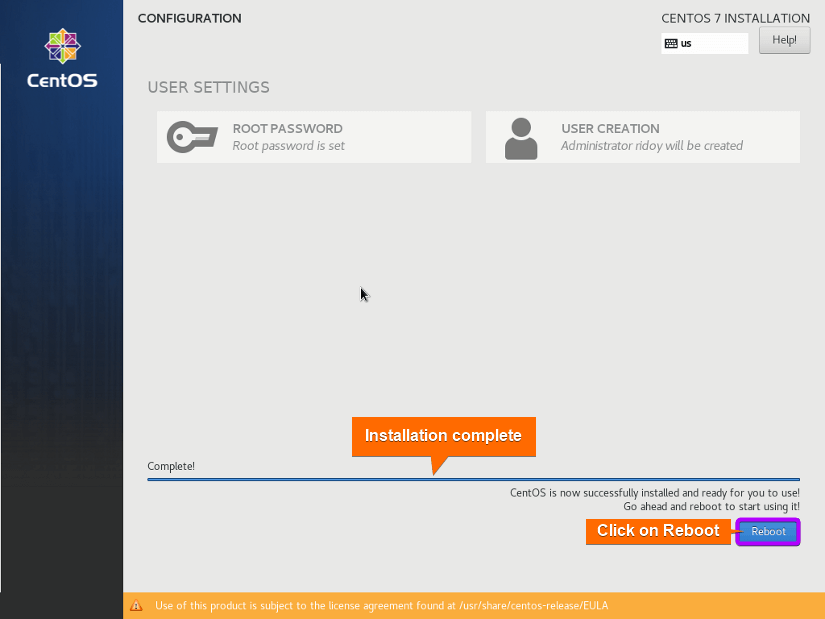
- After installation is complete click on Reboot.
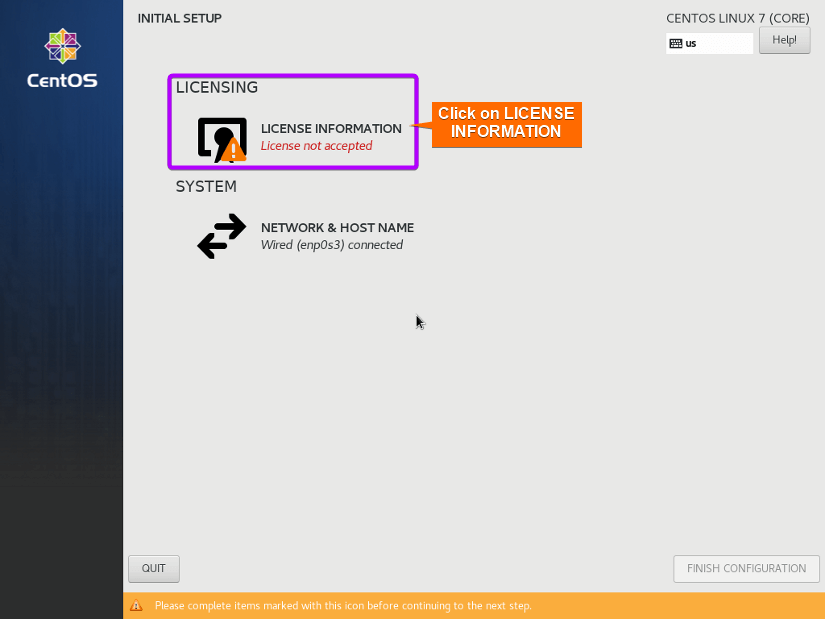
- Click on License Information.
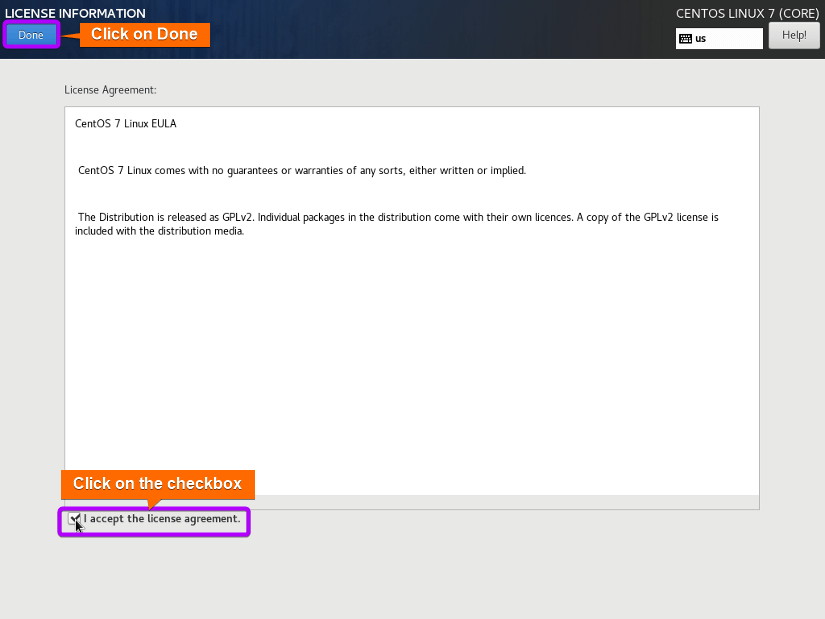
- Accept the license agreement by clicking on the checkbox and then click on Done.
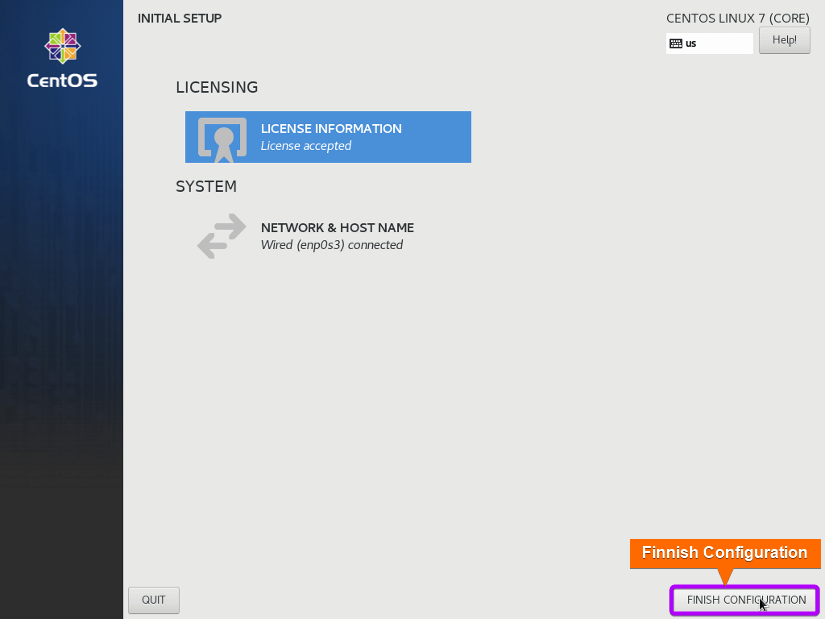
- Finally, click on Finish Configuration. The user login window will open.
Step 7: Post-Installation Setup
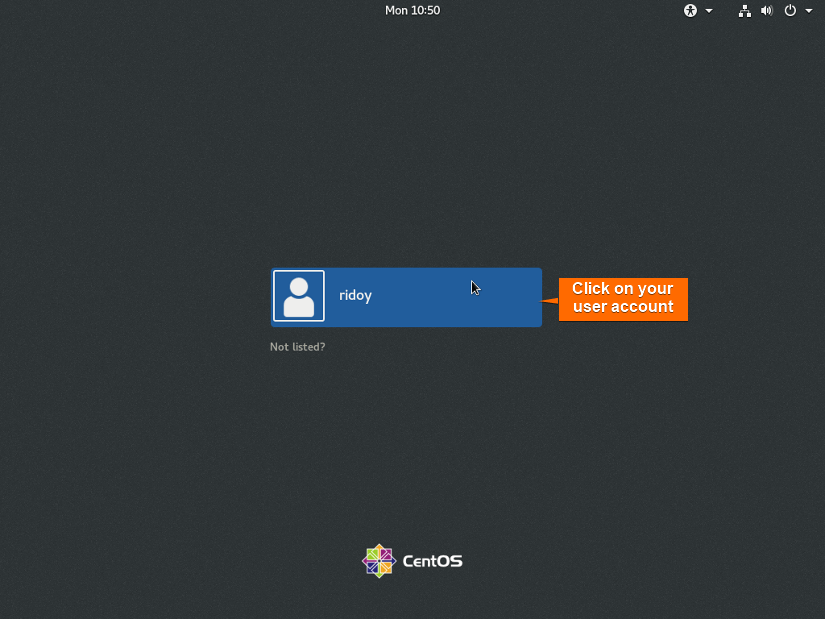
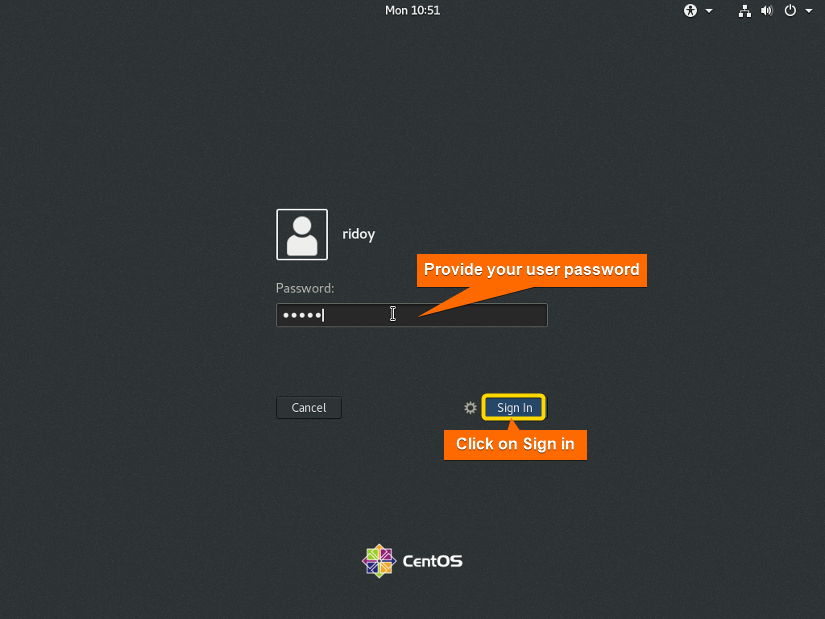
- First, select your user account and log in using the credentials you set during the CentOS installation.
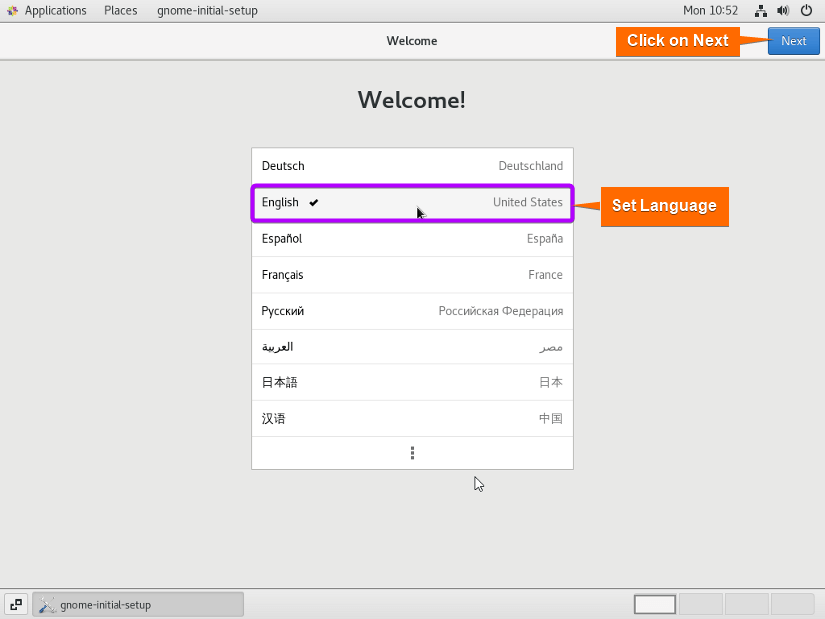
- Then, select your preferred language in the Gnome desktop environment setup. Click on Next.
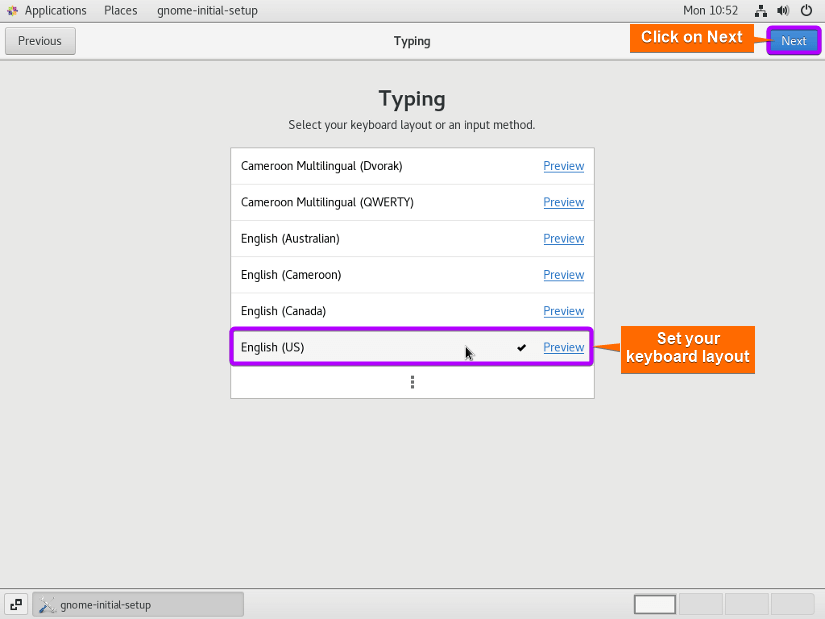
- Afterward, select your keyboard layout. Click on Next.
- Set Location Services according to your preference then click on Next.
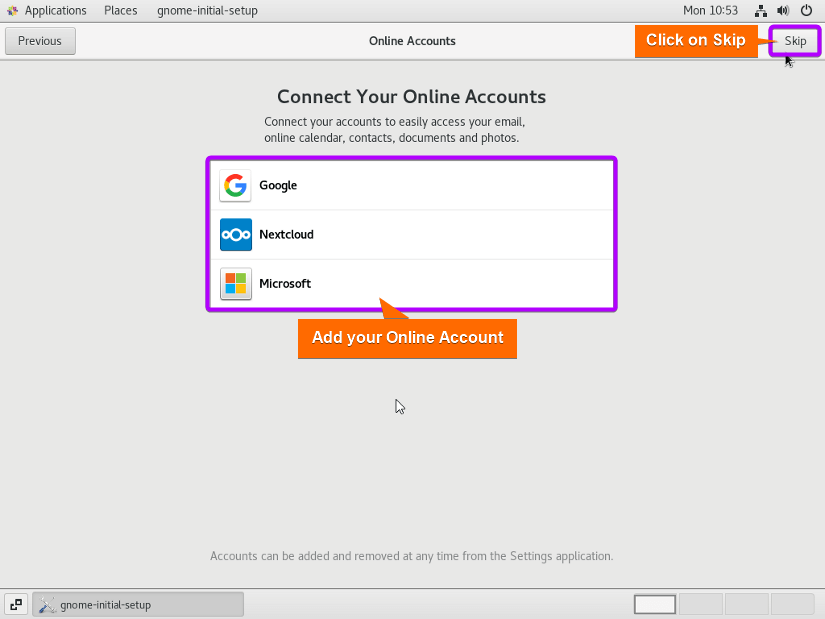
- Now, you can add your online account. Or you can Skip it for now and add them later.
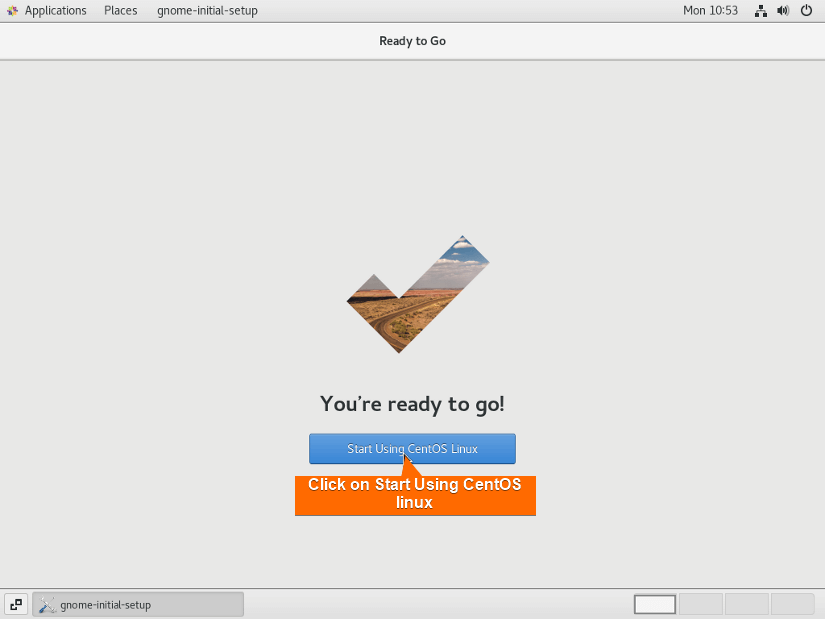
- Click on Start Using CentOS Linux.
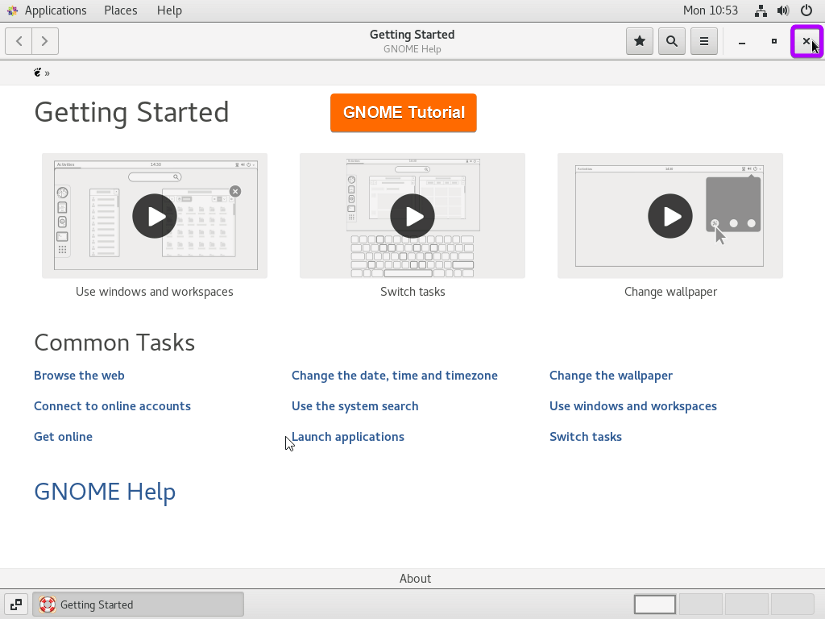
- Close the Gnome tutorial.
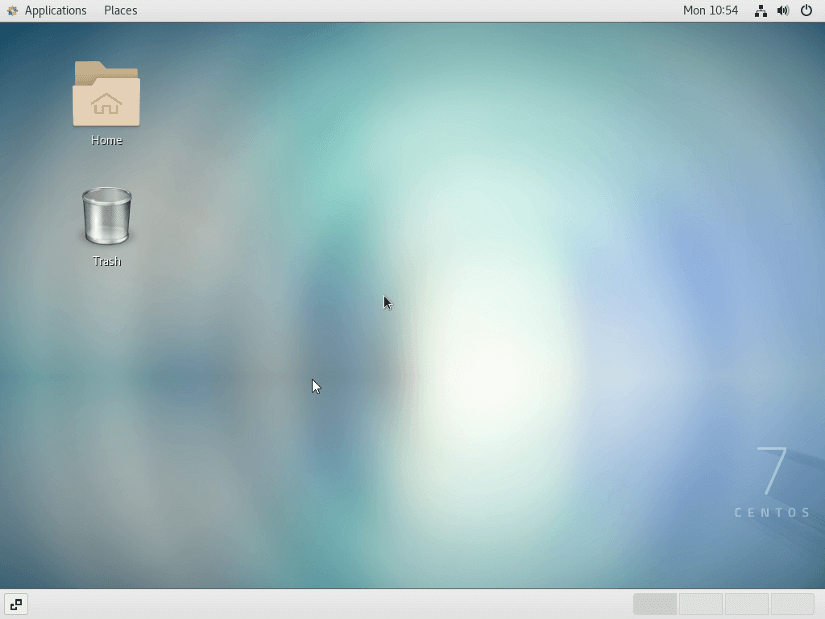
- You will now be in the CentOS user interface. You are good to go, use and experiment with CentOS Linux to your heart’s content.

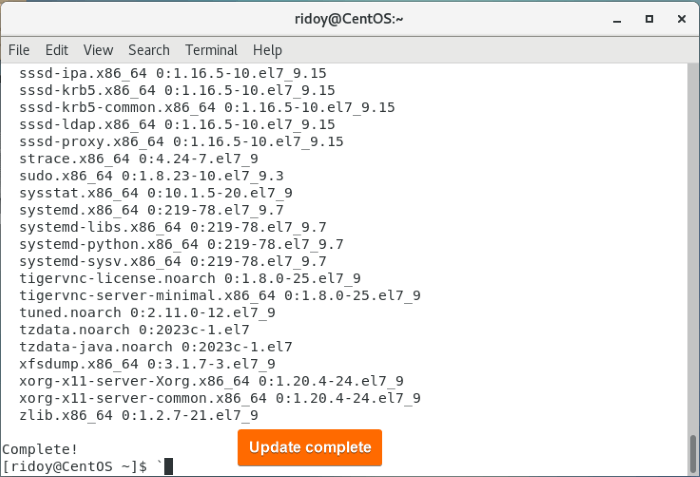
Step 8: Update CentOS
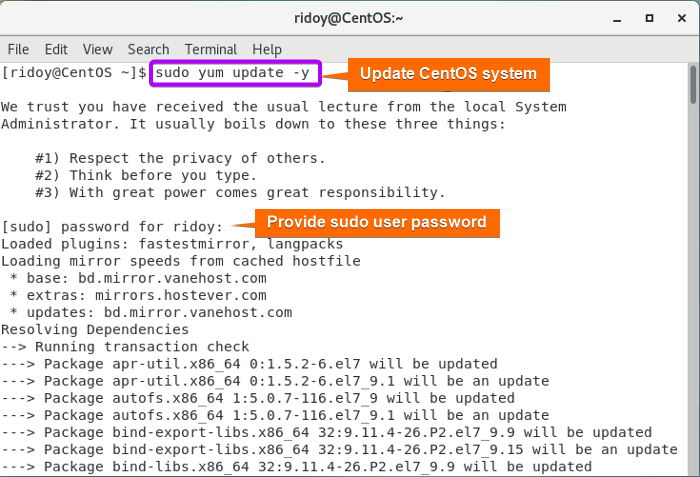
It is recommended to update your software after you set up your OS. To update your CentOS system, open the terminal and run sudo yum update -y command. Make sure to provide your sudo password when you are asked for it. After waiting some time the update will complete.
Note: To install VirtualBox Guest Additions on CentOS Follow “How to Install VirtualBox Guest Additions on CentOS”
Conclusion
Installing CentOS 7 opens up a world of endless possibilities within the realm of Linux/Unix. I hope this straightforward guide will help you to seamlessly integrate the robust features of CentOS 7 into your host system using VirtualBox.
People Also Ask
What is CentOS 7?
CentOS 7 is a robust Linux distribution. It is renowned for its stability and performance. It is an open-source distribution that is derived from Red Hat Enterprise Linux (RHEL) and offers a free platform. CentOS is suitable for a wide range of applications and is a preferred choice among users due to its ability to provide a secure and comprehensive environment for various computing requirements.
Can I Install CentOS 7 on VirtualBox on Windows or MacOS?
Yes, VirtualBox is a cross-platform virtualization tool. You can install and run CentOS 7 on VirtualBox on Windows, macOS, or Linux.
How to full-screen CentOS 7 in VirtualBox?
To open CentOS 7 in full-screen mode on VirtualBox you need to have the Virtualbox guest additions installed. Then you can freely resize your guest system display. To install the guest addition CD on your CentOS VM, start the VM > devices > Insert Guest Additions CD image > Run > authenticate with sudo user password > Reboot. This will install VirtualBox guest addition packages on your CentOS VM.
Can I Install CentOS 7 on VirtualBox for production use?
Yes, you can but it is not recommended. While VirtualBox is excellent for testing and development. It is not suitable for production environments where stability, performance, and advanced features are crucial. For production use, it is recommended to deploy CentOS 7 on a dedicated workstation.
How much RAM does CentOS require to run well?
To run a barebone CentOS system without anything on it you need a minimum of 768MB RAM. But to run it with a desktop environment you will need a minimum of 2 GB RAM but 4GB+ RAM is recommended.
What is the minimum install size for CentOS?
To install CentOS a minimum of 10 GB storage is needed. But for a hassle-free experience, 20 GB+ Storage is recommended.
Related Articles
- How to Install Ubuntu on VirtualBox [A Complete Guide]
- How to Install Arch Linux on VirtualBox [3 Methods]
- How to Install Fedora on VirtualBox [Simple Guide]
- How to Install Debian on VirtualBox [Step-by-Step]
- How to Install VirtualBox Guest Additions on Debian
- How to Install Kali Linux on VirtualBox [Easiest Guide]
- How to Install VirtualBox Guest Additions on CentOS
<< Go Back to Virtual Machine Installation Guide | Linux OS Installation Guide | Learn Linux Basics
FUNDAMENTALS A Complete Guide for Beginners


Thank you for help!
Great post! The step-by-step instructions made it really easy to follow along, and I successfully installed CentOS 7 on VirtualBox without any issues. Thanks for the clear explanations!