Kali Linux is a powerful and widely used penetration testing platform that provides a plethora of tools for ethical hackers, security professionals, and enthusiasts. VirtualBox, a free and open-source virtualization software, allows users to run multiple operating systems on a single machine.
This guide will walk you through the process of installing Kali Linux in VirtualBox, ensuring a seamless and secure setup.
Requirements to Install Kali Linux on VirtualBox
- Minimum 20GB of disk space.
- Minimum 1GB of RAM.
- VirtualBox
What is Kali Linux?
Kali Linux is an open-source Linux distribution based on Debian. It caters to ethical hackers and security experts by offering a diverse set of tools. Kali Linux includes a robust collection of security testing tools.
Furthermore, the development of Kali Linux occurs in a highly secure environment, with a restricted group of trusted individuals who have the privilege to contribute. Each package undergoes authentication through the developer’s signature. Notably, Kali is equipped with a specialized kernel adapted to support injection.
Steps to Install Kali Linux on VirtualBox
The process of installing Kali Linux on VirtualBox includes downloading Kali Linux’s ISO file, virtual machine creation on VirtualBox, and ultimately initiating the installation process for Kali Linux with its necessary configuration.
To install Kali Linux on VirtualBox successfully, follow the steps below:
Step 1: Download Kali Linux ISO File
Download the ISO image of Kali Linux from the official website of Kali Linux. 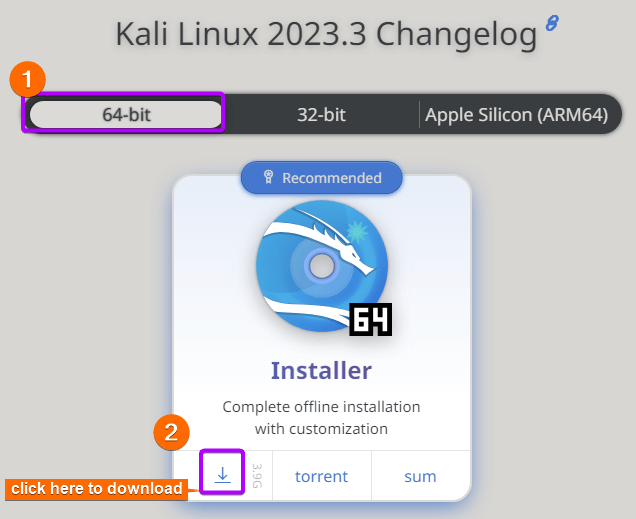
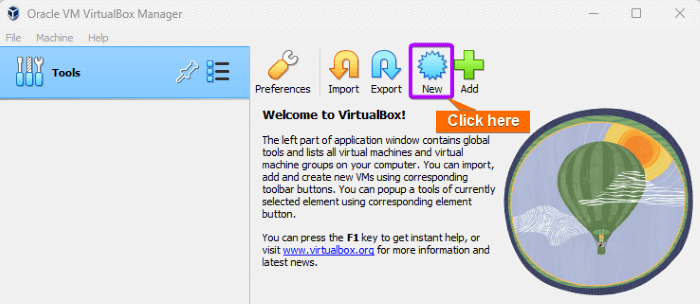
Step 2: Create a New Virtual Machine
To create a new virtual machine (VM) on VirtualBox:
- Open the VirtualBox and click on the New button.

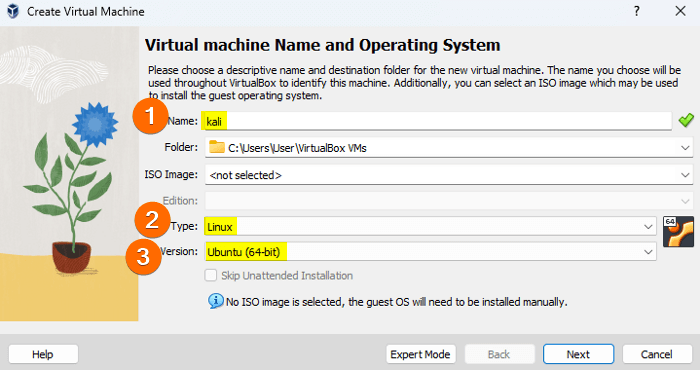
- First, set a name for the VM (for example Kali), then choose Linux as the “Type” of the VM, and finally choose Ubuntu (64bit) as the version.

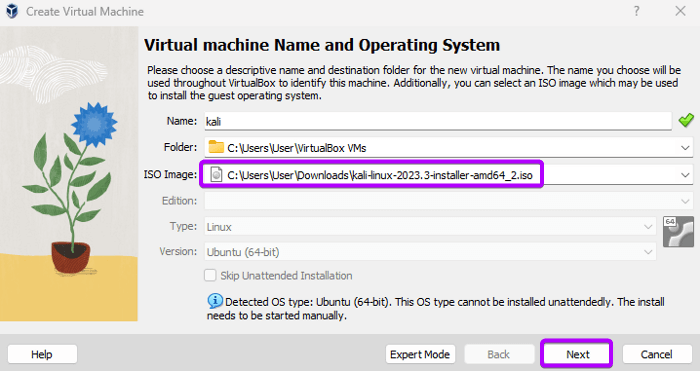
- Now, click on the “ISO Image” and select the downloaded Kali Linux’s ISO file from the host operating system. Then, click on “Next”.

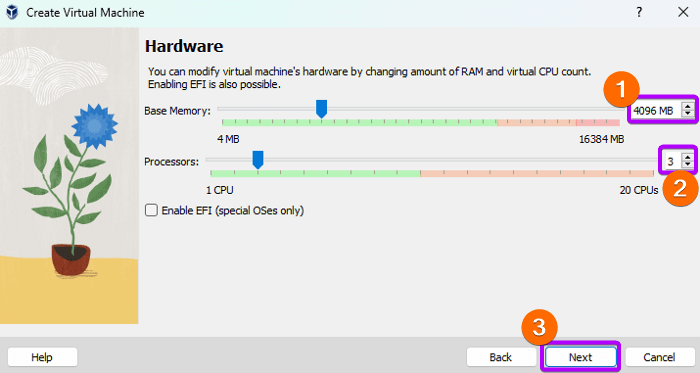
- In hardware settings, set 4GB as base memory, specify 3 processors for the VM, and click “Next”.

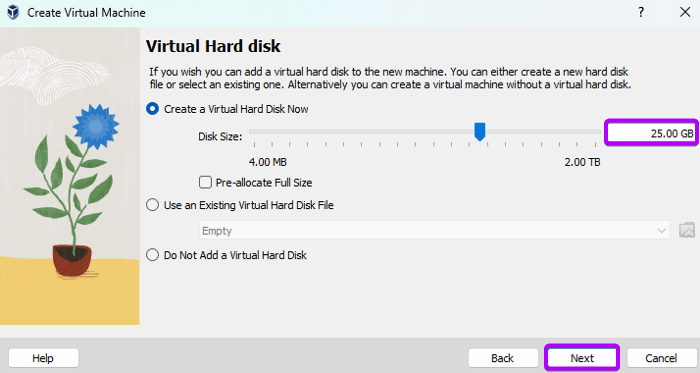
- Create a virtual hard disk of 25GB, and hit “Next”.
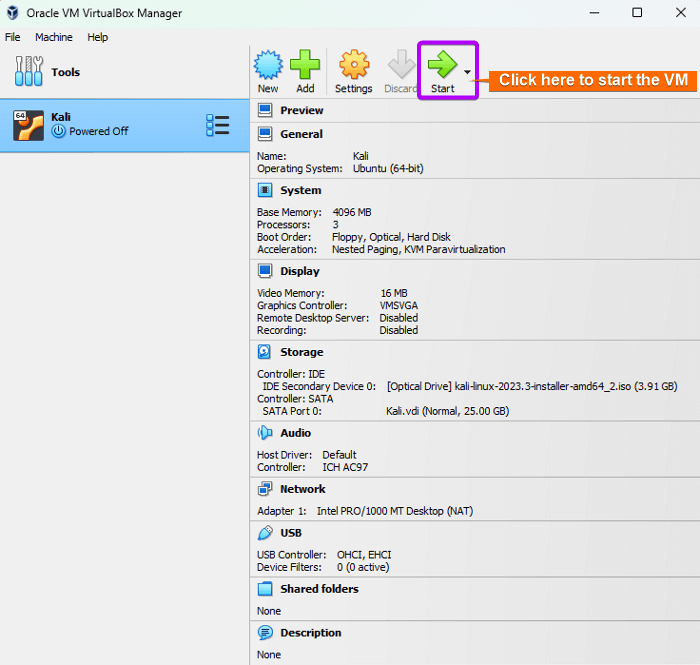
- The following table in the image summarizes the configuration of the new virtual machine. Finally, click on “Finish”. Finally, the Kali Linux VM has been created.

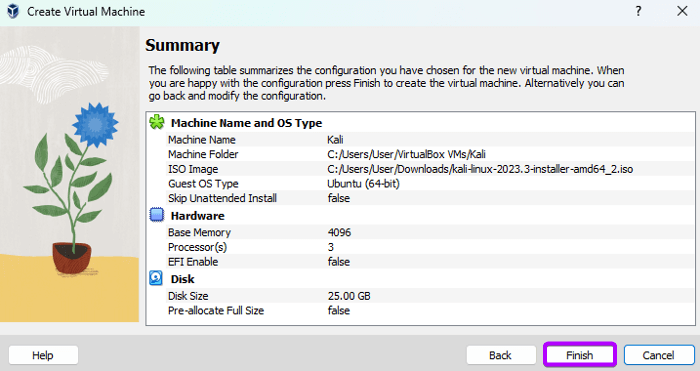 Finally, the Kali Linux VM has been created.
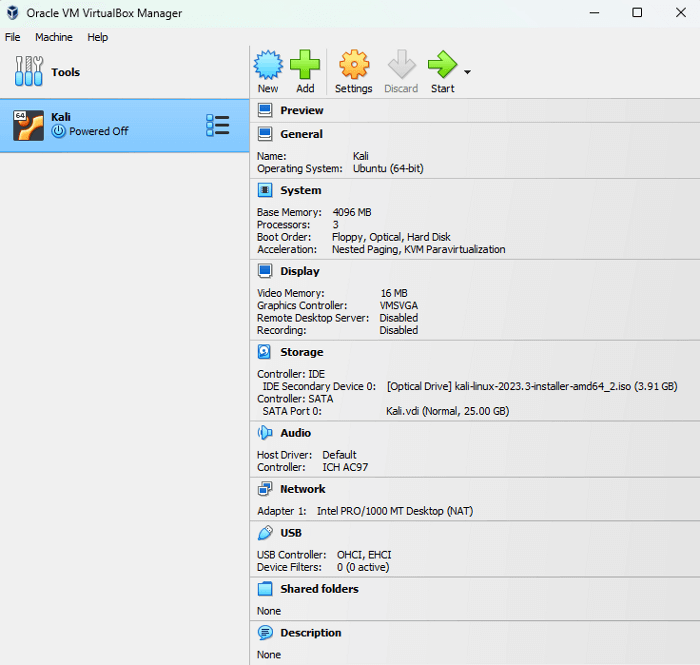
Step 3: Launch and Install Kali Linux
To install kali Linux on the newly created virtual machine follow the below steps:
- Click on “Start” to power on the VM. Upon powering the virtual machine, the installation window for Kali Linux will appear on the screen.
- Now, use the UP and DOWN arrow keys to navigate to Graphical Install and press ENTER.

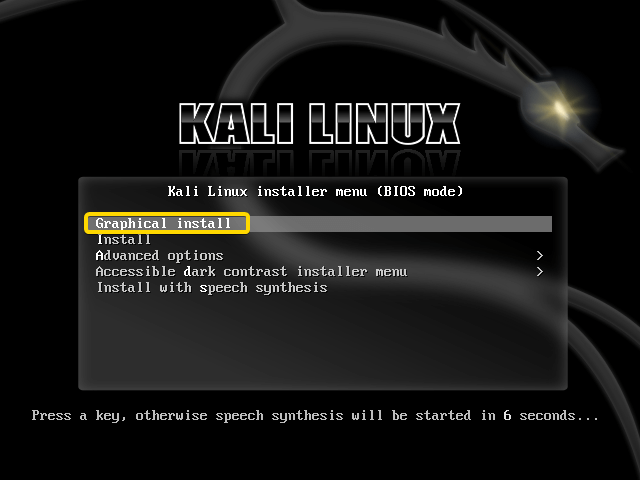
Note: If you don’t select any option from the “Kali Linux Installer menu”, it will choose the first option by default within a few seconds.
Step 4: Configure System Settings
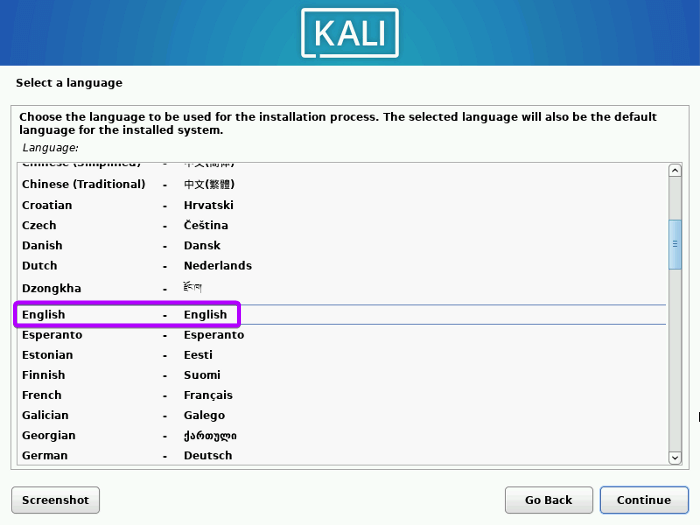
- Select a language as your preference (for example English) and click on Continue.

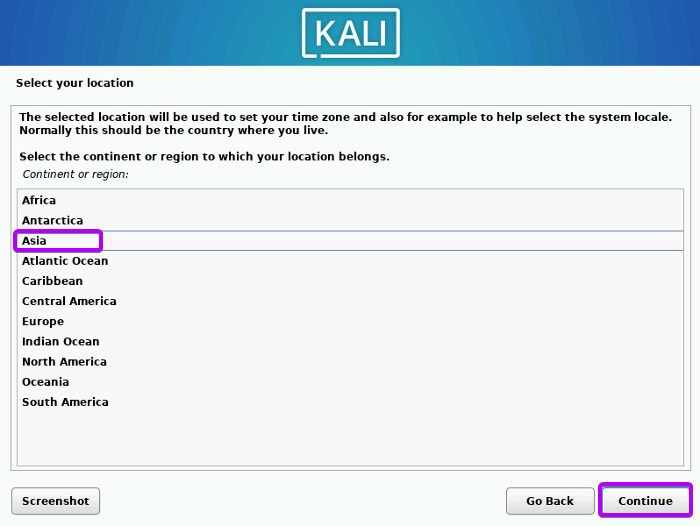
- Select the continent or region to which your location belongs (like Asia). Then click on Continue.

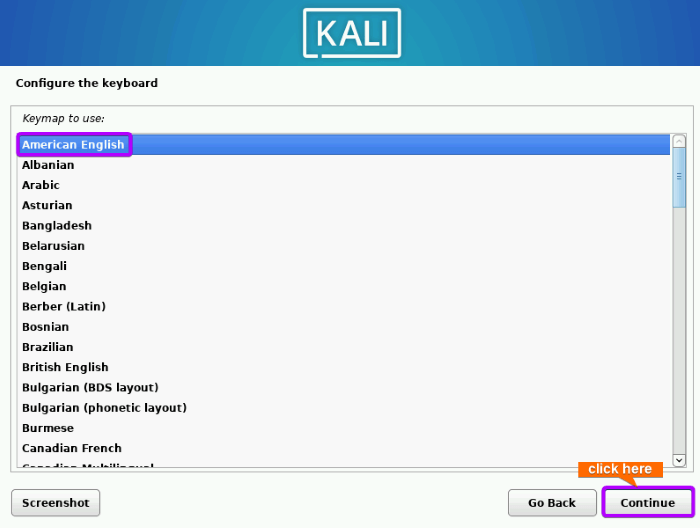
- Select your preferred keymap and hit Continue.

Step 5: Configure the Network
To configure the network:
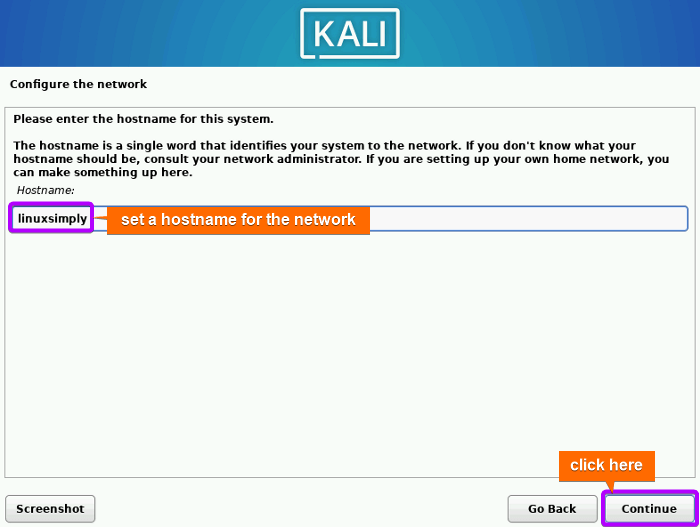
- Type a hostname for the Kali Linux VM and click on Continue.
 Note: Hostname should be a single word. If the system does not accept the single-word hostname you input, use “kali” as the default.
 - Now, type a domain name for the network like below and click on continue to proceed with the installation.


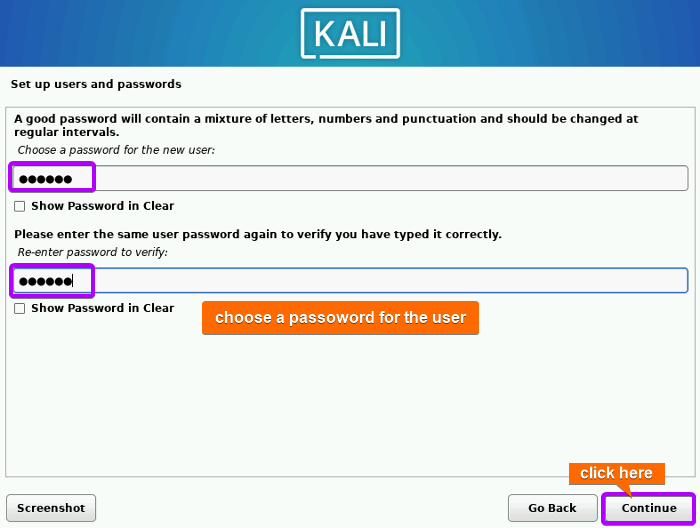
Step 6: Set up Users and Passwords
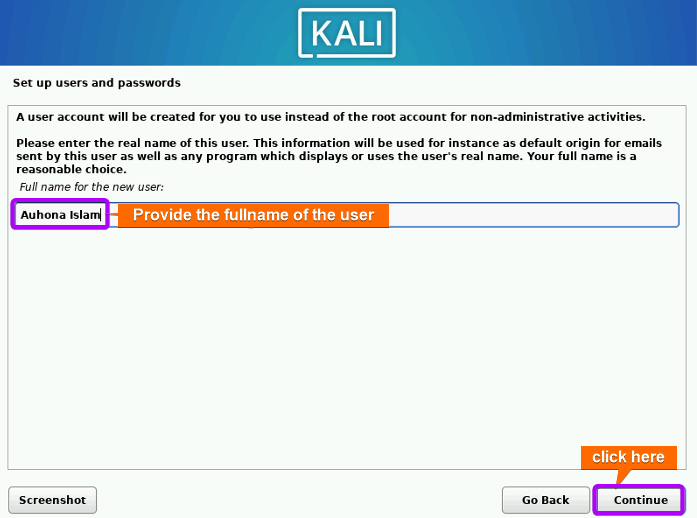
You have to create a user account to work on the Kali Linux VM. For that:
- First, enter your full name and click on Continue.

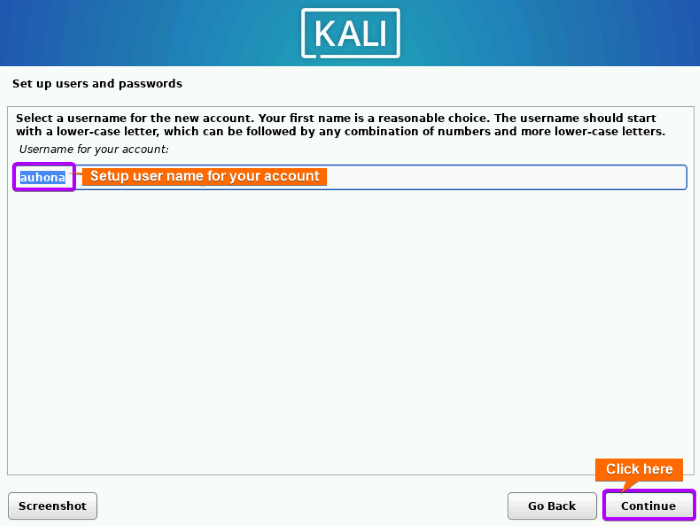
- Then, type a short user for your user account.
- Finally, set a password for the user account which will be asked for every time you turn on the VM. Click on Continue.
Step 7: Select Time Zone
Select your time zone and click on Continue. 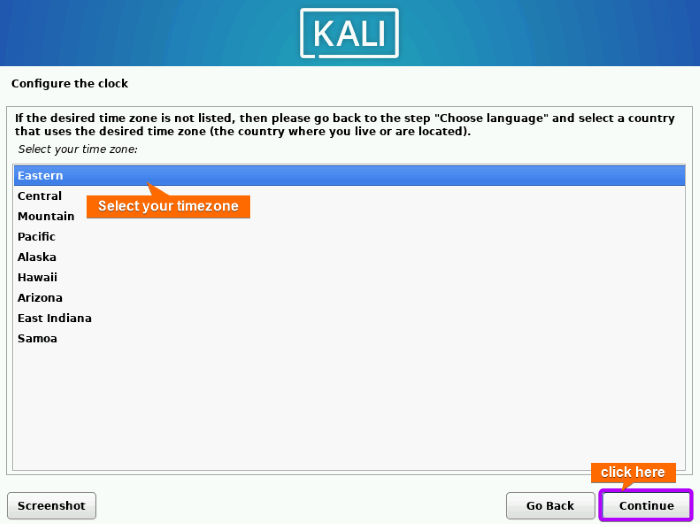
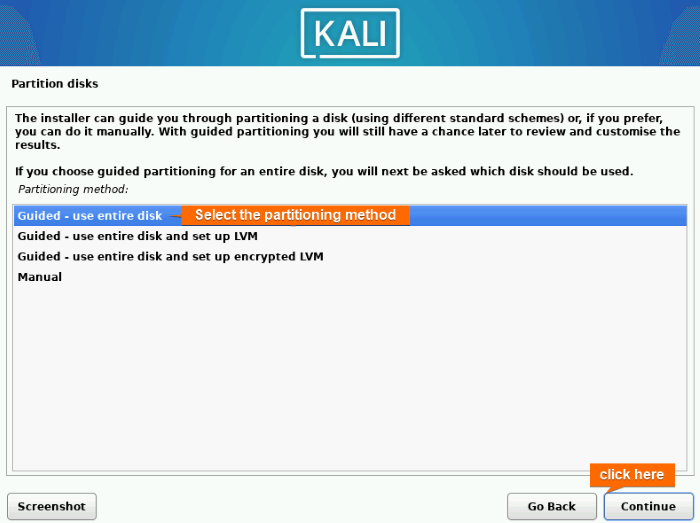
Step 8: Set up the Disk Partition
To ensure the operating system functions smoothly, you have to partition the disk.
- First, select “Guided partitioning” to partition the disk and click on Continue.

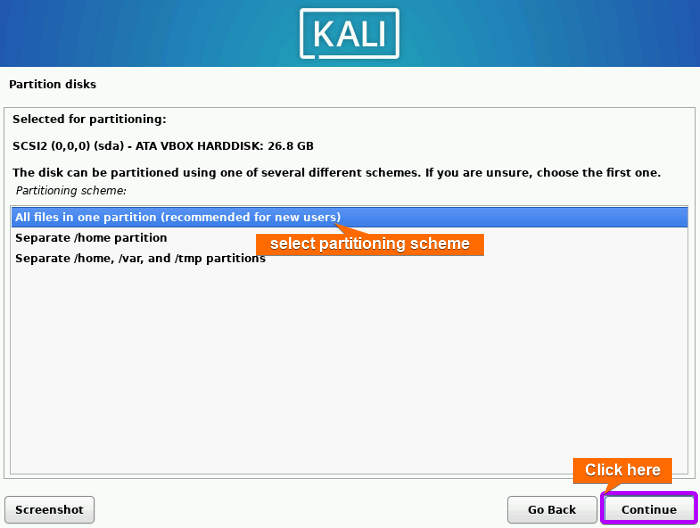
- Select the partitioning disk and click on Continue.
- Choose “All files in one partition” as the partitioning scheme.
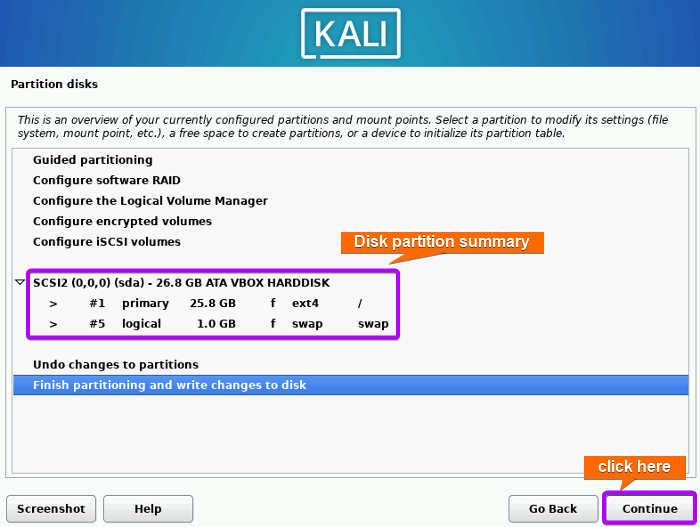
- Here, a prompt shows the summary of the configured partition. Click on Continue.
- Check the Yes option and click on Continue to allow writing the changes to the disks. After this, the base installation starts, and the screen resembles the image below. It may take a few minutes.


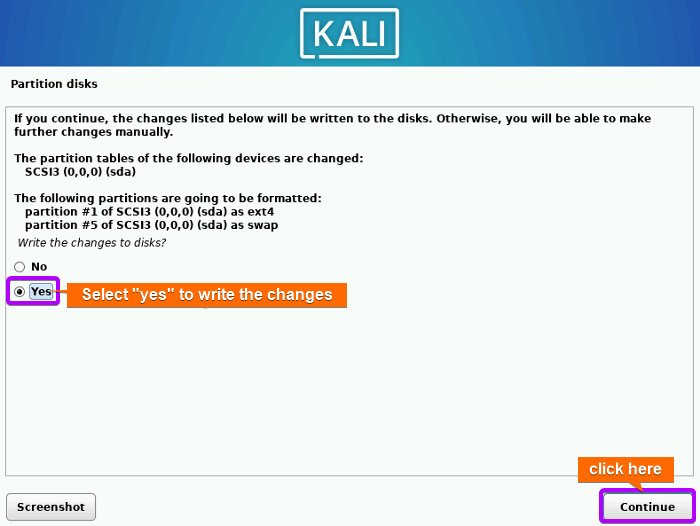 After this, the base installation starts, and the screen resembles the image below. It may take a few minutes.
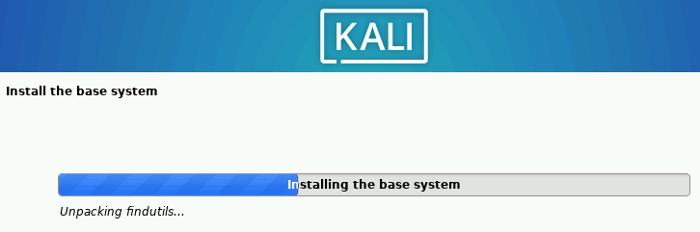
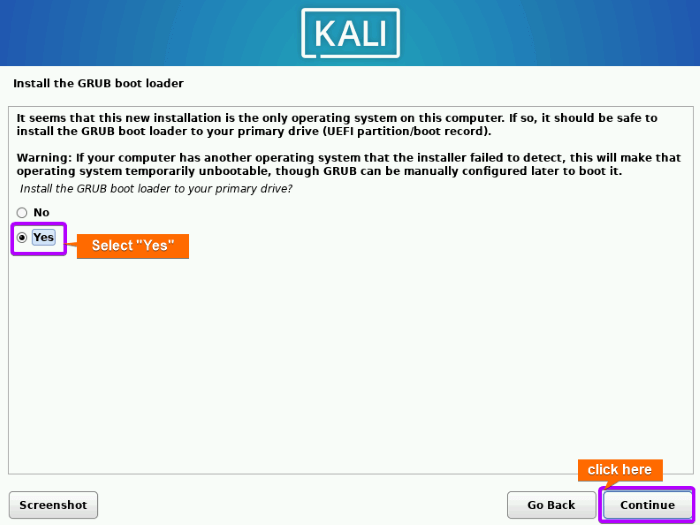
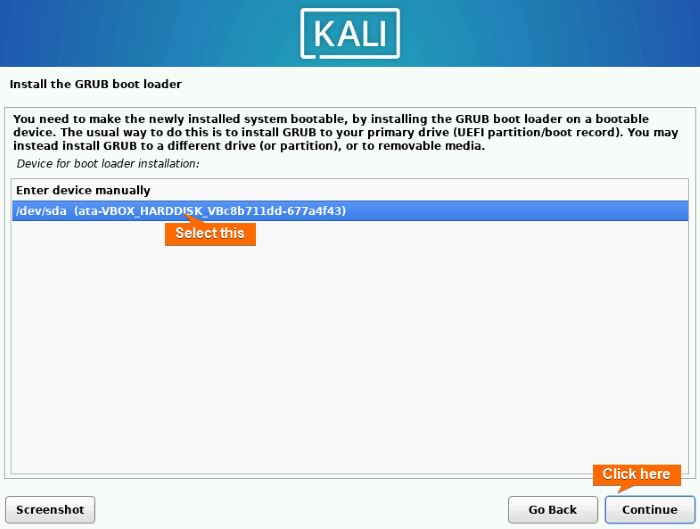
Step 9: Install the GRUB Bootloader
To install the GRUB BootLoader:
- Check the Yes option and click on Continue.
- Select ‘/dev/sda’ as the boot loader device to install GRUB and click on Continue.
 After that, it installs GRUB and starts to finish the Kali Linux installation on VirtualBox.
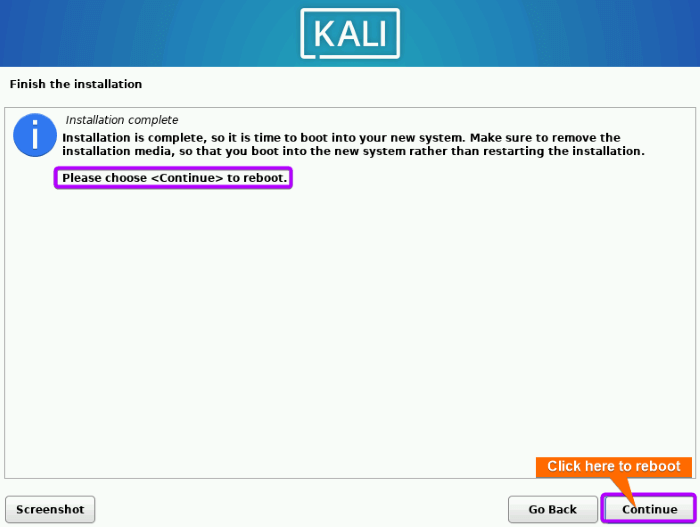
- Now, click on Continue after finishing the installation to reboot your computer.
 After that, it installs GRUB and starts to finish the Kali Linux installation on VirtualBox.
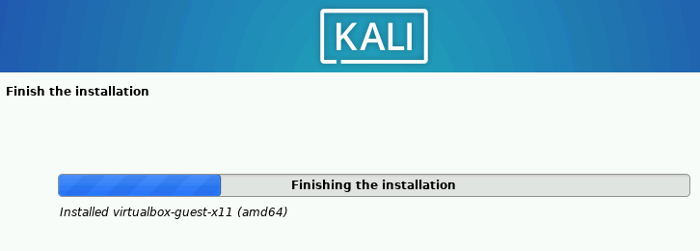
Step 10: Boot into Kali Linux
Finally, the Kali Linux VM starts and a login prompt appears. Now, type your username and password and click on Log In. 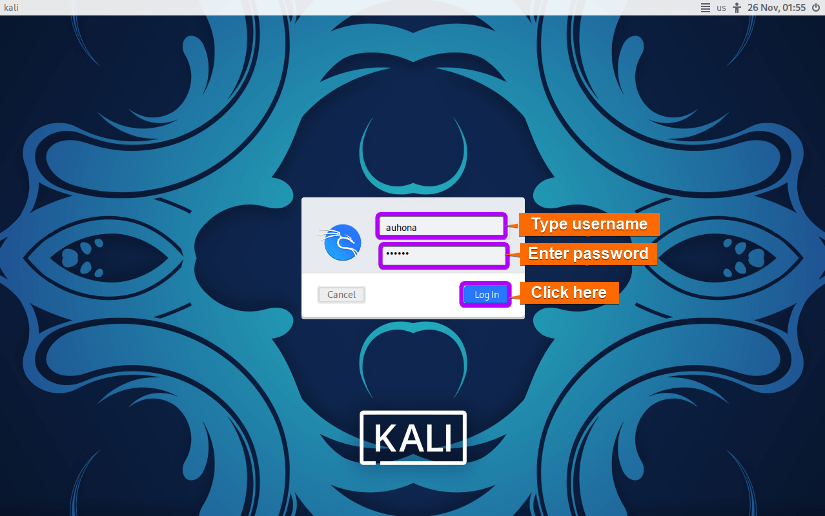 After logging in, the Kali Linux desktop screen will appear as below.
Conclusion
In conclusion, installing Kali Linux on VirtualBox provides a convenient and secure way to explore the powerful tools and features of this renowned penetration testing platform. By following the steps outlined above, you can successfully install Kali Linux on VirtualBox. You can now explore the various security and penetration testing tools of Kali Linux. Remember to use Kali Linux responsibly and adhere to ethical hacking guidelines.
People Also Ask
How do I share files between my host system and the Kali Linux virtual machine?
To share files between the host system and a Kali Linux virtual machine, you can follow the steps below:
- Make sure the Kali Linux VM is powered off.
- In the VirtualBox manager, select your Kali Linux VM and navigate to Settings > Shared Folders.
- Click on the folder with a plus sign icon to add a new shared folder.
- Choose a folder from the host system that you want to share.
- Set the Folder name and start the Kali Linux.
- Now, open the terminal on Kali Linux and create a directory using
sudo mkdir /mnt/shared. - Mount the shared folder with the following command:
sudo mount -t vboxsf <folder_name> /mnt/shared
Replace <folder_name> with the name you assigned to the shared folder in the VirtualBox.
What are the differences between Kali Linux and Ubuntu?
Here are some of the key differences between Kali Linux and Ubuntu:
| Feature | Kali Linux | Ubuntu |
|---|---|---|
| Primary Purpose | Penetration testing, ethical hacking | General-purpose, desktop, server, development |
| Base Distribution | Debian | Debian |
| Target Audience | Cybersecurity professionals, ethical hackers | General users, developers, system administrators |
| Pre-Installed Tools | A comprehensive set of security tools | General-purpose software, f |
| Community support | St5rong community for security professionals | Large and diverse community support |
What flavor of Linux is Kali?
Kali Linux is based on Debian, which is a popular and widely used Linux distribution. Debian is known for its stability and extensive package management system.
How much RAM should I allocate to the Kali Linux virtual machine?
Kali Linux typically requires a minimum of 2 GB of RAM for smooth operation. Allocating more RAM, if available, can improve performance.
Are there any security considerations when running Kali Linux on VirtualBox?
No, VirtualBox itself adds a layer of isolation, but ensure that you follow the security best practices within the Kali Linux environment. Keep the system updated, use strong passwords, and only use Kali for ethical hacking and security testing.
Why Run Kali in a Virtual Machine and Not as My Main OS?
While it’s possible to use Kali as your primary OS, there are compelling reasons to use a virtual machine:
- Running Kali as a virtual machine eliminates the need for dedicated hardware, making it more convenient and cost-effective.
- Storing and running potentially malicious scripts on Kali is after within a virtual environment.
- Running Kali as a virtual machine makes it easier to set up other virtual machines as hacking targets within the same hypervisor.
- The virtual machines allow for easy and frequent snapshots, enabling users to roll back Kali to a previous status in case of any issues or complications.
- Kali is not intended to be a daily driver for regular tasks like word processing or calendaring.
Why should I choose Kali Linux?
You should choose Kali Linux if you’re involved in cybersecurity, ethical hacking, or penetration testing. It offers a comprehensive suite of pre-installed security tools, a supportive community, high flexibility, a strong security focus, and regular updates. Keep in mind that Kali Linux is tailored for security professionals and may not be the best choice for general computing needs.
What is the difference between graphical install and install in Kali Linux?
Opting for the installation-only mode in Kali Linux results in a terminal environment, limiting usage to the command line interface. In contrast, choosing the graphical mode provides full desktop access, complete with a terminal allowing users to navigate through options similar to Windows.
How many tools does Kali Linux have?
Kali Linux includes over 600 pre-installed security tools and applications for various cybersecurity and penetration testing purposes.
What is the phishing tool for Kali Linux?
A phishing tool is a software application designed to facilitate or simulate phishing attacks, where deceptive methods are used to trick individuals into revealing sensitive information. Some notable phishing tools in Kali Linux include:
- Socialphish: Used for creating phishing pages, especially for social media platforms.
- ShellPhish: Generates phishing pages for prominent social networking sites like Facebook, Twitter, and Instagram.
- Zphiser: An open-source phishing tool with multiple features.
- King-Phisher: A phishing campaign toolkit for creating and managing campaigns.
- Ghost Phisher: Designed for wireless and phishing attacks.
Related Articles
- How to Install Ubuntu on VirtualBox [A Complete Guide]
- How to Install Arch Linux on VirtualBox [3 Methods]
- How to Install Fedora on VirtualBox [Simple Guide]
- How to Install Debian on VirtualBox [Step-by-Step]
- How to Install VirtualBox Guest Additions on Debian
- How to Install CentOS 7 on VirtualBox [8 Easy Steps]
- How to Install VirtualBox Guest Additions on CentOS
<< Go Back to Virtual Machine Installation Guide | Linux OS Installation Guide | Learn Linux Basics
FUNDAMENTALS A Complete Guide for Beginners


