Virtualization enables running multiple operating systems on one physical computer, making it valuable for developers, testers, and users without requiring extra hardware. For instance, running Ubuntu on a virtual machine on Windows or macOS illustrated this concept. Ubuntu, known for its user-friendliness and features, is popular. VMware Player offers a solution for exploring Ubuntu without a full physical installation. In this comprehensive guide, I’ll take you through the process of installing Ubuntu on VMware Player, a free virtualization software for Windows and Linux hosts.
Key Takeaways
- Getting familiar with the virtual machine.
- Installing Ubuntu in VMware player and creating a virtual machine.
Requirements
- You must have VMware Workstation Player installed on your computer.
- Your computer needs to own a 64-bit x86 processor with virtualization technology (VT-x or AMD-V) support.
- You would require a computer with RAM of at least 2GB or more for a smooth performance.
- You have to allocate at least 20 GB of disk space for your Ubuntu VM.
Quick Intro to Ubuntu and VMware Player
Ubuntu is a widely used open-source Linux distribution known for its user-friendly interface and strong community support. It’s an excellent choice for both beginners and experienced users, offering a vast library of free software.
VMware Player, on the other hand, is a free virtualization software that allows you to run multiple operating systems, including Ubuntu, on a single physical machine. It’s an easy-to-use tool for creating virtual machines and exploring different operating systems without affecting your main system.
Why Choose VMware Player?
VMware Player is a compelling choice for virtualization due to its user-friendly nature, cost-effectiveness, and versatility. Its straightforward installation and setup make it particularly appealing to beginners, allowing them to delve into the world of virtualization with ease. Being free for personal use, it offers an economical solution for individuals, students, and hobbyists who don’t require the advanced features found in pricier virtualization software.
Moreover, VMware Player boasts compatibility with a wide array of guest operating systems from various Linux distributions to Windows and macOS. It enables users to run diverse virtual machines for various purposes. Additionally, VMware’s robust community support and resources provide users with ample assistance and guidance, making it a solid choice for those seeking a reliable and resource-efficient virtualization solution that doesn’t break the bank.
Install Ubuntu on the VMware Player
Installing Ubuntu on VMware Player is an easy and simple process. This process includes three major tasks which include downloading the Ubuntu iso image file, creating a virtual machine on VMware Player, and installing Ubuntu on the Virtual machine. In this section, Each task has been explained elaborately by mentioning the step-by-step process.
Step 01: Download Ubuntu ISO Image
Installing Ubuntu on VMware is a straightforward process. The very first step of this is to download the Ubuntu iso file on your computer. You can follow the steps below:
Steps to Follow >
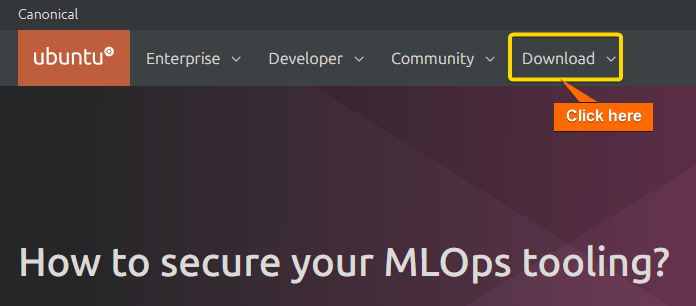
- Begin by accessing the official Ubuntu website and click on the Download option.

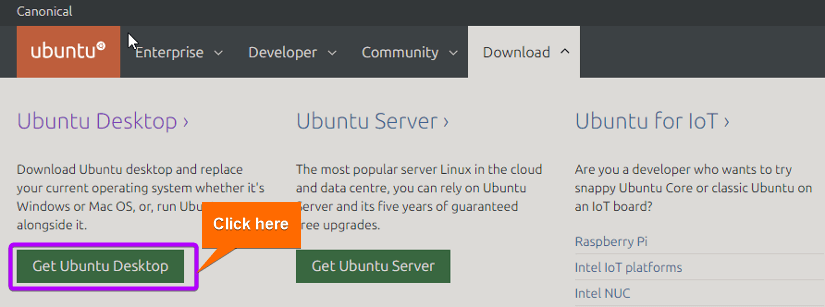
- After that, click on the Get Ubuntu Desktop.

- Now hit the Download 23.04 option to download the Ubuntu iso Image. You can choose any other version of Ubuntu from here as you need.

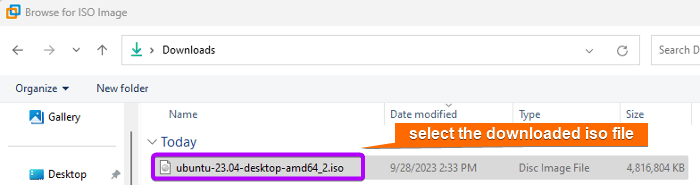
In this location, you can observe the ISO image for Ubuntu-23.04, with 23.04 denoting the Ubuntu version. Now keep this ISO image intact for later use.
Step 02: Create a Virtual Machine on VMware Player
After downloading the Ubuntu iso image file, this is the step to create a virtual machine on a VMware Workstation player.
Step to Follow >
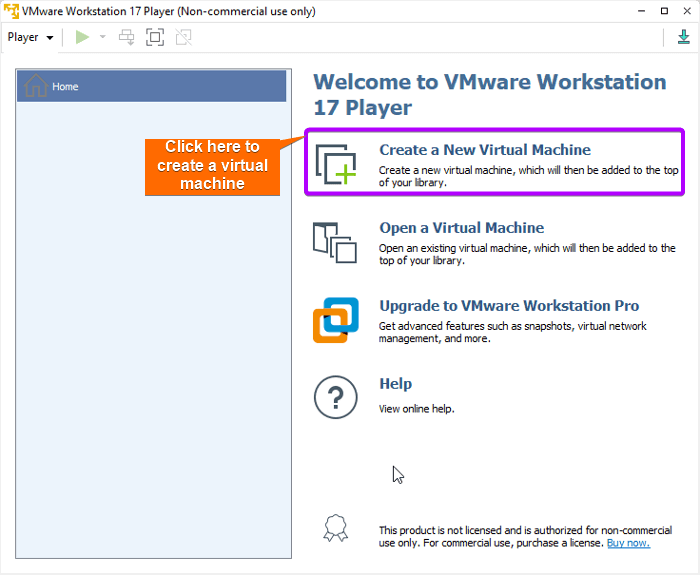
- Open the VMware Player and click on the Create a New Virtual Machine option.

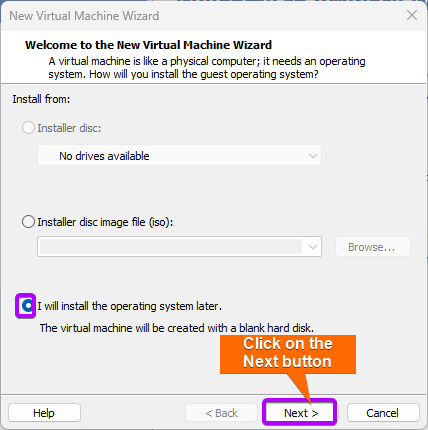
- Choose the third option ‘I’ll install the operating system later.’ Then hit the Next button.

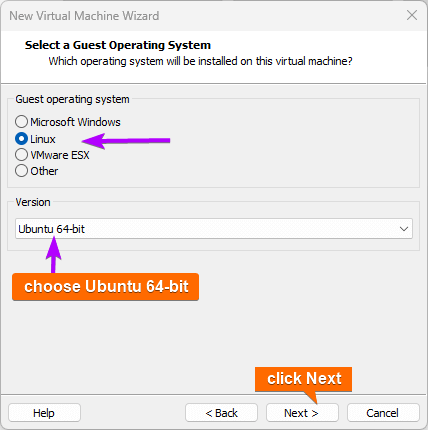
- As Ubuntu is a distribution of Linux, choose Linux as the guest operating system and select the Ubuntu 64-bit option as the Linux version.
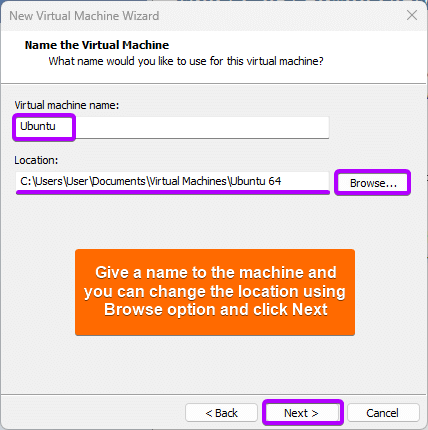
- Give a virtual machine name. You can choose the location of the virtual machine using the Browse option.
Here, you can see that a virtual machine was created on the VMware player named Ubuntu. 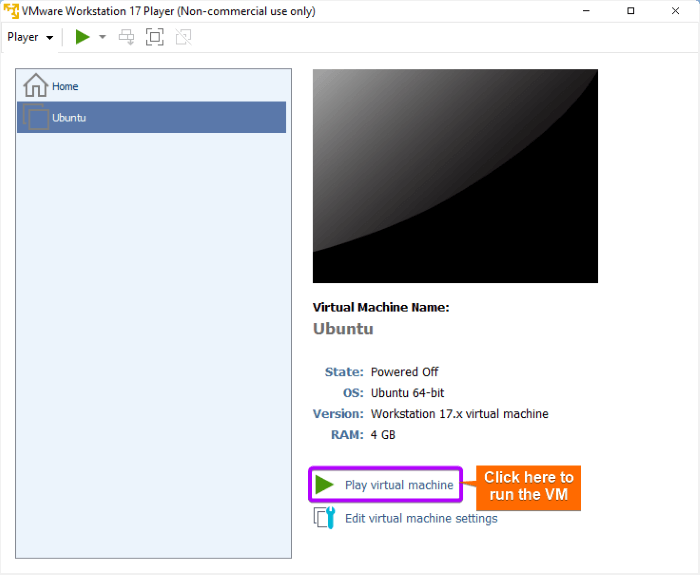
Step 03: Install Ubuntu on the Newly Created Virtual Machine
Installing Ubuntu on the newly created Virtual machine of the VMware Player is a straightforward and instructive process that you have to follow accordingly.
Step to Follow >
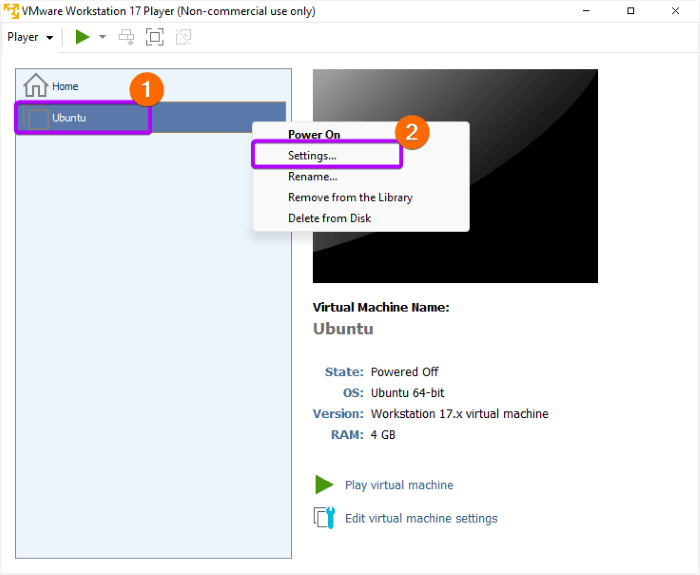
- Right-click on Ubuntu and go to the Settings option.
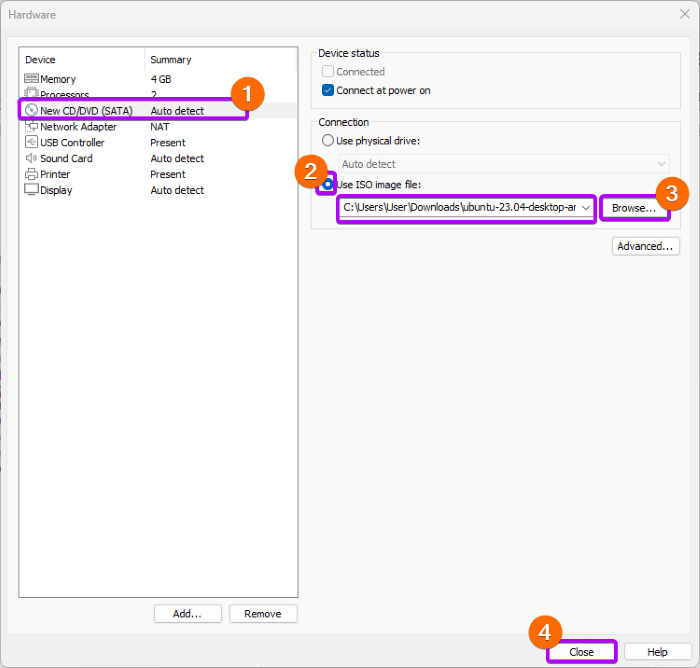
- First, select the CD/DVD (SATA), choose the second option ‘Use ISO image file’ and click on the Browse option to select the previously downloaded Ubuntu iso image file. Lastly, click on OK.

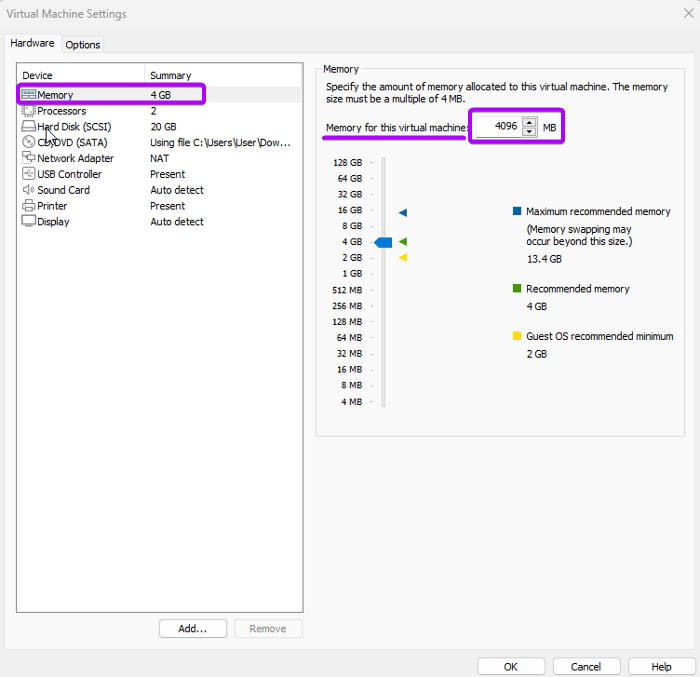
- Select a minimum of 4GB memory for the virtual machine.

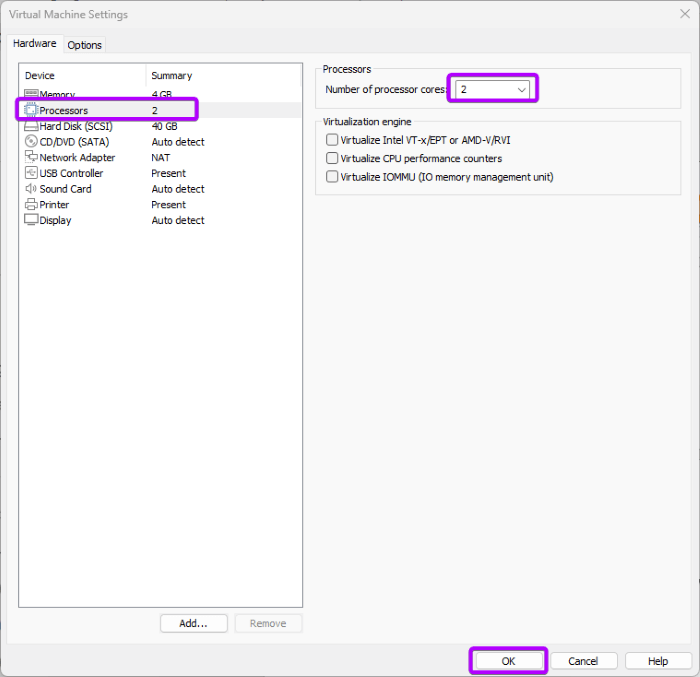
- After that, click on the Processor option in Settings and set the number of processors you want to use for the virtual machine. I’ve set up 2 processors for the virtual machine.
- Lastly, click on the Play virtual machine option to run the VM.
- After clicking the button, you’ll see a window where Ubuntu is opening.
 This is the Ubuntu homepage you’re going to get.
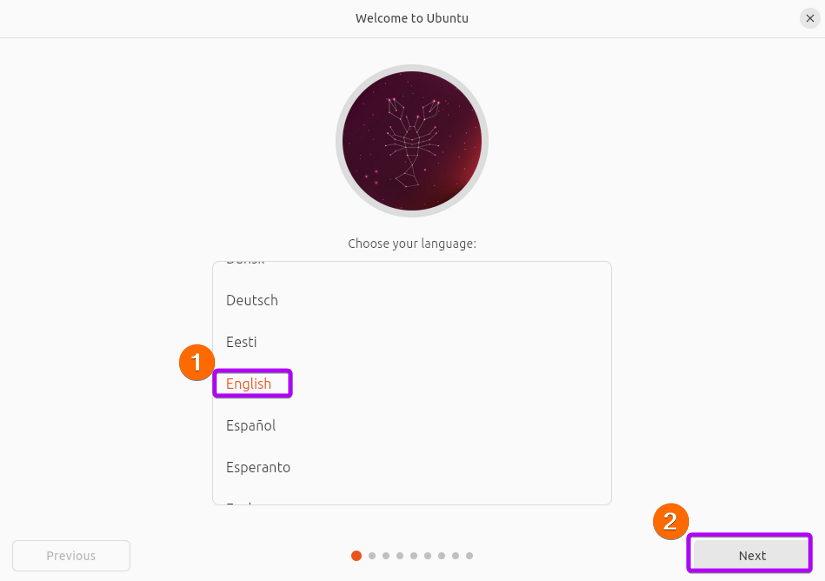
- Choose the Language of your preference and click on the Next option. I’ve chosen English as my Language.

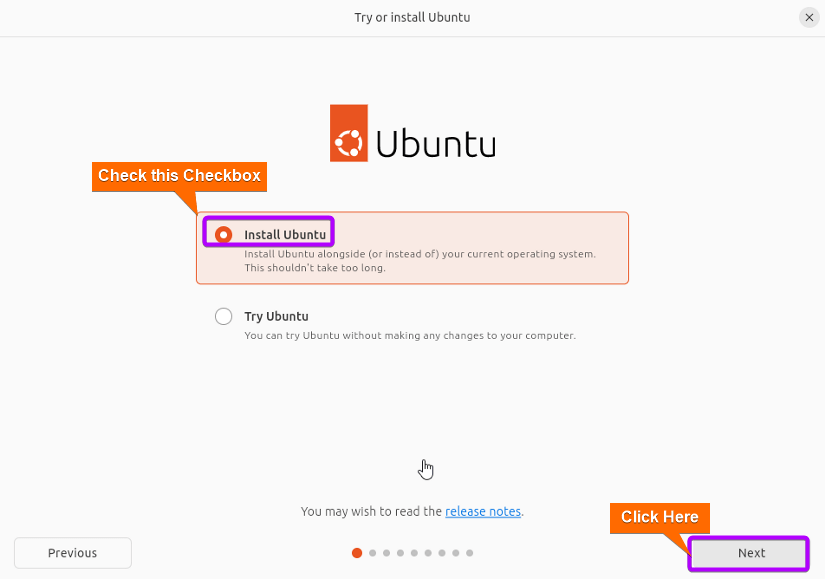
- Now, click on the Install Ubuntu option and go to Next.

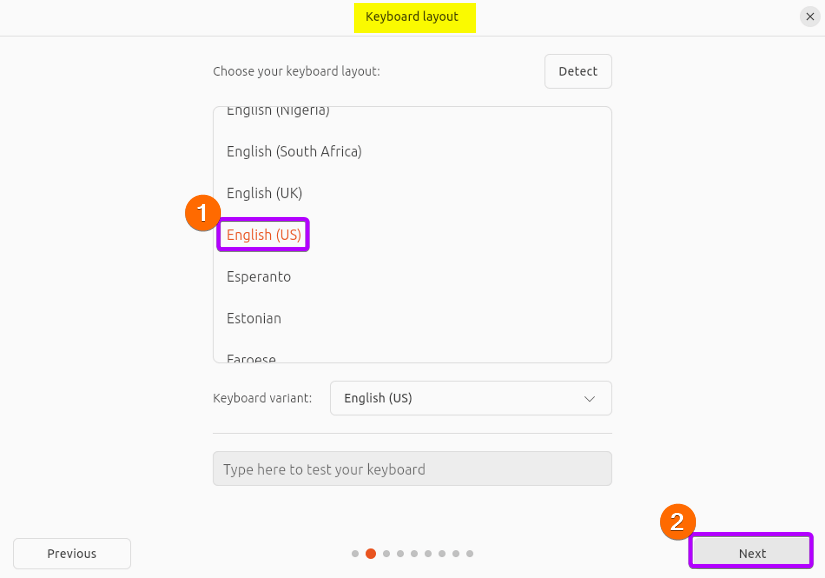
- For keyboard Layout, choose the language. Here I’ve used the English(US) option.

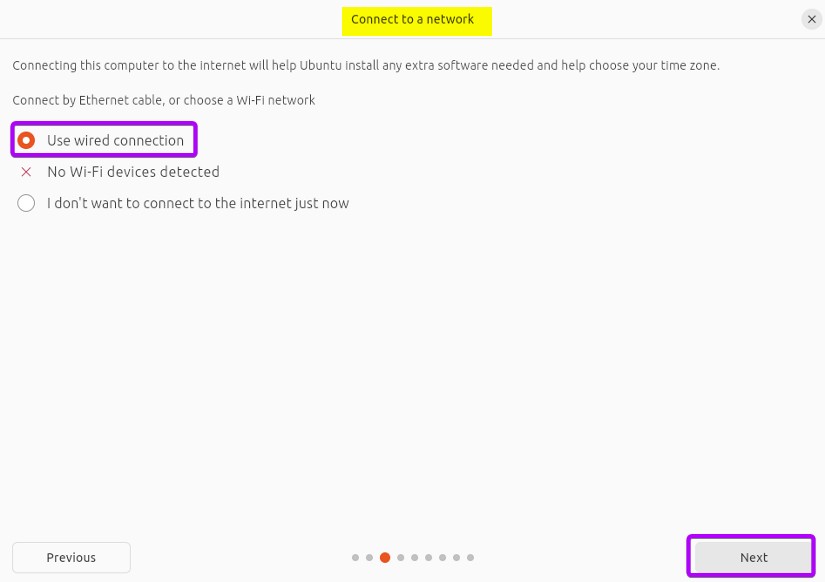
- In the Connect to a Network section, choose the Use Wired Connection.

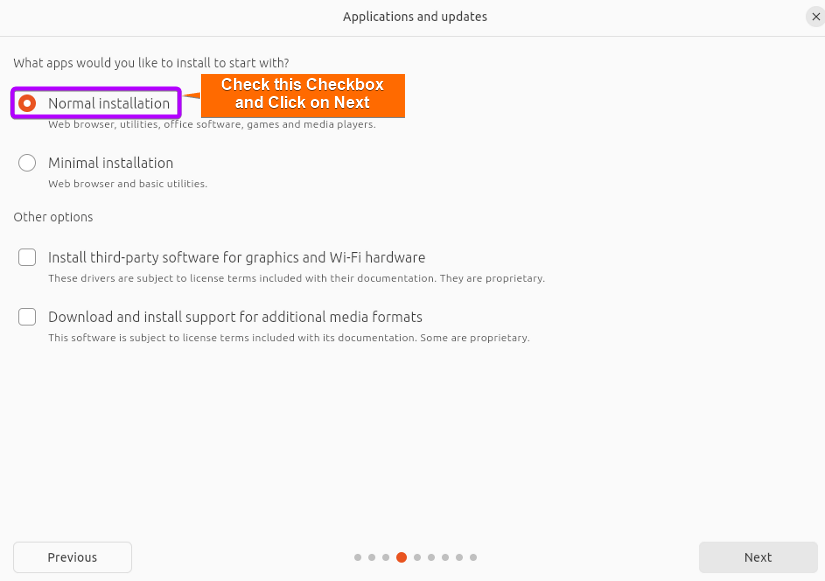
- In Application and Updates, choose the Normal installation option.
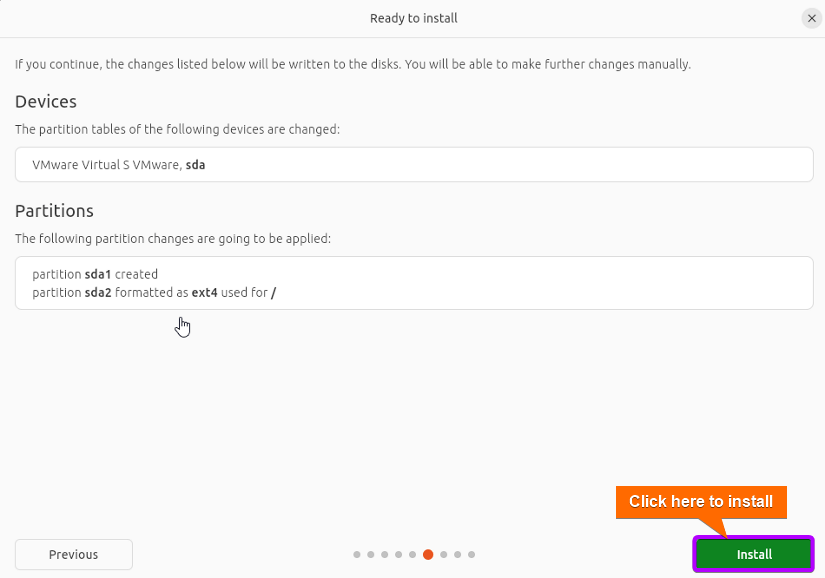
- As a type of installation, choose Erase disk install Ubuntu and, then click on Next.

- Finally, click on the install option.
- After the installation, select your time zone.
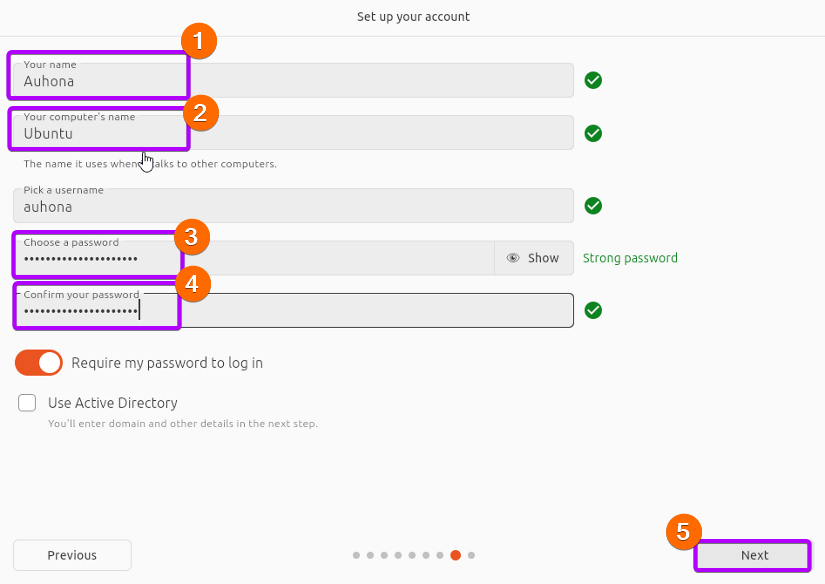
- To set up your account enter your Name, Computer’s Name, and lastly, choose a Password for your account.

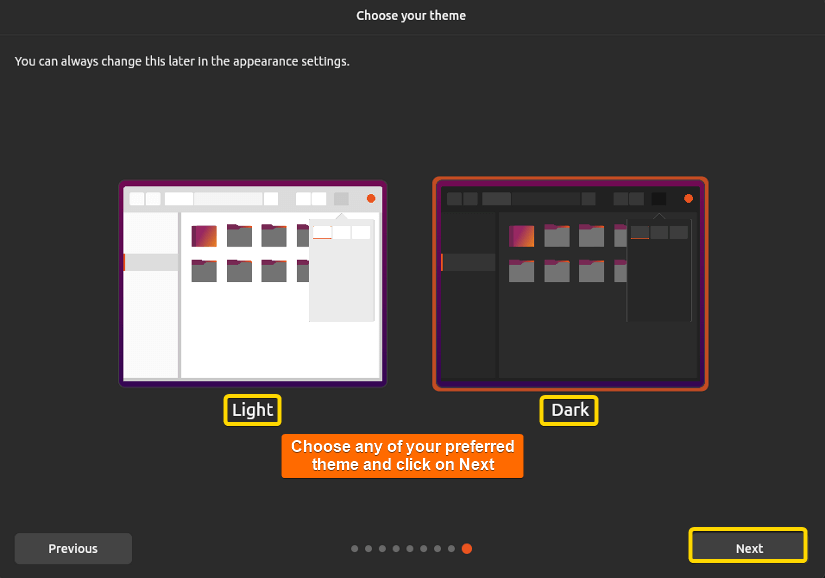
- At this moment, choose a theme between Light and Dark and click on Next. A window will appear while setting up the system.

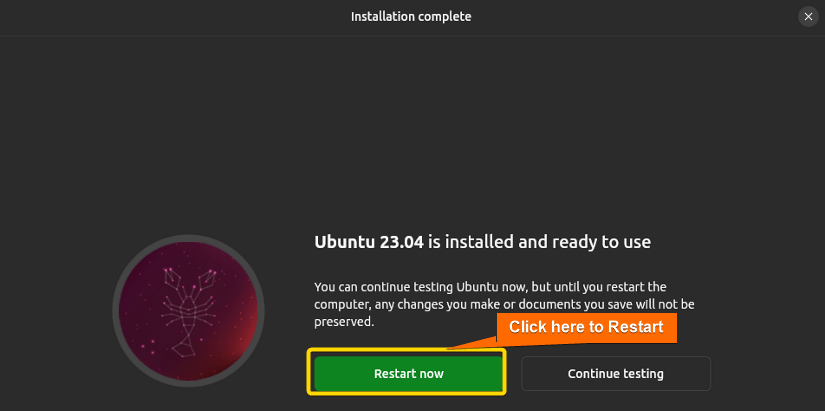
- Now, click on the ‘Restart now’ option to complete the installation.

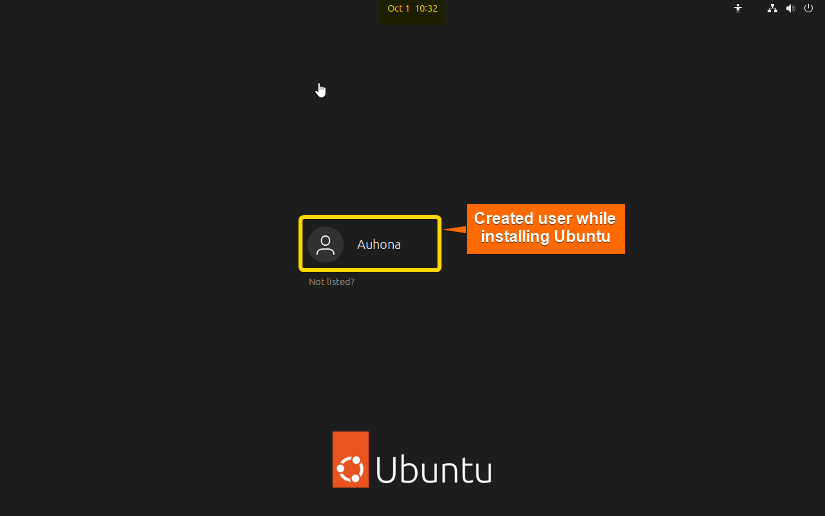
- After the accomplishment of the installation, you can see here a user account has been created. Click on the user name.
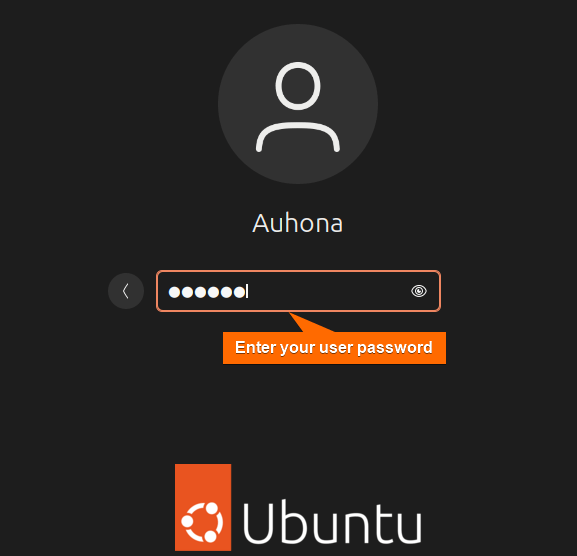
- Now Enter your password and press Enter.


 This is the Ubuntu homepage you’re going to get.


 A window will appear while setting up the system.
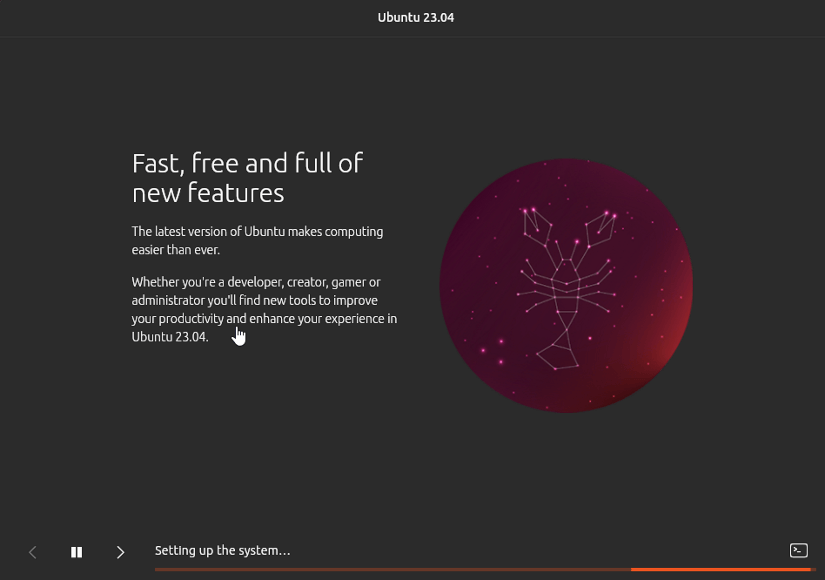
Immediately after logging into your account, a Ubuntu homepage will appear like this. 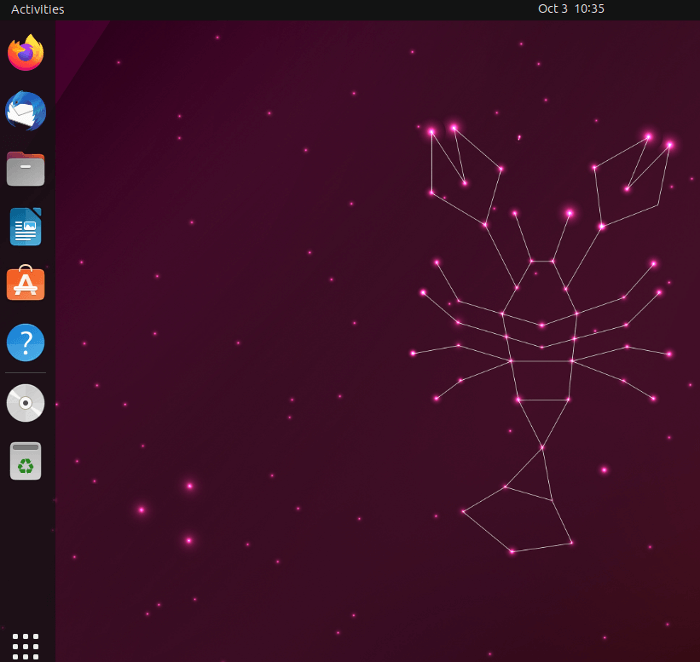 Now, you are good to work on Ubuntu as you want to explore. Don’t hesitate to dive deeper into Linux and its functions as you’ll be working on a virtual machine. Any malfunctions in the VM don’t affect your main operating system. So Explore as much as you are eager.
Conclusion
To sum it up, setting up Ubuntu on VMware Player is a simple procedure that grants you access to Ubuntu’s capabilities without the need for a complete installation on your physical system. Whether you’re a developer, student, or merely intrigued by Linux, this approach offers a convenient and safe avenue to delve into Ubuntu’s features. Enjoy your virtual computing experience.
People Also Ask
Related Articles
- Installing Ubuntu on VMware Workstation [Easiest Guide]
- [Solved] VMware tools not running
- A Comprehensive Guide on Installing Kali Linux on VMware
- Installing Arch Linux on VMware [Easiest Guide]
- VMware Shared Clipboard [Enable Copy-Paste & Folder Sharing]
- [Fixed] Operating System Not Found on VMware
- VMware Workstation Pro vs VMware Player [Ultimate Comparison]
<< Go Back to Virtual Machine Installation Guide | Linux OS Installation Guide | Learn Linux Basics
FUNDAMENTALS A Complete Guide for Beginners


