Installing Linux Mint on a Mac is a compelling venture for users seeking a seamless blend of macOS aesthetics and the versatility of Linux. It opens up the opportunity for customization and access to Linux Mint’s open-source software on your Apple hardware. Let’s delve into the step-by-step process of installing Linux Mint on your Mac hassle-free.
Requirements to Install Linux Mint on Mac
The recommended requirements for installing Ubuntu as dual boot on Mac are:
- RAM: 4 GB
- Processor: 64-bit 2 GHz
- Free Storage: 30 GB minimum
- USB Drive: 4 GB
- Internet access is helpful
11 Steps to Dual Boot Installation of Linux Mint on Mac
Follow the below steps one by one to install Linux Mint on your Mac in the easiest way:
1. Download the Linux Mint ISO File
After backing up data, the first step of installing Linux Mint is to download Linux Mint ISO. Among the available types of Linux Mint, Cinnamon is the most popular version of Linux Mint. It is slick, beautiful, and full of new features and primarily developed for beginners. So, click on the download button of Cinnamon.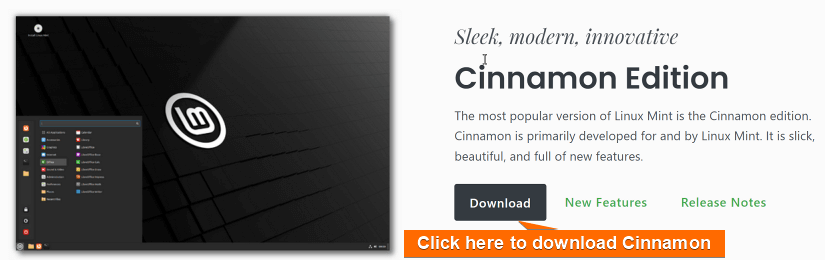
2. Create a Bootable USB Drive
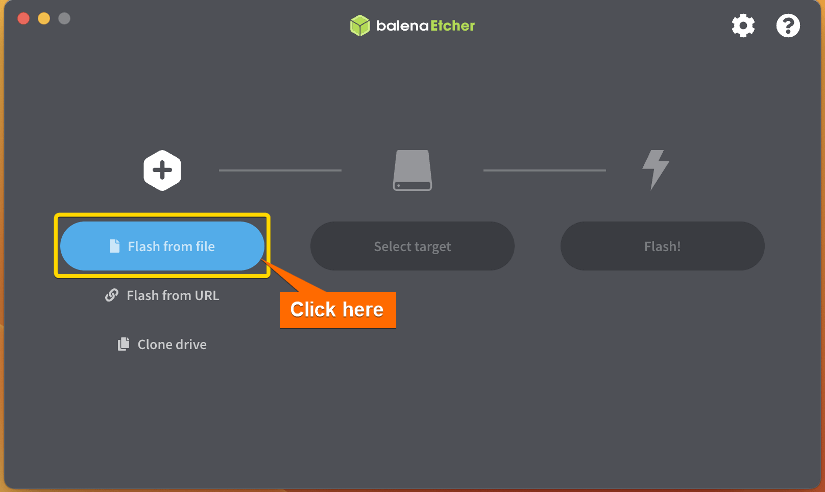
To create a bootable USB drive of the ISO file, use “Etcher”. It is a free and open-source application. First, Install Etcher on Mac. After installing, follow the steps:
- Open Etcher and select “Flash from File”.

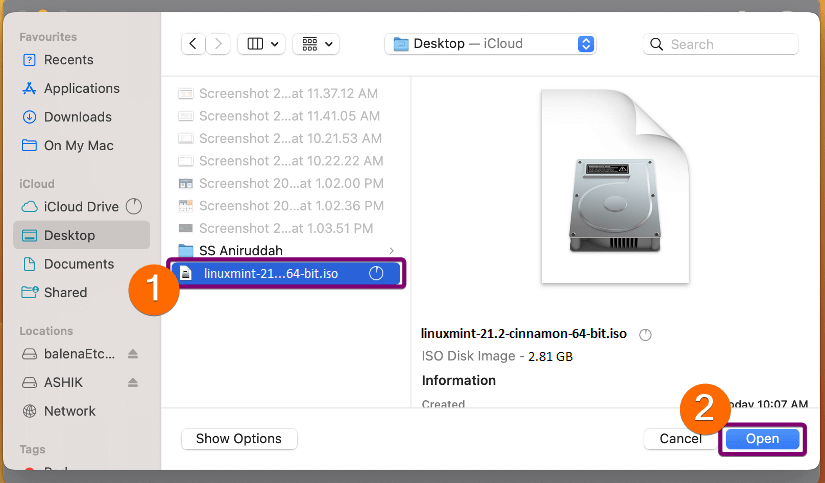
- Select the ISO file from the location where you’ve downloaded it.

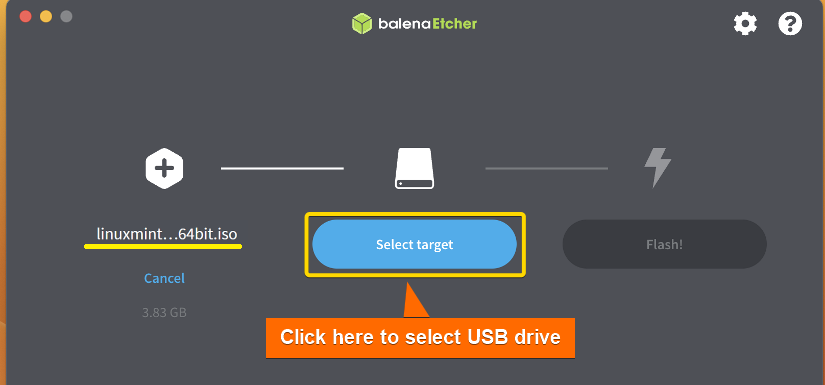
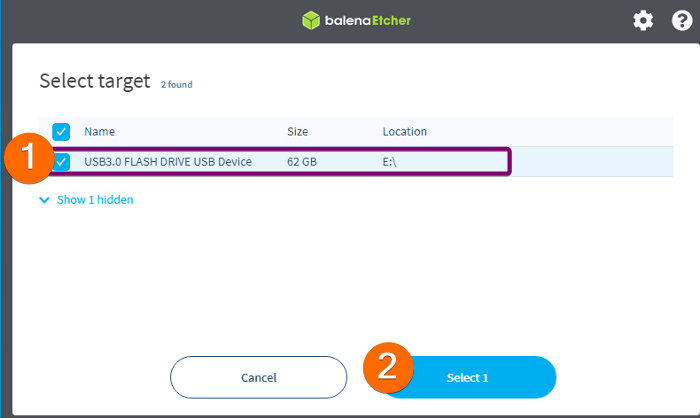
- Plug in a USB pen drive to the PC and click on “Select target”.

- Select your USB drive from the list.

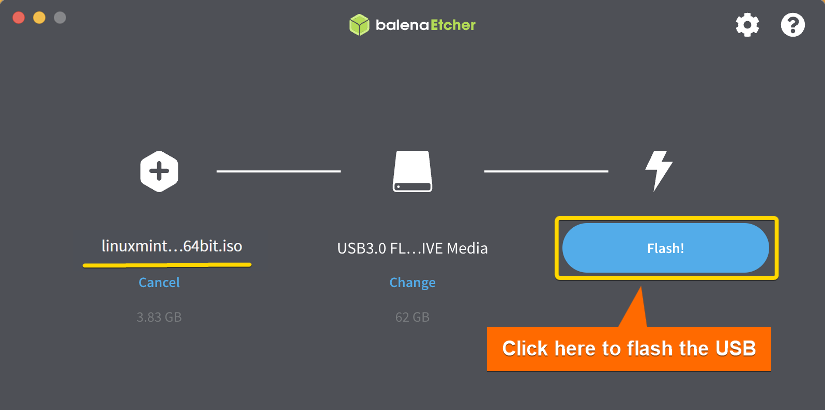
- Finally, click on “Flash” to start flashing the ISO file into the USB drive.
 After that, Etcher will flash the ISO file into your USB drive and make it bootable.
 After that, Etcher will flash the ISO file into your USB drive and make it bootable.
3. Create Disk Partition
To create a disk partition on Mac, follow the below steps:
- Open Spotlight by pressing COMMAND (⌘) + SPACE.
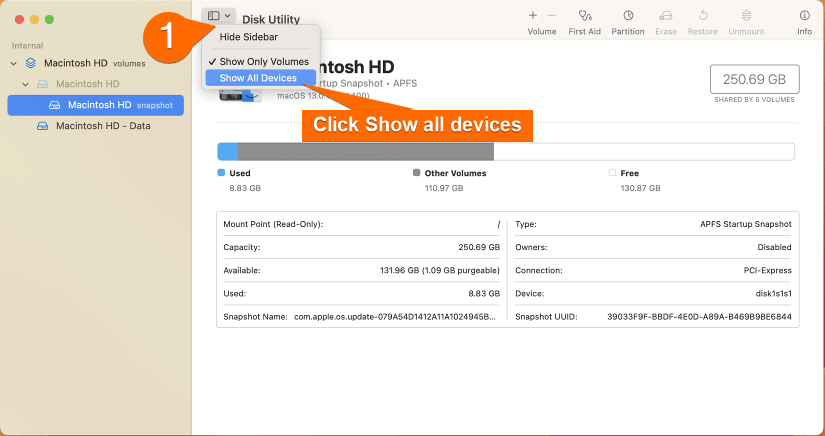
- Search and open Disk Utility.
- Click on View and select “Show All Devices”.

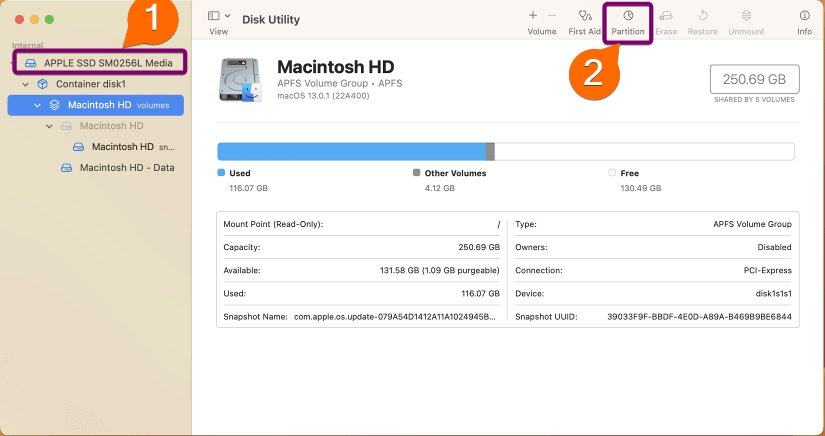
- Select the topmost device and click on “Partition”.
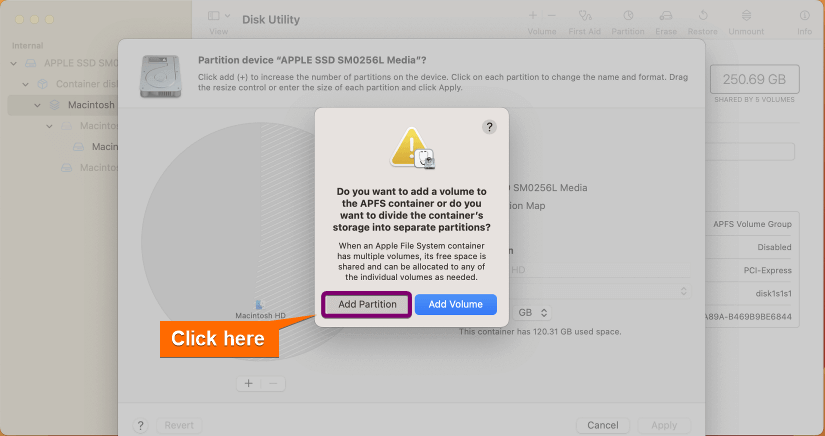
- Click on the + icon.
- Click on Add Partition.
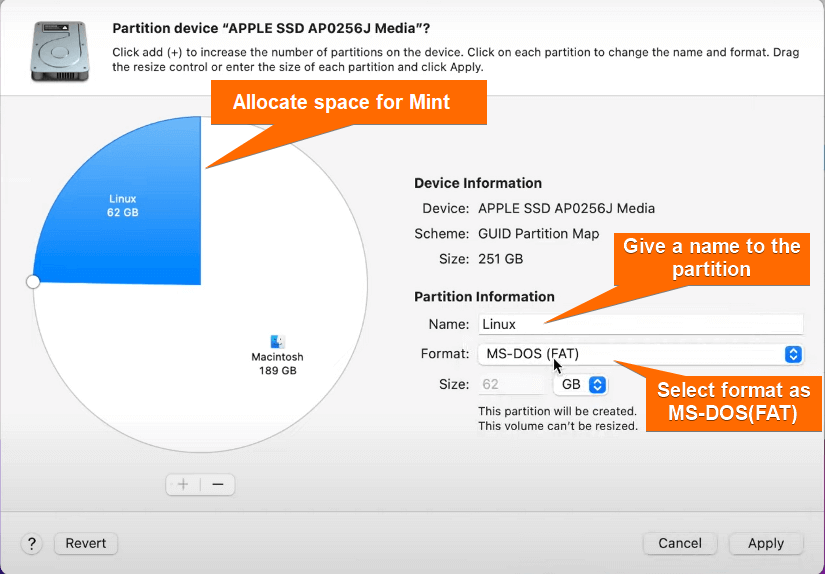
- Allocate space for Linux Mint and set the format as MS-DOS (FAT). Then click on “Apply”.

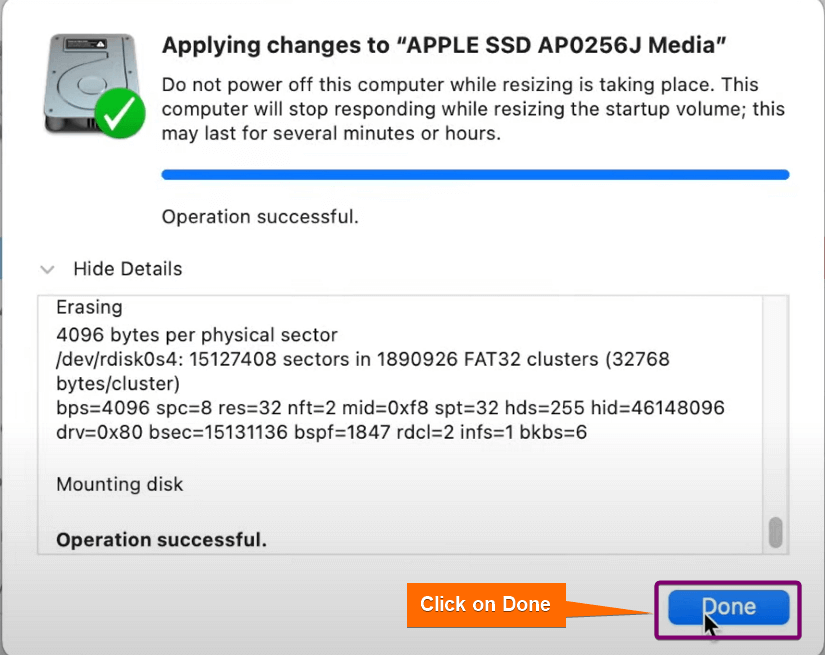
- Click on “Done” when the partition is created successfully.

4. Boot Linux Mint from USB Drive
To boot Ubuntu from the USB drive, follow these steps:
- Plug the bootable USB drive into the PC.
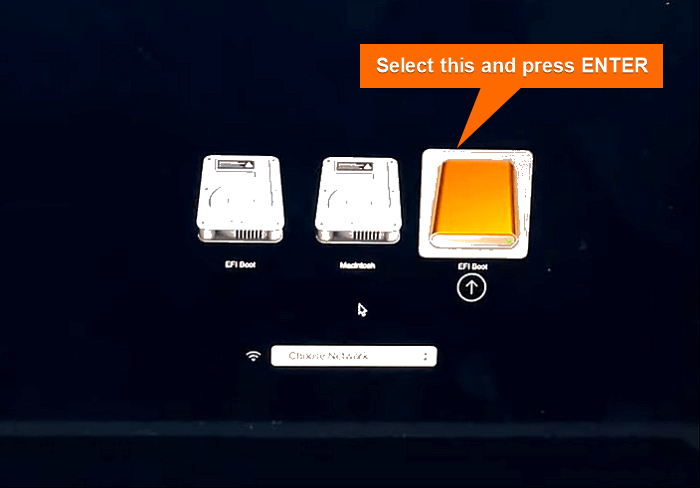
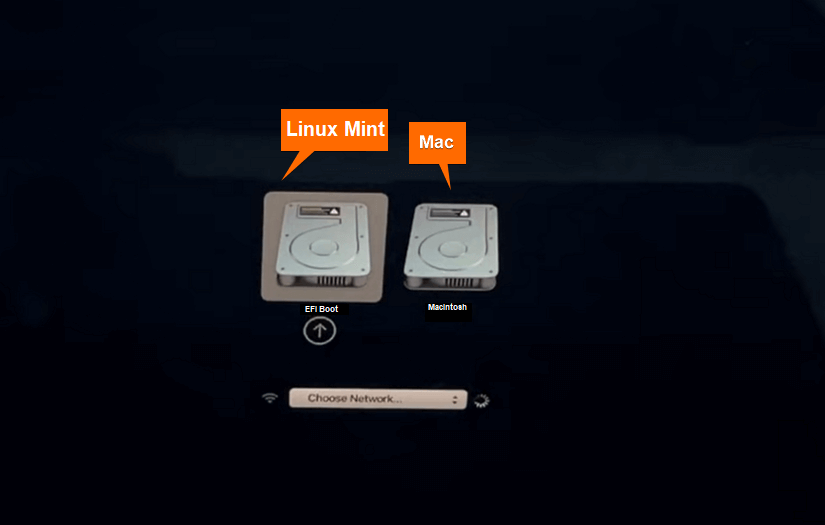
- Restart and hold the OPTION (⌥) key.
- Select “EFI boot” using the arrow keys and press ENTER.

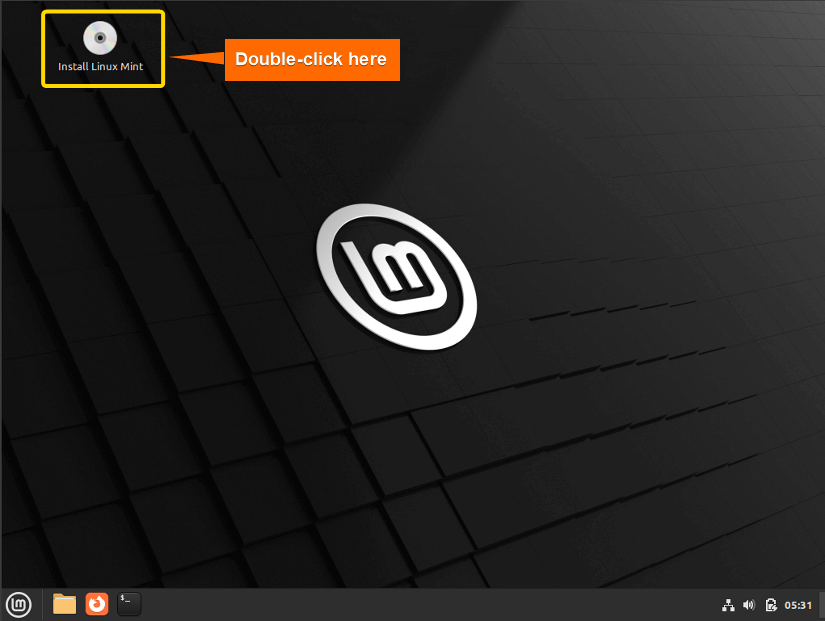
- The Linux Mint live environment will appear after a while. Double-click on the “Install Linux Mint” icon to start the installation procedure.

5. Select Language
Select a language for the system and click on Continue.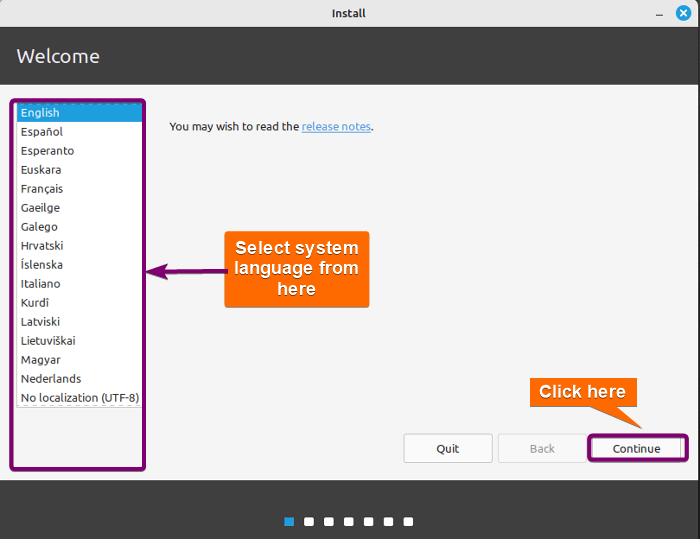
6. Select Keyboard Layout
Select the keyboard layout and click on Continue.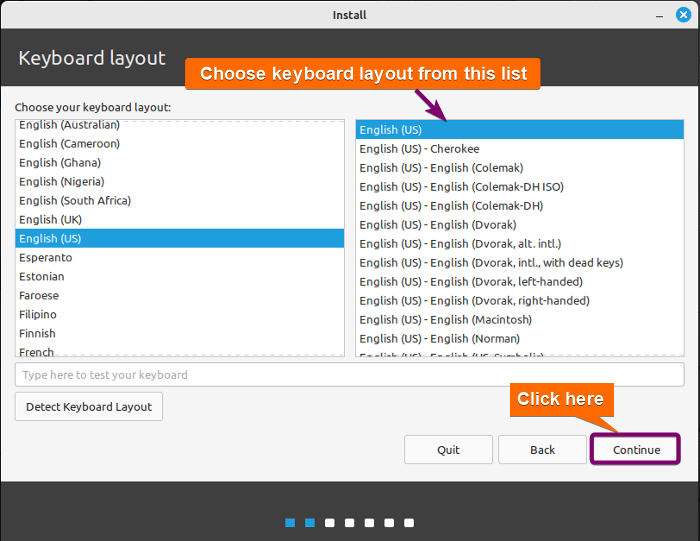
7. Install Multimedia Codecs
Multimedia codecs are additional packages that handle different audio and video file formats. Users often need to install these codecs separately to enable playback of certain media formats. To install these, click on the checkbox “Install multimedia codecs” and click on Continue.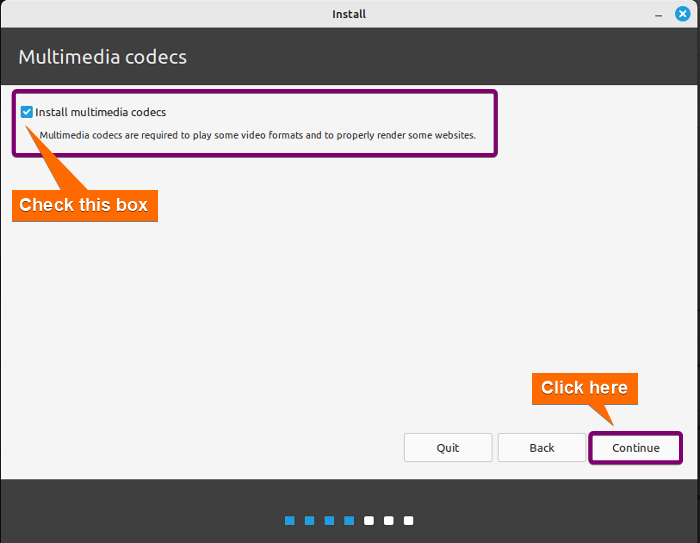
8. Set Installation Type
Select “Install Linux Mint alongside Mac OS X” for a dual boot installation. This is the easiest installation method for a dual boot that automatically allocates disk for Linux Mint from the partitioned space.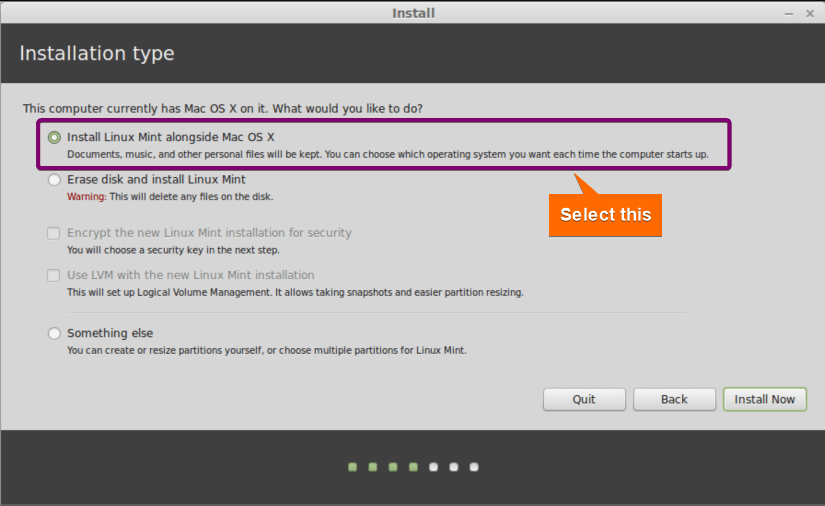
9. Select Location
Select your location from the drop-down menu on the map screen. Then, click on Continue.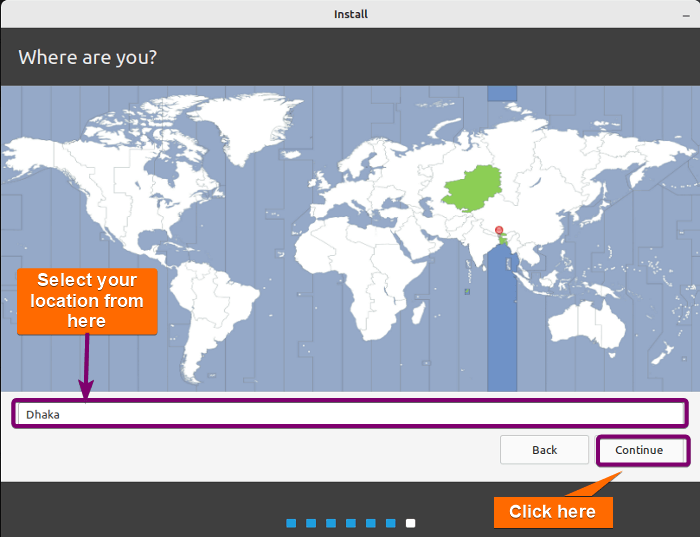
10. Set User Credentials
On this screen, type your name, computer name, and username. Then type and re-type a strong password. Finally, select “Require my password to log in”. Selecting this option will ask for the password every time you power on your PC. Click on Continue.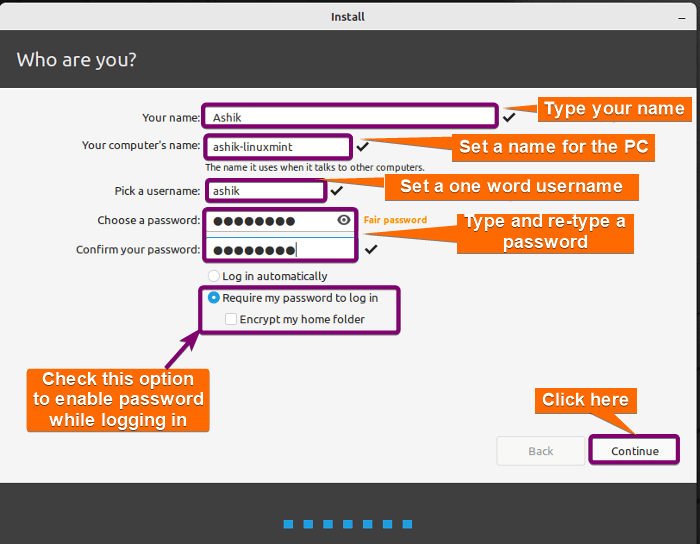 Now, installation will start. It may take a few minutes.
11. Restart the PC
An “Installation Complete” prompt appears on the screen at the end of the installation. Plug out the USB flash drive (installation media) from the computer and click on Restart Now.
 Type the password that was set during the installation and press ENTER.
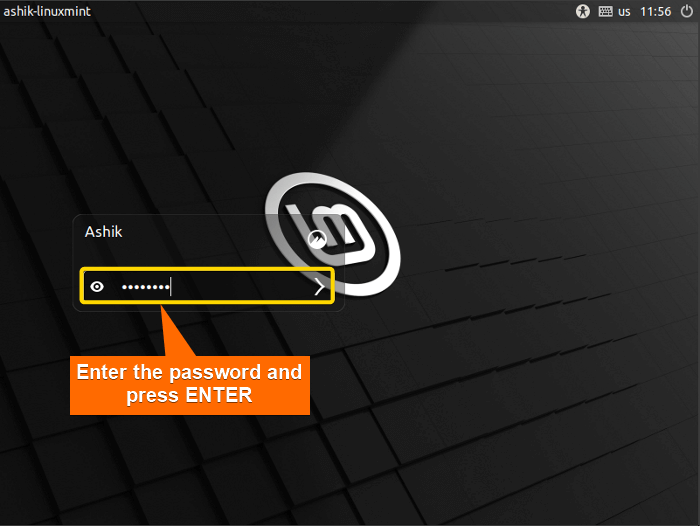
Conclusion
In conclusion, the installation of Linux Mint on your Mac brings a fusion of intuitive design and open-source innovation to your Apple environment. This step-by-step guide provides a comprehensive walkthrough for a seamless installation process, ensuring that both novice and experienced users can harness the strengths of Linux Mint on their Macs.
People Also Ask
How to install Linux Mint on Mac without USB?
To install Linux Mint on a Mac without USB, follow the steps below:
- Open “Disk Utility” on your Mac.
- Shrink and create a new partition with enough space for the Linux Mint installation.
- Download the Linux Mint ISO file from the official website.
- Open Mac terminal and use the hdiutil command to mount the Linux Mint ISO file. For example:
hdiutil mount ~/Downloads/linuxmint-21.2-cinnamon-amd64.iso - Download and install rEFInd, a boot manager that makes managing multiple operating systems on a Mac easier.
- Restart while holding down the Option (Alt) key and select the rEFInd boot manager. Then choose the Linux Mint Live environment.
- Install Linux Mint using the following command:
ubiquity --no-bootloader - Follow the on-screen instructions to complete the Linux Mint installation.
- After completing the installation, do not install the bootloader (GRUB). Instead, use rEFInd as a bootloader.
- Restart your Mac, and “rEFInd” should detect the Linux Mint.
Can I use Mint on Mac?
Yes, you can use Linux Mint on a Mac through various methods. One option is to use virtualization software like VirtualBox to run Linux Mint as a virtual machine within macOS, allowing you to switch between operating systems seamlessly. Alternatively, you can set up a dual-boot configuration, creating a separate partition on your Mac’s hard drive to install Linux Mint alongside macOS. Additionally, you can run Linux Mint in a live environment by creating a bootable USB drive or DVD.
Can I use Linux Mint without installing?
Yes, you can use Linux Mint without installing it on your computer. This is often referred to as running a “live” version of Linux. Here’s how you can do it:
- Download the Linux Mint ISO file from the official website.
- Create a bootable USB drive with the Linux Mint ISO file.
- Reboot your computer and boot from the USB drive.
- Select the option to run Linux Mint without installing.
How to install Linux Mint on MacBook Air?
Here are the steps to install Linux Mint on MacBook Air:
- Download the Linux Mint ISO file from the official website.
- Use a tool like mintStick or Etcher to create a bootable USB drive with the Linux Mint ISO file.
- Switch off your MacBook Air and plug in the bootable USB drive.
- Turn on your MacBook Air while holding down the Option key. This will bring up the boot manager with a list of available devices you can boot from.
- Select the USB stick and hit ENTER. This will be named EFI boot or EFI drive.
- Once you have booted into the Linux Mint live session, you can either install Linux Mint alongside macOS or completely replace macOS with Linux Mint.
Can I dual-boot Linux Mint on a MacBook Pro 13?
Yes, you can dual-boot Linux Mint on a MacBook Pro 13, but the process can be a bit complex. Here are the general steps:
- Download the Linux Mint ISO file from the official website.
- Burn the ISO to a USB stick using a tool like Etcher.
- Shut down your MacBook Pro, plug in the USB stick, and boot by pressing the OPTION (⌥) key.
- Select the option called “EFI Boot” with the logo of an external drive. You will boot to the live version of Mint.
- Once in the live Linux Mint session, you can install Linux Mint alongside macOS.
Related Articles
- What is Dual Boot? [Why & How]
- How to Dual Boot Ubuntu and Windows 10 [Simple Guide]
- Dual Boot Windows and Ubuntu [On Separate Hard Drives]
- How to Dual Boot Windows 11 and Ubuntu? [Easy Way]
- How to Dual Boot Windows 10 and Linux Mint [Easiest Method]
- How to Dual Boot Windows 10 and Kali Linux [Simplest Method]
- Install Ubuntu on Mac [Dual Boot]
- How to Install Kali Linux on Mac [Dual Boot]
<< Go Back to Dual Boot Installation | Linux OS Installation Guide | Learn Linux Basics
FUNDAMENTALS A Complete Guide for Beginners


Thanks for the description. I have a 2009 MacBook Pro which has run out of OS and browser updates. If I follow these instructions and dual boot, will the Linux Mint OS be able to mount the Apple filing system? I don’t really want to set up a separate data partition but I guess I will have to do that if Linux is unable to read files on the Mac filing system.
This works with M3 based macbooks?