Dual boot Windows 10 and Ubuntu on a single machine to get the best of both worlds. It allows users to harness the power of Microsoft’s operating system alongside the flexibility and customization of the Ubuntu Linux distribution. This guide aims to navigate you through the process, ensuring a smooth integration of these operating systems.
Prerequisites to Dual Boot Ubuntu and Windows
- A PC reloaded with Windows 10.
- A USB drive with a minimum capacity of 4 GB.
- RAM: Minimum 4GB.
- At least 50 GB of disk space for each operating system.
Steps to Dual Boot Ubuntu and Windows 10
Dual booting Ubuntu and Windows 10 involves the creation of a bootable USB drive for Ubuntu ISO, partitioning the hard drive for the co-existence of both OS, installing Ubuntu alongside Windows 10, and finally restarting the computer.
Note: Before diving into the process, it’s a must to back up your data before dual-booting your PC. This precautionary step ensures that your data is safeguarded in case the dual-boot setup encounters any unexpected issues.
You can follow the steps below to dual-boot Ubuntu and Windows 10:
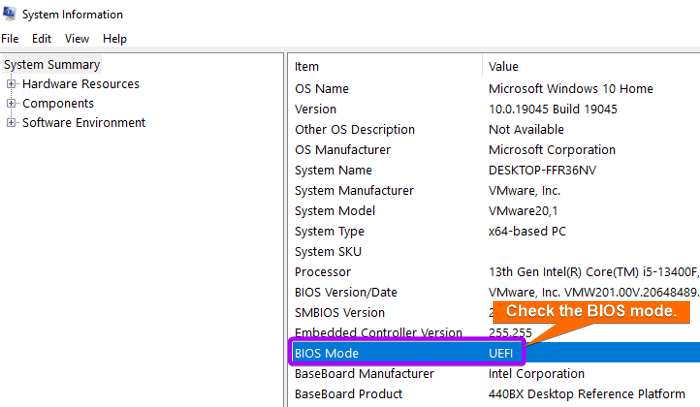
Step 1: Check PC’s BIOS Mode
Verifying the presence of UEFI mode is crucial when considering a dual-boot setup with Ubuntu and Windows 10. To check the BIOS mode:
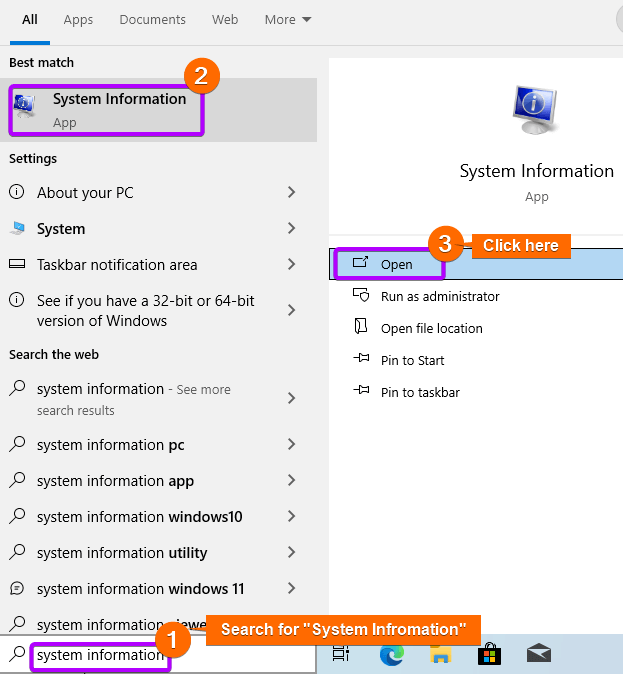
- Search for “system information”, select it, and press ENTER.

- Now, Check whether the BIOS mode is UEFI or not.

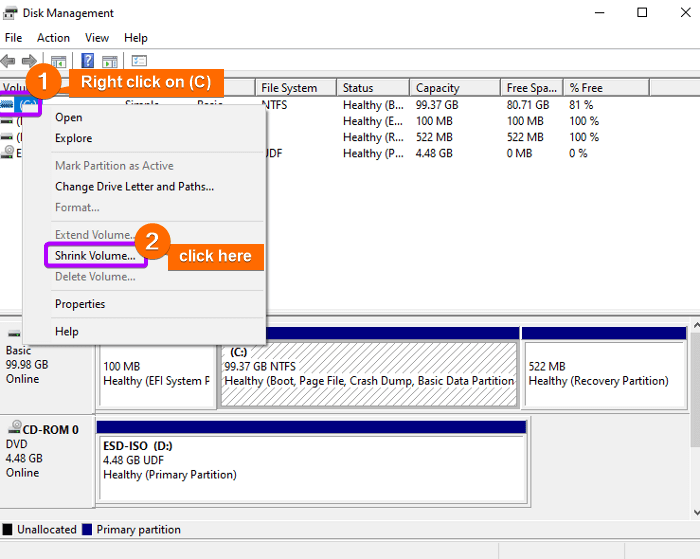
Step 2: Partition Hard Drive for Ubuntu
To partition the hard drive, follow the steps below:
- Right-click on the Windows icon and click on Disk Management.

- After that, right-click on C: and click on Shrink Volume.

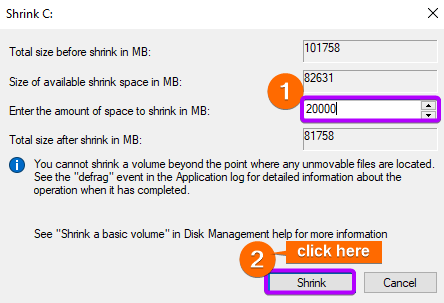
- Now, specify the amount of space to shrink disk space.


Step 3: Download Ubuntu ISO
You can download the ISO file from Ubuntu’s official website. 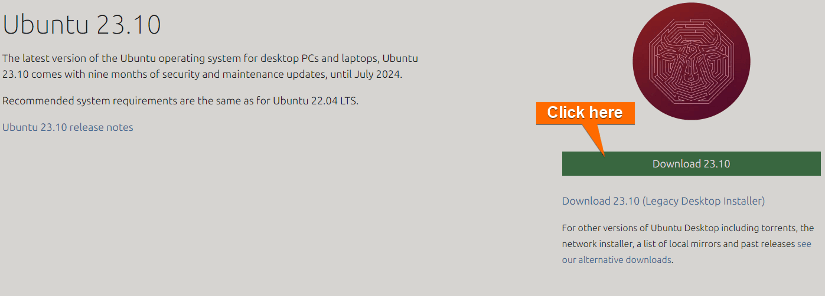
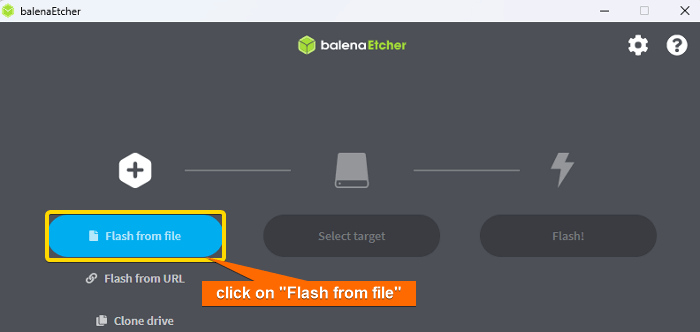
Step 4: Make A Bootable USB Drive
You can use Etcher to create a bootable media which is an open-source application.
- First, install Etcher on either Windows. After installation, launch the application and choose the “Flash from File” option.

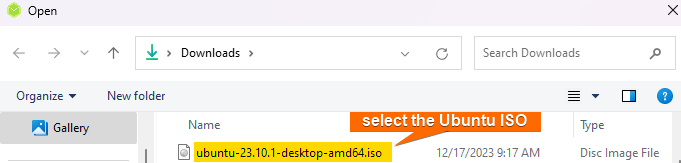
- Now, select the Ubuntu ISO file you’ve downloaded before.

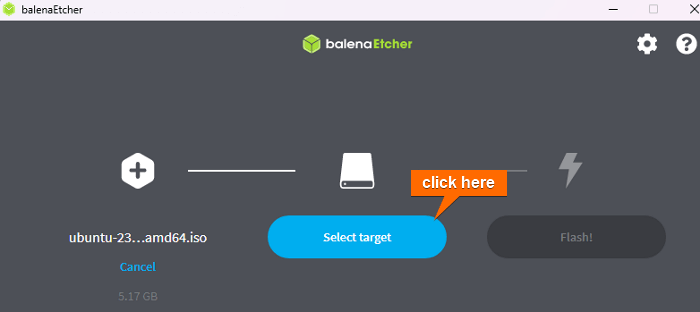
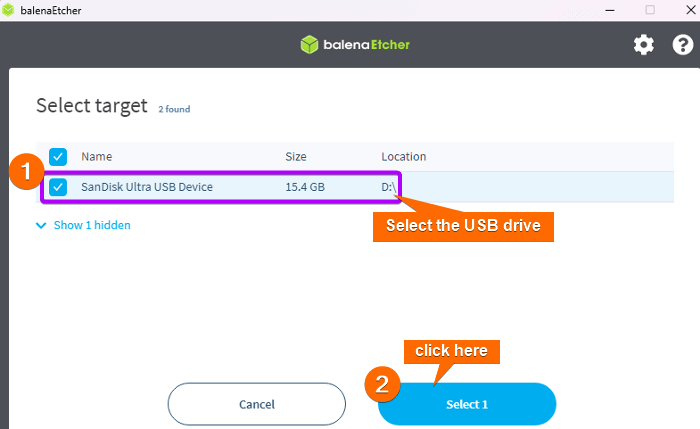
- Connect the USB drive and click on “Select target”.

- Select the USB drive and click on “Select 1”.

- Lastly, click on Flash! To start the ISO file on the USB drive.
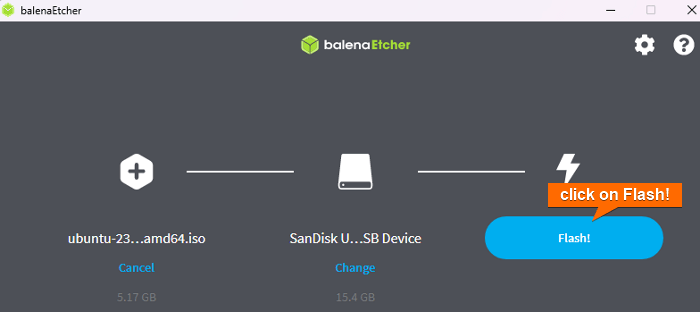
After that, Etcher will proceed to transfer the data from the ISO file to your USB drive converting it into a bootable device.
Step 5: Boot Ubuntu From USB
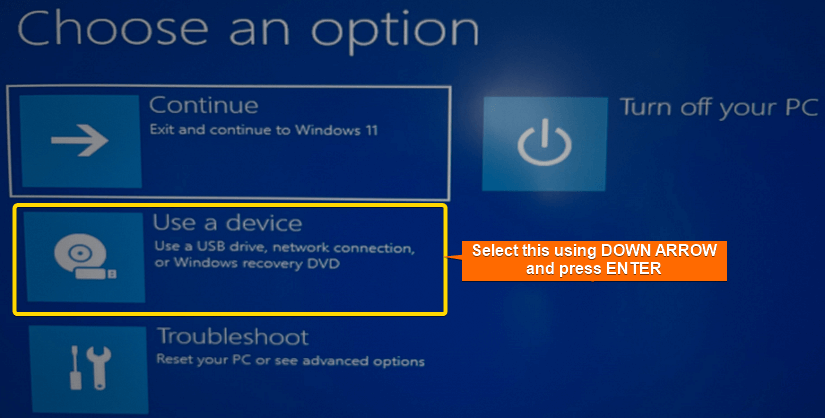
- Now, hold the SHIFT key and restart your computer.
- Select “Use a device” using DOWN ARROW and press ENTER.

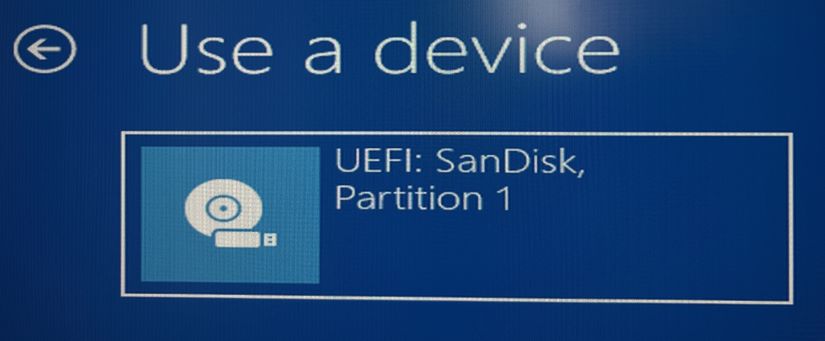
- Find the USB device. Then, select the device and press ENTER.
 Now it will power off your PC and start rebooting. After that, an installation prompt will appear.
 - Select “Try or Install Ubuntu” using DOWN ARROW and press ENTER.

 Now it will power off your PC and start rebooting. After that, an installation prompt will appear.
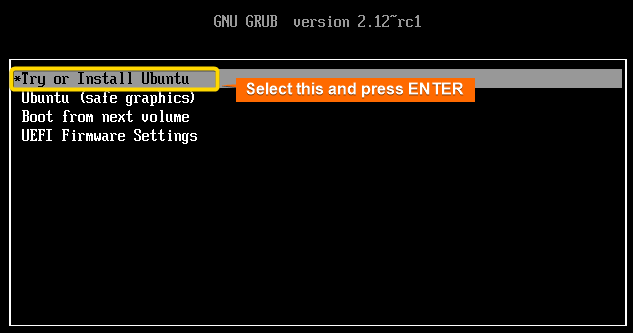
Step 6: Install Ubuntu Linux Distro
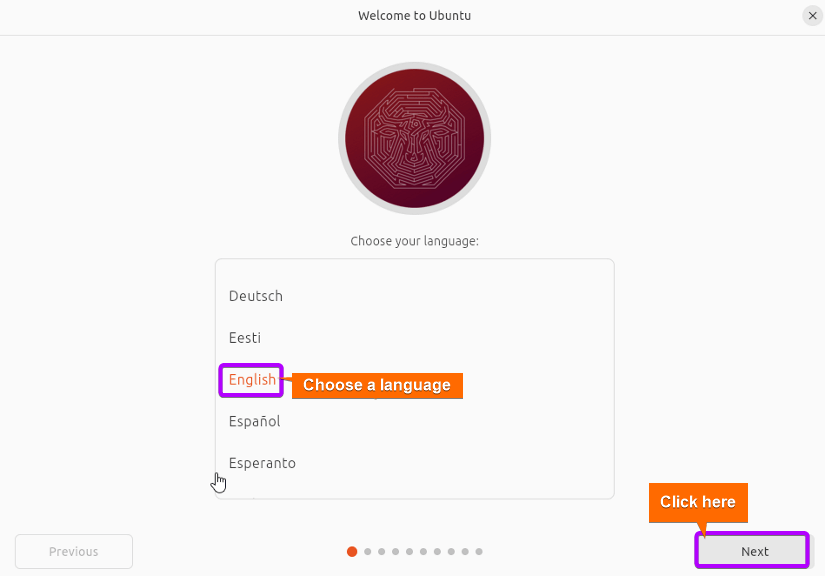
- Select your preferred language and click on Next.

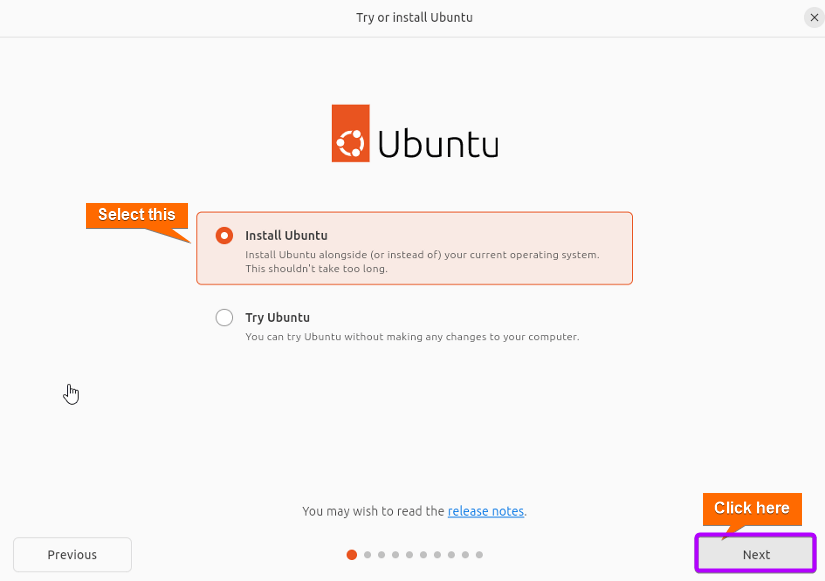
- Now, choose “Install Ubuntu” and click on Next.

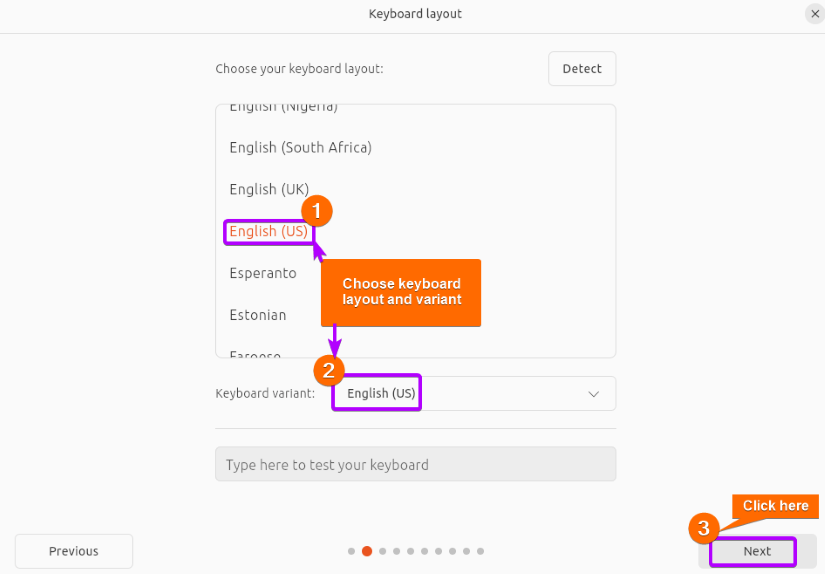
- Choose the keyboard layout and variant as you prefer and click on Next.

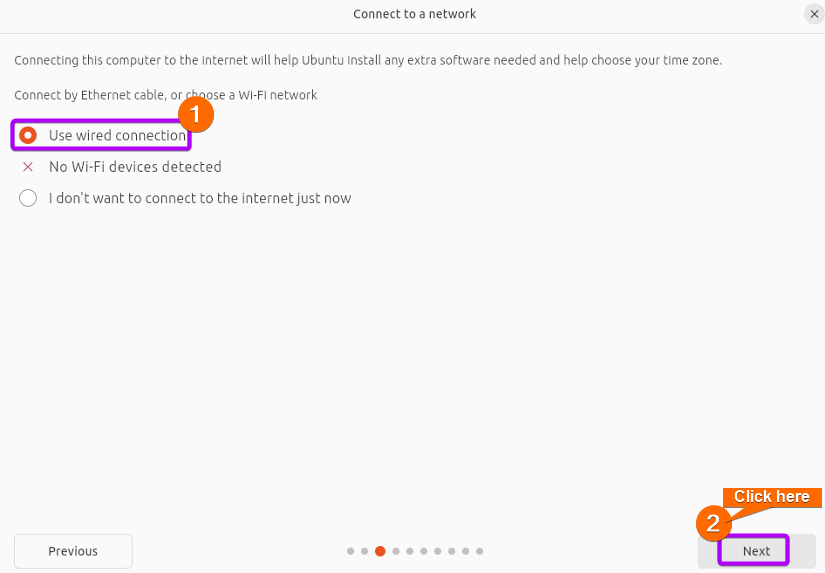
- To connect Ubuntu to the internet, choose “Use wired connection” and click on Next.

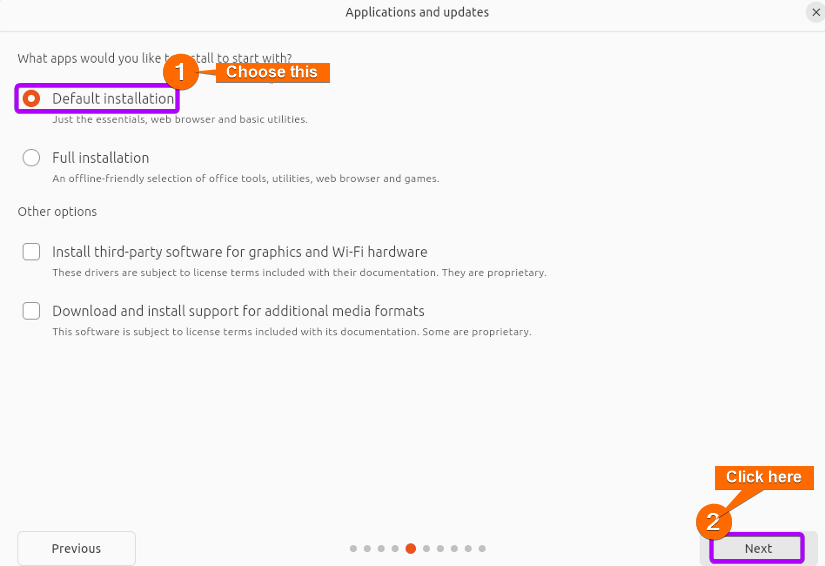
- Select “Default installation” to keep only essential applications. Then, hit the Next.

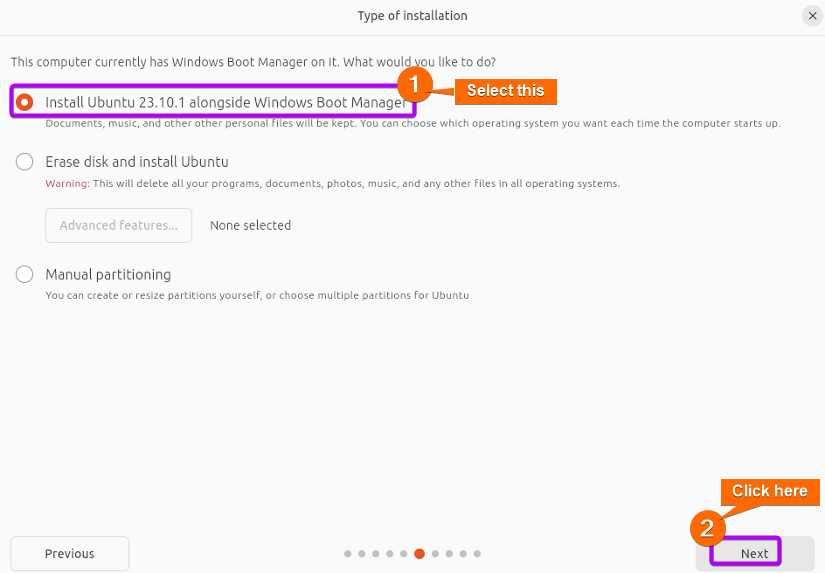
- Select “Install Ubuntu 23.10.1 alongside Windows Boot Manager” as the installation type and click on Next.
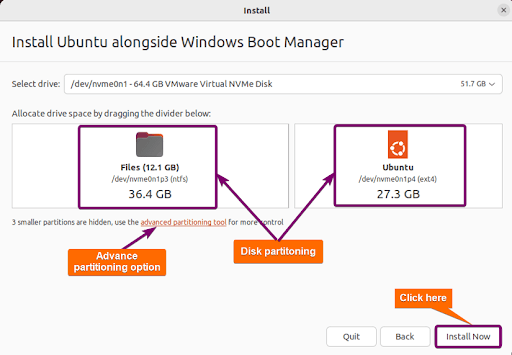
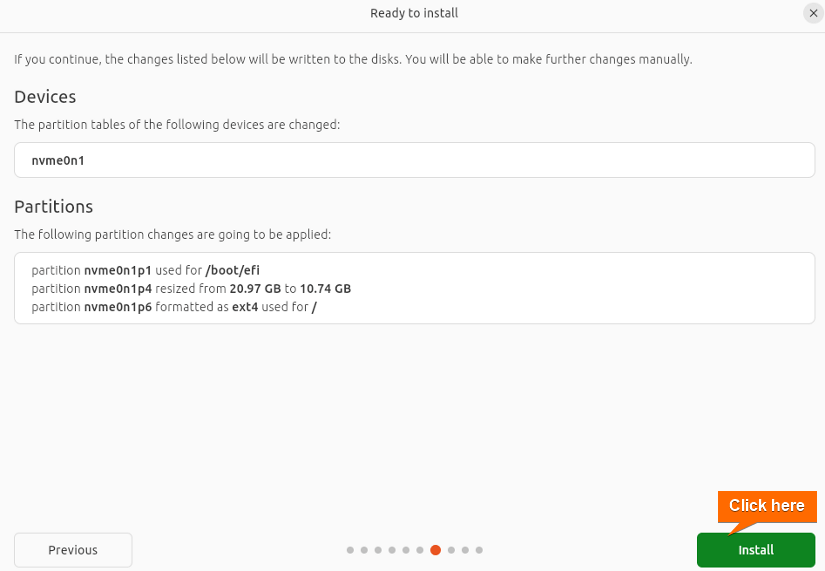
- Click on Install Now.

- Check the partitions and click on Install.

- Select your location and timezone. Then, click on Next.
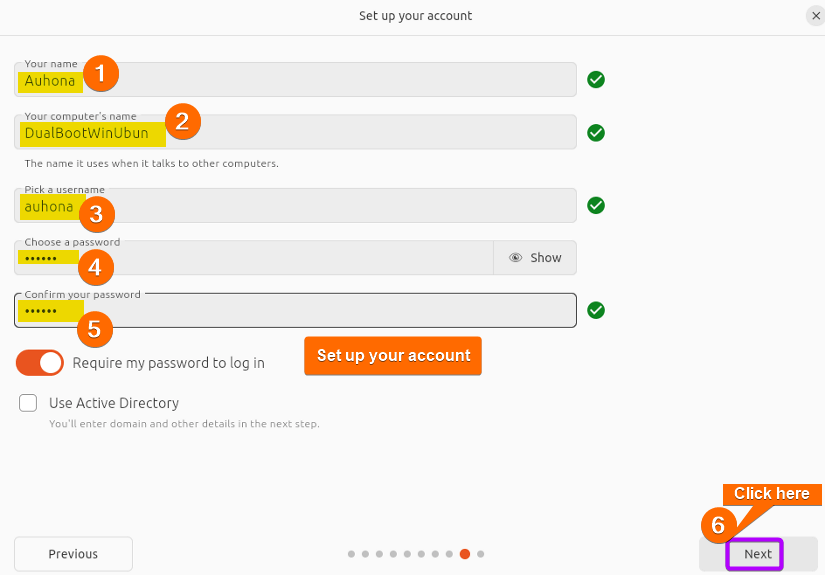
- To set up your account, provide your name, and your computer’s name, and pick a password. Finally, click on Next.


Step 7: Dual Boot Ubuntu and Windows 10
After installing Ubuntu, restart your windows.
To initiate Ubuntu, choose the option labeled “Ubuntu.” Conversely, for Windows booting, opt for “Windows Boot Manager” and then press the ENTER key. 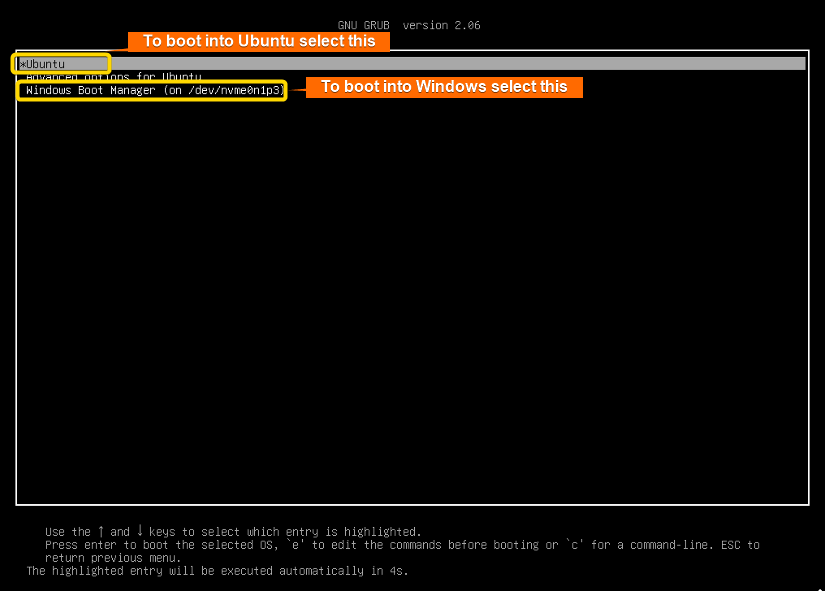
Conclusion
Well done! You’ve effectively set up a dual-boot system with Ubuntu and Windows 10 on your computer. Now, you have the flexibility to switch between Ubuntu and Windows as needed. Hope this guide has helped to achieve this, opening up new possibilities for your computing experience.
People Also Ask
Is it safe to dual-boot Ubuntu and Windows?
Yes, it’s generally safe to dual-boot Ubuntu and Windows if done correctly. However, users should follow proper installation procedures, back up their data, and the cautious during the process to avoid potential issues.
Does dual-boot slow down pc?
Dual-booting itself doesn’t slow down the PC significantly. However, proper partitioning and resource allocation are essential to ensure optimal performance. If both operating systems are actively used simultaneously, it may impact the speed of your PC.
Is dual-boot better than a virtual machine?
The choice between dual-boot and a virtual machine depends on your needs. Dual-booting allows each operating system to run natively on hardware, maximizing performance and providing full access to system resources. However, it requires a system restart to switch between operating systems and carries the potential risk of data loss during partitioning.
On the other hand, virtual machines offer the convenience of running multiple operating systems simultaneously without the need for reboots. While virtual machines may have some performance overhead due to virtualization, they provide features like snapshot and rollback capabilities for easy system state management.
Which is better dual-boot or WSL?
The decision between dual-boot and Windows Subsystem for Linux (WSL) depends on your specific needs and workflow, Dual-booting allows for native performance and full access to system resources when using Linux, but it requires a system restart to switch between operating systems.
On the other hand, WSL integrates Linux functionality directly into Windows without the need for dual-booting, offering seamless interaction between the two environments. WSL is particularly advantageous for developers and users who want to run Linux commands and tools within a Windows environment, streaming tasks and avoiding the need to reboot.
What are the risks of dual-boot?
The risks of dual-booting include:
- Data Loss: Incorrect partitioning or installation process can result in data loss.
- Boot Loader Issues: Problems with the boot loader can make it difficult to access one or both operating systems.
- Compatibility Challenges: Some hardware may not be fully compatible with both operating systems, leading to driver issues or performance problems.
- Partitioning Complexity: Managing partitions during installation requires careful attention, and mistakes can lead to data loss or difficulties in resizing partitions.
- Updates and Upgrades: Operating system updates may affect the dual-boot configuration, potentially causing issues.
- Security Risks: Compromises in one operating system may pose a risk to data on the other partition.
- Updates and Upgrades: Operating system updates may affect the dual-boot configuration, potentially causing issues.
- Security Risks: Compromises in one operating system may pose a risk to data on the other partition.
Can I access files from one operating system while using the other in a dual-boot setup?
Yes, you can access files stored on one operating system while actively using the other. This functionality allows you to retrieve and manipulate files across both operating systems, providing a seamless experience in a dual-boot setup.
To access the files of another operating system, you can follow the steps below:
- Start your computer and boot into the operating system from which you want to access files.
- Locate the other OS partition where the files of other operating systems are stored.
- Now, mount the partition to make it accessible to your currently active OS.
- Once the partition is mounted, navigate to it using the file manager.
- After accessing the file, you can unmount the partition if you want to disconnect it.
Related Articles
- What is Dual Boot? [Why & How]
- Dual Boot Windows and Ubuntu [On Separate Hard Drives]
- How to Dual Boot Windows 11 and Ubuntu? [Easy Way]
- How to Dual Boot Windows 10 and Linux Mint [Easiest Method]
- How to Dual Boot Windows 10 and Kali Linux [Simplest Method]
- Install Ubuntu on Mac [Dual Boot]
- Install Linux Mint on Mac [Dual Boot]
- How to Install Kali Linux on Mac [Dual Boot]
<< Go Back to Dual Boot Installation | Linux OS Installation Guide | Learn Linux Basics
FUNDAMENTALS A Complete Guide for Beginners


