Unix and Unix-like operating systems are multi-user operating systems where sometimes it may become necessary to know the current user. A quick input of the whoami command on the terminal can do the trick. The command whoami in Linux is the concatenation of the words “Who am I?” It displays the username of the effective user associated with the current shell session. it is useful in bash scripting to show who is running the script. Furthermore, the current user can check whether he has root privileges.
In this article, I will shed light on the whoami command in Linux with 5 practical examples.
Linux “whoami” Command Syntax
The syntax of whoami is very simple. It doesn’t take any argument. So no need to stress about that. The syntax is a “whoami” command followed by one or multiple options.
whoami [OPTION]...Linux “whoami” Command Options
There are only two options available for whoami command. You can check the man page by yourself.
man whoami| Options | Description |
| –help | Displays the man page and exit |
| –version | Outputs version information and exit |
5 Practical Examples of the “whoami” Command in Linux
Here I have given 5 practical examples of whoami command in Linux.
Example 1: Displaying the Username of the Current Effective User
It is the primary function of the command whoami. My Ubuntu has two users, walid and jim. Now I will switch between them and show you the output. If you have 2 users you can also do so by following the steps below:
- At first open the Ubuntu Terminal.
- Type the following command in the command prompt and press ENTER:
whoami
For the user walid you can see the output in the below picture: For the user jim you can see the output in the below image:
Similar Readings
- The “usermod” Command in Linux [14+ Practical Examples]
- The “users” Command in Linux [4 Practical Examples]
- The “who” Command in Linux [6 Practical Examples]
Example 2: Using the “whoami” Command Checking for Root Privileges
Having root privileges allows a user to do pretty much anything on the system. You can follow the steps below to check whether you have root privileges or not:
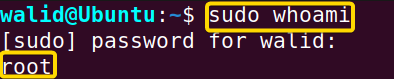
- Run the following command in the command prompt:
sudo whoami - Enter your Password if necessary and hit ENTER.
For the user with root privileges, the output will look like this: Otherwise, the output will look like this:
 Otherwise, the output will look like this:
Example 3: Confirming Whether the Root User Running the Script or Not
You can use the whoami command in the bash script and check if the root is executing the script. You can also print a warning message. Now I will write a script to demonstrate that. Follow the steps below:
- Run the following command in the command prompt:
nano myscriptNote: Here “myscript” is just a file name. You can give it anything you want. - Type the following lines:
#!/bin/bash if [[ "$(whoami)" = 'root' ]] then echo "You are running this script as a root user. Proceed with caution." else echo "You aren't running this script as a root user" fi - To save press CTRL + O and ENTER, to exit press CTRL + X.
- Now type the following command to execute the script.
bash myscript - Finally, press the ENTER button again.
It will create a file named myscript and open it in nano text editor: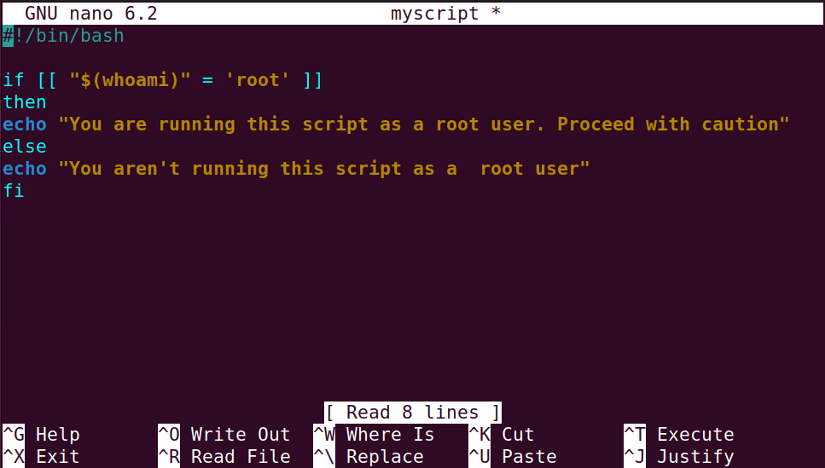 For root user the output will be like this:
To switch to root user use the following command:
sudo suTo exit from the root user type.
exitFor normal user the output will look like this:![]()
Example 4: Checking “whoami” version Using the “whoami” Command in Linux
To check “whoami version”, I will use the option --help with the whoami command. Now I will show you how you can check your whoami version by yourself. Run the following command in the prompt:
whoami --helpI can see my whoami version on the display:
Example 5: Using “id” Command Instead of “whoami” Command in Linux
The id command can serve a similar purpose to whoami command in Linux but you need to provide two options –u and –n. The “-u” option displays the effective user ID while the “-n” option shows the name of the given user ID. So, together the id -un command displays the name associated with the “user ID” of the current user.
Here you will see that id command can give us the same result:
id -unThe output is similar to “whoami” command:
Conclusion
If you have made it to the end of the article, you can be confident that you have learned enough about the whoami command in Linux. Practicing the examples will help you to become a power user.
People Also Ask
How to check the current user in Linux?
Use the whoami command in Linux by simply typing the command in the terminal and hitting the ENTER button to reflect on the changes and check the name of the current user:
whoamiCan I get a list of all the logged-in users in Linux?
Yes, you can. Run the Linux who command to display a list of all the users who are currently logged-in to the system.
whoYou can also use the w command to get the same result.
How is the “whoami” command in Linux different from “echo $USER”?
The whoami and echo $USER commands essentially do the same thing: upon executing the commands, they display the current username of the shell session.
Can the “whoami” command in Linux display the user permission or groups?
No, it can’t. The whoami command in Linux only displays the name of the currently logged-in user. To get information permission and groups, other commands like id and groups are more suitable.
Similar Readings
- The “useradd” Command in Linux [12 Practical Examples]
- The “adduser” Command in Linux [12 Practical Examples]
- The “su” Command in Linux [6 Practical Examples]
- The “userdel” Command in Linux [4 Practical Examples]
FUNDAMENTALS A Complete Guide for Beginners


