The adduser is a command in Linux that is used to create a new user or group on the system. It’s a user-friendly front-end command that simplifies the process of adding a new user by handling various configurations and defaults. It creates a new user with a home directory (/home/username by default), sets up initial configuration files, and copies files from /etc/skel to the user’s home directory to provide a basic environment for the new user.
In this article, I will describe all the features and uses of the “adduser” command in Linux.
Syntax of “adduser” Command
The general syntax for using adduser commands is:
adduser [OPTION] usernameIn the above syntax, the [OPTION] is not mandatory. It takes “username” as a parameter and creates a new home directory for the “username”.
Options of “adduser” Command
There are some options for the “adduser” command to modify its execution. You can check them with the man (manual) command.
man adduser| Options | Description |
| –disabled-login | Does not ask to set a password for a new user. The user won’t be able to use the account until the password is set. |
| –disabled-password | Like –disabled-login, but logins are still possible (for example using SSH RSA keys) but not using password authentication. |
| –group | Creates a group. |
| -h or –help | Display brief instructions. |
| –home | Add a User with a Different Home Directory. |
| –firstuid | Override the first uid in the range that the uid is chosen from (overrides FIRST_UID specified in the configuration file. |
| –lastuid | Override the last uid in the range that the uid is chosen from LAST_UID. |
| –shell | Add a User with a Different Shell. |
| –system | Create a system user or group. |
| -u or –uid | Force the new user ID to be the given number. adduser will fail if the ID is already taken. |
| –version |
Display version and copyright information. |
Note: All options are case-sensitive.
Practical Examples of the “adduser” Command in Linux
The adduser command in Linux helps to manage the system’s users and groups by adding and deleting users and designating them into various groups. A few real-life examples of the command are given below.
1. Add a New User Using the “adduser” Command in Linux
To add a new user, use the adduser command, and provide the username after the command as below:
sudo adduser tyanHere, “tyan” is the username. After running the above command, you can see a new user named “tyan” is created.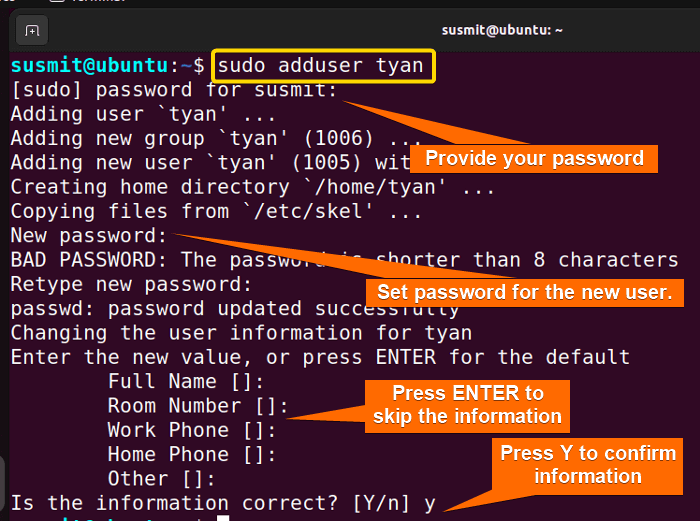
Similar Readings
- The “usermod” Command in Linux [14+ Practical Examples]
- The “users” Command in Linux [4 Practical Examples]
- The “who” Command in Linux [6 Practical Examples]
2. Add a User With a Specific Shell Using the “adduser” Command in Linux
Sometimes, creating a new user account with a different shell is necessary. The default shell is /bin/bash for new users in Ubuntu. Here, I will create a new user account with the /bin/sh shell, skipping the other details. Here’s an example to do so:
- At first, open the Ubuntu Terminal.
- Type the following command in the command prompt:
sudo adduser rick --shell /bin/sh - Now, press the ENTER button.
- After that, Type the following command to check the shell:
grep rick /etc/passwd - Now, press the ENTER button.
Then, you can see a new user named rick is created with a different shell.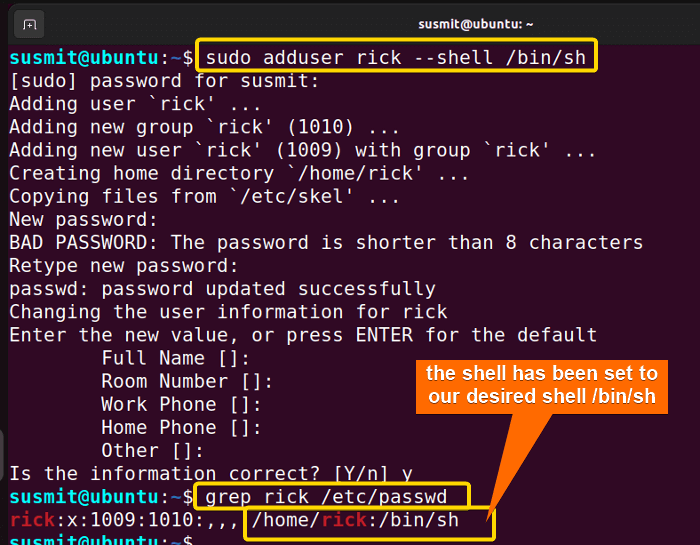
3. Add a User With a Different Home Directory
You can create a user with a different home directory. For example, to add a user “arsenal” with a different home directory (/home/football), run the following command in the command prompt:
sudo adduser arsenal --home /home/footballIn the following image, you can see “arsenal” user account is created with the /home/football home directory.
4. Create a User Without Home Directory
To create a user account without creating a home directory, use the adduser command with the --no-create-home option. Here’s how:
sudo adduser --no-create-home leeThe above command creates a user account named “lee” without creating a home directory.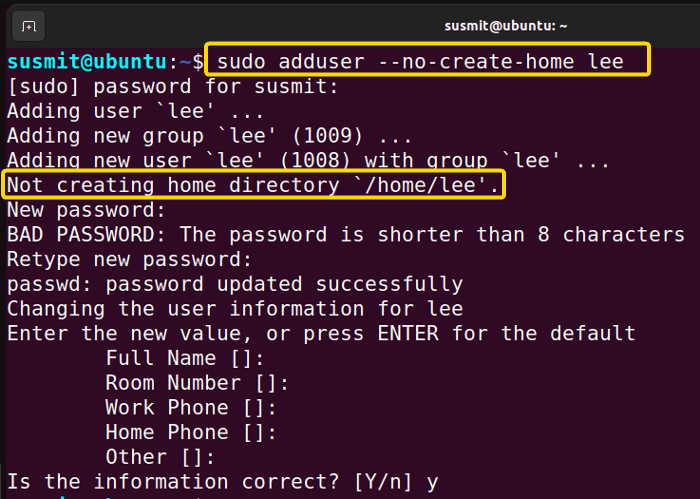
5. Add New User With a Specified User ID Using the “adduser” Command in Linux
To create a new user account specifying an individual user ID, you can use the adduser command with option -u. Here is an example:
sudo adduser -u 16101 beanIt will create a new user account named “bean” specifying a user ID 16101.
Now, the below command will confirm whether the user contains the specific user ID.
id bean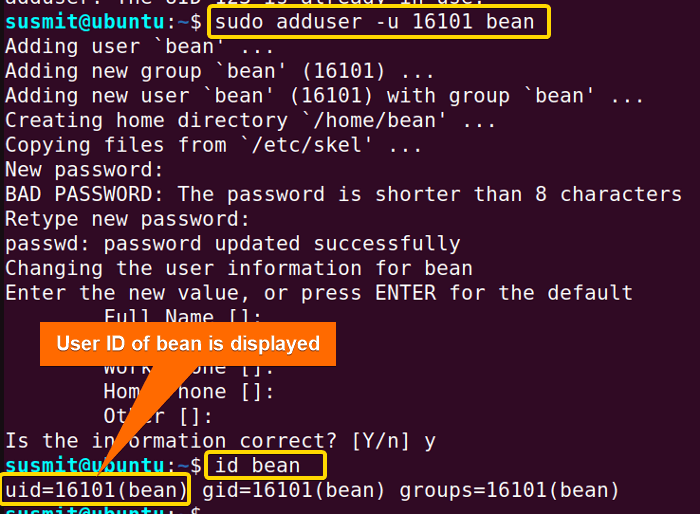
6. Add New User With a Specific Group ID Using the “adduser” Command in Linux
To create a new user account specifying an individual group ID, use the adduser command along with option --gid. Here is an example:
sudo adduser --gid 1007 mortyIt will create a user named “morty” and add it to a group of specific group ID: 1007.
Now, to check the group ID of morty, type the following command in the command prompt.
id morty 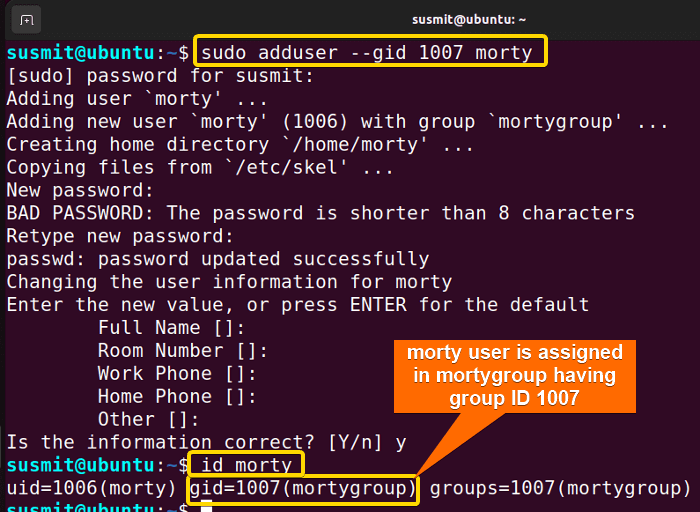 In the above image, you can see the “morty” user account is created and added to a group named mortygroup of specific group ID: 1007.
7. Add a New System User Using the “adduser” Command in Linux
To create a new system user, you can use the adduser command and the --system option. Here is an example:
sudo adduser -- system thiagoIt will create a system user named “thiago”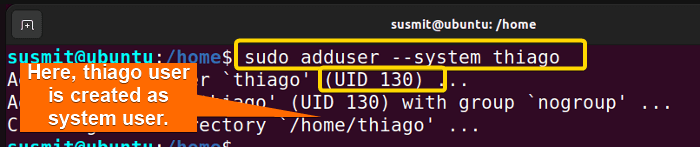 In the above image, you can see “thiago” user account has been created as a system user. Here you can see its UID is 130 (in my case) which means that it is a system user account.
8. Create a User With Disabled Login Set-up
To create a user account by skipping setting the password initially, you have to use the adduser command with --disabled-login option. Follow the example command:
sudo adduser --disabled-login tikIt will create a user account named “tik” without setting a password initially.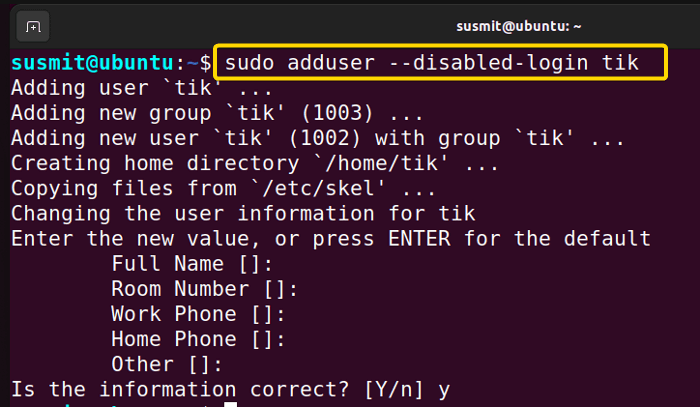 In the above image, you can see by using the
 --disabled-login option, the command prompt does not ask to set a password for the new user. However, The user won’t be able to use the account until the password is set.
9. Create a User Without a Password Using the “adduser” Command in Linux
To create a user account by skipping setting the password initially, use the adduser command with --disabled-passwordoption. Follow the example command:
sudo adduser --disabled-password peter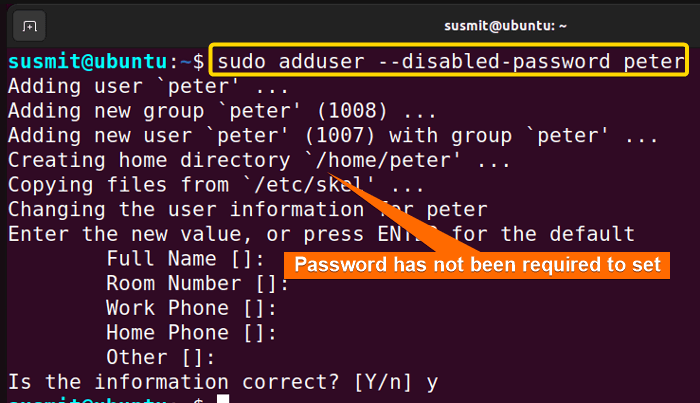 In the above image, you can see by using the
 --disabled-password option, the command prompt does not ask to set a password for the new user.
10. Creating a Group Using the “adduser” Command in Linux
To create a group, you can use the adduser command with --group option followed by the group name. For example, if you want to creat a group named “xyz”, use:
sudo adduser --group xyz In the above image, you can see “xyz” group has been created.
11. Display the Help Section of the “adduser” Command
For details about the adduser command in Linux, you can go to the help section using the command:
adduser -h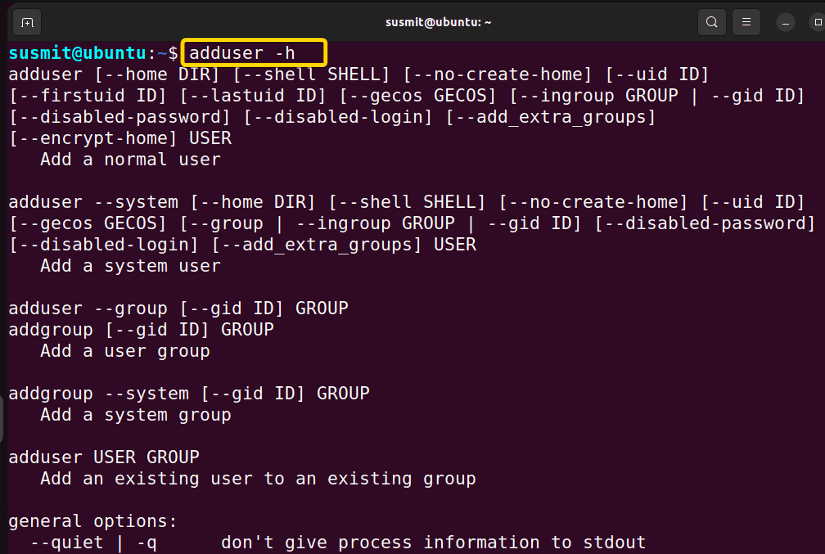 In the above image, the help section of the adduser command is displayed.
12. Get the Version of the adduser Command
To get the version of the adduser command, use --version options after the adduser command.
adduser --version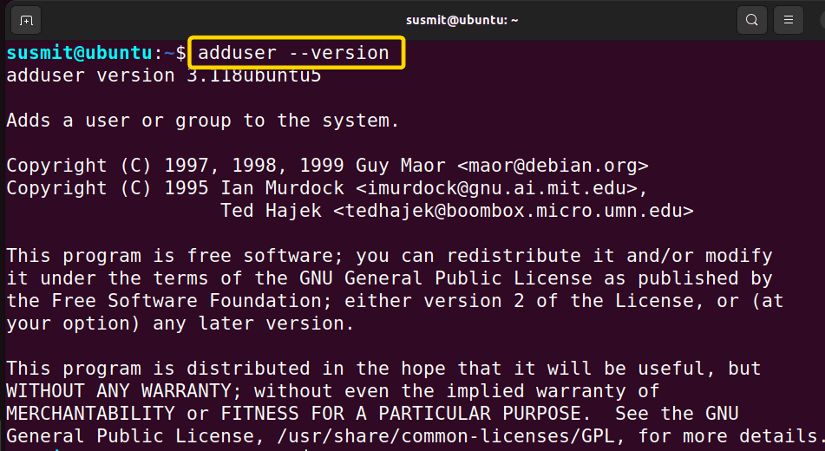 The following image shows the version details of the adduser command.
Conclusion
In this article, I have tried to demonstrate the applications and effectiveness of the adduser command in Linux. I hope you’ll be competent enough to explore more things with the help of these practical examples.
People Also Ask
Should I use adduser or useradd?
If you want to create a new user account with customized parameters, useradd is the better option. If you want to create a new user account with default settings and options, adduser is the way to go. Both commands are used to create new users or groups in Linux. However, adduser is a high-level interface for useradd and features interactive prompts when creating new accounts.
How to add UID in Linux?
To add a new user with a specific UID in Linux, you can use the useradd command with the -u option. For example, to create a new user named “newuser” with a UID of 1001, you can run the following command:
sudo adduser -u 1001 newuserHow to add a user in Ubuntu?
To add a new user in Ubuntu, you can use the adduser command in the syntax sudo adduser usernamereplacing the username with the desired username. If you want to create a new user with a specific UID, you can use the -u option with the adduser command in the syntax sudo adduser -u UID username. Replace UID and username with the desired ID and username.
What does adduser command do in Linux?
The adduser command in Linux is used to create a new user or group. The basic syntax for the command is:
sudo adduser <options> <username>By default, the command adds a user based on the preconfigured options in the /etc/adduser.conf file.
Similar Readings
- The “whoami” Command in Linux [5 Practical Examples]
- The “useradd” Command in Linux [12 Practical Examples]
- The “su” Command in Linux [6 Practical Examples]
- The “userdel” Command in Linux [4 Practical Examples]
FUNDAMENTALS A Complete Guide for Beginners


