Ubuntu is a versatile tool to work with multiple files and folders at a time. Sometimes you might delete any file or file or folder unwantedly. In such cases, you need to undelete that file or folder. So deleting and undeleting files and folders in Ubuntu is a very common task done by a Ubuntu user. In this article, I will show the process to undelete a folder in Ubuntu.
Process Flow Chart to Undelete Folder in Ubuntu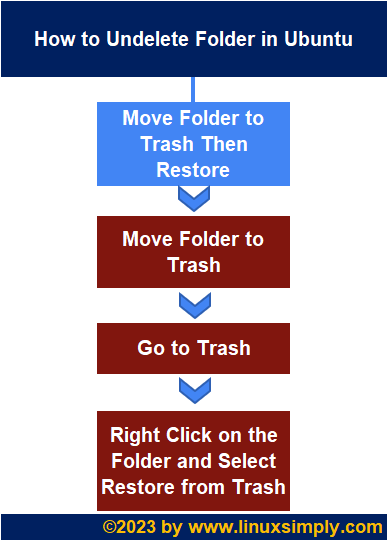 Distro Used Throughout the Tutorial: Ubuntu 22.04.1 LTS
Steps to Undelete Folder on Ubuntu Using GUI
Here I will show you the process of moving a folder into the trash and then restoring that folder from the trash in Ubuntu.
Undelete a Folder from Trash
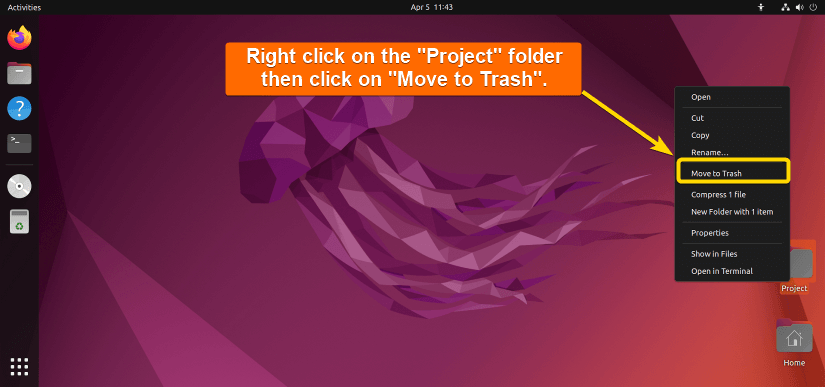
You can easily delete a folder from Graphical User Interface(GUI) and then undelete or restore that folder from the trash. Here I have a folder named Project on my desktop. At first, I will move the Project folder to the trash and then undelete or restore it from the trash. Here is the step-by-step guide:
- At first, Right click on the Project folder. Then click on the “Move to Trash” from the appeared option.

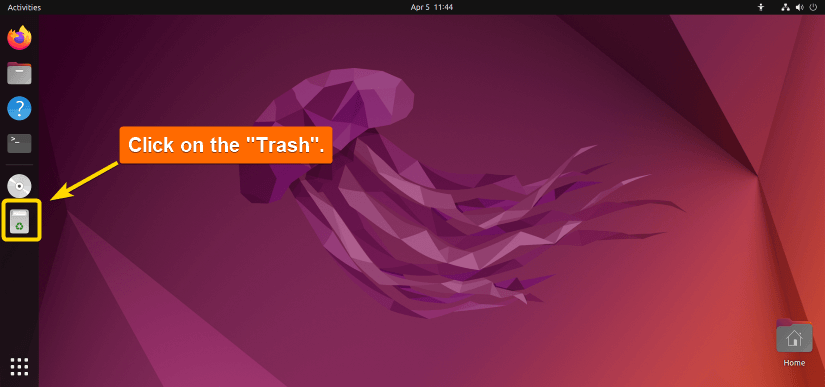
- Now, click on “Trash”.
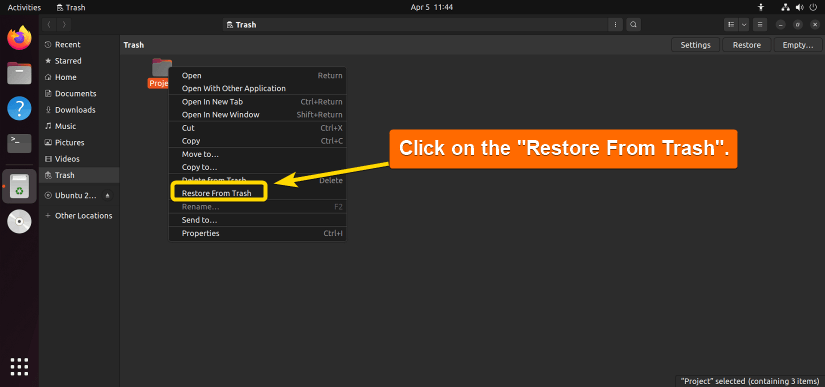
- Then Right click on the Project folder from the Trash window and click on “Restore From Trash” to restore the Project folder from the Trash window.
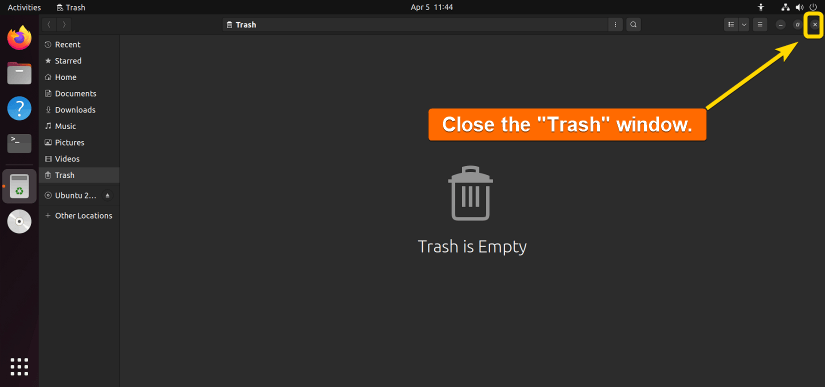
- Now, close the Trash window.The following image shows I have successfully undeleted or restored the Project folder from the Trash.
 The following image shows I have successfully undeleted or restored the Project folder from the Trash.
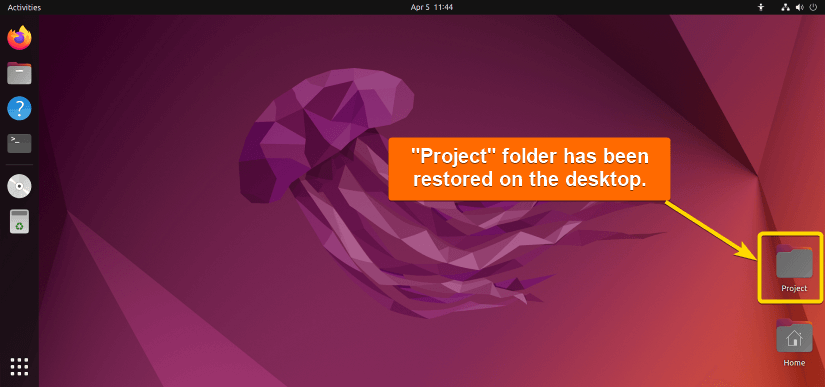
3 Tips to Undelete Folder in Ubuntu
If you delete any folder in Ubuntu using the rm command, you can not undelete that folder in Ubuntu if your Ubuntu is installed in any virtual machine like VMWare. So here, I am sharing 3 preventive measures to easily undelete folders in Ubuntu.
1. Move a Folder to Trash then Undelete it in Ubuntu
If you remove any file or folder using the rm command you can never undelete or restore that file or folder in Ubuntu. A possible solution in such a case is to move that file or folder to the trash and then restore it from the trash. Here, I will move folder1 to the trash and then restore it from the trash. To achieve so, follow the below procedures:
- At first, open the Ubuntu terminal.
- Then, type the following command into the terminal to list the contents of the current directory:
ls -lEXPLANATION- ls: Lists all contents of the current directory.
- -l: Prints all the contents of the current directory with size, permission information, owner information, group information, last modification time, etc.

- Now, execute the following command to move folder1 to the trash:
trash -d folder1EXPLANATION- trash: Moves the following file or folder to the trash.
- -d: Necessary for moving any folder to the trash.
- folder1: Concern directory to be moved.

- Then, run the following command to list the deleted files and folders:
trash-listEXPLANATION- trash-list: Lists the deleted files and folders.
 Here, /home/susmit/Desktop/folder1 is the removed folder.
 - Now, execute the following command to restore the deleted folder:
trash-restore /home/susmit/Desktop/folder1EXPLANATION- trash-restore: Restores the following folder.
- /home/susmit/Desktop/folder1: The concerned folder is to be restored.
 The below image shows that I have successfully undeleted folder1 in Ubuntu.
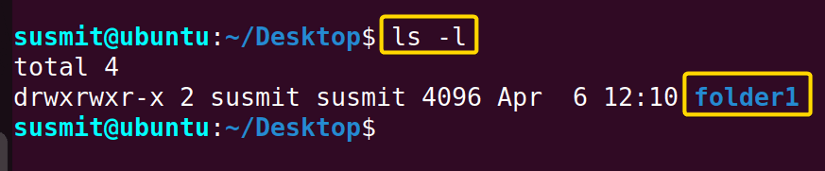

 Here, /home/susmit/Desktop/folder1 is the removed folder.
 The below image shows that I have successfully undeleted folder1 in Ubuntu.
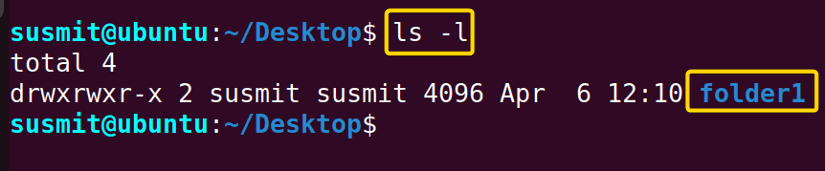
- Remove All Files in a Directory with the Prompt in Linux
- 3 Ways to Remove Write Protected Regular File Using the rm command
- Remove All Files from Current Directory in Linux [2 Methods]
2. Sort of Hack to Protect the Files to Undelete Folder in Ubuntu
To avoid deleting any file using the rm command we can use the mv command in Linux as an alias for the rm command. The mv command will move the file to a directory which is an alternative to the trash. Here, I will move the project directory using the rm alias, which is a bypass of deleting any file. To do so, follow the below procedures:
- At first, press CTRL+ALT+T to open the Ubuntu terminal.
- Then, type the following command into the terminal and press ENTER to create a directory named .trash on the user’s home directory:
mkdir ~/.trashEXPLANATION- mkdir: Makes directory.
- ~/.trash: Location and name of the directory to be made.

- Now, execute the following command into the terminal to open the ~/.bashrc file to which I will define the alias:
nano ~/.bashrcEXPLANATION- nano: Opens a file.
- ~/.bashrc: File name to be opened.

- Then, insert the following command into the ~/.bashrc file to define the rm alias:
alias rm='mv --target-directory="$HOME/.trash"'EXPLANATION- alias: Create a user-defined command with the desired name.
- rm: Name of the alias.
- mv: Command of the alias which will move the concerned file or folder to the destination location.
- – -target-directory: Sets the destination directory of the moving file or folder.
- $HOME/.trash: Destination directory of the moving file or folder.
After inserting that line, press Ctrl+S then Ctrl+X to save then close the ~/.bashrc file.
- Afterward, run the following command into the terminal to communicate this change to the user:
source ~/.bashrcEXPLANATION- source ~/.bashrc: Communicates the changes of ~/.bashrc to the user.

- Now, execute the following command into the terminal to list the current contents on the current directory:
ls -l
- Then, type the following command into the terminal and press the ENTER button to use the rm alias to move the project directory to ~/.trash:
rm projectEXPLANATION- rm: Here rm is the alias.
- project: Directory name.

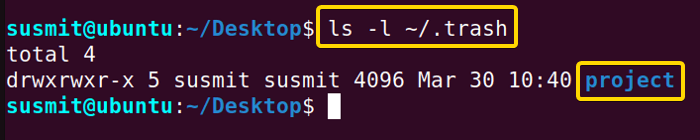
- Now, execute the following command to list the contents of ~/.trash:
ls -l ~/.trashEXPLANATION- ~/.trash: Directory name.
 The above image shows that the project directory has been successfully moved to ~/.trash which you can easily restore at any time.


 The above image shows that the project directory has been successfully moved to ~/.trash which you can easily restore at any time.
3. Remove Folder Interactively to Undelete it in Ubuntu Later
To avoid the unwanted deletion of a folder in Ubuntu you can use an interactive prompt for removing any file. Here, I have a file named linux.txt. At first, I will define an alias named rm which will open an interactive prompt when I use the rm command. To achieve so, follow the below procedures:
- At first, open the Ubuntu terminal.
- Then, type the following command into the terminal and press ENTER to open ~/.bashrc:
nano ~/.bashrcEXPLANATION- nano: Opens a file.
- ~/.bashrc: Filename to open.

- Then, insert the following command into the ~/.bashrc file to define the rm alias:
alias rm="rm -i"EXPLANATION- alias: Create a user-defined command with the desired name.
- rm: Name of the alias.
- rm: Command of the rm alias which will remove the concerned file or folder.
- -i: Opens interactive prompt.
After inserting that line, press Ctrl+S then Ctrl+X to save then close the ~/.bashrc file.
- Afterward, run the following command into the terminal to communicate this change of the ~/.bashrc file to the user:
source ~/.bashrcEXPLANATION- source ~/.bashrc: Communicates the changes of the ~/.bashrc file to the user.

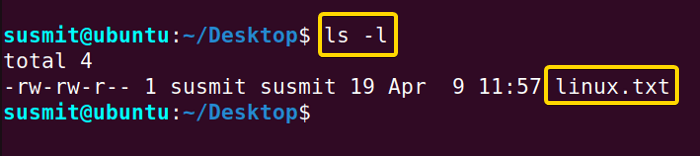
- Now, execute the following command into the terminal to list the current contents on the current directory:
ls -l
- Then, type the following command into the terminal to pass the linux.txt file to the rm alias:
rm linux.txtEXPLANATION- rm: Calling the rm alias.
- linux.txt: The filename.

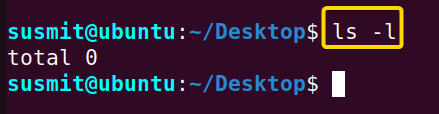
- Now, execute the following command into the terminal to list the current contents on the current directory:
ls -l
 The above image shows that I have successfully deleted the linux.txt file interactively.


 The above image shows that I have successfully deleted the linux.txt file interactively.
Conclusion
In this article, I have shown the process of how to undelete any file or folder in Ubuntu. After going through this article, I believe you will be confident enough to undelete any file or folder in Ubuntu.
People Also Ask
How do I undelete a folder in Ubuntu?
To undelete folder in Ubuntu: go to the Trash, then right-click on the mouse and select Restore From Trash. After that click Close to exit trash.
Are there any tools to recover deleted files in Ubuntu?
Yes. Several tools are available for the Ubuntu system to recover deleted files. For example, recovery utilities such as testdisk, photorec, extundelete, etc. can be installed via the terminal or software center to attempt recovery.
Can I undelete files in Ubuntu from backup?
Yes, you can. Open the terminal and run the command sudo -o rw,remount and enter the user account password. After that run the command sudo cp <filename> /media/<backup_location> and enter the user password again to restore files to their original location.
How to delete an empty folder in Ubuntu?
To delete an empty directory in Ubuntu type the rm -d FOLDER_NAME command into the terminal then press the ENTER button.
How to recursively remove a non-empty directory in Ubuntu?
To delete a non-empty directory recursively in Ubuntu, type the “rm -r FOLDER_NAME” command into the terminal then press the ENTER button.
What is extundelete in Linux?
The extundelete is a utility that can undelete files and folders from an ext3 or ext4 partition in Linux.
Related Articles
- How to Force Remove Directory in Linux? [Step-by-Step]
- Remove a User and Home Directory in Linux [2 Methods]
- How to Remove a Non-Empty Directory in Linux [2 Methods]
- 2 Cases of Recursive Remove of Directory in Linux
- 3 Ways to Remove All Files in a Linux Directory
- How to Find and Delete Directory in Linux [3 Methods]
FUNDAMENTALS A Complete Guide for Beginners


