The tree is a command-line utility that recursively lists the contents of a directory in a tree-like format, with each directory shown as a folder and each file shown as a file. The tree command also shows the file permissions and other attributes of each file and directory. It is useful for visualizing the hierarchical structure of a file system and for quickly navigating through complex directory structures.
Syntax of “tree” Command
The syntax of the tree command in Linux is:
tree [OPTION]... [DIRECTORY]...
Options of “tree” Command
You can learn more about the tree command, its options, and their uses by checking the man page using:
man tree| Option | Usage |
|---|---|
| -a | List all files( including hidden files) are printed. |
| -d | List directories only. |
| -f: | Display the full path prefix for each file. |
| -L | Max displays the depth of the directory tree. |
| -P pattern | List only those files whose names match the wild character “pattern”. |
| -I pattern | Don’t list those files whose names match the wild character “pattern”. |
| -o | Send output to any file. |
| -Q | Quote the names of files in double-quotes. |
| -p | Display the file type and permissions for each file. |
| -s | Print the file size. |
| -h | Print the size of each file in a human-readable way. |
| -D | Display the last modification date. |
| –device | Prints the device number to which the file or directory belongs. |
| -r | Sort the output in reverse order. |
| -t: | Sort the file depending on the last modification time. |
| –filelimit | Used to limit the number of files or directories displayed in the output. |
| –version | Display the version of the tree command. |
| –help | Display the help information of the tree command. |
Installing the “tree” Command in Linux
The tree command is not a part of the standard Linux distribution, so it needs to be installed separately. Write the below command on your terminal to install tree command:
sudo apt-get install treeUpon completion of these steps, the tree command will be installed on your machine.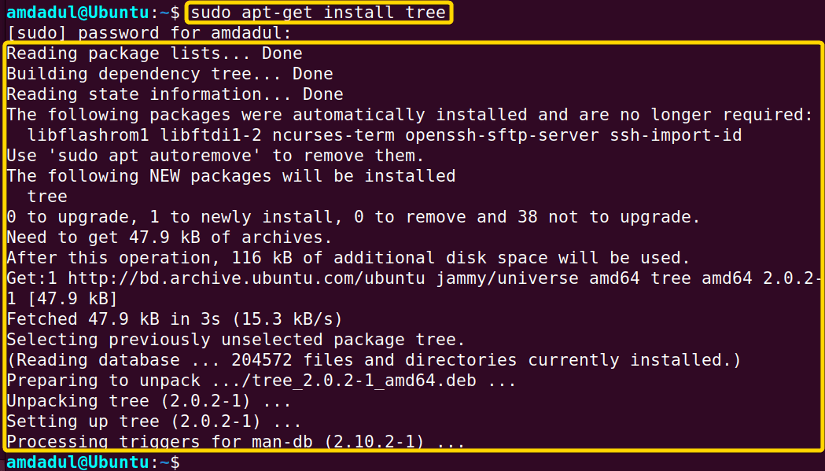
Practical Examples of the “tree” Command in Linux
In Linux, the “tree” command is a helpful tool to visualize the hierarchical structure of a file system, which helps you to navigate quickly through complex directory structures. In the section below, I will show you some of the most useful applications for the tree command in Linux.
1. Display Files of a Directory
The tree command in Linux allows you to display the files of a specific directory in a tree-like format, which helps visualize the hierarchical structure.
Type the following command into the command prompt:
treeIn the following image, you can see the list of contents inside my current directory.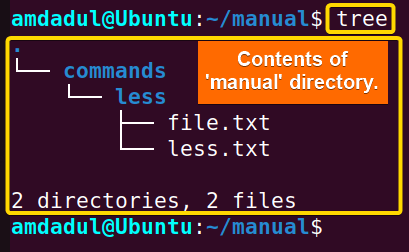
2. Display Hidden Files Along With Other Files
You can display the hidden files (The name of the hidden files starts with a dot ”.”)along with the regular contents of a directory by using the tree -a command. In this example, I will display the hidden files along with the regular contents of the “manual” directory using the tree command.
Type the following command into the command prompt:
tree -aIn the image below, you can see the hidden file named “.abc.txt” which was invisible in the previous image.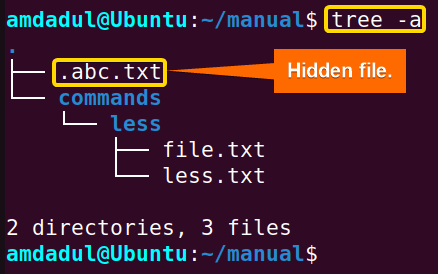
Similar Readings
- The “man” Command in Linux [6 Practical Examples]
- The “history” Command in Linux [6 Practical Examples]
- The “cal” Command in Linux [7 Practical Examples]
- The “bc” Command in Linux [10+ Practical Examples]
3. Display the List of Directories
Using the tree command in Linux followed by the option -d, you can display only a list of directories held by any directory. Type the following command into the command prompt:
tree -dThe list of only directories contained in the “manual” directory is shown in the accompanying image.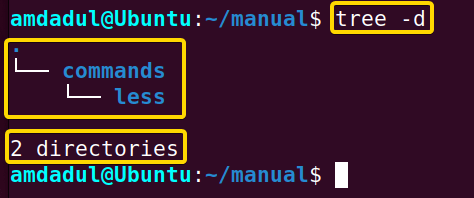
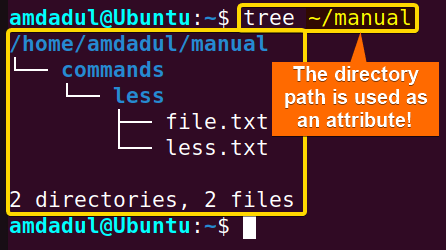
4. Display Full Path of Files and Folders as Prefix
To display the full path of files and folders, use tree -f command. Open the terminal and type the following command into the command prompt:
tree -fThe list of files & directories contained in the “manual” directory is shown in the image below with their full paths as prefixes.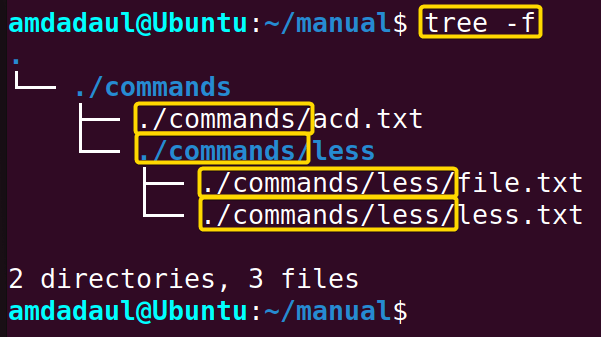
5. Display the Size of Files and Folders
You can show the file and directory size in front of that file or directory name by using the -s or -h options. Type the following command into the command prompt:
tree -hIn the following image, you can see that the size of the contents is shown before their name.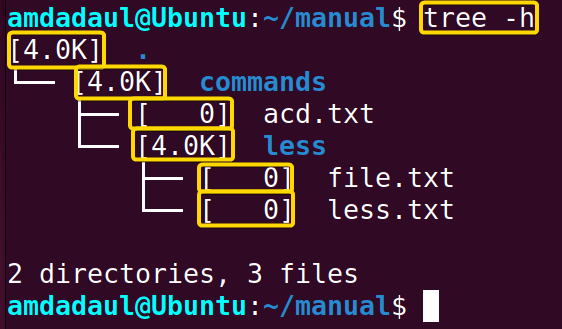
6. Display Read-Write Permission of Files and Folders
The tree command is capable of showing you each file’s permissions list with the help of option -p. Type the following command into the command prompt:
tree -hIn the image below, you can see the permission list of each file prior to the file name.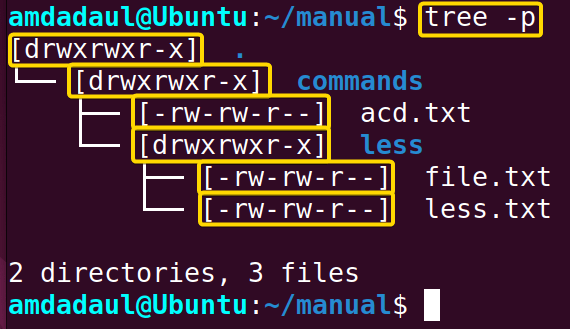
7. List Contents to a Certain Level/Depth
You can set the tree command to display the tree at a specific level or path rather than listing every item in our directory. The syntax is: tree -a -L <number of levels>, For instance, use the following command to show tree up to level 1:
tree -a -L 1The below image shows you the first-level items inside the “manual” directory.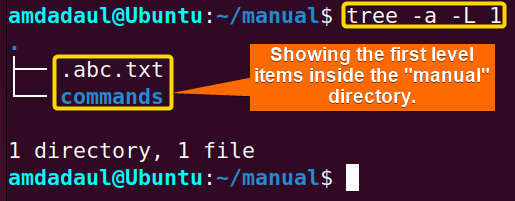
8. Print the Device Number to Which the File or Directory Belongs
The tree command allows you to print the device number to which the file or directory belongs. To print the device number before the file name, you have to use the --device option after the tree command. Type the following command into the command prompt:
tree --deviceThe below image shows you the device number prior to the file or directory name where the items belong.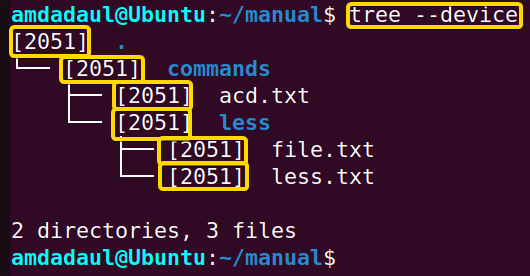
9. Redirect the Output of the “tree” Command to a File
You can redirect the output of the tree command to a file by using the option -o. For example, to redirect the output to a text file named “file.txt”, execute the following command:
tree -o file.txtNow, run the command to see the redirected output
cat file.txtThe image in the section below shows the process of redirecting the output of the tree command and the redirected output through the cat command.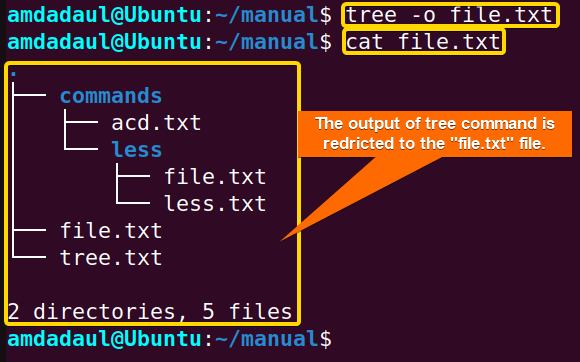
10. Print the File Names in Double-Quotes
To print the file names in double-quotes, use the -Q option after the tree command. Run the following command.
tree -QIn the image below, you can see that the outputs are shown in double-quotes.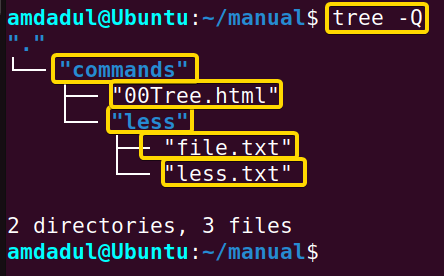
11. Sort the Files in Reverse Alphabetical Order
The tree command in Linux allows you to sort the contents of a directory according to the first letter of their name. Use -r option with tree command for the purpose. Run the following command into the command prompt:
tree -rThe below image shows the contents of the “manual” directory sorted reverse alphabetically.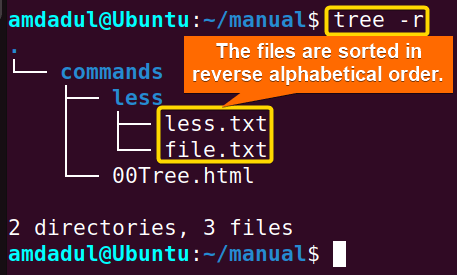
Similar Readings
- The “cron” Command in Linux [3 Practical Examples]
- The “crontab” Command in Linux [10 Practical Examples]
- The “date” Command in Linux [8+ Practical Examples]
- The “ncal” Command in Linux [8 Practical Examples]
12. Sort Files Based on the Last Modification
To sort files based on the last modification time, use option -t. You can also use option -D to display the last modification date as well. Type the following command into the command prompt:
tree -tDIn the following image, you can see that I have sorted the files according to the last modification time.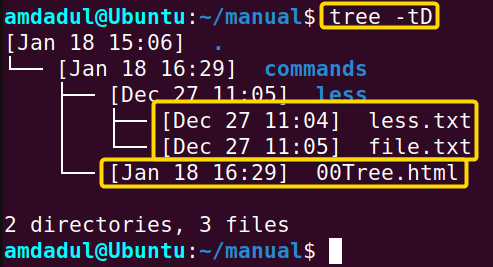
Conclusion
In this article, I’ve discussed the tree command, which is useful for exploring the file structure, organizing files and directories on a personal computer, and debugging issues with file permissions or directory structure. At the same time, I’ve discussed its options and provided some relevant examples. Hopefully, this article will help you better understand the tree command and its use. Consequently, it will make your journey easier to become a power user of the Linux command line.
Similar Readings
- The “neofetch” Command in Linux [12+ Practical Examples]
- The “whatis” Command in Linux [12 Practical Examples]
- The “whereis” Command in Linux [10 Practical Examples]
- The “which” Command in Linux [3 Practical Examples]
- The “at” Command in Linux [7 Practical Examples]
- The “tree” Command in Linux [4 Practical Examples]
FUNDAMENTALS A Complete Guide for Beginners


