apt-get update and upgrade both commands are used in Debian-based Linux distros to update the software packages. Undoubtedly, the apt-get package management tool is great to use to perform package installation, update, removal, and so on. Therefore, to update the package information, you can use apt-get update. On the other hand, to upgrade an installed package to its latest version, run the apt-get upgrade in your Ubuntu terminal. Though both commands perform updates, their purposes are different. So to know the differences between apt-get update Vs apt-get upgrade, stick to this article.
What Does “apt-get update” Do?
The apt-get update basically downloads the latest information of the packages from the source file. Thus, it updates the package index files with all necessary information along with package versions. In the Linux system, all the information of the packages is stored in ‘/etc/apt/sources.list’ files. It is recommended to run this update command before upgrading any package as it ensures that you have all the updated information available to be upgraded to the newest version.
What Does “apt-get upgrade” Do?
The apt-get upgrade automatically downloads the latest version of the packages and replaces the old version package by installing the new one. It actually updates the installed packages in your Linux system. When you wish to have some extra and modern features in your software package, upgrading the package can fulfill your desire. This command ensures that you have the latest versions of the packages that keep your system up-to-date and healthy.
“apt-get update” Vs “apt-get upgrade”
The apt-get update downloads the index files whereas the apt-get upgrade downloads the latest versions packages of the installed packages.
You can update a piece of package information with the apt-get update command. On the other hand, the apt-get upgrade command is used to install a new version package.
Downloading the most recent information from the sources.list file is the main task of the apt-get update command. However, the main task of an apt-get upgrade command is not downloading the package data but downloading the actual recent package version installed in your system.
You can run the apt-get update command when you only want to update the package details. Crontastly, use the apt-get upgrade command if you want to have a modern version software package.
How to Use the “apt-get update” Command?
Using the apt-get update command is an effortless task. Some basic steps are needed to perform this command. Don’t forget to run this command without the sudo prefix as it requires administrative permissions. Now, follow the steps mentioned below to use it properly:
- Open the Ubuntu terminal.
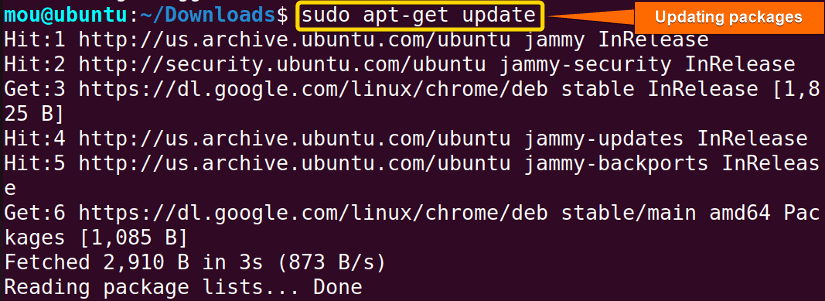
- Update the packages with the apt-get package manager by writing the following code:
sudo apt-get updateEXPLANATION
Now you have all the recent information about the packages.
How to Use the “apt-get Upgrade” Command?
To use this apt-get upgrade command, you just need to access the Ubuntu terminal and run the code with sudo to have administrative privileges. Check the steps below:
apt-get update command before running the apt-get upgrade to ensure that you have all the recent data of the packages.- Open the Ubuntu terminal.
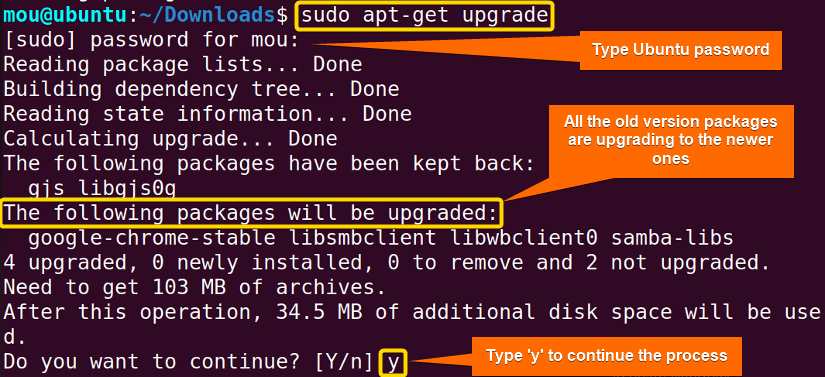
- Now, upgrade all the installed packages with the apt-get upgrade command:
sudo apt-get upgradeEXPLANATION- upgrade: Upgrades packages to the latest versions in Linux.

After you enter your Ubuntu password, the updating procedure will begin. Next, press ENTER. Now, type ‘y’ to finish the updating process. All of the packages on your Linux system are currently installed in their latest versions.
How to Use Special Options With the “sudo apt-get upgrade” Command?
There are multiple operations that can be done with the sudo apt-get update command. They are as follows:
| Command options | Description |
|---|---|
| -y or – -yes | Automatically answers yes to all prompts. |
| -s or – -simulate or – -dry-run | Simulates the upgrade process without making any changes. |
| – -only-upgrade | Upgrades only existing packages. |
| -u or – -show-upgraded | Shows an upgraded package list. |
| -V or – -verbose-versions | Displays version information in detail. |
In this table, you can see different options that can be used with the apt-get upgrade command. However, -y and –dry-run commands are the most used commands. Let’s know more about it.
How to Use the “- -yes” or “-y” Option With “apt-get upgrade” Command?
This command answers yes to any prompts asking your permission. Write the following code to upgrade the packages without a prompt:
sudo apt-get upgrade -y- -y: Answers yes to all prompts.
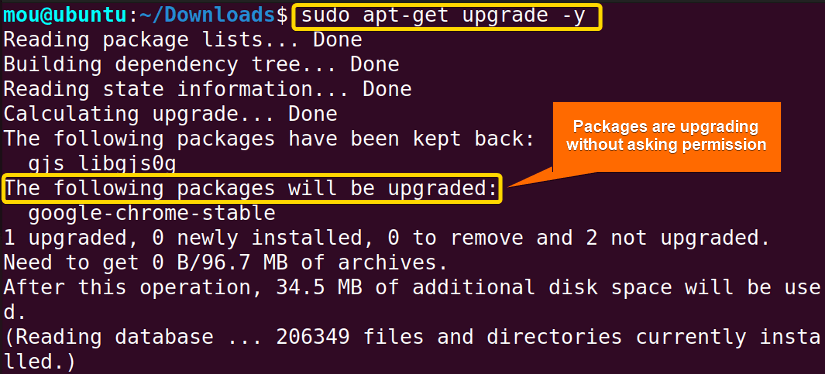
You can notice in this picture that it has no prompt to ask your permission to proceed.
How to Use the “- -dry-run” or “-s” Option?
With the use of this command option --dry-run or -s, you can mimic an upgrade without executing any. It is safer to explore an upgrade before applying it because you will be able to see what would occur with the upgraded packages. Now, write the code to mimic the upgrade procedure with the -s option:
sudo apt-get upgrade -s- -s: Simulates the upgrade process without making system changes.
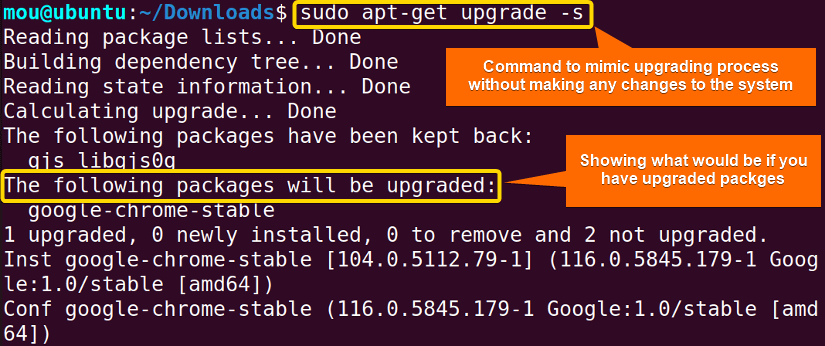
You can see what will happen if you do an upgrade in your terminal by looking at this image. It doesn’t alter the system; just demonstrates the process to you.
“apt” or “apt-get”? Which One Should You Be Using?
apt stands for Advanced Packaging tool which offers a modern interface for managing packages in Linux whereas apt-get is an outdated and low-level package management system. apt provides additional advantages that apt-get doesn’t do. apt-get requires a command option to upgrade packages but apt can handle packages automatically. Hence, apt is more convenient to use than apt-get.
Some Examples of “apt” and “apt-get”
In this section, I will show you two Practical examples of using apt and apt-get package managers. First, you will get to know how the installation procedure works with these commands. Then, the removal process. Let’s get into the detail.
1. Installing a Package With “apt” and “apt-get”
A package dependency contains all the necessary functions to operate the package successfully. Sometimes many unwanted dependencies can be downloaded with the software package during installation. To handle them, package managers are needed. Check the working procedure of the two package managers below to handle dependencies:
- Open the Ubuntu terminal.
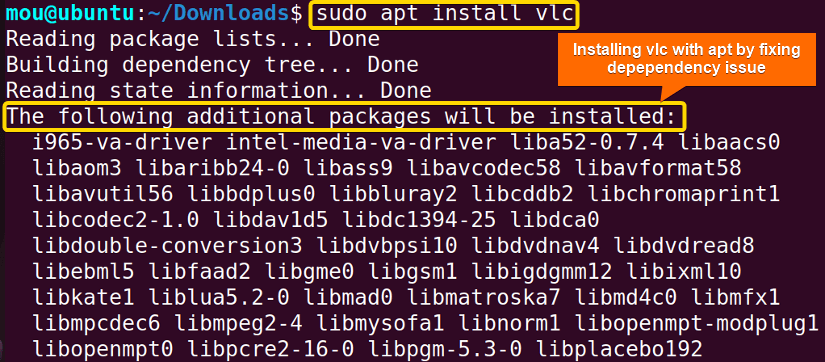
- Run this command to install a package with apt.
sudo apt install vlcEXPLANATION- install: Installs packages in Linux.
- vlc: Package name.

Here, the vlc package is installed without any dependency issues.
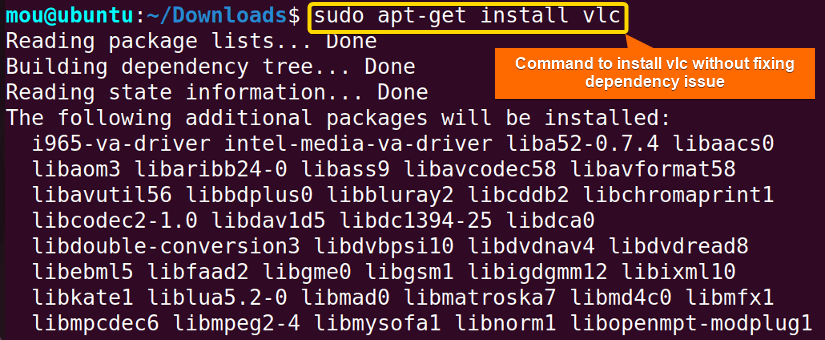
- Now, install the same vlc package with apt-get:
sudo apt-get install vlc
Dependency problems may arise in this installation procedure. However, to fix that, follow the next command.
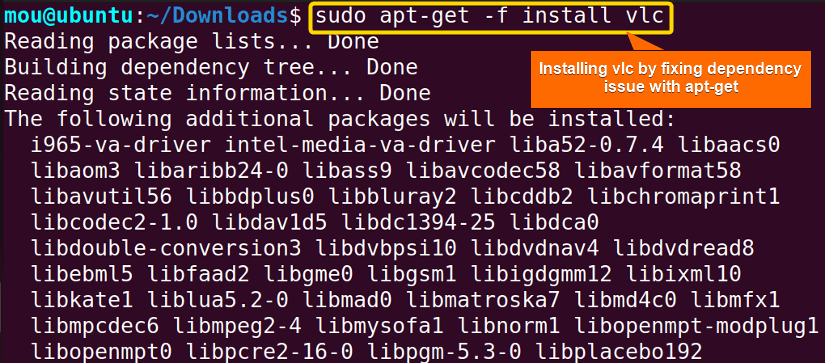
- To fix the broken dependency, run this command:
sudo apt-get -f install vlcEXPLANATION- -f: Fixes broken dependencies during package installation.

No dependency issues will occur after running this command.
2. Removing a Package With “apt” and “apt-get”
During package removal with apt, it automatically removes the unused dependency along with the package but to do the same task, apt-get needs two separate commands. See the procedure in detail:
- Open the Ubuntu terminal.
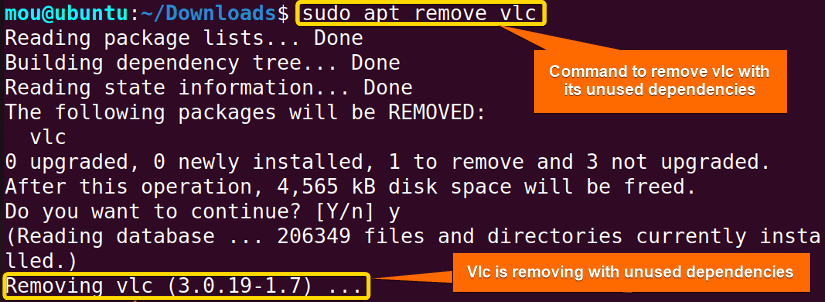
- To remove vlc package with unused dependencies, run this command:
sudo apt remove vlcEXPLANATION- remove: Removes packages with unnecessary dependencies.

Here, the vlc package along with its unused dependencies has been removed.
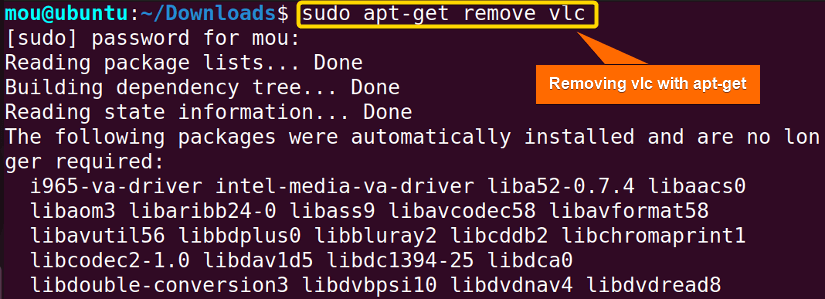
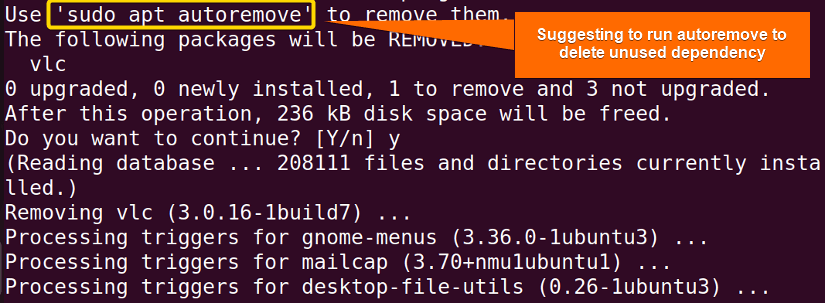
- However, apt-get removes only the package but not the dependencies. Write the following code to remove the vlc package:
sudo apt-get remove vlc
After removing, it suggests running autoremove command to remove the unnecessary dependencies.

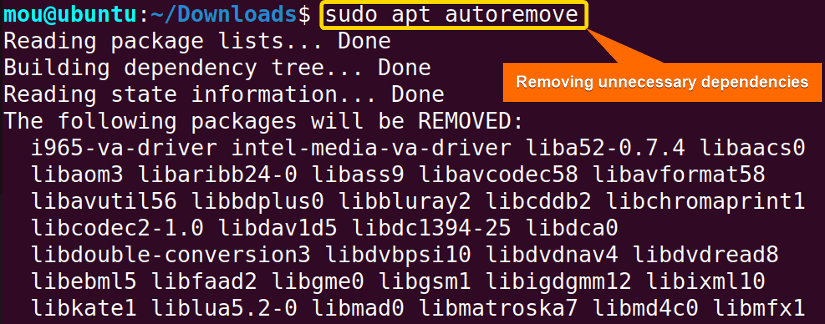
- To remove the unnecessary dependencies with apt-get, run this command:
sudo apt-get autoremoveEXPLANATION- autoremove: Removes unused dependencies of the packages in Linux.

All the unused dependencies of vlc have been removed now.
Comparative Analysis of “apt-get update” and “apt-get upgrade”
Here, I have explained the advantages and disadvantages of the two commands.
| Commands | Pros | Cons |
|---|---|---|
| apt-get update |
|
|
| apt-get upgrade |
|
|
Both commands are useful to update packages. Before upgrading any package update must be run to ensure the most recent data of the packages. Therefore, perform both if you want to upgrade any package otherwise perform only the apt-get update command.
Conclusion
In this article, I have gone through two different package managers including apt and apt-get. I have explained how to use update and upgrade arguments with apt-get. Moreover, different important options of the apt-get upgrade command are discussed elaborately. After reading the whole content, you will be able to know the basic differences between apt-get update and upgrade and can find out which one is better on your own. Good luck!
People Also Ask
How does ‘apt-get update’ work?
apt-get update works by updating the local package index using the apt-get package manager in a Debian-based Linux distro. It downloads the latest package information from the source file and provides you with up-to-date information about the available packages on your system.
How does ‘apt-get upgrade’ work?
apt-get upgrade works by upgrading the installed packages to their latest versions available in the repository. It automatically downloads the newer version packages and replaces the older ones.
What is the difference between ‘apt-get update’ and ‘apt-get upgrade’?
The basic difference between apt-get update and apt-get upgrade is that the apt-get update command updates the package list by downloading the package list from repositories, and can not install or remove any packages whereas the apt-get upgrade command upgrades the packages by downloading the latest version package files available in the repositories and can install or remove any packages.
Is apt-get upgrade important?
Yes, it is. Because it will make your device up-to-date and secure by upgrading all the installed packages.
Why is apt-get upgrade so slow?
The following factors could cause the apt-get package to run slowly:
- Mirrors problem.
- Issue with name servers.
- Issue with repositories.
How can I speed up my apt-get update?
Follow some instructions below:
- Check your /etc/apt/sources. list file to see if you have the correct source repositories.
- Remove source repositories that are undesirable or unsupported.
- Empty the apt-get cache.
- Select a quick DNS server.
Related Articles
- dnf Update Vs Upgrade [Which One Is Better]
- Yum Update Vs Upgrade [Basic Differences]
- How to Use ‘sudo apt full-upgrade’ in Linux [A complete Guide]
<< Go Back to Upgrade Package in Linux | Package Management in Linux | Learn Linux Basics
FUNDAMENTALS A Complete Guide for Beginners


typo at start of first paragraph: “apt-get upgrade and upgrade”
You meant “apt-get update and upgrade” instead, right?
yes. thanks for the response.