GIMP in Linux/UNIX-like system stands for GNU Image Manipulation Program. It is an open-source image editor. This editor is available for both UNIX-like systems and Windows NT-based systems. In this article, I will show you how to install the GIMP application on your Linux-based machine. And I will also show some use of this application.
How to Install GIMP in Linux Using GUI?
If you want to use the GUI to install GIMP you have to use your machine keyboard and mouse. Now follow the steps below.
Steps to Follow >
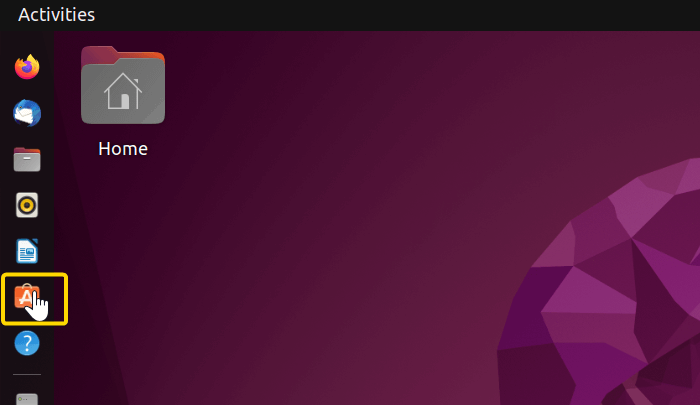
➊ Open your Ubuntu Desktop.
➋ Click on the Application icon.
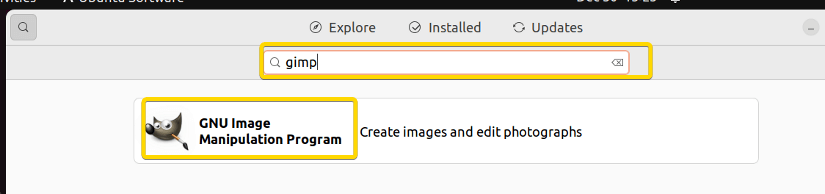
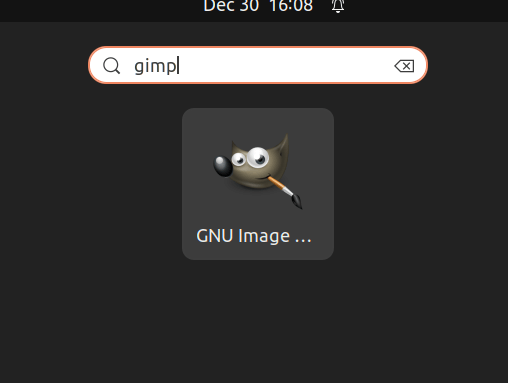
➌ Now, click on the search icon in the upper left corner and search for gimp.
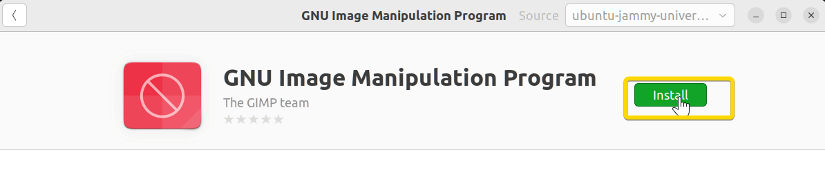
➍ Now, click on GIMP and the install button.
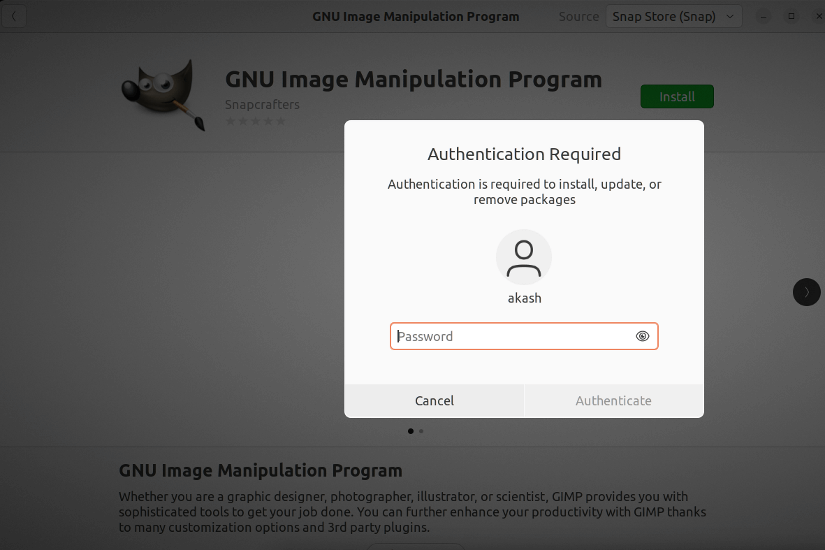
➎ It will ask for a Password. Give the password and the installation will start.
➏ You can check if the application is installed from the application menu.
How to Install GIMP in Linux Using CLI?
If you want to install GIMP, you first have to find the GIMP files in your system. Then you will install the software using root user privilege. For enabling the root user privilege sudo command is necessary. Now follow the steps below to see how to install the GIMP editing tool.
Steps to Follow >
➊ Open your Ubuntu terminal.
➋ Write the following commands and press ENTER.
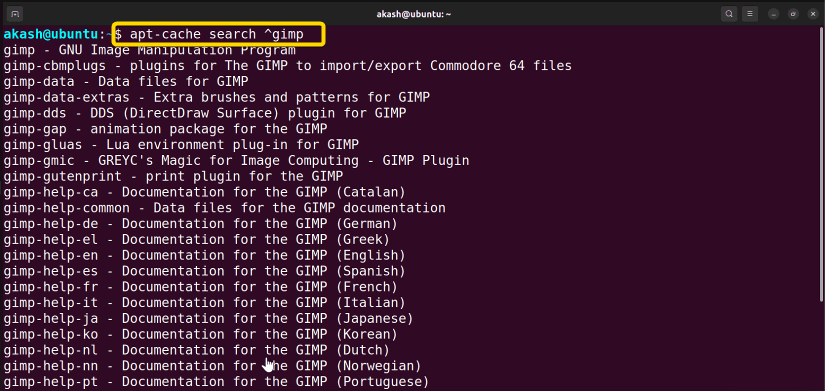
apt-cache search ^gimpThis command looks through the entire machine for available GIMP files to install. Now, look at the picture below to see the command output.
➌ Now, write the command below to install GIMP.
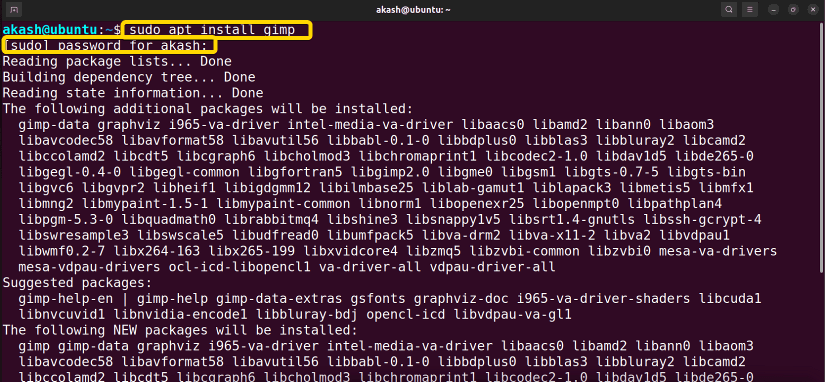
sudo apt install gimp➍ Type your user password and press ENTER.
This will start the installation, you will see a window like below.
So this is how you can install GIMP on your system. Now I installed this application using the CLI(Command Line Interface) but I could have done that using the GUI(Graphical User Interface). So in the next section, I will show you how to install GIMP using the GUI.
How to Open Image Files with GIMP in Linux
In this section, I will show you how to work with GIMP. First I will show you how to open a file inside the GIMP editor. Now follow the steps below.
Steps to Follow >
➊ Go to your application menu and search GIMP.
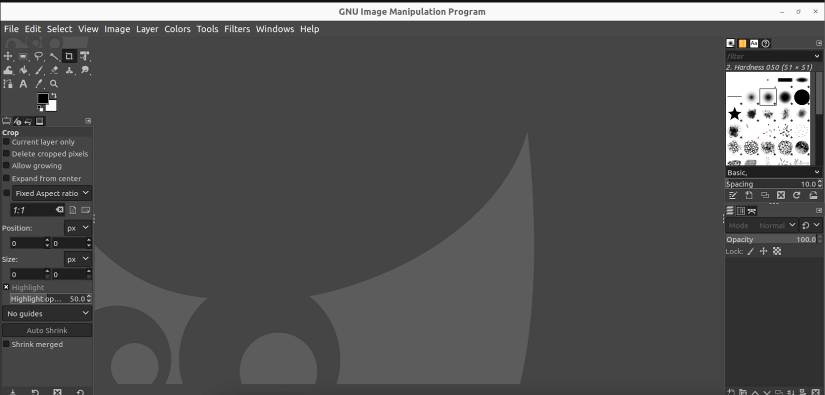
➋ Now click on the icon the application window will open up.
➌ Now, click on File in the upper right corner of the menu bar.
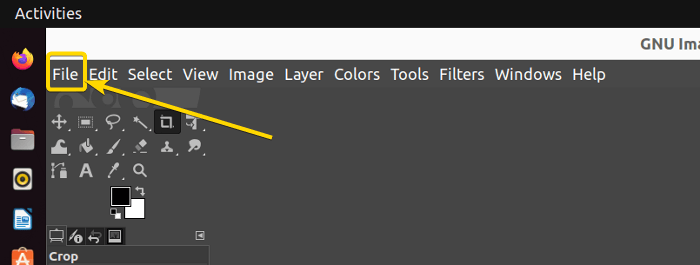
➍ From the drop-down menu click on open file
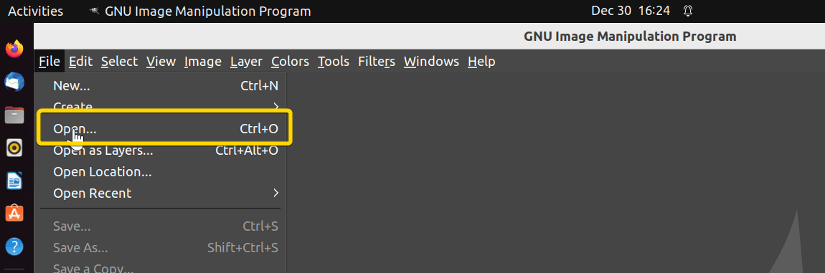
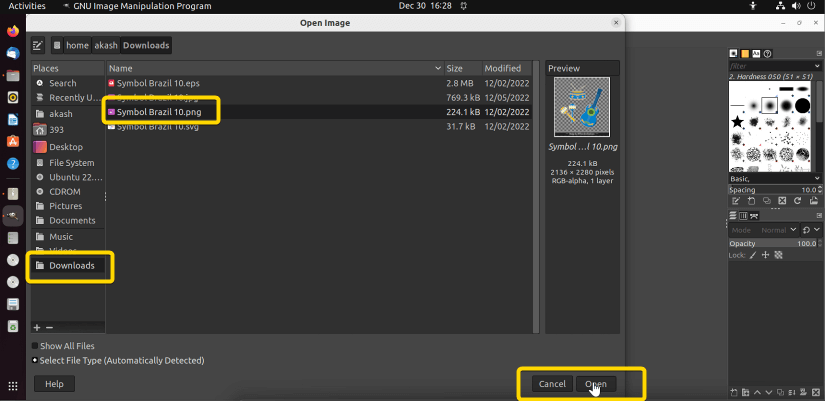
➎ Finally browse through the machine and select the file that you want to open inside the editor.
So this is how you open an image inside the editor GIMP. Now in the next section, I will show you how to work with an opened file.
How to Edit Image File with GIMP
Image Scaling
If you want to scale your image to your own preference then follow the steps below.
Steps to Follow >
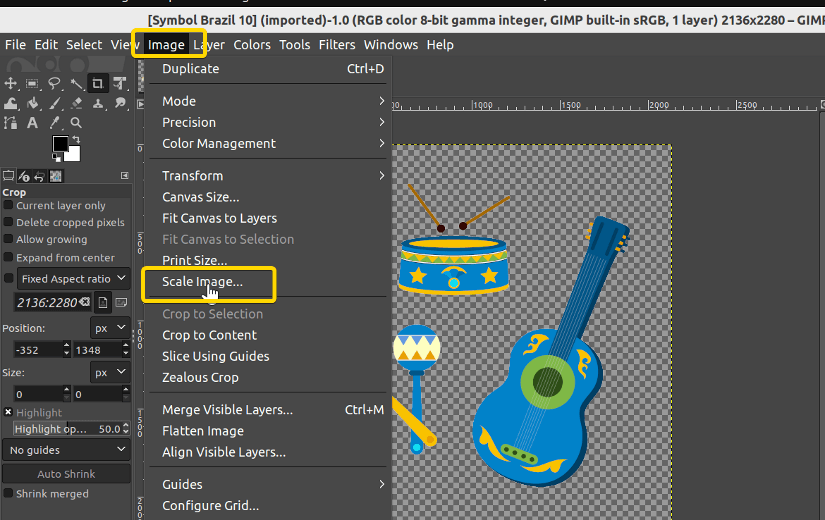
➊ Click on the Image button from the menu bar then, click on the scale image from the drop-down menu. Look at the picture below to understand properly.
➋ Now, the scaling window will pop up, give your expected resolution and finally click on scale.
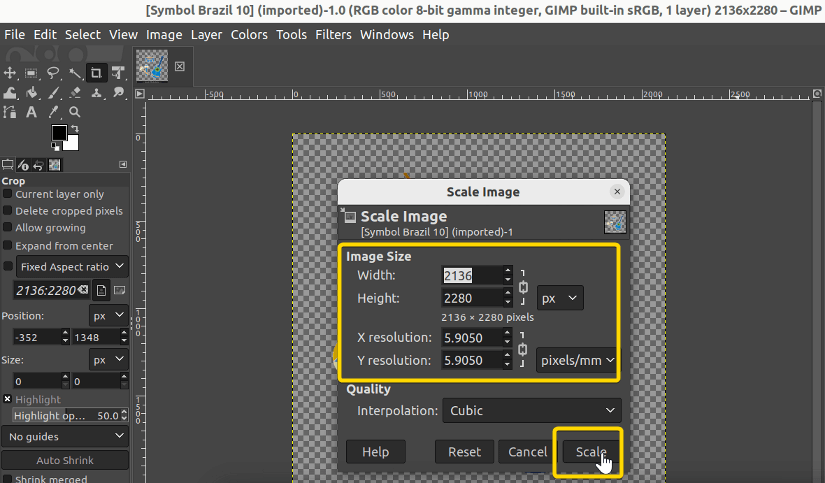
So this is how GIMP is used to scale an image. Next, I will show you how to crop an image using the GIMP application.
Image Cropping
If you want to crop an image using GIMP in Linux you will have to select the crop tool or just press SHIFT+C. Now follow the steps below to crop an image perfectly.
Steps to Follow >
➊ First click on Tools from the menu bar then, select Transform Tools from there select Crop. Look at the picture below to understand properly.
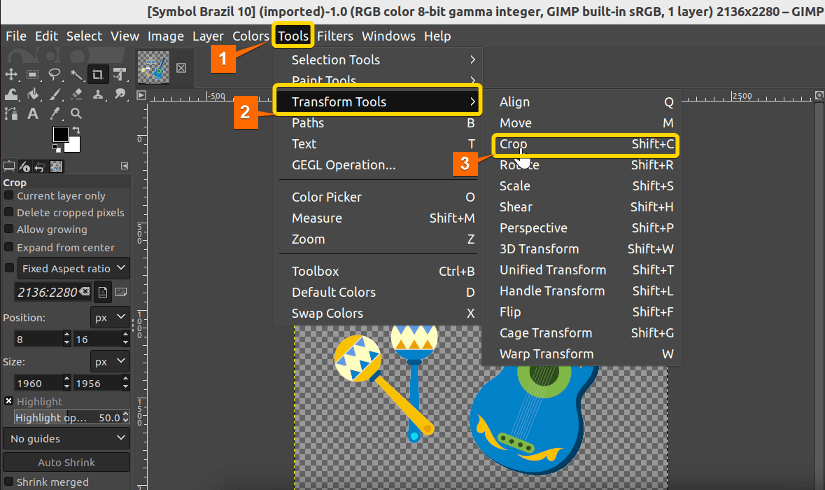
➋ Now, pull your mouse from any corner to where you the picture to be cropped and then press ENTER.
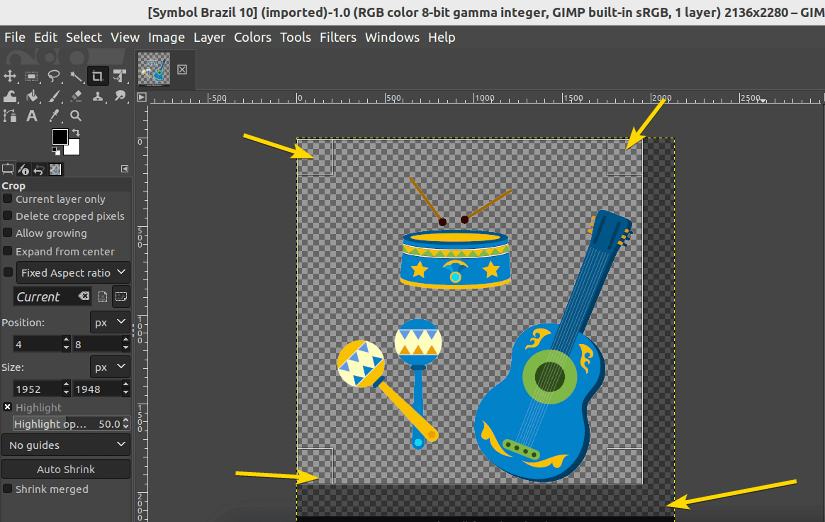
And so the image is cropped. This is how you properly crop an image using the GIMP tool in Linux.
Adding Text to Image
If you want to add text to an image using GIMP in Linux you will have to select the text tool or just press T. Now follow the steps below to add text to an image perfectly.
Steps to Follow >
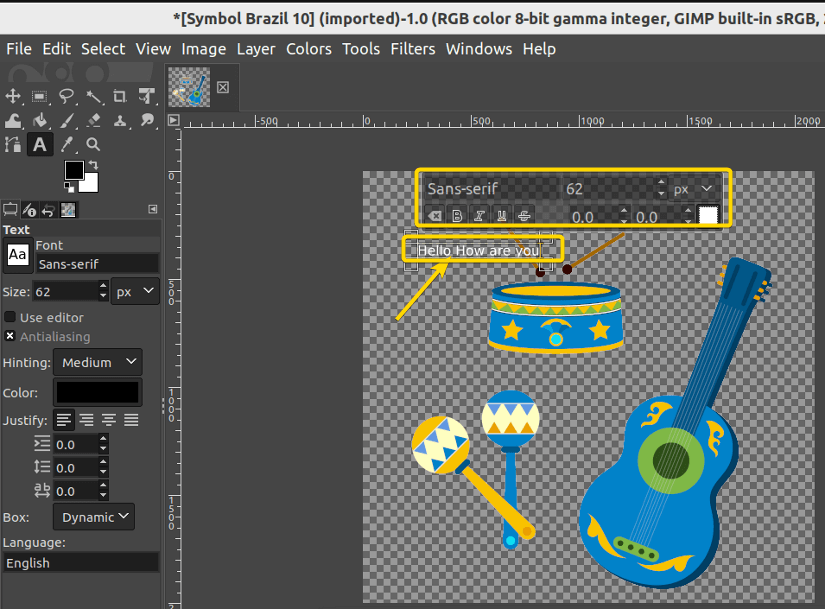
➊ First click on Tools from the menu bar then, select Text. Look at the picture below to understand properly.
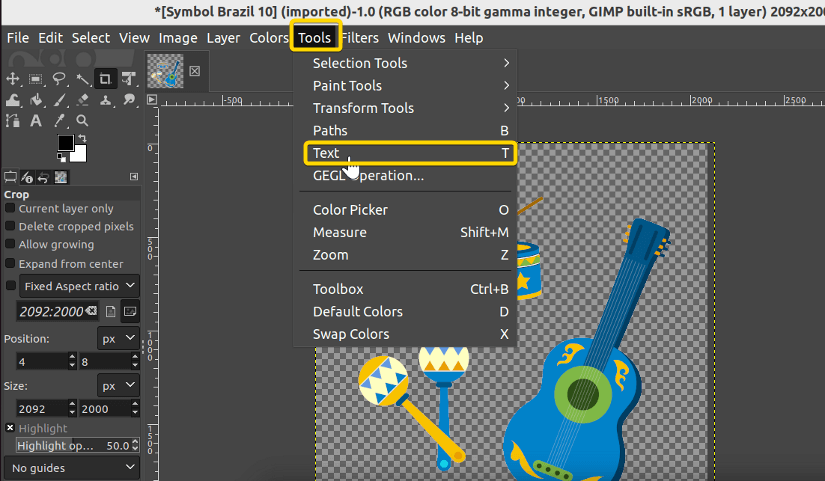
➋ After clicking on the Text Tool, Click anywhere on the picture Which will give you a text box. You will write inside that box. This is how you can add text to a picture. Now take a close look at the picture below.
But now you have to save this picture in your desired format. In the next section, I will show you how to do that.
Saving Picture in the GIMP Editor
If you want to save the picture after some editing like cropping or scaling you will simply press CTRL+S but the problem is it saves the file in .xcf format. But for using the edited image properly it has to be in a popular format like .png or .jpg. Now follow the steps below to perform this operation.
Steps to Follow >
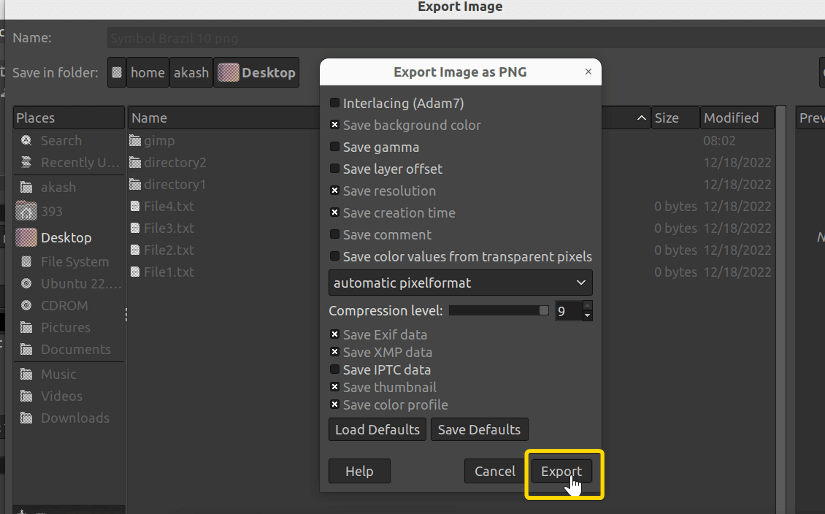
➊ At first you will press CTRL+E and then change the format. Now, look at the picture below to see how this works.

➋ And then export the image file. Look at the picture below to get a clear idea.
Difference Between GIMP and Photoshop
There are many differences between the two of these editors. But some important differences are given below.
- GIMP is a free-to-use software but Photoshop is paid software.
- GIMP can only be used on Computers but Photoshop is also available for android mobile or IOS.
- GIMP doesn’t have any classified standards but Photoshop has many standards which are commercial standards.
These are some of the important differences. There are other differences too but these are the most important ones.
Conclusion
In this article, I have tried to explain how to install GIMP on a machine and how GIMP works, some useful Examples, and the difference between GIMP and Photoshop. I tried to make it as simple as possible, considering how hard it is to learn to use the GIMP editor for beginners. So after reading this article you should be able to use GIMP properly and without facing many difficulties.
Similar Readings
- What is Applets in Linux? [Adding, Removing & More]
- What is GNOME in Linux? [The Complete Overview]
- What is GUI? [A Complete Overview]
FUNDAMENTALS A Complete Guide for Beginners


