APT (Advanced Package Tool) is a collection of tools used to install, update, remove, and otherwise manage software packages on Debian and its derivative operating systems. In this article, you will get to know all the aspects and features of APT in Linux.
How Does APT Work?
APT stands for Advanced Package Tool that is used for downloading, removing, or upgrading software packages in Linux. It is a powerful tool that can also be used with sudo, which lets us be the super user or sudo root user. APT works through the use of repositories, or special directories that hold collections of software packages.
When apt-get update is called, APT tries to connect to all specified repositories in the file and download information about those repositories what programs are available, and so on. It caches all retrieved data locally to use it later without making internet requests to the repository.
Also the apt is command is used to install, upgrade, or remove binaries as well as their configuration data files and dependencies 3. The apt-cache command is used to search for packages and display information about them.
How to Install Package Using APT?
The syntax of installing a package using APT is: sudo apt install <package name>. For example, to install “ncal” package, run the below command:
sudo apt install ncal Provide the password and you will see the installation start.
Now to check whether “ncal” is installed, run ncal. This should give you the calendar of the running month. The terminal should show-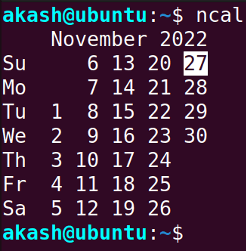
To install multiple packages, write the package name separated by space. For example:
sudo apt install ncal teamviewer firefoxHow to Remove Package Using APT?
The syntax of removing a package using APT is: sudo apt remove <package name>. For example, to remove “ncal” package, run the below command:
sudo apt remove ncalNow it will ask for confirmation. Type y and press ENTER.
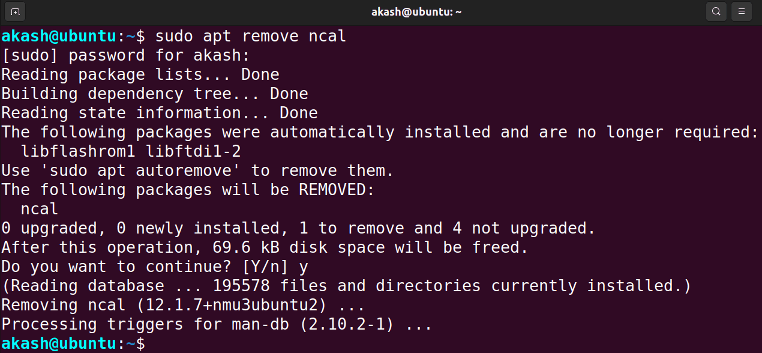 The output shows that “ncal” is removed.
APT Purge
To remove the package and the configuration files too, use purge. The syntax is:
sudo apt purge packageTo remove multiple packages, write the package name separated by space. For example:
sudo apt remove pack1 pack2APT Autoremove
While installing a package, some software packages are installed as dependencies. To remove the dependency packages associated with a package, use sudo apt autoremove.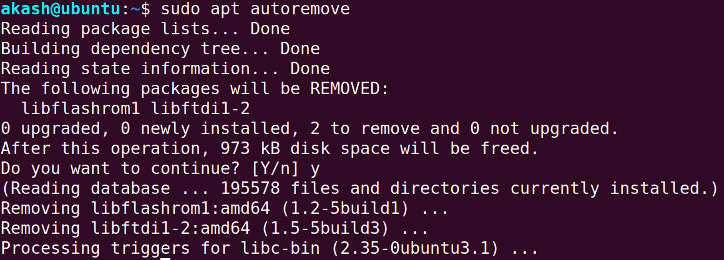
How to Update Packages Using APT?
To update all the available packages with APT, use the command below:
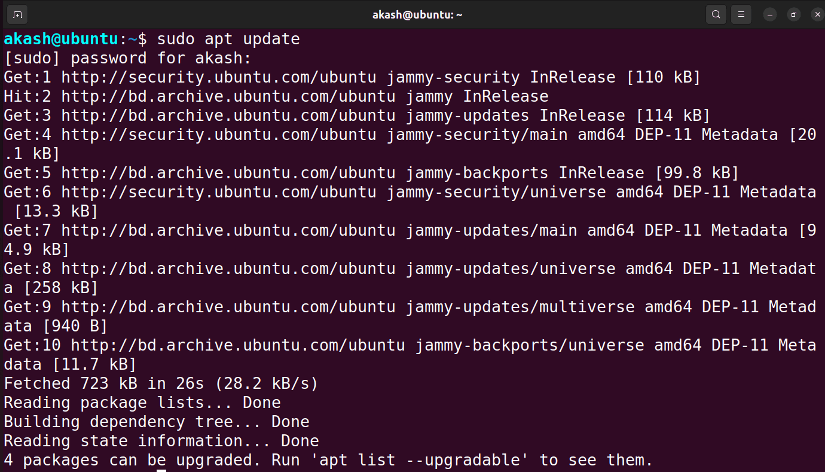
sudo apt update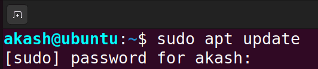 Provide the password and you will see that update started.
 Now there might be times when you need to upgrade your system rather than update. First, you will run an update, then the terminal will tell you if there is anything to update. You can see the list of upgradable packages using:
sudo apt list --upgradable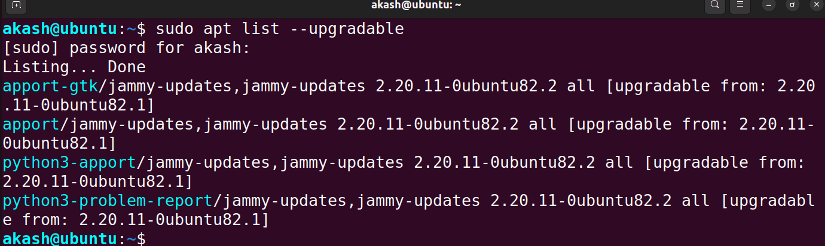 Here is the list of available upgradable packages in the system.
How to Upgrade Packages Using APT?
To upgrade all the available packages with APT, use the command below:
sudo apt upgradeThis will start upgrading all the existing packages in the system.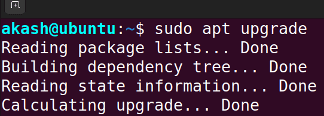
To Upgrade a specific package, use the following syntax:
sudo apt upgrade package_nameThis will start upgrading that specific package. The terminal should look like the image below.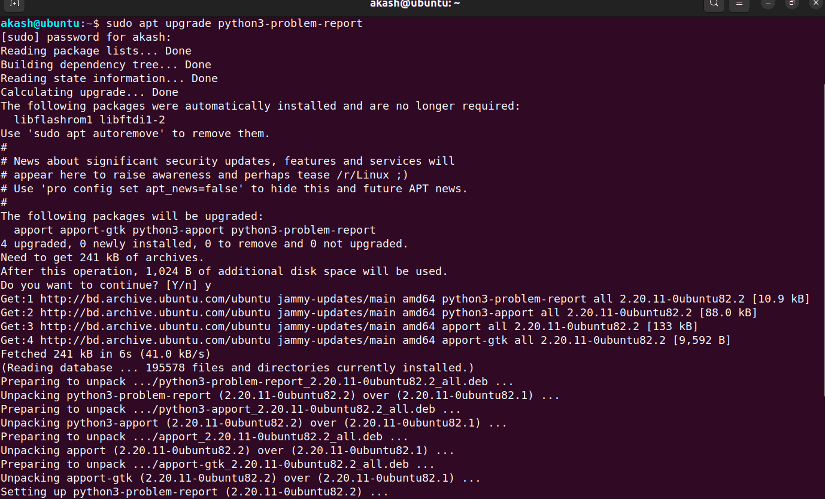 Type Y and press ENTER when a confirmation prompt appears.
Upgrade vs Full Upgrade
First of all, the syntax for these commands is different. For upgrade, you will use
sudo apt upgradeand for full-upgrade, you use
sudo apt full-upgradeSecondly, these two commands function a little differently. The core difference between upgrade and full-upgrade– the latter will remove any pre-installed packages to upgrade the entire system if needed. So we must be very cautious while using full-upgrade.
How to List Installed Packages Using APT?
Use the command below to list all the installed packages in your Ubuntu:
sudo apt list --installed
How to Search Package Using APT?
To search for a specific package in Ubuntu repository, use the syntax sudo apt search <pacakge name>. For example, to search if “ncal” is present, use:
sudo apt search ncal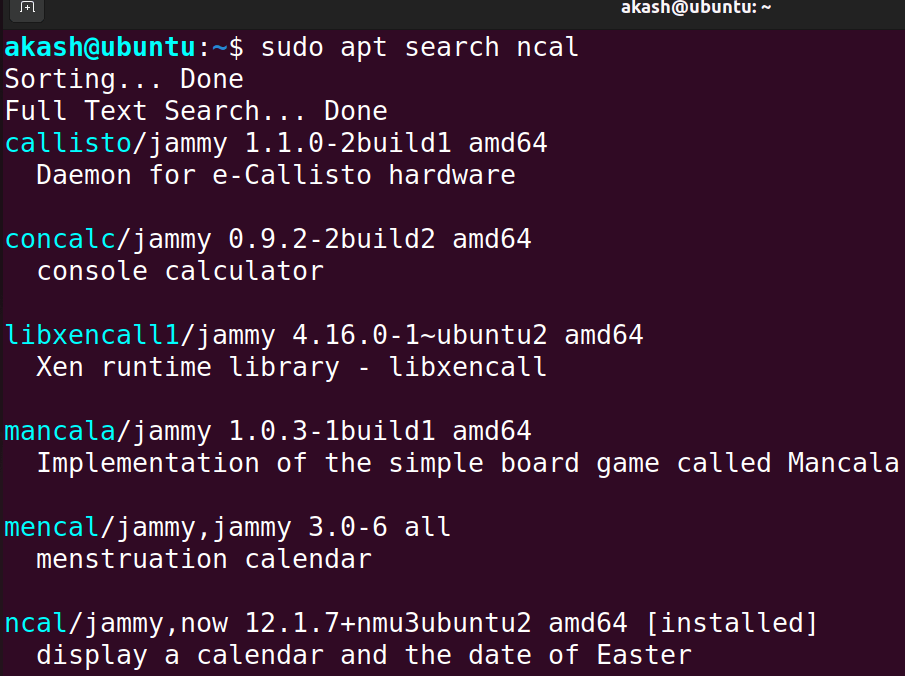
Show Information of a Package
To show information about a package such as how much space a package is holding, it’s origin, dependencies etc, use show with apt. For example, to show information about “ncal”, use:
sudo apt show ncal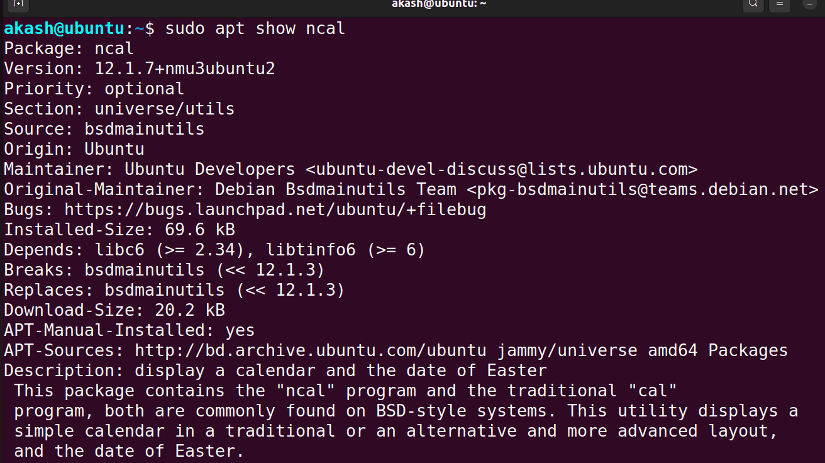 This shows all the relevant data about ncal.
sudo grants root privileges while running a command. Fixed: “apt Command Not Found” in Linux
The error message “apt Command Not Found” usually occurs when trying to use the APT package manager on a non-Debian-based Linux system. To fix this error, you can try the following steps:
- Make sure that you are using a Debian-based distribution of Linux.
- Check if the APT package is installed on your system by running the following command in your terminal:
dpkg -l | grep apt - If the “apt” package is installed, you should see it listed in the output. If it’s not, you’ll need to install it 2. 3. If the “apt” package is installed, try running the following command to update the package list:
sudo apt-get update - If the “apt” package is still not found, you may need to install it manually. You can download the APT package from the official Debian website.
Conclusion
This article explains how apt works. I tried to make it as simple as possible, considering how hard it is to learn to use the command line for beginners. So after reading this article, you should be able to use apt properly. Feel free to comment below if you face any difficulties regarding the use of APT.
People Also Ask
How to install apt on Linux?
apt is a package management tool that comes pre-installed on Ubuntu, Debian, and related Linux distributions. However, if you are using a different distribution that doesn’t have apt pre-installed, you can install it using the following command:
sudo apt-get install aptWhat is apt format?
The command format for apt is sudo apt <subcommand> <package name>. However, if you are referring to the format of the Ubuntu sources.list file, it is a plain text file that contains a list of package sources and their locations. The file is located in the /etc/apt/ directory and is named sources.list. Each line in the sources.list file represents a package source and has the following format:
deb http://archive.ubuntu.com/ubuntu/ distribution component1 component2 ...
Why is apt used?
apt is used as a package management tool on Ubuntu, Debian, and related Linux distributions. It is a command-line utility that is used for installing, updating, removing, and otherwise managing deb packages apt combines the most frequently used commands from the apt-get and apt-cache tools with different default values of some options.
What is the difference between APT and apt-get?
apt-get is a full-featured interface to dpkg, which is the underlying package management system in Debian. It provides a wide range of options and features, but it can be somewhat complex to use. APT, on the other hand, is a slightly stripped-back but more user-friendly version of apt-get. It includes most of the same commands as apt-get, but with a simpler syntax and more intuitive output.
Similar Readings
- What is Package Manager in Linux?[Install, Update & Manage]
- What is DPKG in Linux? [With Practical Applications
FUNDAMENTALS A Complete Guide for Beginners


