The “test” command is available in most Linux shells, either as a built-in function or a standalone executable file located in /usr/bin that evaluates conditional expressions. The command checks file types, compares values, and performs various logical operations, making it versatile for scripting. It is useful in complex expressions by combining multiple conditions.
In this tutorial, you will learn about the “test” command in Linux with detailed explanations, basic-to-advanced usage, and helpful tips.
Syntax of “test” command in Linux
The basic syntax of the “test” command is:
test EXPRESSIONor
[ EXPRESSION ]- test: The command itself.
- EXPRESSION: The condition that you want to test. It can be a comparison between two numbers, a check on a file, or a logical operation.
Note: [ EXPRESSION ] or simply [] is a short form of the “test” command syntax.
Options of “test” command in Linux
Some common options of the “test” command are:
| Option | Function |
|---|---|
| -s FILE | Checks if FILE exists and has a size greater than zero. |
| -f FILE | Tests if FILE exists and is a regular file. |
| -eq | Checks if two numbers are equal. |
How to Install “test” Command in Linux?
The test command is typically part of the coreutils package, which is pre-installed in most Linux distributions. Anyway, if it’s not installed on your system, you can install it by using the following commands:
➊ To install the “test” command in Debian-based Linux distributions like Ubuntu, use the APT package manager. Here is the command:
sudo apt-get install coreutils➋ To install the “test” command in RPM-based Linux distributions like CentOS, use the YUM package manager. Run the below command:
sudo yum install coreutils➌ To install the ‘test’ command from its source code, you can clone the “coreutils” repository that includes the “test” command. This is particularly useful if you want to use a specific command version. Use the below website link:
git clone git://git.sv.gnu.org/coreutilsAfter cloning, you can now compile and install “test” from the source code.
How to Use “test” Command in Linux?
To use the “test” command for evaluating a condition, for example, checking if a directory exists or not, run the following command on the terminal:
test -d /usr/local/binNote: You can also use square brackets [] instead of “test” for the same result, for example: [ -d /usr/local/bin ]
The successful execution of the test command displays no output on the terminal. To find the exit status of the command (to check whether the command ran successfully), use the variable $? with the echo command after execution. The full syntax is:
echo $?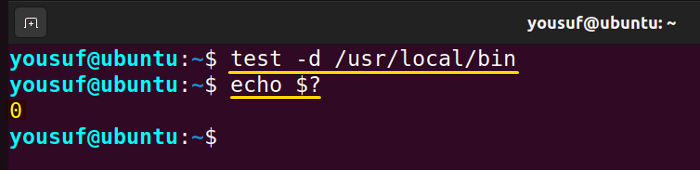
The command checks if the directory exists and then it returns 0 as exit status if the condition is True. It returns a non-zero value if the condition is False. Which you can see from the return value of the echo $? variable.
Now, another approach to getting the display result of the test command is by using the logical operators to combine test with another command that prints the output status.
To get a confirmation message after running the “test” command, simply use && (AND) or || (OR) logical operators with the “echo” command. Where, the AND (&&) operator produces a true outcome when every condition is true. On the other hand, the OR (||) operator evaluates to true if at least one of the conditions it connects is true. For example:
test -d /usr/local/bin && echo “Directory exists.”
Running the command prints a confirmation message in this case “Directory exists” as the condition is True.
5 Practical Examples of Using “test” Command in Linux
Here are a few examples of using the “test” command in Linux:
1. Testing for a File
To test for a file’s existence, you can use the test command with -e option. Testing a file is crucial to avoid clobbering i.e. creating multiple files under the same names. Here is a command to test for a file with a confirmation message:
test -e states.txt && echo "File exists"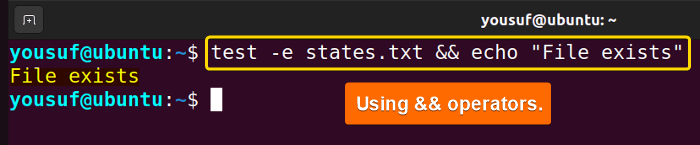
As you can see, the command prints a confirmation message because the file actually exists.
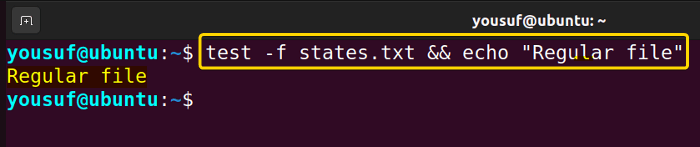
2. Testing File Types
To test a variety of different file types, you can use the test command with various options. Here are some command file types:
- To test for a regular file, use
testwith the-foption. Here is the command:test -f states.txt && echo “Regular file”
Upon running, the command returns true because it is a regular file and “echo” displays that message.
- To test for a directory, use
testwith-d. Run the command below:test -d /usr/local/bin && echo “Directory”
Hence, the command returns true for the given file as a directory.
-
To check if a file is a block special file, use
testfollowed by the-boption. A block special file is a device file that provides buffered input/output operations. These files are used to interact with block devices such as hard drives and SSDs. For example:test -b /dev/sda && echo “Block file”
After execution, the command returns true since the specified file is a block file.
-
To test files with symlinks, use
testalong with-Lor-h. A symlink is a special type of file that acts as a pointer or shortcut to another file or directory. Use the following command to do so:test -L symlink.txt && echo “Symbolic link”
Thus, the command returns true as the given symlink.txt is a symbolic link file.
-
To check if a file is a socket, apply
testwith-S. A socket is a special file used for inter-process communication between processes on the same or different computers. See the below command:test -S /tmp/socket/my_socket && echo “Socket file”
Upon execution, the command returns true as the specified file is a socket file.


3. Testing for File Attributes
To test for file attributes for a given file, you can use the test command in Linux. Here are a few cases you can use the command for file attributes:
3.1 Searching Metadata of a File
To search metadata of a file, you can use the test command with -s and -N options. Here are the commands:
- To check if the size of a file is greater than zero, use
-soption. The command:test -s states.txt && echo “Size greater than zero”
The command returns true because the size of states.txt is actually greater than zero.
- To check if a file has been modified since the last read, use
-Noption. Run:test -N states.txt && echo “Modified since last read”
As a result, it returns true because the specified file has been modified since it was last read.


3.2 Testing by Ownership
To test a file by ownership, you can use the test command in Linux. Here are the cases:
-
To test a file owned by the current primary user, use
testcommand with-Ooption. Run the command below:test -O states.txt & echo “Owned by current user”
Since the states.txt file is owned by the current primary user, the command returns true.
-
To test a file owned by the current primary group, use the
testcommand followed by the-Goption. The command:test -G states.txt && echo “Owned by current group”
The command returns true because the current group owns the specified file.


3.3 Testing by Permissions
To test files by current permissions, use the test command. Follow the few cases of different permissions:
- To test a file with read permission granted, use
testcommand with-roption. Run the command below:test -r log.txt && echo “Read permission granted”
This command checks if the file log.txt has read permission granted.
-
To test a file with write permission granted, use the
testcommand with the-woption. Here is the command:test -w log.txt && echo “Write permission granted”Running the command checks if the current user has write permission for the file named log.txt and shows output if true.
-
To test files with execute permission granted, use the
testcommand with the-xoption. For example, use the command below:test -x log.txt && echo “Execute permission granted”
Hence, this code checks if log.txt has the execute permission set and, if so, prints a message.
-
To check a file with the sticky bit set, use the
testcommand with the-koption. The sticky bit is a special permission that controls how to delete or modify files within the directory or system. Here is the command to do so:test -k log.txt && echo “File has sticky bit set”
Upon running, the command returns true as the specified file has a sticky bit set.


4. Combining Tests
You can combine multiple conditions and perform AND or OR operations, using the test command with -a or -o options. The -a option (AND) lets you combine multiple tests, checking all tests to be true for the entire condition to be true. The -o option (OR) requires that at least one expression is true for the entire condition to be true.
Suppose, you have two files named colors.txt and puppy.png. Let’s create combining tests with them:
- To combine multiple tests with AND operations, use
testcommand with-aoption. For example:test -e colors.txt -a -e puppy.png && echo “Correct”
The command returns true since you have both files.
- Now, try to use the command to search for one of the files, that does not exist:
test -e colors.txt -a -e kitty.png && echo "Correct"
See from the image that the command returns no output because one of the conditions is false.
-
To combine multiple tests with OR operations, use the
testcommand with the-ooption. Use the below command:test -e colors.txt -o -e kitty.png && echo "Correct"
As you can see, the -e option returns true for at least one true expression even though the kitty.png file does not exist in my system.


5. Testing Integers
To test integers, you can also use the test command in Linux. This is particularly useful when you’re using variables with assigned integers in a script. Run the below commands to test if two variables are equal or not using the -eq option:
apple=33
banana=32
test $apple -eq $banana || echo “Not equal”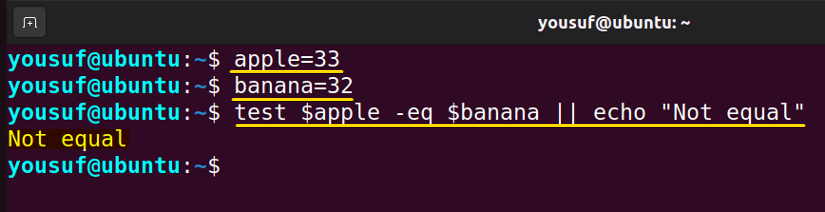
The command returns false as the -eq expression is false.
Here are some other options to compare integers while using the “test” command:
| Options | Function |
|---|---|
| -ne | Not equal |
| -ge | Greater than or equal to |
| -gt | Greater than |
| -le | Less than or equal to |
| -lt | Less than |
Advanced Use Cases of “test” Command in Linux
Here are a few advanced use cases to dive deeper into the usage of the “test” command in Linux:
1. Using “test” Command in Scripts
The ‘test’ command is incredibly useful in shell scripting. It allows you to dictate script behavior based on specified conditions.
Here’s a simple example of using “test” command within a shell script:
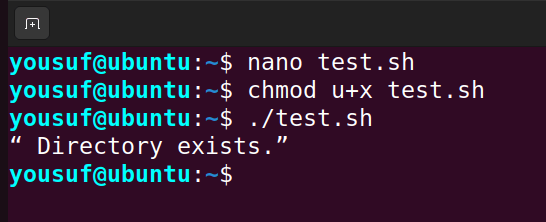
- Run the following command to open the nano text editor:
nano test.sh - Paste the following “test” command in the Nano editor:
#!/bin/bash if test -d /usr/local/bin; then echo “ Directory exists.” else echo “Directory does not exist.” fiEXPLANATIONThe script checks if the directory specified exists and prints a corresponding message depending on the result of the check.
- Give execution permission to the user using the below command:
chmod u+x test.sh - Lastly, run the below command:
./test.sh
This way you can perform more advanced “test” operations in Scripts.
2. Altering “test” Command Behavior Using Negation Operator
You can alter or reverse the behavior of the “test” command using a negation operator !. The ‘!’ operator in the test command negates the result of the condition that follows it. If the condition is true, the ‘!’ operator makes it false, and vice versa.
Here is an example of using the “test” command with “!” operator:
test ! -d /usr/local/bin && echo “Directory exists.”The command with && operators returns no output since the “!” option reverses the expression.
test ! -d /usr/local/bin || echo “Directory exists.”In this case, the command with || operators returns an output because of the “!” option reversing the expression.
Conclusion
In summary, the “test” command in Linux is a versatile tool for evaluating expressions, commonly used within scripts. Hopefully, you can now check for your file properties and compare numerical or string values. If you have any further questions, please write them in the comment box below.
People Also Ask
Why do we use “test” command in Linux?
We use the “test” command to check the type of file and the permissions related to a file. Test command returns 0 as a successful exit status if the command/expression is true, and returns 1 if the command/expression is false.
What is the difference between “[” and “test” commands in Linux?
The main difference between “[” and “test” commands is in their origin. The “[” is a shell built-in equivalent to the test command that doesn’t require a separate program execution. The “test” command is a separate executable file located in /usr/bin.
Why is the output value different for -z and -n with “test” command in Linux?
The “test” command evaluates the condition and indicates the result of the evaluation by its exit status. An exit status of zero indicates that the condition is evaluated as true and an exit status of 1 indicates that the condition evaluates as false. The “-n” string is True if the length of the string is non-zero. The “-z” string is True if the length of the string is zero.
Can I use the “test” command within an if-else construct in Linux?
Yes, you can use the “test” command within an if-else construct in Linux. If-else statements rely on the exit status of commands (0 for success, non-zero for failure). The “test” command follows this convention, making it perfect for use within if-else constructs.
FUNDAMENTALS A Complete Guide for Beginners


