DNF (Dandified YUM) serves as the most recent package manager tailored for Red Hat-based operating systems like RHEL, Fedora, and CentOS. It builds upon the yum package manager. It streamlines package management in Linux/Unix systems with its advanced features, making installation, dependency resolution, version control, and package uninstallation more straightforward. In this comprehensive guide, I will dive into a vital component of package management: installing group packages. I will show you how you can use the DNF package manager to install group packages using the command line interface (CLI) in the Red Hat-based system.
Key Takeaways
- Learning the process of installing group app packages in your system.
Requirements
- A Red Hat-based distribution is required.
- Sudo privilege is required.
Process Flow Chart
[Distro Used Throughout the Tutorial: RHEL 9.2]

What is the “dnf group” Command?
The “dnf group” command is a powerful command line tool in Red Hat-based Linux systems like RHEL, Fedora, CentOS, etc. This command facilitates the installation and management of software packages organized into groups. Using this command you can effortlessly explore available package groups, access detailed information about specific groups, and effortlessly install entire groups of packages. This streamlines the process of setting up software environments for particular purposes, such as development, gaming, or server roles.
In this comprehensive guide, I will show you how you can install a group package using the dnf package manager. Throughout this guide, I’ll focus on the “development tools” group.
If you want to install an app package from your local file using dnf, go through this simple article “How to Install Local Package Using DNF”. If you want to learn about groupinstall using dnf, check this in-depth article “5 Ways to List Installed Packages in RHEL Using DNF With Cases”. To know how to install app packages using yum, check this detailed article on “How to Install RPM Packages Using YUM”.
2 Methods to Install Group Package Using “dnf”
Now, let me dive into the most important part, how you can install a group package. Group packages can save you time and effort by allowing you to install multiple related packages in one go. The “dnf groupinstall” and “dnf install” commands can be used for this purpose.
Method 01: Using the “dnf groupinstall” Command
At first, I will dive into how you can install a group package using the “dnf groupinstall” command. As its name suggests, it is a very straightforward command for group package installation. It allows you to install group packages effortlessly, streamlining the process of setting up development or any other specific environment in your system. You can use the group name or the group ID to install a package group using this command.
Case 01: Install Without Optional Packages
By default “dnf groupinstall” command only installs all “mandatory” and “default” packages listed under a package group and omits the optional packages. To install the default and mandatory app packages without the optional packages follow these step-by-step process:
Steps to Follow >
➊ First open the terminal in your system and run the following command to install the group package with their group name. Your terminal will look similar to the image below:
sudo dnf groupinstall "development tools"Or,
sudo dnf group install "development tools"- sudo: Permits administrative permission.
- groupinstall/ groups install: Instruct dnf to install a package group.
- development tools: Name of the package group I want to install.
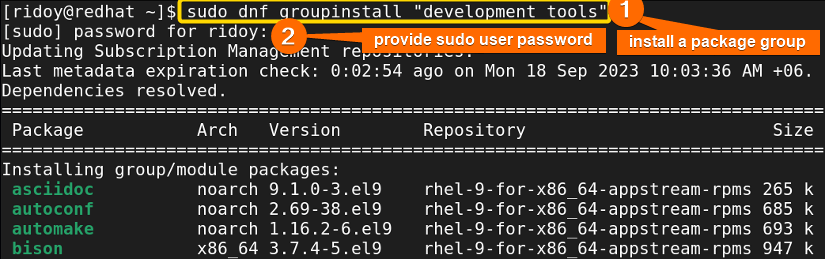
Note: If the group name has multiple words then you have to keep them in between quotations as I have done. In the case of a single word, you do not have to use any quotation.
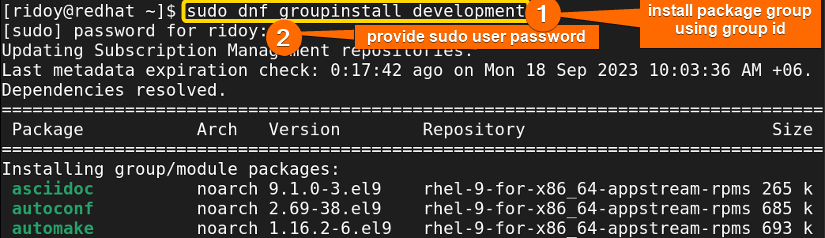
If you want to install a package group using group ID then run this command instead as shown in the image below:
sudo dnf groupinstall developmentOr,
sudo dnf group install development- development: Group ID of the package group I want to install.
To list all available group packages check How to List All Group Packages. You will be able to find the group name and the group ID by using this command. If you want to check detailed information about a particular group package check Check Details of a Group Package.
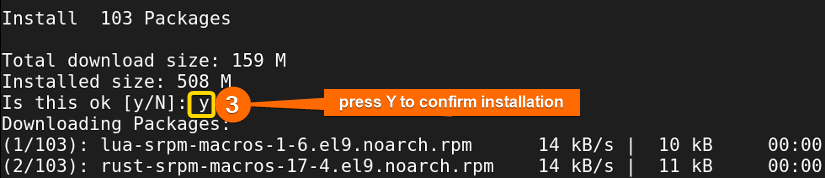
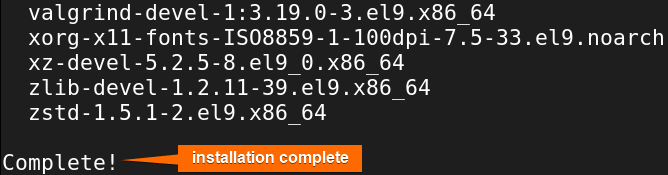
➋ After that, press “Y” to confirm the group installation as shown in the image above. All app packages of the group will be downloaded and installed automatically. This process will take some time.

After the group installation is complete you will get a confirmation message like the image above.
Case 02: Install With Optional Packages
In the previous section, I have shown how to install group packages with DNF, but what if you want to go the extra mile and include optional components within a package group? This is where the “–with-optional” flag comes into play. In this section, we’ll explore the process of installing group packages along with their optional components using DNF.
Steps to Follow >
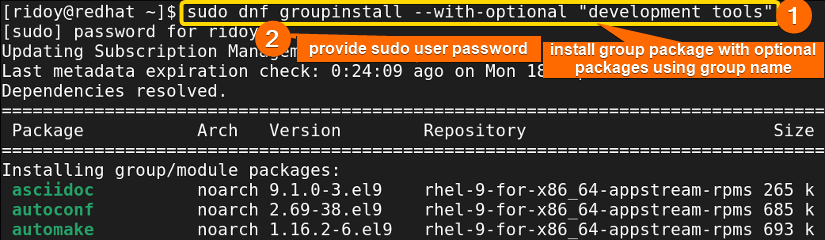
➊ First open the terminal in your system and execute the following command to install the group package with their group name:
sudo dnf groupinstall --with-optional "development tools"Or,
sudo dnf group install --with-optional "development tools"- –with-optional: Modify the behavior of the groupinstall command to install any optional packages associated with the group.
It will look similar to the previous image.
Note: If the group name has multiple words then you have to keep them in between quotations as I have done. In the case of a single word, you do not have to use any quotation.
In case, you want to install a package group using group ID then run this command instead:
sudo dnf groupinstall --with-optional developmentOr,
sudo dnf group install --with-optional development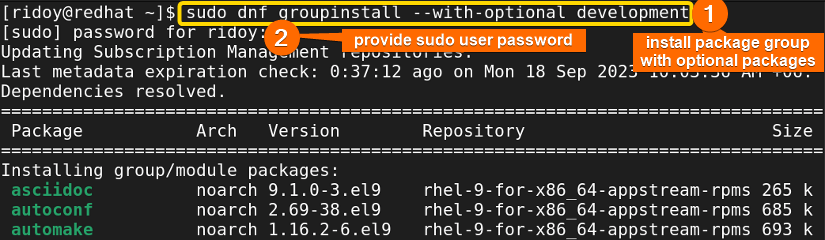
Your terminal should look like the image above.
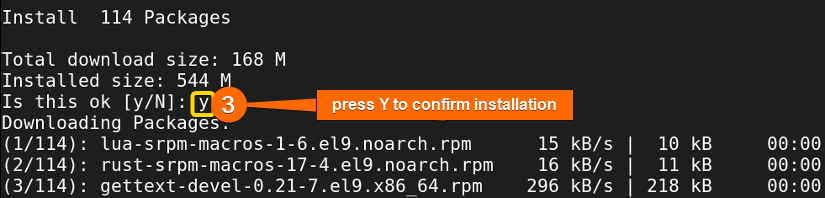
➋ Following that, you should press the “Y” key to confirm the group installation, as shown in the image above. All application packages within the group will be automatically downloaded and installed. This installation process may require some time.
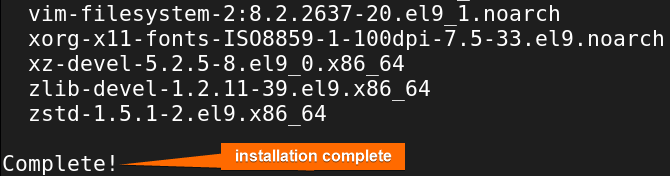
Upon successful completion of the group installation, you will receive a confirmation message similar to the above image.
Method 02: Using the “dnf install” Command
In the realm of Linux package management, DNF (Dandified YUM) reigns supreme as a versatile and robust tool. I have already shown how to use the “dnf groupinstall” command to install package groups along with their optional components.
Now, I will venture into an alternate method by leveraging the “dnf install” command. This approach provides a different way to achieve the same goal of installing group packages. To install group packages using the “dnf install” command follow these step-by-step instructions:
Steps to Follow >
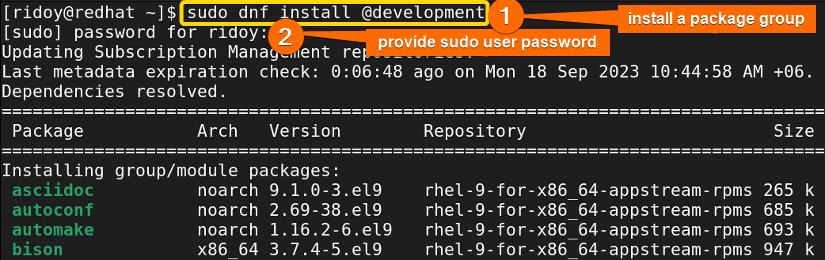
➊ First open your terminal and run the following command to install a group package from the remote repository as shown in the following image:
sudo dnf install @development- install: Install an app package using dnf.

➋ After that, press “Y” to confirm the group installation as shown in the image above. All app packages of the group will be downloaded and installed automatically. This process will take some time. After the group installation is complete you will get a confirmation message like the following image.
Now, you know how to install package groups in Red Hat-based systems.
How to List All Group Packages in RHEL
Before installing group packages, it is helpful to know what group packages are available. You can do that by listing all available groups. To do that follow these processes:
Steps to Follow >
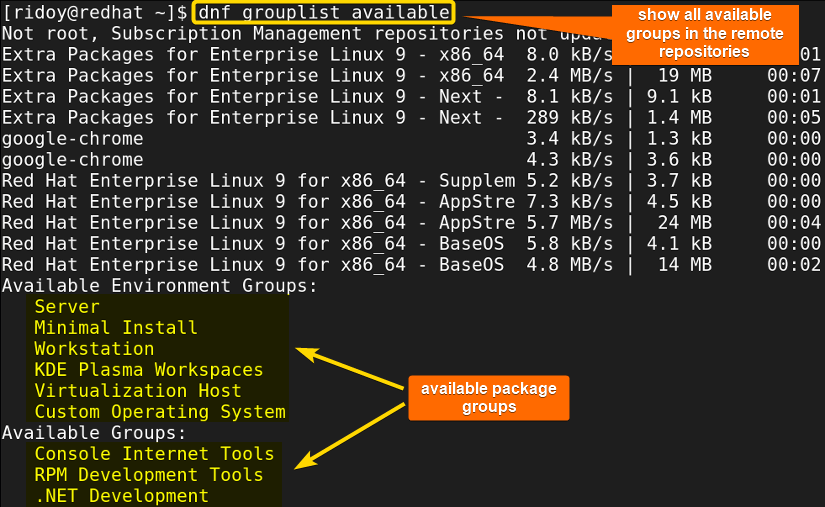
➊ First open your terminal and run the following command to check for all available group names from the remote repository as shown in the following image:
dnf grouplist availableOr,
dnf group list available- dnf: Package manager in Red Hat-based distributions.
- grouplist/ groups list: list all groups in the remote repository.
- available: Name of the groups that are available for you.
Note: If you want to list all groups, use the following command:
dnf grouplistIn case you just want to list all installed groups run this command instead:
dnf grouplist installedAnd, to list all hidden groups, use this command:
dnf grouplist available --hidden➋ If you’d like to see more detailed information about the package groups, you can use the -v or –verbose option with the command. For example:
dnf grouplist available -vOr,
dnf group list available --verbose- v/verbose: Display additional information about the package groups, including descriptions and other details.

Your terminal should look similar to the image above.

After executing the command, you will be able to see the group ID along with the group name in your terminal.
How to Check Details of a Group Package in RHEL
This is another important step before installing group packages. It is important to check the details of a specific group package. It will allow you to understand what software packages are included in the group and make an informed decision. Follow these steps to check the details about a particular group package:
Steps to Follow >
➊ To begin, open your terminal.
➋ Now, type the following command:
dnf groupinfo developmentOr,
dnf group info development- groupinfo/ groups info: Instruct dnf to provide information about a package group.
- development: Name of the group package that I want to check the details of.
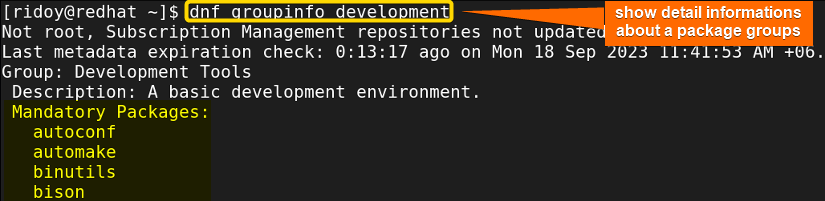
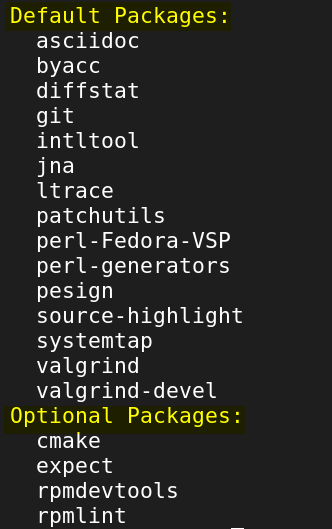
➌ After that, hit “ENTER”. After executing this command you will receive details information about your specified group package in your command line interface similar to the images above.
Conclusion
In this comprehensive guide, I have delved into the process of installing group packages on Red Hat-based systems using DNF. Whether you chose the “dnf groupinstall” or “dnf install” command, you now have the knowledge of managing an efficient Linux system.
People Also Ask
Why use DNF instead of YUM?
Switching to DNF (Dandified YUM) over YUM in Red Hat-based Linux systems is recommended for enhanced performance, improved dependency resolution, parallel processing, and an updated codebase. DNF offers a more efficient and user-friendly package management experience, making it the preferred choice for Red Hat-based Linux distributions.
How to install software using dnf?
To install software using DNF (Dandified YUM), open the terminal and run sudo dnf install <package-name>. DNF will automatically resolve dependencies and will download and install the package. This simple command streamlines software installation on Red Hat-based Linux systems.
How to install yum command in Linux?
In Red Hat-based distributions yum is a very dependable package manager. If you want to install yum in Debian-based Linux distros run sudo apt install yum in the terminal. If you install yum in Arch Linux-based distro then run sudo pacman -S yum in the terminal.
What is the dnf command?
DNF(Dandified YUM) is the go-to package manager in modern Red Hat-based Linux systems like Fedora, RHEL, CentOS, etc. It streamlines software installation, updates, uninstallation, and overall package management via the command line. DNF replaces the older YUM package manager by offering enhanced capabilities and efficiency.
Related Articles
- How to Show List of Installed Packages Using YUM [2 Cases]
- How to Check if Package is Installed Using YUM [3 Solutions]
- How to Install Specific Version of a Package Using YUM
- How to Install Local Package Using YUM [2 Practical Cases]
- How to List Installed Packages Using RPM [2 Practical Cases]
- 3 Ways to Install Pacman Package Manager in Ubuntu
- How to Install Local Package Using RPM [A Quick Guide]
- How to Install RPM Packages Using DNF [4 Useful Cases]
- How to Install RPM Packages From Text File [5 Simple Cases]
<< Go Back to Package Installation in Linux | Package Management in Linux | Learn Linux Basics
FUNDAMENTALS A Complete Guide for Beginners


Is there a shortcut for installing multiple packages? or is this the quickest? I tried colon and semi colon to no avail…
#dnf install realmd -y |dnf install sssd -y |dnf install oddjob-mkhomedir -y |dnf install samba-common-tools -y |dnf install krb5-workstation -y