The head command is one of the most useful commands in Linux if you only want to know about the starting of content or some specific part. It can be handy if your motive is just to check the content or use a particular part. Thus the head command can make the handling of contents more efficient. Hence, as a Linux enthusiast, you should learn in detail about the head command in Linux.
A. Description
The head command prints the first(by default 10 lines) few lines of a file. You can also print the first specific lines or bytes from a file using the head command in Linux.
B. Syntax
The head command in Linux has a fairly simple syntax. It takes some options following the command and one or more files as arguments. The syntax of the head command is as follows:
head [OPTION]... [FILE]...Note: In the above syntax OPTION enclosed by a square bracket and followed by 3 dots represents that multiple options can be utilized at the same time. Moreover, 3 dots after FILE suggest that you can specify multiple files to display their contents.
C. Options
Many useful options are available for the head command. I have listed some of the most used ones here. However, if you want to know more about options for the head command you can always check the man page for the head command.
man headUseful Options
- -c, –bytes=[-]NUM (Prints the first NUM bytes. However with – as a prefix prints everything except the first -NUM bytes.)
- -n, –lines=[-]NUM (Prints the first NUM lines. However with – as a prefix prints everything except the first -NUM lines.)
- -v, –verbose (Prints message of what is being completed.)
NB: The options in Linux CLI(Command Line Interface) are all case-sensitive, So be cautious while using them.
Practical Examples of the “head” Command in Linux
The head command in Linux is an easy-to-use command that is used to display the first few lines of contents. Some of the most useful applications of the head command have been illustrated below.
Example 1: Displaying the First 10 Lines using the “head” Command in Linux
By default, You can print the first 10 lines of a text file on your terminal using the head command. Here, I’ll print the first 10 lines of a text file named “Numbers.txt”. To do the same you can follow the below process.
Steps to Follow >
➊ At first open the Ubuntu Terminal in the TextLab directory.
You can open the Ubuntu Terminal from a specific directory. To learn details about that click here.
➋ Type the following command in the command prompt:
head Numbers.txt➌ Now, press the ENTER button.
Output >
In the below image, you can see that the first 10 lines of the Numbers.txt file have been printed by using the head command.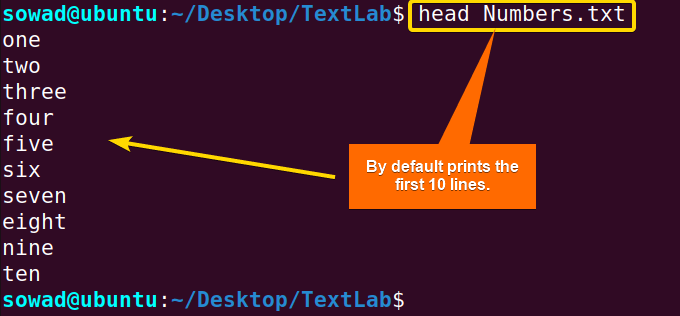
Example 2: Displaying First N Lines using the “head” Command in Linux
You can print a specific number of lines of a text file on your terminal using the head command. Here, I’ll print the first 7 lines of a text file named “Numbers.txt”. To do the same you can follow the below process.
Steps to Follow >
➊ At first open the Ubuntu Terminal in the TextLab directory.
➋ Type the following command in the command prompt:
head -n7 Numbers.txtAlternatively,
head -7 Numbers.txt➌ Now, press the ENTER button.
Output >
In the below image, you can see that the first 7 lines of the Numbers.txt file have been printed by using the head command.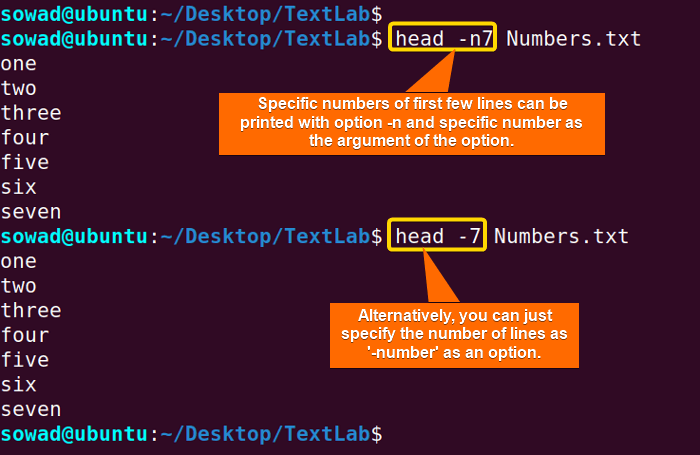
Example 3: Displaying First N Bytes using the “head” Command in Linux
You can print the first few specific bytes of contents of a text file on your terminal using the head command with the -c option & number of bytes as its argument. Here, I’ll print the first 100 bytes of a text file named “TheAlchemist”. To do the same you can follow the below process.
Steps to Follow >
➊ At first open the Ubuntu Terminal in the TextLab directory.
➋ Type the following command in the command prompt:
head -c100 TheAlchemist➌ Now, press the ENTER button.
Output >
In the below image, you can see that by adding -c100 with the head command output has changed.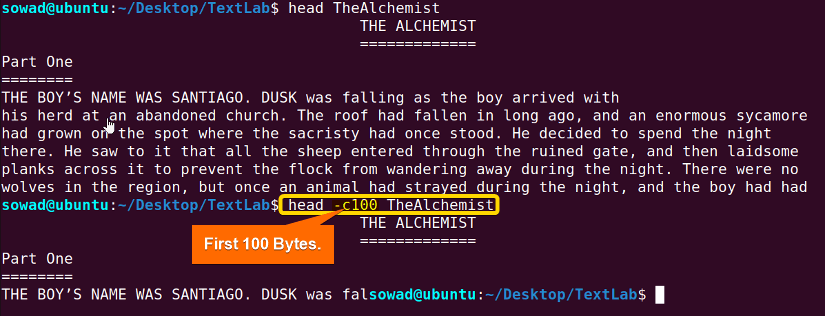
Example 4: Displaying the First Few Lines of Multiple Files
You can display the first few lines of multiple files using the head command in Linux. Here, I’ll print the first 10 lines of two files named “TheAlchemist” & “BeingYourself”. To do the same you can follow the below process.
Steps to Follow >
➊ At first open the Ubuntu Terminal in the TextLab directory.
➋ Type the following command in the command prompt:
head TheAlchemist BeingYourself➌ Now, press the ENTER button.
Output >
In the below image, you can see that 10 lines from two different files have been displayed one by one using the head command.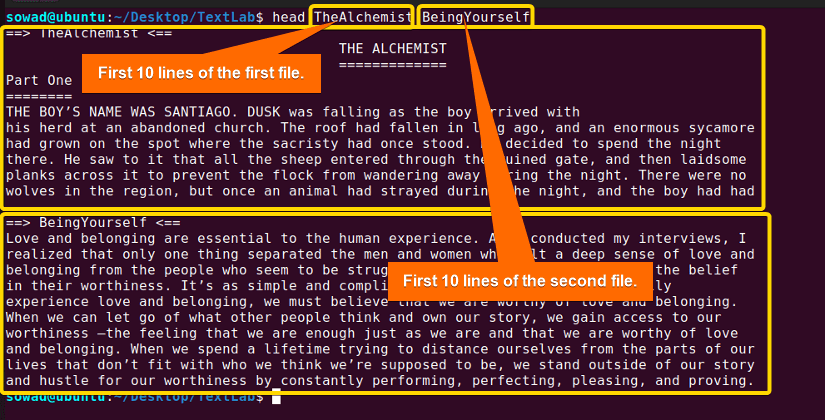
Example 5: Redirecting the Output of the “head” Command
You can redirect the first few lines of one or more files to another file using the head command. Here, I’ll redirect the first 3 lines of two text files named “Numbers.txt” & “TheAlchemist”. To do the same you can follow the below process.
Steps to Follow >
➊ First open the Ubuntu Terminal in the TextLab directory.
➋ Type the following command in the command prompt:
head -n3 Numbers.txt TheAlchemist >> Combined.txt➌ Now, press the ENTER button.
Output >
In the below image, you can see that the first 3 lines of both files have been redirected to the Combined.txt file by using the head command.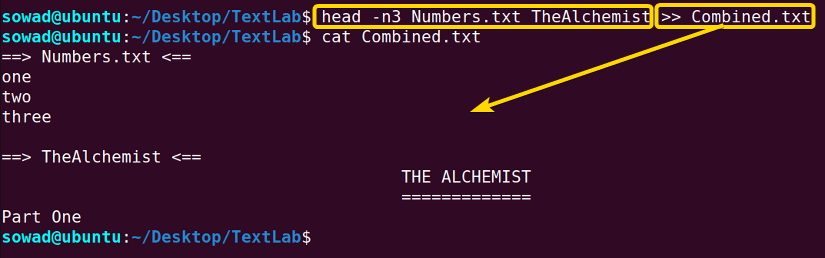
Example 6: Display Lines with Specific Range
You can display lines of a specific line number range by combining the head & tail commands. Suppose you want to display the contents from the num1 line to the num2 line, then the syntax will be like the below format:
head -num2 FILE | tail -(num2-num1+1)Now, I’ll print the contents from line 9 to line 11 of the “Numbers.txt” file. To do the same you can follow the below process.
Steps to Follow >
➊ At first open the Ubuntu Terminal in the TextLab directory.
➋ Type the following command in the command prompt:
head -11 Numbers.txt | tail -3➌ Now, press the ENTER button.
Output >
In the below image, you can see that contents from line 9 to line 11 of the “Numbers.txt” file have been printed by using the head and tail commands.
Example 7: Piping Other commands with the “head” Command in Linux
I’ve illustrated the basic applications of the head command in previous examples. Now in this example, I will use the concept of piping(|) and combine multiple commands with the head command. I will print the 15 highest disk space using processes of my home directory using the head command. To do the same you can follow the below process.
Steps to Follow >
➊ At first open the Ubuntu Terminal.
➋ Type the following command in the command prompt:
du -h | sort -hr | head -15➌ Now, press the ENTER button.
Output >
In the below image, you can see the 15 highest disk space user processes of my home directory by using the head command and other essential commands(i.e. du, sort).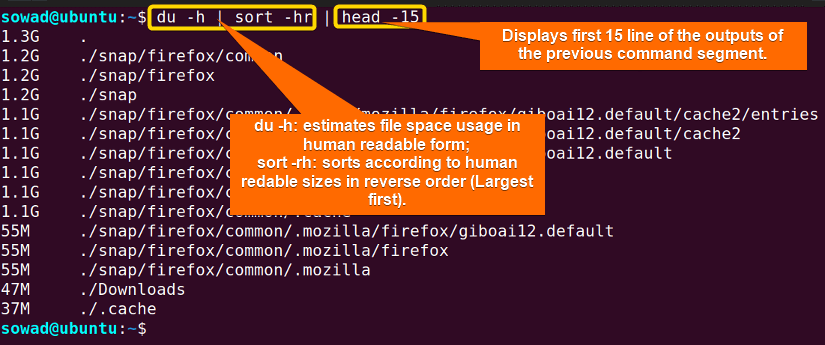
Conclusion
In this article, I have tried to present you with the applications and usefulness of the head command in Linux. Hope that you’ll be able to explore more things with the help of these practical examples and head in the right direction to be a power user of Linux.
Similar Readings
- The “cat” Command in Linux [10 Practical Examples]
- The “tail” Command in Linux [7 Practical Examples]
- The “less” Command in Linux [10 Practical Examples]
- The “more” Command in Linux [10 Practical Examples]
FUNDAMENTALS A Complete Guide for Beginners


