You can use the below commands to show line numbers in Vim:
- To show line numbers
:set numberorset nu - To show relative line numbers
:set relativenumberorset rnu - To hide line numbers
:set nonumberorset nonu - To toggle line numbers
:set number! - To toggle relative line numbers
:set relativenumber! - To hide all line numbers:
set nonumber norelativenumberorset nornu
Showing line numbers in Vim allows programmers to edit and create the necessary files by navigating through the file. For long files, there are often big chances of getting lost on track. The line numbers in Vim help programmers reach the concerned line effectively and do the necessary tasks. In this article, I will discuss how to show line numbers in Vim in different scenarios, incorporating the above commands. So let’s start!
How to Start the vim Editor?
To start the Vim editor with or without mentioning the filename read out the following processes:
- To start the Vim editor without mentioning any filename, execute the below command on the terminal:
vimNOTE: If the Vim editor is not installed on your machine, execute the below commands to install it in Vim:sudo apt updatesudo apt install vim - If any filename is mentioned, it will be opened in the Vim editor or created (if it doesn’t already exist). Now, to create or open a file in the Vim editor, execute one of the below commands:
vim file_namevi file_name - After opening a file in the vim editor, press I to go to editing mode.
- Then, type the intended text and press ESC to exit the editing mode.
- After that, type
:w!and press ENTER to save the file. - Finally, type
:qand press ENTER to quit the vim editor.
How to Show Absolute Line Numbers in Vim?
To show the line number in Vim, first, open the file in the Vim editor. Then, press the ESC button to switch to the normal mode. After that, type :set number and press ENTER to show the line number in the vim. See in the below image: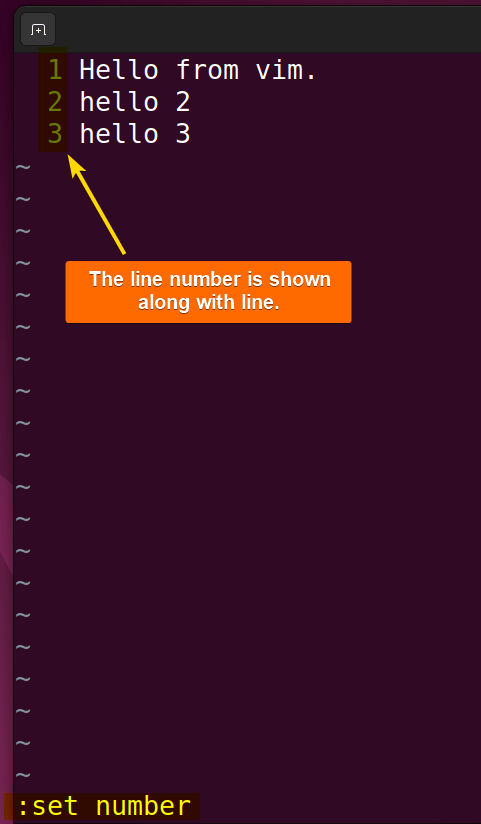 The vim editor shows line numbers.
Now, read the following section to learn how to modify line numbers while displaying them in Vim in different ways:
1. Adding Relative Line Number
The relative number shows numbering starting from the mouse cursor. To add the relative number in the Vim editor, first press the ESC button to switch to the normal mode. Then type :set relativenumber or set rnu and press the ENTER button. See in the image: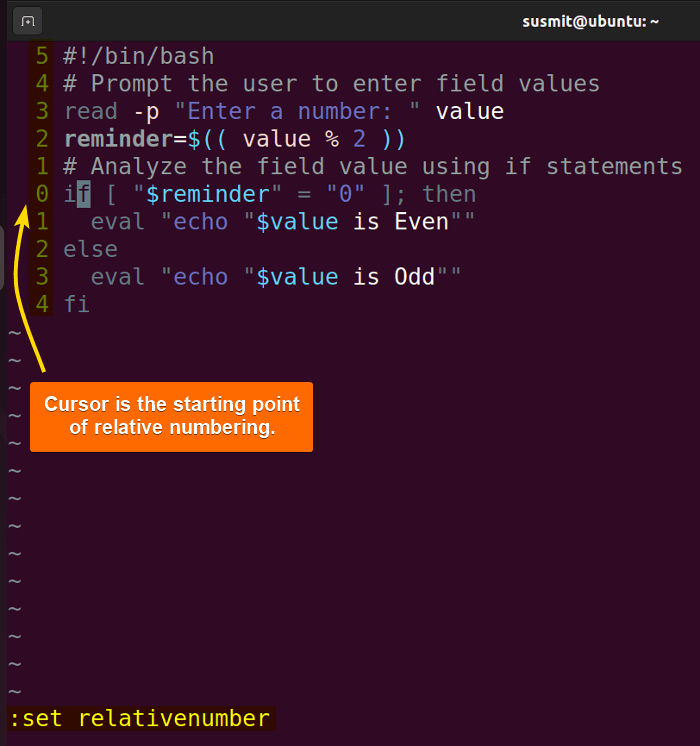 The image shows the relative line number of the text file.
2. Showing Line Number in Vim by Default/ Permanently
Before launching the Vim editor, it executes the /etc/vim/vimrc file. To display the line number by default or permanently, open the /etc/vim/vimrc file by executing the vim /etc/vim/vimrc command, then append the set number at the end of that file. Afterward, it will launch the Vim editor, showing the line number by default. It is a permanent setting until someone omits the added set number line from that file.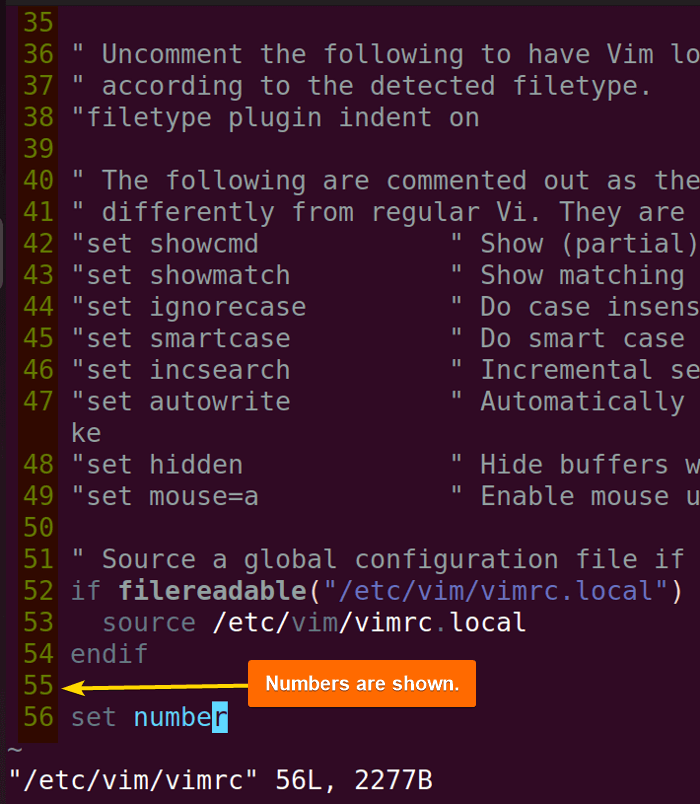 By default, the vim editor shows the line number.
3. Changing Gutter Column Width for Line Number Showing
To change the gutter column width of the line number showing, modify the number of the width option to your desired width. First, open a file in the Vim editor, then switch to the normal mode by pressing ESC. After that type :set numberwidth=10 and press ENTER.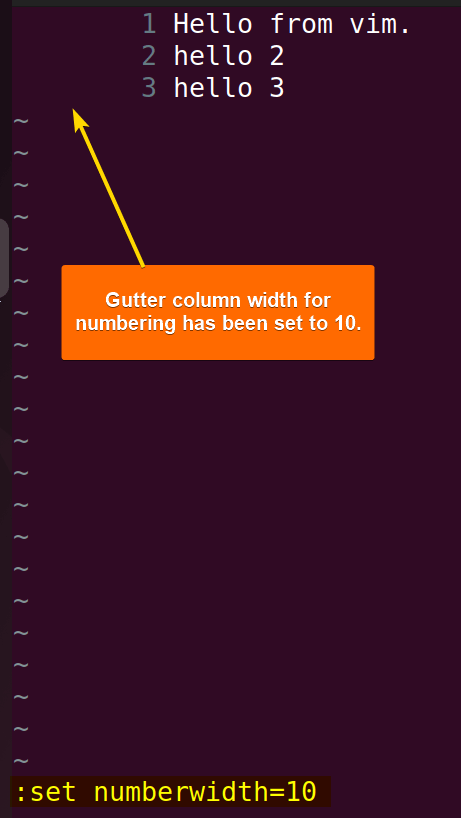 The image shows that the gutter number column width is set to 10.
4. Configuring Text Wrapping for Line Number Column in Vim
Text wrapping means putting the whole line in the Vim editor under a single line number. To do this, switch to the normal mode by pressing the ESC button. Then, type :set cpoptions+=n and press the ENTER button.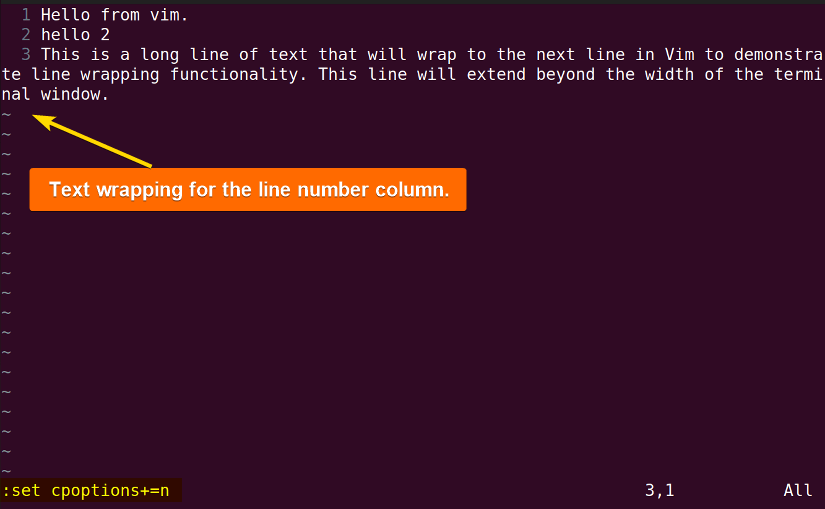 The image shows text wrapping is done for the line number column.
5. Disabling Line Numbers in Vim
To omit line numbers in Vim, first, open a file in the Vim editor, then press ESC to switch to the normal mode. After that type :set nonumber and press ENTER.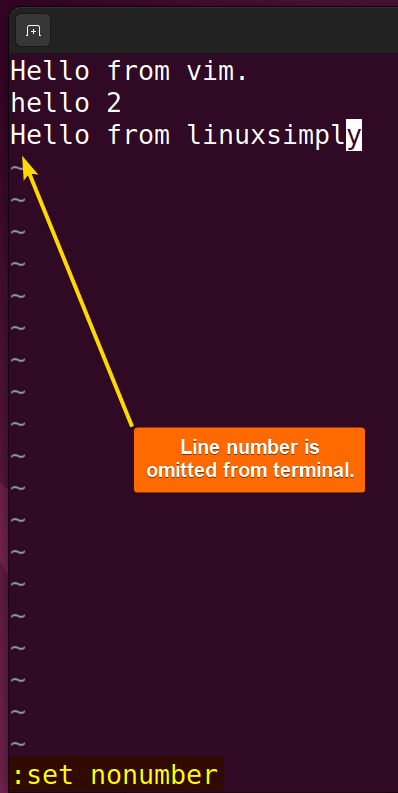 The image shows that there is no line number in the vim editor.
6. Toggling Showing and Not Showing Line Numbers
Toggling between showing and not showing line numbers in the Vim editor enables users to choose when to display line numbers and when not to. To toggle the line number between displaying and hiding, first switch to the normal mode by pressing the ESC button. Then type :set number! and press the ENTER button.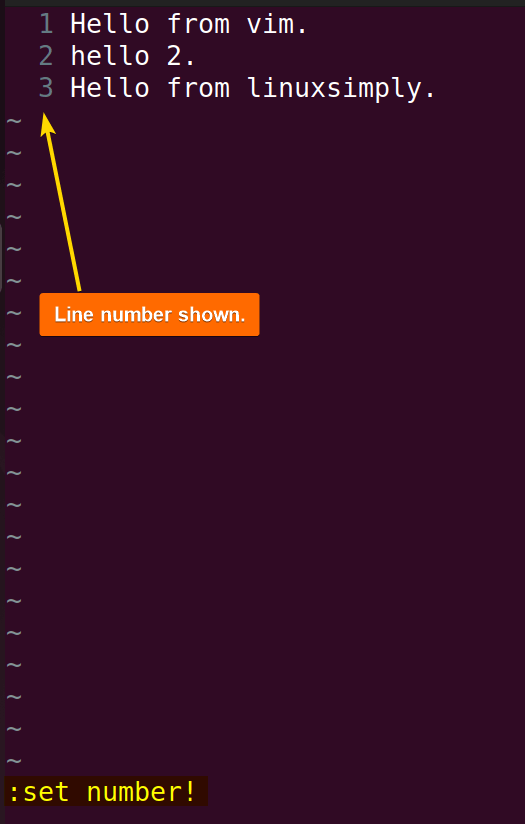 The image shows the line numbers in the vim editor.
After that, to remove the line number in the vim command, first switch to the normal mode by pressing the ESC button. Then type :set number! and press the ENTER button. This will automatically remove line numbers that were previously added. Just like in the following image: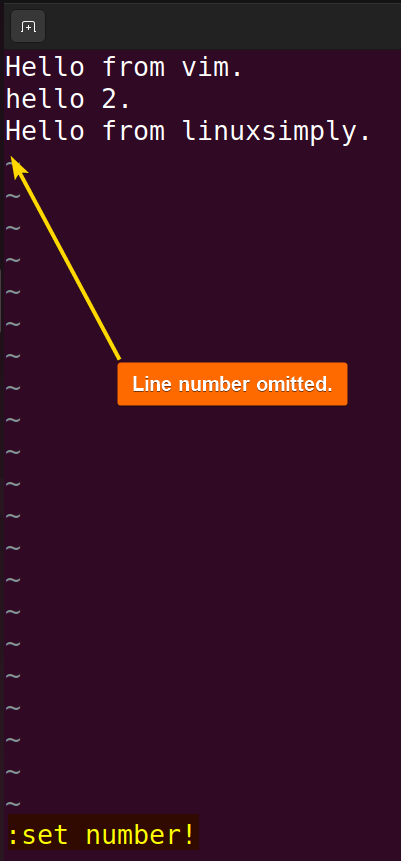 The image shows no line numbers in the vim editor.
Note: For toggling relative line numbers just type the command :set relativenumber!
7. Showing Hybrid Line Numbers (Including Relative Line Numbers)
To add both numbers and relative numbers in the Vim editor, first switch to the normal mode. Then type :set number relativenumber and press the ENTER button.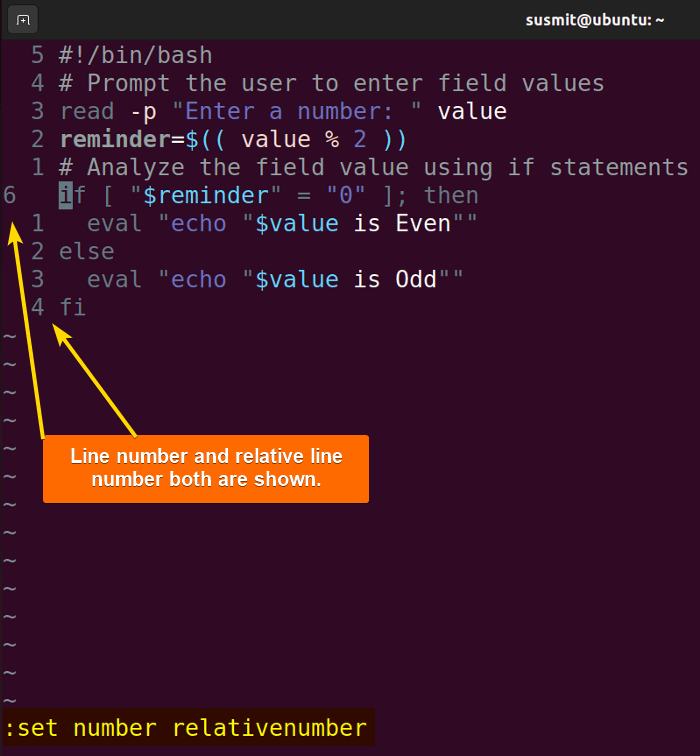 There are both the line number and relative line number displayed on the terminal.
Conclusion
In this article, I have explored the processes of showing line numbers in Vim. This article will help developers and programmers work with long files and perform specific tasks without any hustle. Do not forget to put your suggestions in the comment box.
People Also Ask
How to show line numbers in vi or vim text editor?
To show line numbers in Vim, press the ESC button first. Then, type :set number and press the ENTER button.
How do I turn on relative line numbers in Vim?
To turn on relative line numbers in Vim, press the ESC button to switch to the normal mode first. Then, type :set relativenumber and press the ENTER button.
How do I show the current line in Vim?
To show the current line in vim type :set cursorline and press the ENTER button. It will highlight the current line in vim.
How to use Vim visual mode?
To use Vim visual mode from normal mode, press the v key. This will start the selection’s beginning mark. Then, use the arrow to select the intended area. To enter visual line mode press V key.
How do I edit in Vim editor?
To edit a file in Vim editor, press the I button to enter Insert mode. Then, do the editing as necessity, then press the ESC button to exit the insert mode. After that, type :w! and press ENTER to save the file. Finally, type :q and press ENTER to quit the vim editor.
How to have vim line numbers on by default?
To display the line number by default or permanently, open the /etc/vim/vimrc file by running the vim /etc/vim/vimrc command, then append the set number at the end of that file.
FUNDAMENTALS A Complete Guide for Beginners