VSCode is a powerful and versatile text editor for developers in terms of software development, app development, etc. While it’s primarily known for its Windows and macOS versions, it’s also fully compatible with Linux distributions. This guide aims to walk you through the process of installing VSCode on your Linux system.
There are three approaches to installing VSCode in Linux:
- Using a universal package manager.
- Using Distribution’s Package Manager
- Using VSCode Installer
Let’s explore the processes for installing VSCode in Linux.
1. Install VSCode Using Snap
Snap is a universal package manager for all Linux distributions. To install VSCode in Linux using Snap, simply run the following command in the terminal:
sudo snap install code --classic--classic flag is used to install the package in classic confinement mode which grants the snap additional privileges like accessing files and services outside the confined environment. After installing the VSCode, you can check for the VSCode version using the following command:
code --version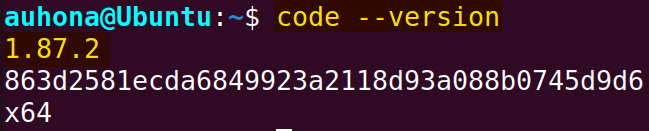 The command shows that the VSCode version is 1.87.2. It represents the second release of VSCode installed within the 87th minor version under the first major version of VSCode.
2. Install VSCode Using Distribution’s Package Manager
Visual Studio Code (VSCode) can also be installed on Linux using dedicated package managers designed for specific distributions such as apt for Debian-based distros, yum for Red Hat-based distros, and Pacman for Arch Linux-based distros. This section demonstrates the installation process using different package managers for specific distros.
In Ubuntu/Debian-based
To install Visual Code (VSCode) Debian-based distros like Debian and Ubuntu, you must use the package manager apt or apt-get.
Check the following steps to install VSCode in Ubuntu-based Linux distro:
-
Before installing, ensure your package lists are up to date by running the following command:
sudo apt update -
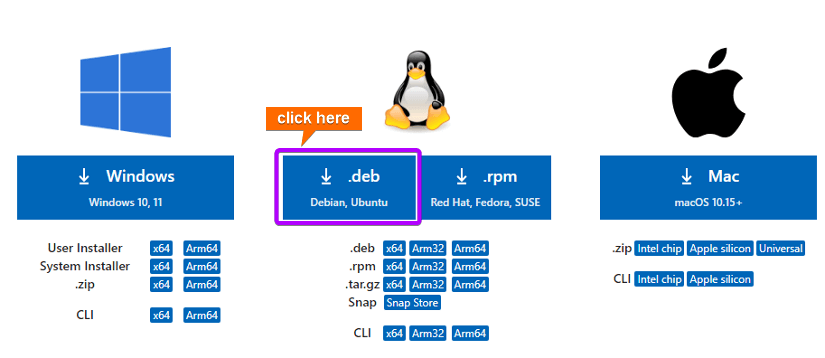
Download the .deb package (64-bit) from the Visual Studio Code download page.

- Now, run the following command to install the deb package
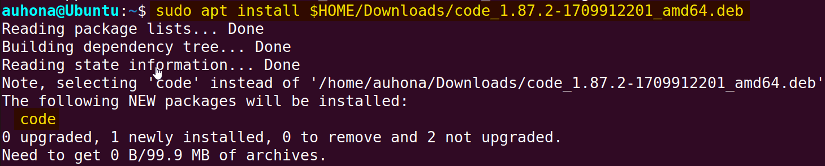
sudo apt install <filepath>.debReplace <filepath>.deb with the complete path of the downloaded deb package with .deb extension as below:
sudo apt install $HOME/Downloads/code_1.87.2-1709912201_amd64.deb The command installs the new packages of code (VSCode) successfully.
 The command installs the new packages of code (VSCode) successfully.
In Red Hat-based
To install Visual Studio Code (VSCode) on a Red Hat-based Linux distribution like RHEL, Fedora, CentOS, etc you can follow these steps:
- First, download the rpm package of VSCode from the Visual Studio Code download page.
- After the download is complete, install VSCode using the following command
sudo yum install <filepath>.rpm
In Arch Linux-Based
The easiest way to install VSCode in Arch Linux-based distros like Manjaro, and Arch Linux itself is through the official repositories.
To do this, run the following command:
sudo pacman -S install codeHowever, you can also install VSCode from the Arch User Repository (AUR). If you prefer installing from the AUR, you can use an AUR helper like yay. First, install “yay”:
sudo pacman -S yayThen, install VSCode using yay by running the following command:
yay -S visual-studio-code-bin3. Install Using VSCode Installer
VSCode installer is a program that installs VSCode on a computer system. To install VSCode using the installer, follow the steps below:
-
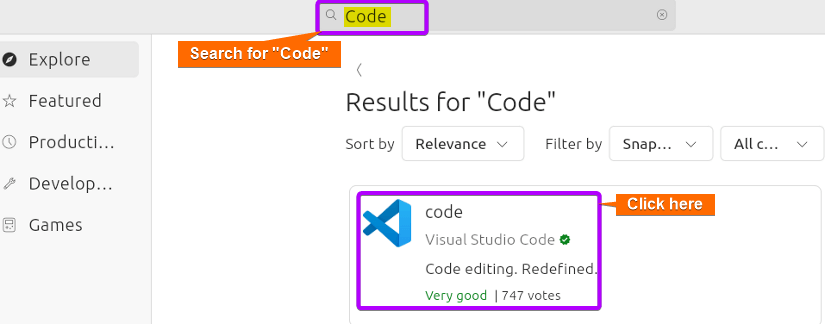
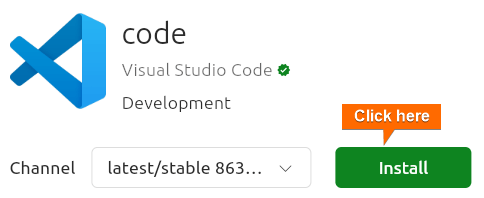
Open App Center in Ubuntu and search for “Code”. Then click on the application named code.

- After that, click on the Install button.

- Later on, authenticate yourself by providing the user password, and then click on the Authenticate button.

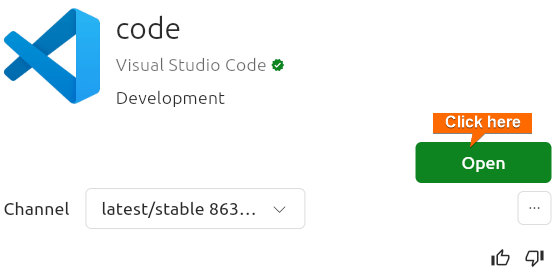
- In a short period, VSCode will be installed and an open button will appear. click on it and you are all set to start using VSCode.
 This is how you can install VSCode using the VSCode installer GUI easily.

 This is how you can install VSCode using the VSCode installer GUI easily.
How to Start VSCode on Ubuntu?
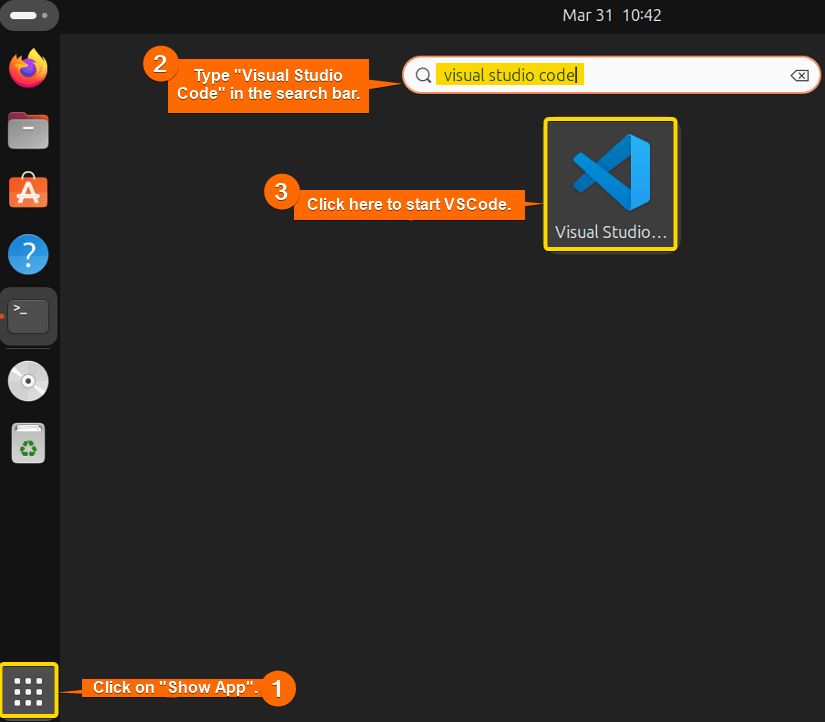
To start VSCode on Ubuntu, click on the Show Application, and in the search bar, type “Visual Studio Code”. The icon of Visual Studio Code will appear. After that, click on its icon to launch the VSCode.
 Alternatively, you can simply run the following code in the terminal to start VSCode on Ubuntu:
codeHow to Uninstall VScode from Linux?
You can uninstall VSCode in three approaches such as using Snap, using distro-based package manager, and using GUI.
Using Snap
If you ever need to uninstall Visual Studio Code (VSCode), you can use Snap as the following command:
sudo snap remove codeUsing Package Manager
You can also uninstall VSCode using a package manager like apt or yum. For example, to uninstall VSCode in Ubuntu, run the following command:
sudo apt remove codeUsing GUI
Uninstalling VSCode using Graphical User Interface (GUI) is a straightforward process that can be accomplished from the application center provided by your Linux distro. For example, to uninstall VSCode from GUI in Ubuntu, follow the steps below:
-
Open App Center.
-
Navigate to Manage > Installed and Updated > Code.
-
Next to the “Open” button, click on the three-dot (…) icon. This will reveal an option to uninstall VSCode. Simply click on it to proceed with the uninstallation.
Conclusion
In conclusion, there are various methods to install VSCode on Linux, including using Snap, a package manager, or the VSCode installer. You have the flexibility to select any method and simply follow the provided instructions at your convenience. I hope this article simplifies the process of installing VSCode on your Linux system.
People Also Ask
How to install VSCode in Ubuntu?
To install VSCode in Ubuntu, first download the .deb package from the Visual Studio Code download page. After that, run the command sudo apt install <filepath>.deb in the Ubuntu terminal. Don’t forget to update the package lists using the command sudo apt update.
What is Visual Studio Code?
Visual Studio Code (VSCode) is a freely available, open-source text editor and integrated development environment (IDE) designed for use on Windows, Linux, and macOS platforms. It provides a wide range of features including debugging capabilities, syntax highlighting, code refactoring tools, code snippets, automatic code completion, built-in Git version control, and more.
How to launch VSCode in Ubuntu after installing it?
To launch Visual Studio Code after installing it on your Ubuntu system, click on the “Show Applications” button on the Ubuntu and type “Visual Studio Code” into the search bar. Visual Studio Code should then appear in the search results. Click on its icon to initiate the application.
How can I set Visual Studio code using the apt package manager?
To set up Visual Studio Code (VSCode) using the apt package manager on Ubuntu, you need to add the Microsoft Key repository to your system’s package list. You can set VSCode using the apt package manager as below:
- Import the Microsoft GPG key using the following command:
wget -qO- https://packages.microsoft.com/keys/microsoft.asc | gpg --dearmor > microsoft.gpgsudo mv microsoft.gpg /etc/apt/trusted.gpg.d/microsoft.gpg -
Add the VSCode repository by running the code below:
sudo sh -c 'echo "deb [arch=amd64] https://packages.microsoft.com/repos/vscode stable main" > /etc/apt/sources.list.d/vscode.list'
After that, install VSCode and lastly update your distro.
Related Articles
<< Go Back to VSCode in Linux | Linux Text Editors | Learn Linux Basics
FUNDAMENTALS A Complete Guide for Beginners